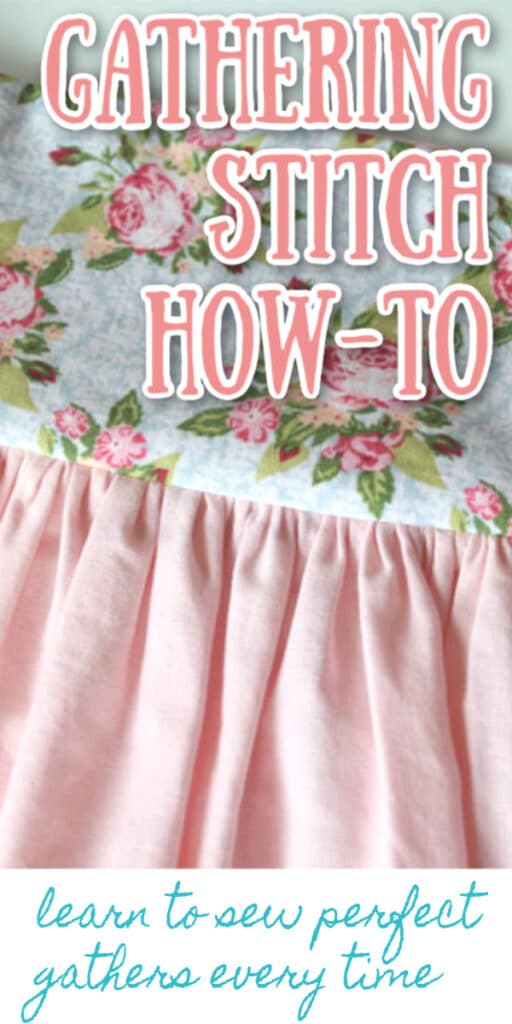
I’ve had some requests recently for sewing basics so today I’d like to discuss how to sew a gathering stitch. Learning how to gather fabric is a basic sewing technique, and essential for garment sewing, but it can be challenging when you are first learning.
I would LOVE IT if you would take a few minutes to leave a comment with any sewing basics that you’d like to see here on the blog. It will obviously take some time to create a good pool of basics, but it will help to know what your interests are!
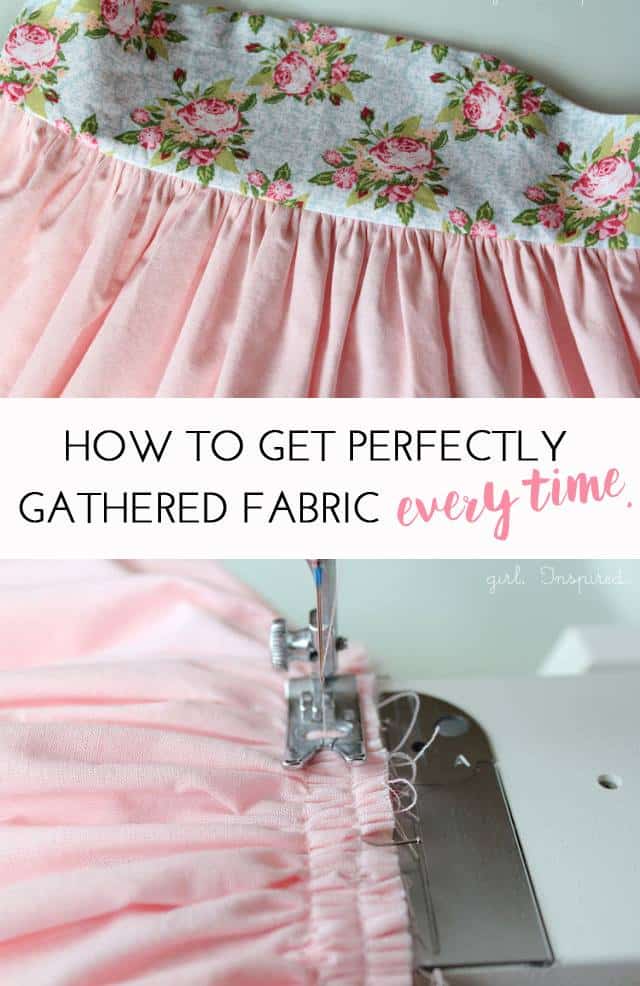
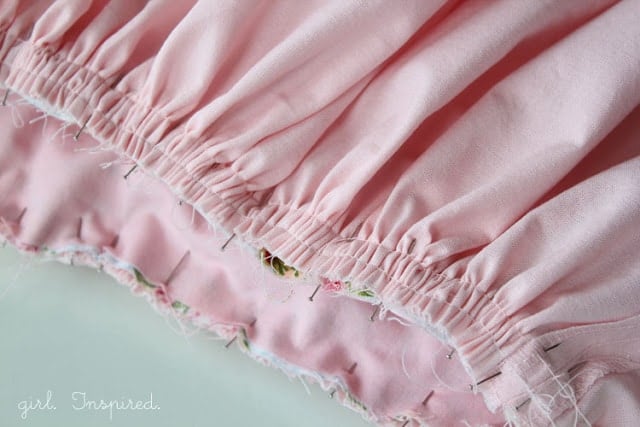
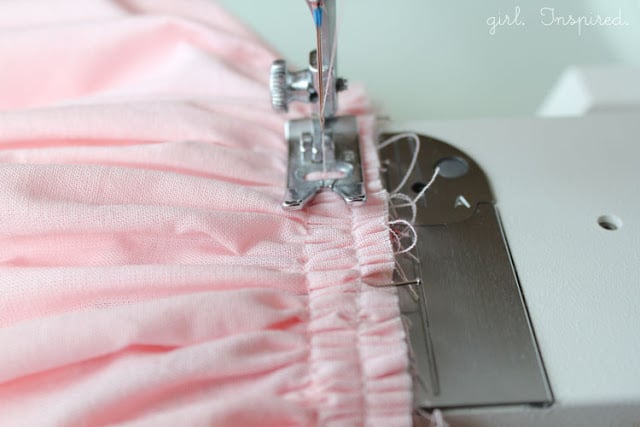
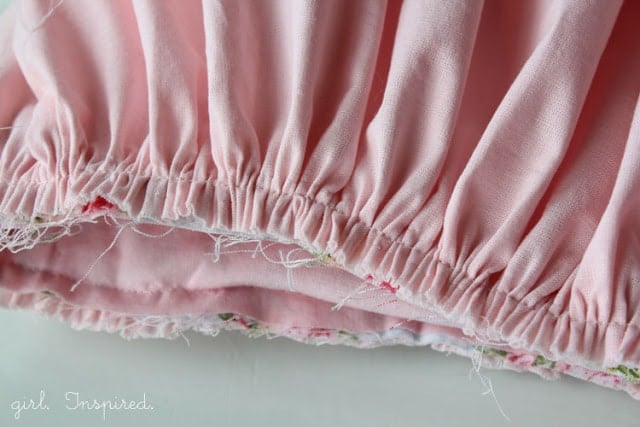
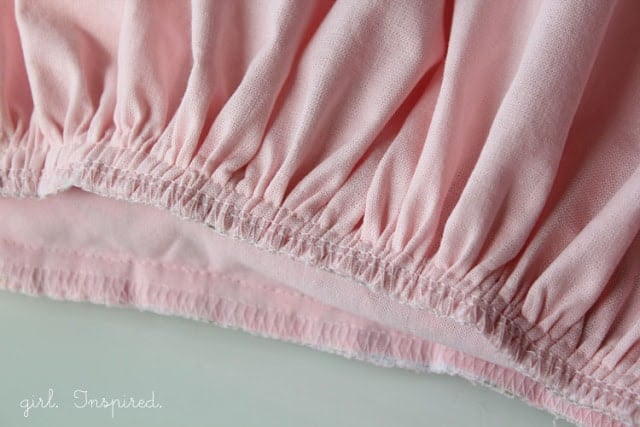
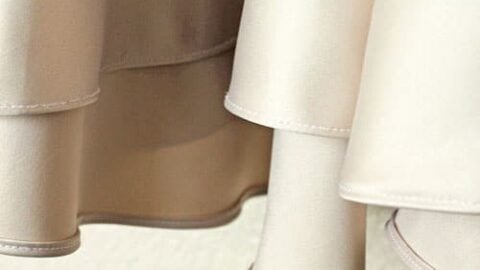
Clearly, I like a lot of ruffling to accompany “my style.” And while it may be old hat to many of you, gathering and stitching fabric can be an intimidating process for others – I know it definitely was for me when I started sewing garments! I’m going to show you the process of gathering a skirt to join it to a bodice that will give you the cleanest results with (hopefully!) the least amount of frustration and/or mess. The trick is this: sew two lines of gathering stitches, press and steam your gathers, and pin a lot!! Incorporate those three things and you’ll be good! Ready?
Prepare your skirt pieces so that they’re ready to attach to the bodice. First, you’ll sew two parallel rows of long (gathering) stitches around the top of the skirt. (Stitch length long, tension loose.)
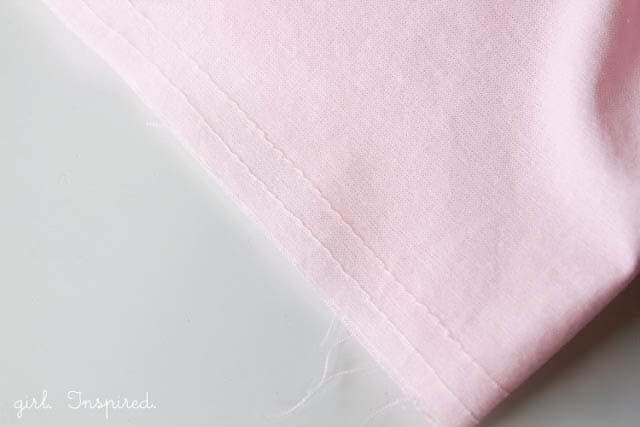
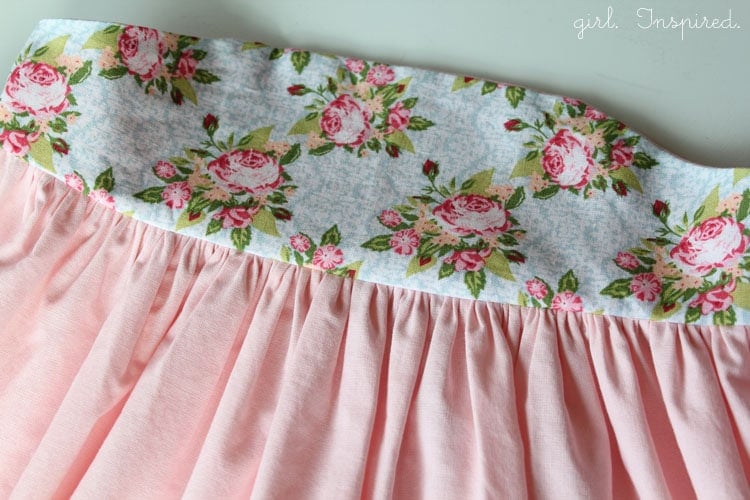
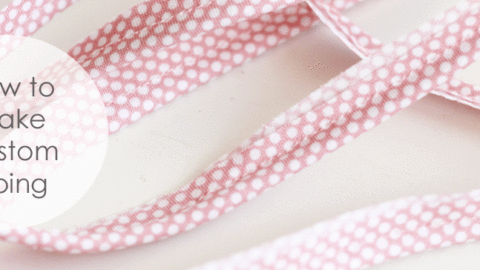
Use this gathering technique for perfect ruffles added to anything! It’s not necessarily limited to attaching a gathered skirt to bodice. You would use this technique if you’re gathering a skirt to add it to a waistband or to add a ruffle to the bottom of your garment.
SO!! Is this how you do a gathering stitch?? Is this Sewing Basics tutorial helpful? What other Sewing Basics would you like to see on the Girl. Inspired. blog??
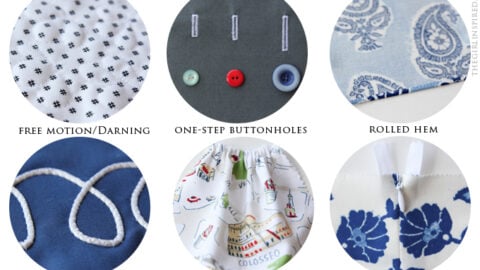
Popular Sewing Basics & Tutorials
You might also enjoy these other sewing basics and project ideas!
Comments & Reviews
Bratling says
You forgot one thing, hon. You’ve gotta anchor the stitching at the beginning of the gathering or it’ll just pull out. So with normal tension, go forward, back, and forward before turning down the tension. Three lines of gathering are awesome, too, if you’ve got a *really* full skirt. I also tend to do it in panels. So I gather the front, and then the back instead of over the seams.
Charity says
I don’t anchor the stitching at the beginning of my gathers because I like to be able to gather it from both sides… I just temporarily wrap the threads in a figure 8 around a pin so they won’t pull out. Three lines of gathering helps on shifty or thick fabrics too. =)
Sharon F says
This is how I anchor the threads too.
Sandra says
Hi. Im a self taught sewer. Have found this helpful. I often try n skip the iron but yes girls, ironing is essential for great results.
Thanks for the basics , glad of the simple help. Hard to find.
S.l.
Sewlady says
That is what I do. Then you can unwrap and adjust.
LA says
That’s how I anchor mine too with pins and do the figure eight . Works great.
Stef says
I also don’t anchor the stitching – I just make sure to leave long (inches or so) tails at the beginning and end of my row of stitching so that there’s no chance they’ll pull out before I can get everything gathered up! Thanks for the tip on three lines of gathering – I’ll have to try that!
Jeanie says
Great tutorial ! This post is old but I just ran across it – thanks to Pinteest ! Have you tried the 3 rows for gathering yet? I have done this for years and it works great. I sew the two threads like you do then I go back and follow the bottom row of stitching but move my needle position outside of the 5/8″ seam line. Yes, the thread will show once you have sewn your seam so this wont work on fabrics that leave needle marks but for all other fabrics it will hold the gathers flat while you sew. Once finished simply remove the third row of stitching. I do leave the third row if I need to ‘stitch in the ditch’, then remove it. It just helps me lay in gathers without having any of the fabric kick up and get in my stitching seam.
Nenita C. says
This is not exactly a comment but a question how about if I want to make a bed skirt ?
girlinspired says
Hi Nenita – well, if you wanted to make a bed skirt, you would essentially gather the same way. You’d piece together the skirt sections and then gather, gather, gather. Same concept, just a lot more gathering. 🙂
Sewlady says
Use crochet cotton and zigzag over the thread. Hold the thread up as you sew and it won’t catch the cord.
Carolyn says
yes that is what I have been doing for years.. 3 rows one outside of seam allowance. gather stitch to bodice then remove third row. perfect gathers.
Judy P says
I don’t anchor mine either, how ever I do leave a long thread at the beginning of my stitches and then take both of the and wrap them in a figure 8 pattern around one of my pins. Makes it stable and yet easy to remove when I’m done.
Deborah says
I started sewing when I was 8 yrs. old and always struggled with this.It would seem to take forever.I’m in my late 50’s and I GUESS you can teach an OLD DOG new TRICKS. I LOVE this idea nd can’t wait to try it. THANKS.
Tina Butcher says
When I began sewing I used the two thread method for gathering. While it works great if you are easing a sleeve onto a bodice I discovered years ago that if you use 50 lb test monofilament fishing line you never have to worry thst your threads will break in the middle of a large project. You simply lay the fishing line on your fabric and zig zag over top
If the fishing line. When you finish you can pull the line to gather your fabric. It’s much quicker. Less frustrating.
Shannen s says
Exactly the information ive been looking to find .. i appreciate that you really play-by-played every step thats what i needed! Thank you!
Rachel Allen says
Great tips! Thanks! Any good tips or short cuts on cutting patterns? It seems like it always takes so long & I just want to get the show on the road.
samanthasmom says
Pattern weights for the big pieces. I still like to pin the small pieces, but a good set of pattern weights cuts the time down. And a rotary cutter for the long straight pieces.
jana giraud says
Rachel, there is a product called fabric Stick. It’s in a small can I found it at Joanns. It works great and all you do is spray it on your pattern piece and lay it on your fabric. No more pinning and you don’t have to worry about folding it up on its self to put back into the envelope. Comes apart easily. I love the stuff.
Azsuntea says
A good pair of sewing scissors is essential
treen says
Ah ha! So that’s what I’ve been doing wrong! I do the double line of stitching to gather in the first place, but I’ve been sewing the main seam on one side of both lines rather than between them and not pulling the gathering threads when I’m done. This should clean up my lines a lot. Thanks!
Charity says
Thanks for the tips! I also do two lines of stitching and lots of pins, but I don’t think I’ve ever steamed my ruffles. I’m going to try it, I think it’ll make things much easier for me. =)
SpringsAcres says
Thanks for the tips! I think I’m going to have to go sew my daughter yet another skirt now to make sure I have the technique right. 😉
Vanessa@Designs By Sessa says
I don’t get to sew little dresses much, but I am very thankful for the steam tip! I did not know that helped! Thanks!
Falafel and the Bee says
Oh I love this idea! Can you tell me if you have any tips on attaching sleeves to a lined bodice so the seams are covered?
~Michelle
Jessica says
I’m not sure I understand why to double stitch. I usually only do one (but I’m very new). Do I use both to gather or just one?
Clever Blonde -Donna G says
Hi Jessica, you use both rows of stitching. The theory is that by doing two rows you will get neater and more even gathers. I also think it helps spread the load of the fabric so there is less tension on each strand of gathering thread.
Mae says
so glad I finally learned the reasoning behind the two stitch gather. I at times will do two and others be lazy and just do one. I hadn’t steamed along the way, which is probably why mine were not as clean as I’d liked. Thanks again for pointing out these basics. Even after years of sewing I can better my basics. 🙂
Stef says
Thanks, Clever Blonde!! Using two stitches isn’t mandatory, but it sure does gather everything much neater. I also agree that the double row of stitches is much more durable when you’re pulling up the threads to gather! Of course, I get lazy sometimes and skip the second row of stitches, but I usually end up kicking myself because it makes more work in the next step.
twiggynest says
I absolutely adore ruffles and try to add them to my projects when they suit. This is the best tutorial I’ve read! PS. Your blog is my favourite, I read a lot of blogs but get a thrill when I see your latest post pop up in my inbox, Thankyou!
Clever Blonde -Donna G says
Thank you for sharing this tutorial. I sometimes just use pins to gather. Marking and matching beginning, end, middle and also 1/4 marks and then go round manually spacing it out as I pin. I do use this method of sewing 2 gathering lines also but I then gather and pin to other piece of fabric. I can see this method of sewing the gathers in place before attaching the other piece of fabric will make it much, much easier to work with. I’m looking forward to the chance to try this method. Thx
Stef says
In this example, I did gather and then pin to the bodice piece before sewing the gathers down. BUT, when I use my ruffling foot to gather a ruffle that doesn’t need precise finished measurements, I definitely gather it separate from attaching it to the other piece of fabric and it does make it SO much easier!
Paula says
OK I need really basic info…lol, I actually know how to do this gathering…which is quite funny to me that I can do something sort of advanced (in my book anyway ) but, I CANNOT manage to keep a sewing machine running for long because I always mess up the tension somehow…My mom just shakes her head and walks away saying, “I don’t know what you did”… while I exclaim “I never touched the tension thingy!”
Help!
Stef says
Thanks for sharing this Paula! It made me giggle. Sometimes it helps to have someone looking over your shoulder when you’re having a hard time with your machine. I wonder if a plate or part is loose in your sewing machine if the tension is changing without you touching it? Maybe carry your machine in to a professional for a glance over?
Ellen says
I get even lazier sometimes and yse a machine foot that gathers the fabric and attaches ut to the other fabric at the same time. Not the big really strange contraptions of earlier years, but a small flat foot where you guide two fabrics through.
The gathers are based in the length ofof the stitch you select (I made samples to keep in hand fir reference). Most sewing machine makers have this foot to purchsse.
Those older contraptions tend to make more of a flat gather that look like pleats than real gathers.
Ellen says
how do you keep the weights from shifting when cutting ?
I put a pin in each corner and if the piece is long another pin in each long side in the middle if the length.
Ellen says
I’ve learned the hard way not to mess with my tension (my newest machine dies it all by itself).
If your tension is that messed up, its time to take it to the shop for a tune up. Well worth the $, once a year as it also gets super cleaned up inside in places you can’t get to.
Motherglads says
My very first machine was like that. It was 1957 and I had just bought a Kenmore machine. For years I spent hours adjusting the tension. Finally, in 1972, I learned it was a faulty tension control and bought a new machine. No more trouble. It is now 2016 and two machines later I still have no tension problems.
Chrissy says
Thank you so much for the basics! I have done many ruffles but it is always great to be reminded of the correct technique from the master!!!
Stef says
I don’t know about master, but thank you for the sweet comment!
kristin says
Great tips, Stef! Especially loved the steam recommendation (and used it this weekend!). I usually gather this way too; sometimes using the “cheater” method of increasing tension and stitch length and just sewing one line that gathers on its own, especially for small sections of fabric.
Anonymous says
Hi! I would love to see a tutorial on how to finish seams/raw edges without a serger by both sewing and finishing with ribbon or bias tape. Thank you for sharing your knowledge.
Anonymous says
Thanks for sharing, this is a great tutorial. Alyssa
Jessica Powers says
This is great – my friend is making a basic skirt for me this week and it’s gathered, so I texted her to check out your tutorial. Me, I just play with her kids and buy the fabric, but I would be interested in seeing a post on tools from you – I know that sergig. 2014 is going to be my official ‘learn to use a sewing machine’ (rather than have bobbins fly off when I look at one!). It’d be really useful to know what items you have on hand? It always seems that when taking on a new craft one can go overboard and get sold a lot of ‘helpful’ things that actually never get used, and other things that are seemingly good for one thing are also great for other things too.
inkypinkie says
I would love to see either tips on purchasing a sewing machine OR alternatively on how to hand sew. Particularly rips on heavy-weight wool coats. 🙂
inkypinkie says
I love your blog! It is very inspirational to me since I am very very very very very new at this sewing stuff.
Monika Weidenbach says
All I can say is Thank YOU Thank YOU!!
Charmaine says
Thank you so much for this tutorial, I have done a lot of sewing and still do as it is my passion. I have never been that happy about my gathers, but I understand your tutorial and can just picture it working out just as it should. So thanks for sharing your knowledge and experience. I would love to follow you blogs.
Kind Regards
Charms
RESI says
Am I to actually put the iron down on top of the gathers? Please help. 😉
girlinspired says
Hi there! I think it depends on the fabric you’re using and how you want the finished garment to look. If you’re using something like silk or a polyester, you may not want to actually press the iron down on the fabric, but a knit or a cotton, you would. You don’t have to, even the steam helps the fabric lay out smoothly and gather up without curling over on top of itself. If you do put the iron down on top of the gathers, it will press lines into the fabric – test how it looks on some gathered scraps before deciding how to finish your actual garment/project – it’s your own personal preference. Hope that helps!
RESI says
Thanks. I’m not avoiding projects with gathers anymore!
Karen says
Thank you! Your way of gathering was how I was taught in school ! So often I
see what some are referring to as gathering, when it is really pleating. There is a big
difference!! Maybe you can have a tutorial showing the difference 🙂
This is my first time reading your blog, really enjoying it!
Helen says
Wow! That is beautiful. Beautiful fabrics too…
There are also cute free sewing patterns here:
http://www.sewing-patterns.org/blog
Tari says
Beautiful. Excellent tutorial
Dee says
All very good tips for gathering ruffles. I have a drapery workroom and used to make custom clothing. Although ruffles aren’t currently requested frequently, I generally zigzag over dental floss (long, wide stitches, standard tension). It’s much easier to work with on heavy fabrics or on large items, such as dust skirts. Then stitch an additional row (straight stitches, long & loose) slightly beyond the stitching line. Gather up both rows. This helps hold the fabric flat while stitching, as described in previous comments. Stitch between this row and the zigzag row, on the seam line, to join pieces together. Remove this row after final stitching is done, and remove the floss, which will pull out easily, and may be reused. The zigzag stitches can be left in the fabric.
To cut clothing pieces faster, if you are making more than one item from the same pattern, simply stack the fabrics and cut multiples at the same time. If one fabric is a stripe or plaid, place that one on the top, so you can match patterns accurately at the seams. Also, the stitching will go faster if you complete ‘step 1’ on both items, then move on to ‘step 2’, etc. This is great if both fabrics can be stitched using the same thread. It saves time switching from one machine to another (standard to serger or hemmer), or from one foot to another (straight to zipper or cording, etc).
Although different sizes can’t be cut at the same time, you can still sew multiple items in stages. This is helpful when making clothing for a group (bridesmaids, siblings), and insures uniformity.
Alice says
Thank you. I have been sewing for a while but never thought to sew between the two gathering rows. A great idea.
Elizabeth says
I never thought to steam my gathers. Tried it and it worked great, it was almost like the steamed “relaxed” the fabric and thread making it easier to pull and gather. Thanks for the tip!
Dee says
This is definitely the tried and true method and works great! The reader’s comments are helpful too. I have not tried out the floss method. What I do now is use a ruffler foot. I have sewn many “tiered” skirts and I can’t say enough about it; it works very well. I actually use an old Kenmore (the kind with the pattern discs!) and set it up with the ruffler foot and do a bit of an assembly line with it (I have my Janome set up for the actual sewing)- there are three rows of gathers in my daughter’s favorite skirt! Happy gathering!
marilyn raphael says
Very Nice. I use a similar divide and pin method, with a wide zig-zag over a thread of knit cro sheen. I can full that stuff to my heart’s content , and the heavy thread never breaks! The slick heavy thread slides out very easily after the gathered fabric is attatched. 😉
BJ says
Always used one row of stitching to gather if I didn’t want to put my ruffling foot on…can see how this would make nice and neat gathering….SWEET:)
Charity says
Thanks. My tension has been high this whole time. No wonder it never worked. I’m gonna try that next time.
Lela C says
Put a different color thread in your bobbin. It makes it easy to see when you gather your fabric. The bobbin threads always gather easier for some reason
Mary Murray says
I usually use a shorter stitch length. My gathers are a bit finer. If the fabric is heavier, I may increase stitch length, but only enough to prevent the threads from breaking. I may add a third row of basting stitches for security. One more thing…. I leave bobbin threads extra long and top threads about one inch so it’s easy to grab the bobbin threads to pull up the gathers.
Heidi says
I have gathered like this, but never thought to press those gathers down. It might keep them from sliding. Thanks
Donna Antaramian says
I used to use this method until I found the tip to zigzag over fishing line .. SEW much easier and faster. I use the zigzag method for my custom window treatment business especially on gathered bed skirts!
Karen says
I was wondering about the holes left in the fabric in the gathering row below where you do the final stitching.
girlinspired says
For most basic fabrics, the holes will press out with a quick press and steam. If you’re using a really delicate fabric (I’ve had trouble with silks, for example), you may want to sew all your gathering rows to the inside of the final row of stitching – it makes it a little more difficult, but a necessary adjustment if the holes are going to be visible on the finished garment.
Karen Leanne King says
Great tips! Let me add a little bit to this:
When stitching your 2 gathering rows;
1) Use a heavier thread on the bobbin, if you can. Draw these threads… don’t pull from the needle thread, as the bobbin thread is looser, and less likely to break.
2)I have found that tying your threads together on one end helps keep your fathers from slipping.
3) use a long stitch on the draw threads.
4) before drawing up threads, divide the length of gatherings and the piece they sew into equal sections. Pin these marks together first!
Kathy Cathcart says
I have always used the 2 thread loose tension approach but I’ve never used steam.boy does that make a difference! Thanks so much for sharing! Kathy
Adrienne says
I was just doing gathers last night and hating them. This makes them look so neat and manageable. I must try this ASAP.
Helen Nunn says
gathering info was very good, thanks and more please
Elaine says
This is the basic way I have always done gathers. I like the comment of pressing the gathers. I will do this the next time. Also I will try the comment of having my gather lines farther apart. I feel this will make for much easier removal of the thread.
Jacqueline Gabriel says
This is THE BEST tutorial on attaching a gathered skirt to a waistband or bodice, bar none! I knew about the two stitched rows and pulling the bobbin threads. What I found most helpful: the pinning instructions and the STEAMING instructions! I had forgotten how far a bit of steam goes to create even gathering and in making the waistband sewing go so much smoother. Thank you!
Joanne says
Thank you! I always have sewed since I was 7. This is the best technique I have see yet for gathering. Thank you for sharing!!
Chris says
A friend of mine told me to use thin cording to do gathering. lay the cording on the fabric, extending the cording about 6-8″ on each side, do a wide zig zag over it, then pull on the cording, working the fabric into a gather. Thread doesn’t break while working it.
DEBBIE says
Thank you for this tip. I just made an apron for my Granddaughter and made three rows of ruffles. The steam ironing would have made it simpler.
Heather says
I always tie the gathering thread ends together before pulling, that way I can ensure the threads don’t accidently pull out and that they are pulled equally.
Carol says
Thank you, thank you, thank you! This is exactly the gather that I love, when I fall in love with a dress in a shop. Those types of dresses are always too expensive for my budget, so I walk away disappointed.
But yea, I can give it a whirl! Thank you for your great instructions!
Carol P
Teresa says
I sew the two gather stitch lines in a contrast color. That way when it comes time to sew between them I can tell which is which.
Bonnie says
Thank you for this tutorial. I learned to mark with pins,to steam your gathers, sew down the middle and use lots of pins. I would love to see an article about different types of fabrics. When I go into a store, I feel overwhelmed with choices. It would be nice to have one article about their basic differences,even though I know to check the pattern for suggestions.
Rose says
That was very helpful. I always had trouble getting my gather even and to stay even. My biggest problem seems to be I only used one line of loose stitching instead of two. Do you have any helpful hints on sewing sleeves in? I always wrestle with that too. Thank you.
Theresa says
A beginner “GATHERER” can sometimes benefit by not only marking center front and back, and sides, but also bring front to side and mark it as well. You’ll have eight marks instead of four on the gathered piece and eight marks on the piece you’re attaching to. (I know that’s poor grammar). A marking pen is easier for beginners too so they don’t have lost pins to deal with.
The third row of gathering threads is a really good idea if you have a very long piece to gather. I’ve had students get almost to the end and a row breaks. One other thing:. Someone might have mentioned this, but if it’s a really nice long ruffle, I have started In the middle and stitched to the end.
Your photos and explanations are good.
Penny says
Thanks for your directions! I used contrasting thread for the basting stitches to make removal easier.
amita says
thank u.Love to know the basics of front openings.
C. Gresham says
I’ve had a project on hold for almost a year because I couldn’t get the ruffles to behave! I use two rows of long stitches but picked up several tips from this article and now will go back and try it again. Thank you so much.
girlinspired says
Wonderful! Let me know how it turns out!
Kiki says
Omg could you do a zipper adding video plz?
girlinspired says
Great idea! I don’t think I’ve done a zipper video before. What kind of zippers do you need help with? Regular or invisible? Both?
Melissa says
Thanks, although this appears to be an older post, it just popped up on my Pinterest, it is new to me. There are a couple steps you did i have never done, hoping when I add those steps my gathering is better.
girlinspired says
Ah! Good luck! We learn new little tricks all the time, huh? Happy sewing!
Sandra says
Thanks for the precise tips. My grandma taught me how to gather a skirt, but I always had trouble the thread braking. I will make sure to pull the bobbin thread.
Granny Suzy says
I know this post is rather old, but I’d like to suggest another way and hope someone sees it. Try using twin needles if your machine works with them. This way you get both rows done at the same time. The best “twins” for this would be the ones with a 6mm spread. And if you’re making something that can be done with just one line of gathering, try this quick machine gathering method: set your stitch length to at least 4mm, tighten your upper tension significantly and stitch away. Your machine will gather the fabric as you go; easy-peasy. Alternatively, you could simply buy a gathering foot. And if your ends are not tied off, you can easily adjust the results of this method should it be necessary.
Please note, the tension setting for this quick machine gathering method is initially a “guesstimate”, so please practice on some scraps first.
I’ve actually thought of trying the quick gather method with twin needles installed but have never yet tried it. Anybody want to give it a shot?
Kat says
I am just getting into sewing for myself after many years of boring curtains & pillowcases. I enjoyed the video on how to sew gathers. Never thought of using 2 rows of stitching though I’ve been using gathers quite a lot with a homemade pattern for nighties.
SilkCityGirl says
Wonderful tutorial! And the tip on using the pins also useful. I think the double or triple rows help keep the gathers neat, even & anchored. Will definitely try this technique, and I agree that the ruffler foot creates pleated-looking gathers.