
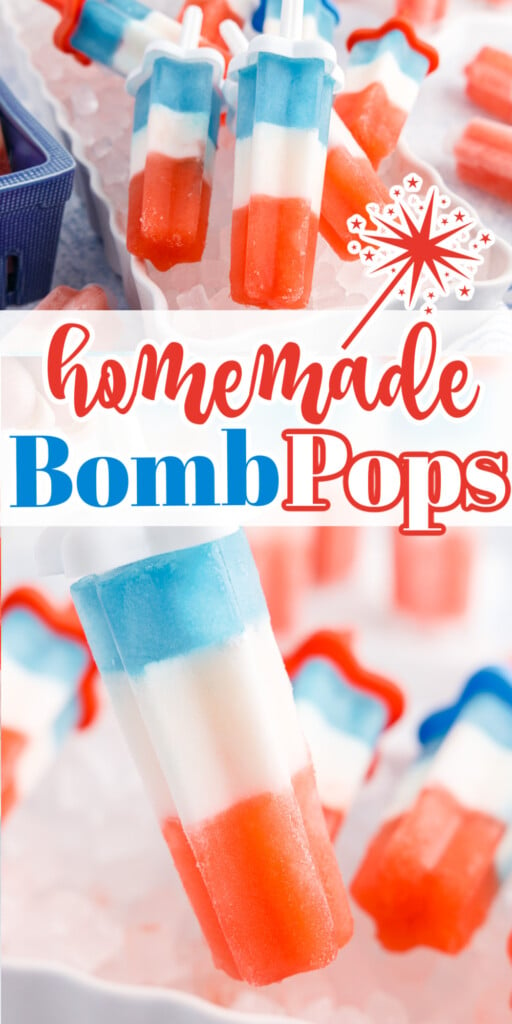


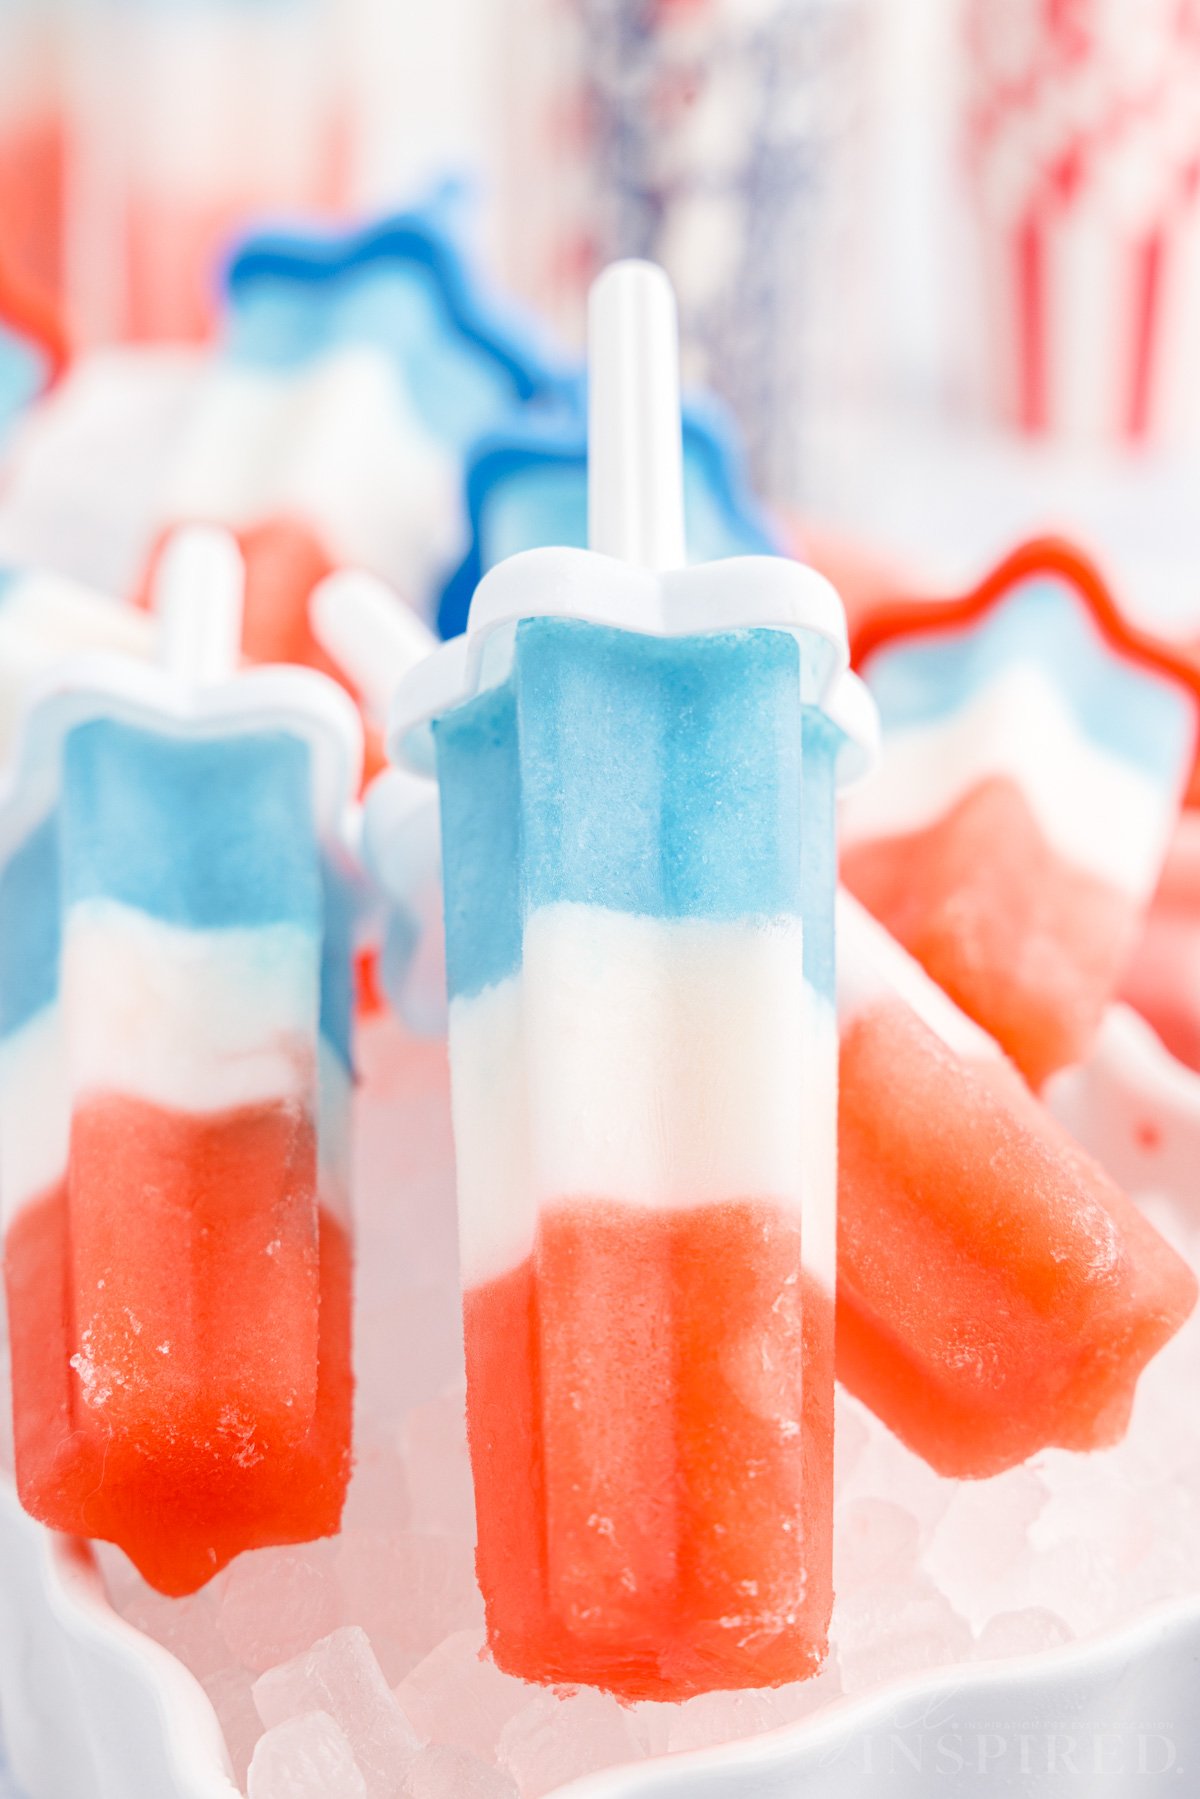
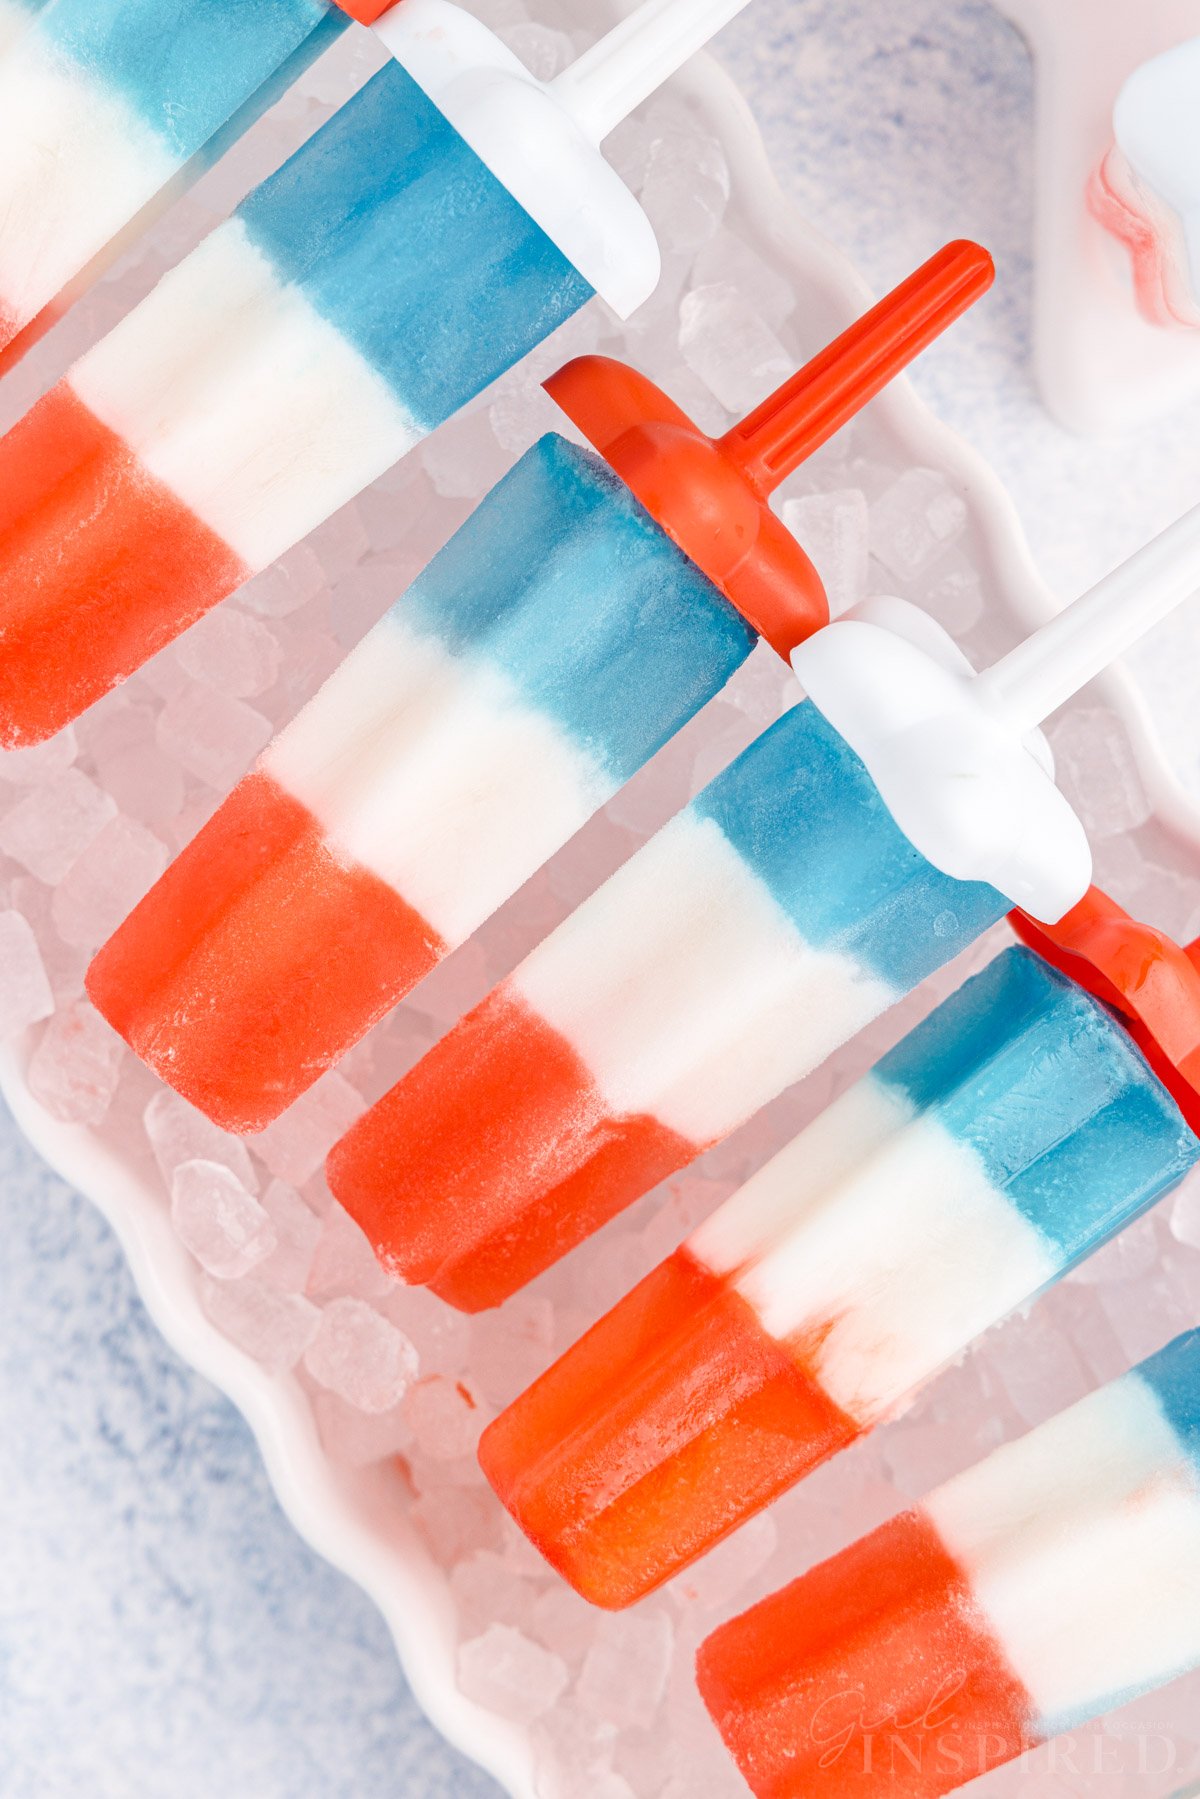
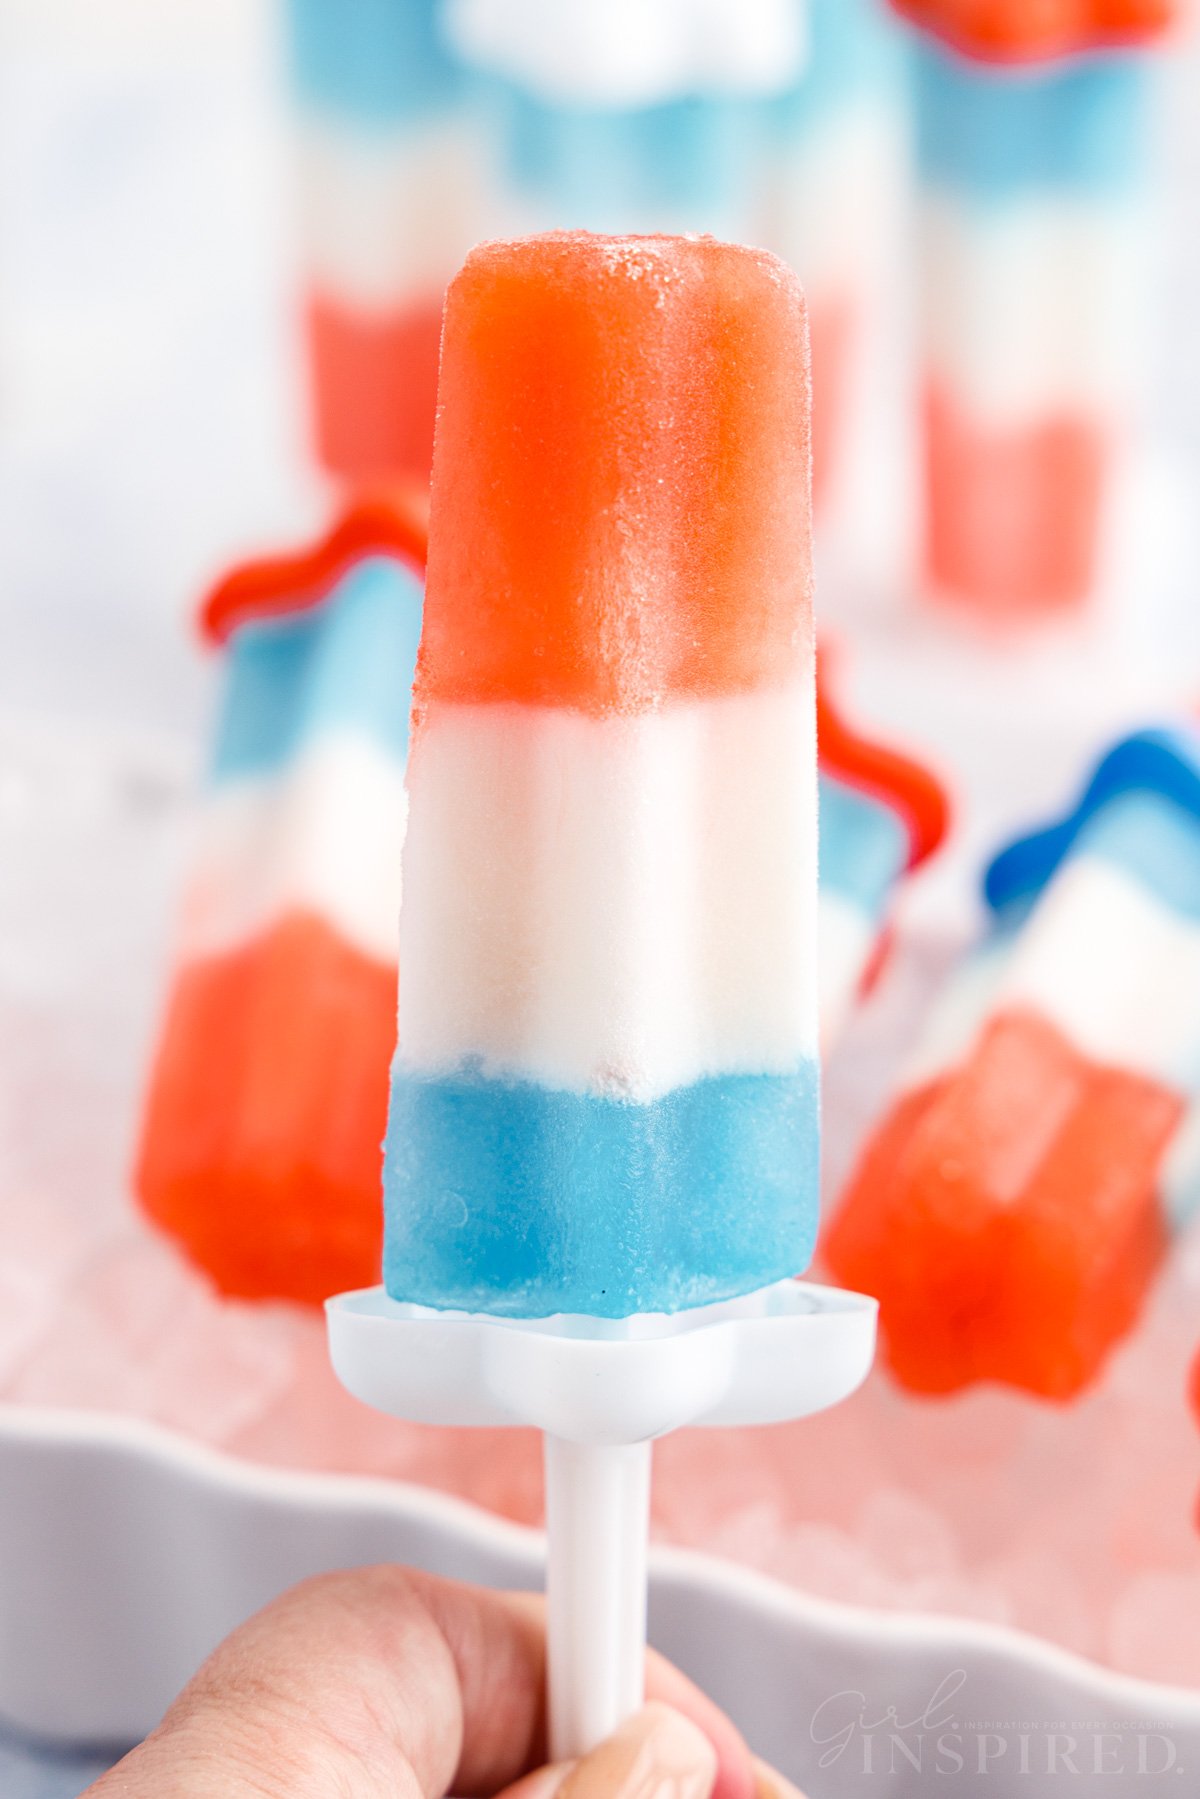
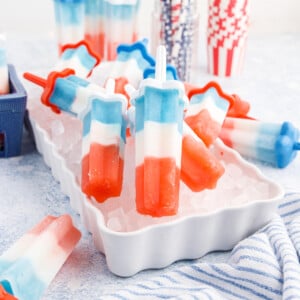
This homemade bomb pop recipe has the same iconic red and blue colors that you see in the stores, along with a rocket pop shape in classic cherry, lime, and blue raspberry flavors. They are fun, festive, and make the best sweet treat on a hot summer day.
As a kid, on a hot day, the whole family would enjoy these popsicles with the famous rocket shape. So, I thought it would be fun to make them with my kids from scratch, and they were excited! It was like I was back in my childhood again except now we are making new memories.
This isn’t the first time we’ve made from scratch frozen treats. We love cookie monster ice cream, mini ice cream sandwich pops, and we even recreated rolled ice cream at the house! Not only are these a tasty reminder of summer fun, but they are a refreshing treat that kids enjoy helping with.
Jump to:
🚀 Ingredients:
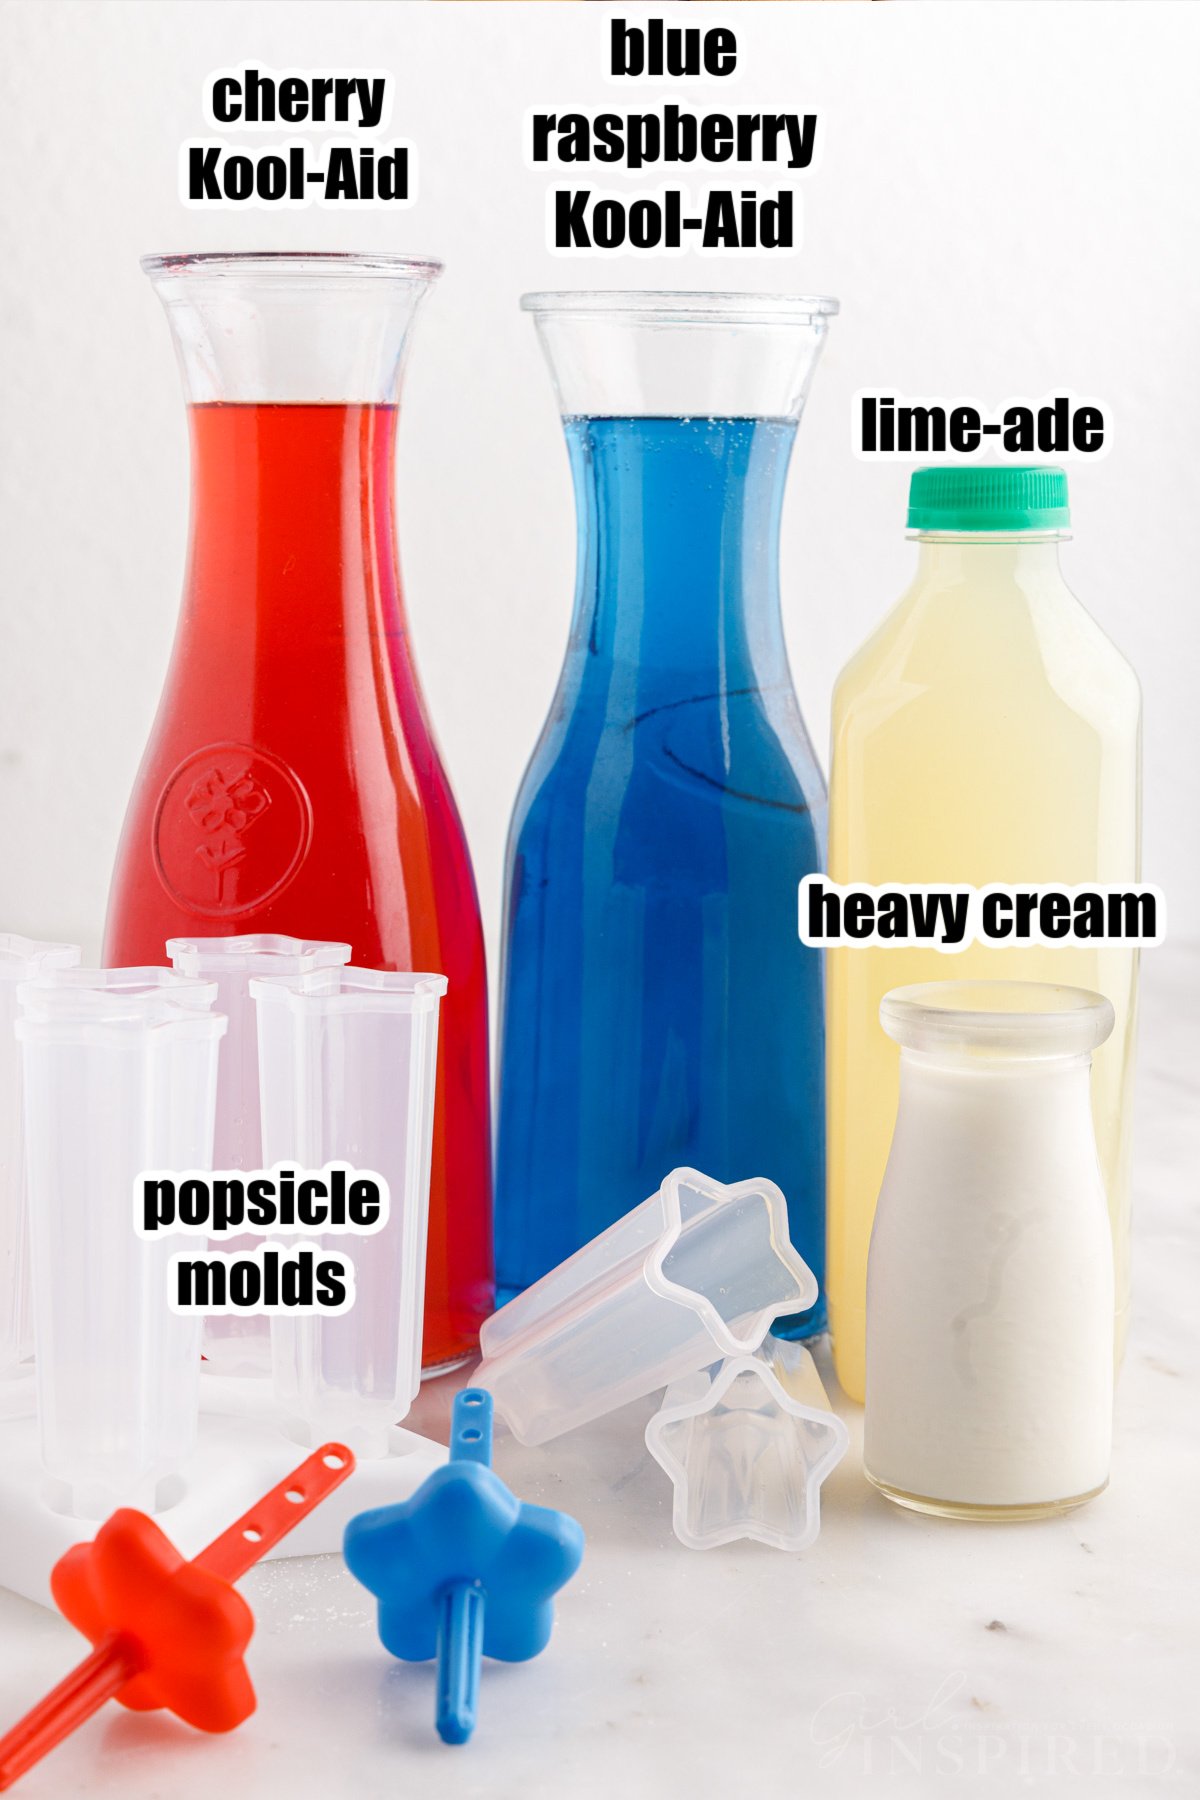
- Kool-Aid – you’ll need cherry and blue raspberry.
- limeade – normally on the juice aisle or in the frozen concentrate section. If using frozen, thaw beforehand.
- heavy cream – for the white layer – we add this to the limeade to get an opaque and creamy section.
For a full list of ingredients and their measurements, 📋 please view my printable recipe card at the bottom of the post.
Equipment Needed:
Substitutions and Variations
- Individually-wrapped bomb pops – if you are making a bunch of these and need a better storage solution to make them in advance, I recommend getting self sealing popsicle wrappers.
- Dairy free – use coconut milk in place of the heavy cream.
- Sugar free – use Splenda when mixing the Kool-Aid. Be sure that the limeade you’re using is sugar-free as well!
🔪 Instructions:
PREP: Make the cherry and blue raspberry Kool-Aid by following the instructions on the packet.
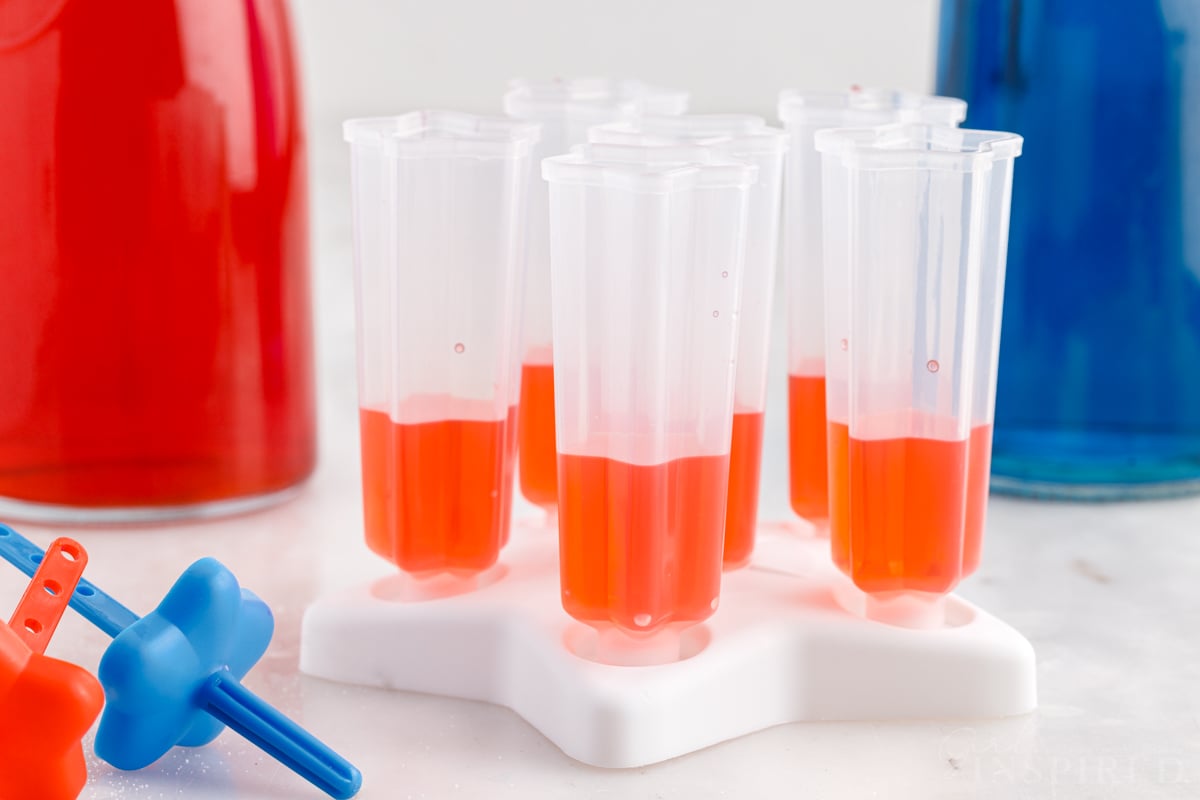
Step 1: Pour the cherry Kool-Aid into the bomb pop molds so it’s ⅓ of the way full. Freeze for 2-3 hours, or until the liquid has turned solid. It must be super frozen or the color will bleed into the next layer.
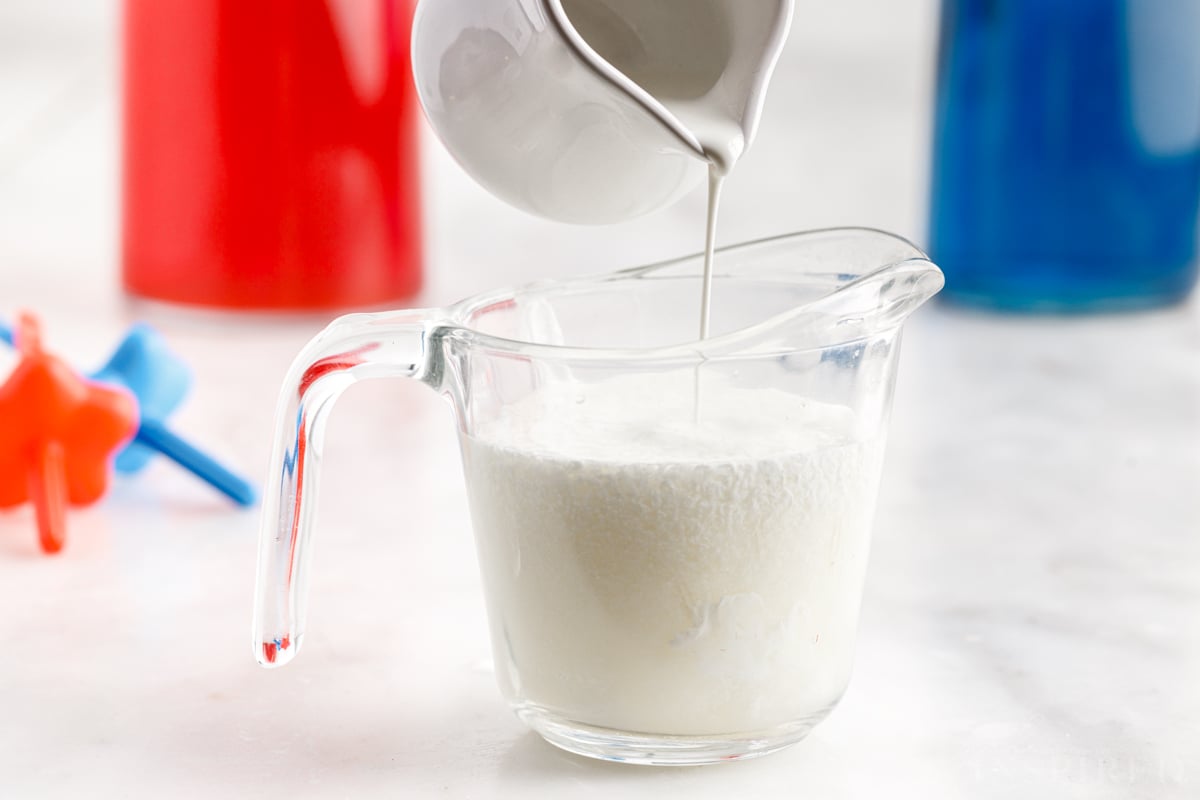
Step 2: Whisk the heavy cream with the limeade until combined. Pour into the popsicle molds for the second layer.
Pro Tip: Head down to the notes section to see different ways of adding the sticks to the molds if you are having trouble.
SERVE: Loosen the bomb pops by running them under lukewarm water then pull the molds off and serve! Alternatively you can leave them on the counter for a few minutes and the mold will loosen.
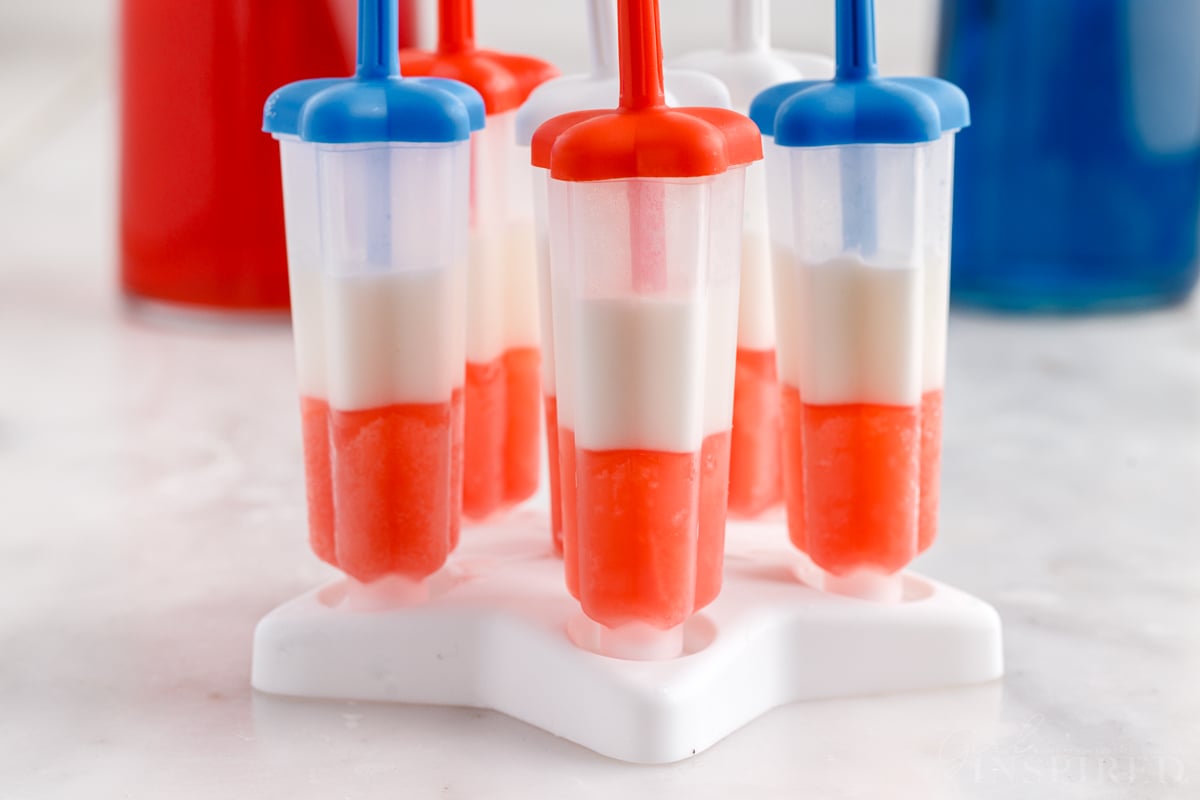
Step 3: Freeze until the white layer is solid.
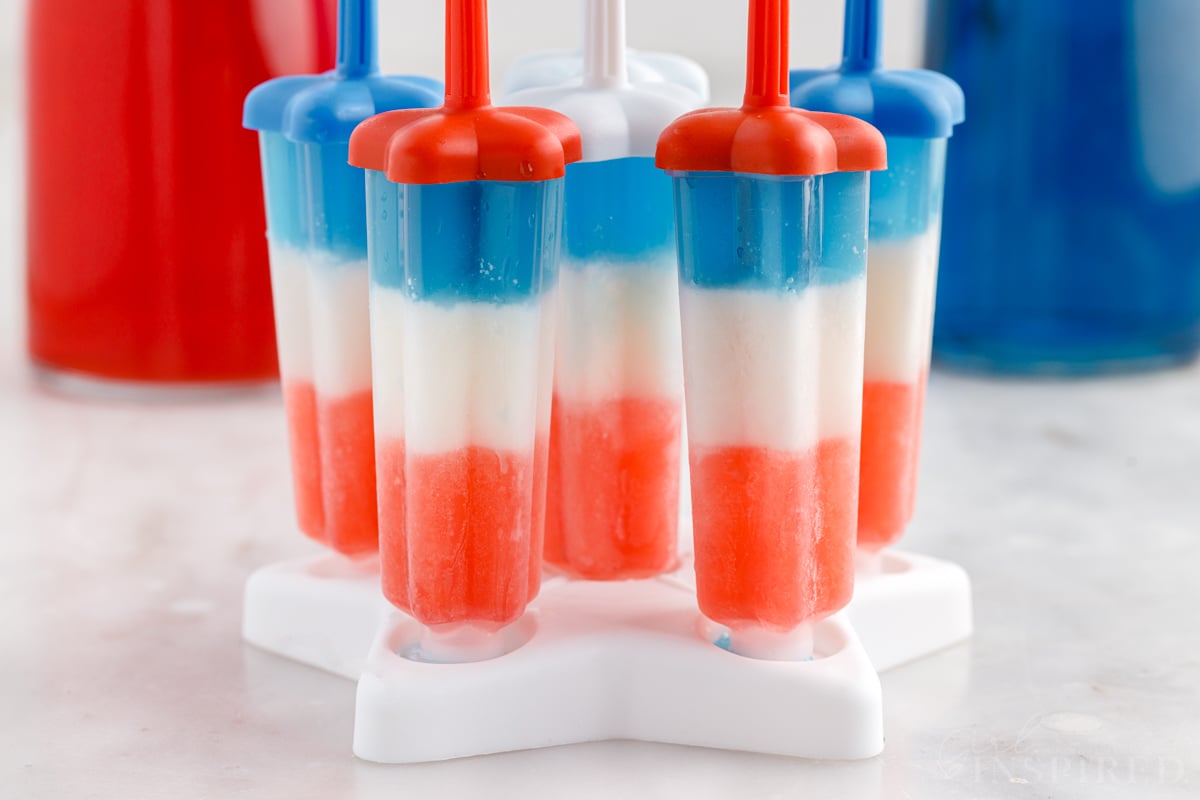
Step 4: Add the blue raspberry Kool-Aid on top and freeze. If you haven’t already placed the sticks in, do so now.
- When we mixed the limeade with the cream, we didn’t have trouble with it curdling. However, if you do run into a problem you can use coconut milk instead.
- Be sure each layer is solid before adding the next. If they aren’t, the red and blue layers will bleed into the white.
- The popsicle mold I used made things a little tricky for adding the popsicle stick as the stick reached into the white layer. If you add the lid and stick and freeze in the white layer, it’s harder to pour in the blue Kool-Aid. I had to wiggle the cap over, then pour it in.
- It might be easier to ditch the lids and sticks that came with this set and just use regular wooden popsicle sticks.
- I also tested using a knife to make a slit in the white layer, then added the blue, and was able to get the stick/lid on with no problem.
Fun Fact
Did you know that bomb pops have their own national holiday in June? -National Today
Recipe FAQs
They will stay fresh for up to 1 week in the freezer. To save for a month, seal them in an airtight container.
In the white layer of the bomb popsicle, we use heavy cream with the limeade to get the creaminess, but coconut milk can also be used and you will get similar results.
Blue raspberry, lime, and cherry flavors are layered on a stick to make the infamous bomb pops. Feel free to use other flavors of Kool-Aid or fruit punch for variety.
More Easy Patriotic Recipes


If you tried this Bomb Pop Recipe or any other recipe on my website, please leave a 🌟 star rating and let me know how you liked it in the 📝 comments below.
Homemade Bomb Pops
Equipment
- Popsicle Molds (affiliate link for the mold I used) – https://amzn.to/3AukSqR
Ingredients
- 1 cup cherry Kool-Aid
- ¾ cup limeade
- ¼ cup heavy cream
- 1 cup blue raspberry Kool-Aid
Instructions
- Prepare cherry and blue raspberry Kool-Aid according to packet instructions (you can use regular sugar or Splenda for sugar-free, if desired)
- Pour cherry Kool-aid into the bomb pop popsicle molds, filling ⅓ of the way full. (For a 2 oz. mold, ⅓ is about 1 ⅓ tablespoons of Kool-aid.)
- Place the molds into the freezer for 2-3 hours or until the liquid is frozen solid.
- Pour the cream into the limeade and stir until fully combined. Add the second layer of “white liquid” on top of the frozen red layer. Check to determine if you will need to add the lids to the popsicles at this point – see notes for some ideas on this.
- Freeze the popsicles for another 2-3 hours until the second layer is solid.
- Add the blue Kool-aid to top off the popsicles and freeze until solid. (Add popsicle sticks before freezing if you have not already done so.
- Loosen the popsicle from the molds by running them briefly under lukewarm water or by setting on the counter for a couple minutes until they slide easily from the molds.
Would you like to save this?
Notes
Nutrition
Make this recipe?
Share it with me on Instagram @girlinspired1 and follow on Pinterest for more!


Comments & Reviews
swathi says
Homemade bombpops looks delicious I need to try this. My daughter is a fan of this.
Nicole NK says
I just got all the ingredients and can’t wait to make these for the 4th!!
Elizabeth says
These were so fun to make and were a big hit with everyone. Thanks for the recipe!
Lindsay Howerton-Hastings says
These are so cute for the 4th of July – I used to love them when I was little! Definitely making these on repeat all summer long.