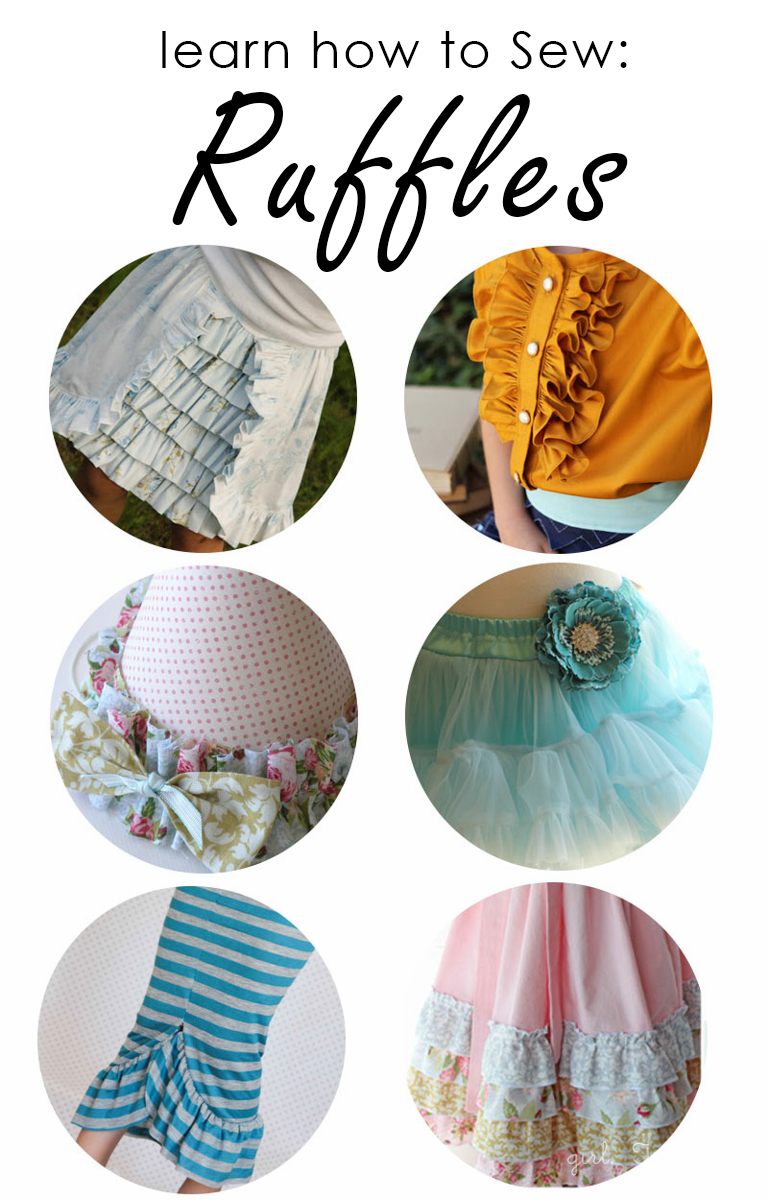
Hey friends! Things are super crazy busy around here, and though I can’t share any of the fun quite yet, I do have a really great techniques post for you today. Ruffles are one of the sewing techniques that first pulled me into garment sewing and I have to admit that I still have a soft spot for their flowy, feminine charm. If you love ruffles as much as I do, but aren’t sure where to begin, today I’m going to show you four different methods to sew a ruffle.
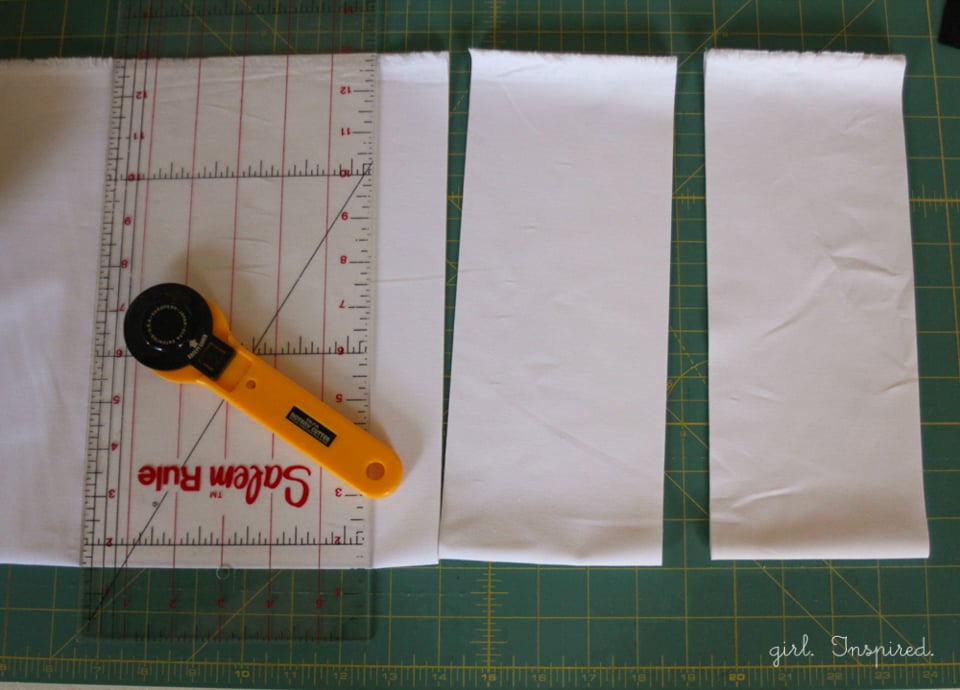
For this technique, I cut strips of fabric in 4 ½” sections; this width will vary depending on the project for which the ruffle is intended and the needed hem/seam allowances. Cut the fabric strip from selvage edge to selvage edge. In general, you will want the length of your fabric strip to be 2-3 times the length of the finished ruffle that you desire. A fuller, more gathered strip will require more length while a lightly gathered ruffle will require less. For the purposes of learning the ruffling techniques, we are not going to worry about the raw edge of the ungathered side of the strip. However, when sewing a ruffle for a finished garment/home décor project, you will probably want to finish the edge opposite the gathers prior to gathering/ruffling. A rolled/narrow hem works great (here’s a rolled hem video tutorial), as does turning the edge under ¼” and then another ¼” and stitching close to the edge. For crafting projects, people will often leave the edges unfinished for that fun, frayed edge effect.
How to sew a ruffle
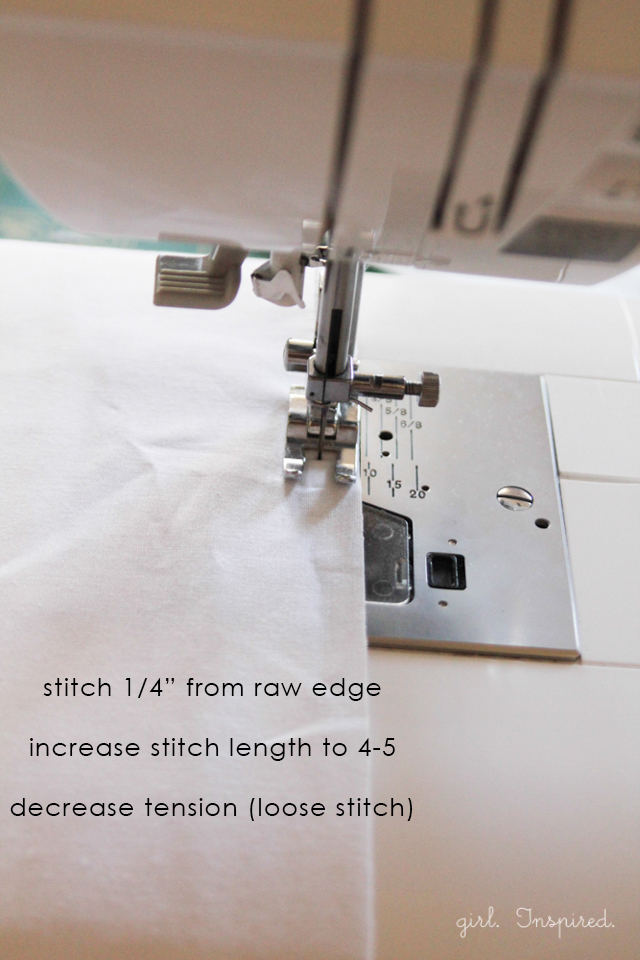
To turn your fabric strip into a ruffle, it is quite simple. Change the settings on your sewing machine to a long stitch length, with low tension (a basting stitch). Stitch about ¼” from the raw edge, leaving long tails at the beginning and end of your stitch lines.
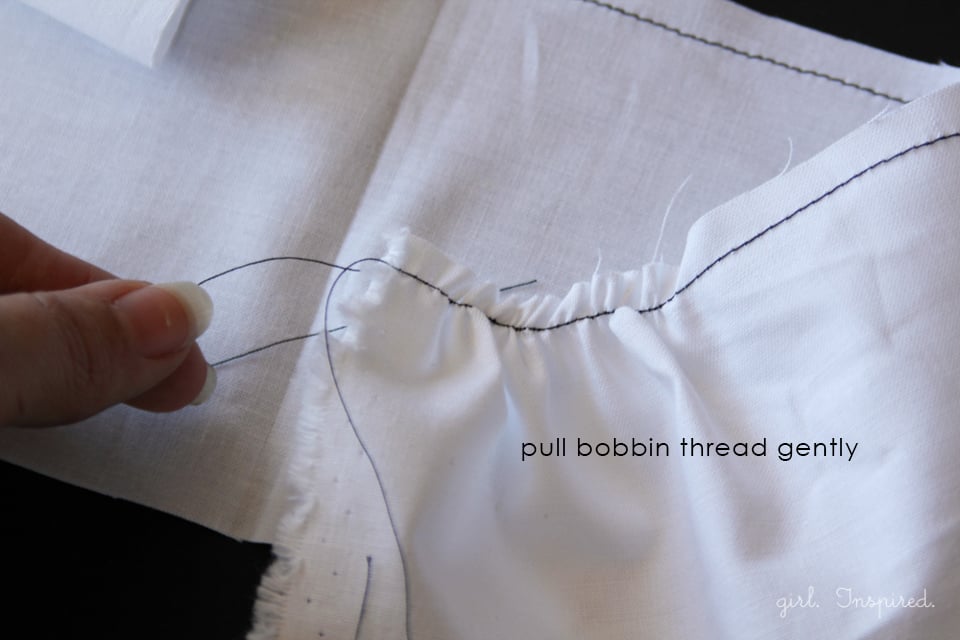
Remove the strip from your sewing machine. Find the bobbin thread tail on one end of the strip and begin pulling. The fabric will begin to gather. Continue to pull the bobbin thread and work the fabric down until the entire strip is evenly gathered and the length you desire. Be very careful that you don’t pull the thread all the way out from the other side! This is the most basic method to form a ruffle.
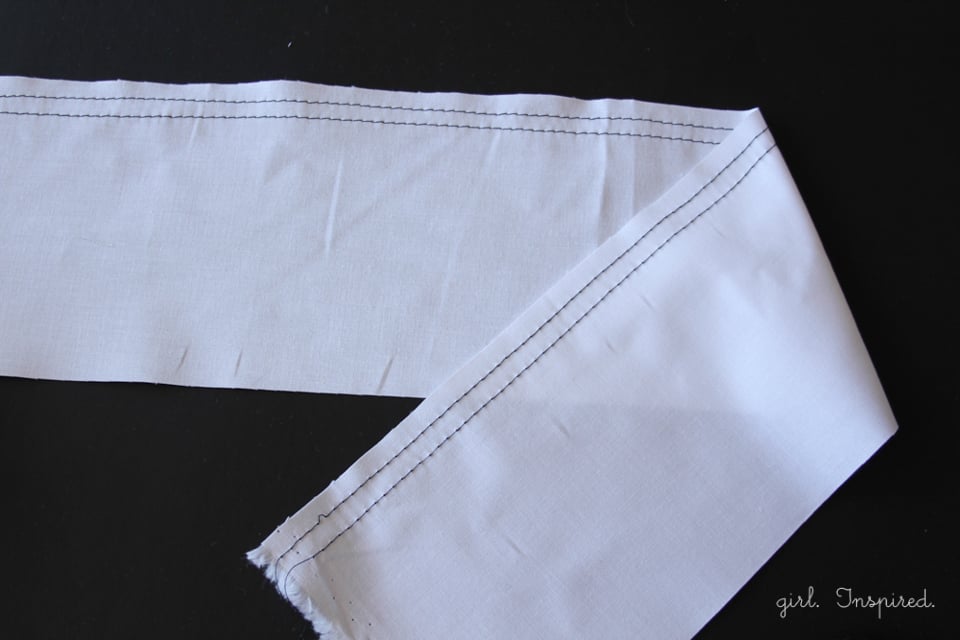
For more evenly gathered ruffles and for ease of attaching a ruffle to another piece of fabric, I like to sew two parallel lines of basting stitches. You follow the exact same steps as above, but sew a second row of stitching ¼” below the first row of stitching.
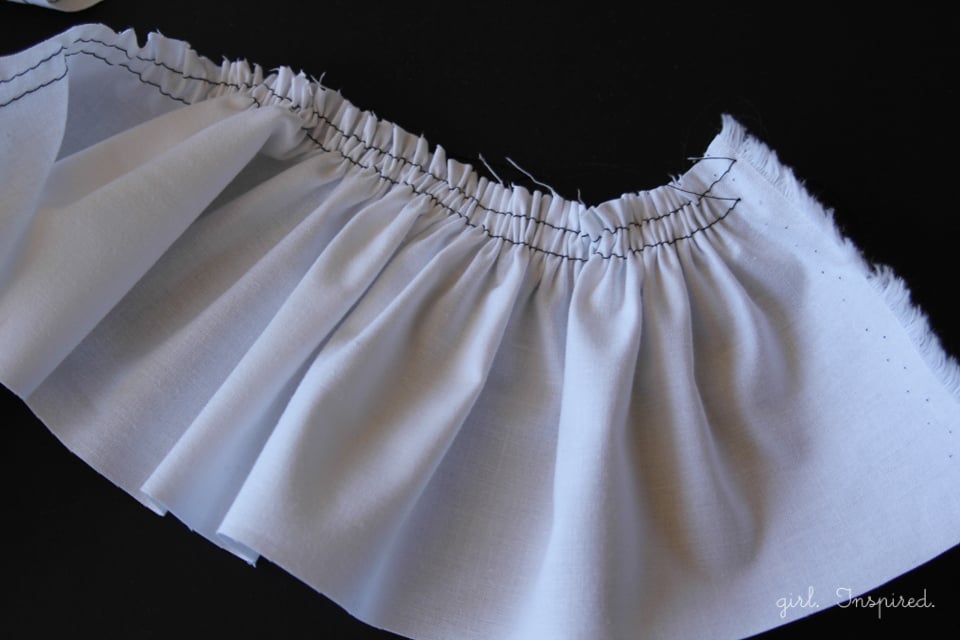
Note that the fabric gathers more evenly as you pull the bobbin threads together at the same time.
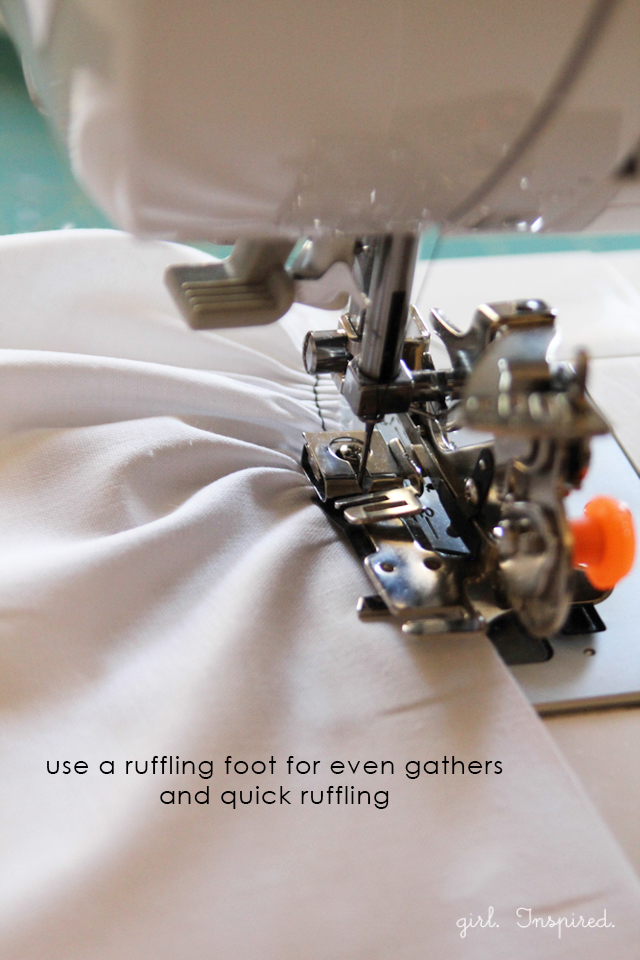
If you’re going to be sewing a lot of ruffles, you might be interested in a ruffling foot for your sewing machine. This makes ruffle sewing SO easy. You simply remove your standard presser foot and replace it with the ruffling foot (you can see the one that I have through my affiliate link here). Place the fabric strip between the plates on the ruffling foot, adjust the settings on the foot for fullness, and stitch (your sewing machine settings should be standard length and tension – the foot does all the work for you). The ruffling foot will turn out a perfectly gathered piece of fabric, no bobbin thread pulling necessary! The main drawback to the ruffling foot, in my opinion, is that it takes more work to make sure that the settings are correct to give you a finished ruffle at the length you require for your project.
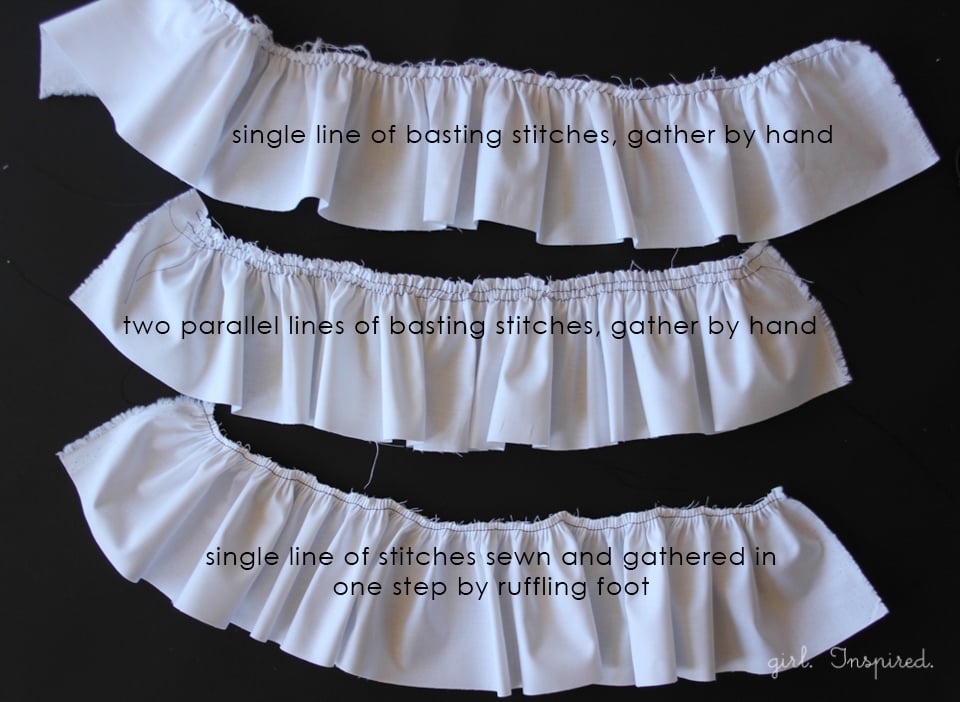
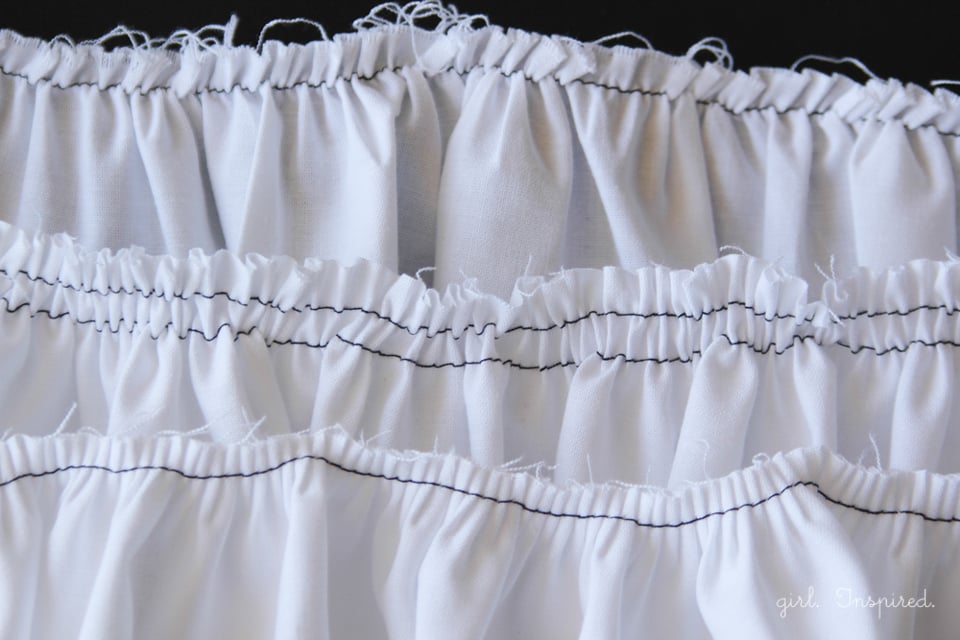
You can see the three variations in the pictures above. Regardless of your method, you will want to press and steam the gathers once you have them even and at the desired finished length. This will help set them and make it easier to work with the ruffle as you continue with your project.
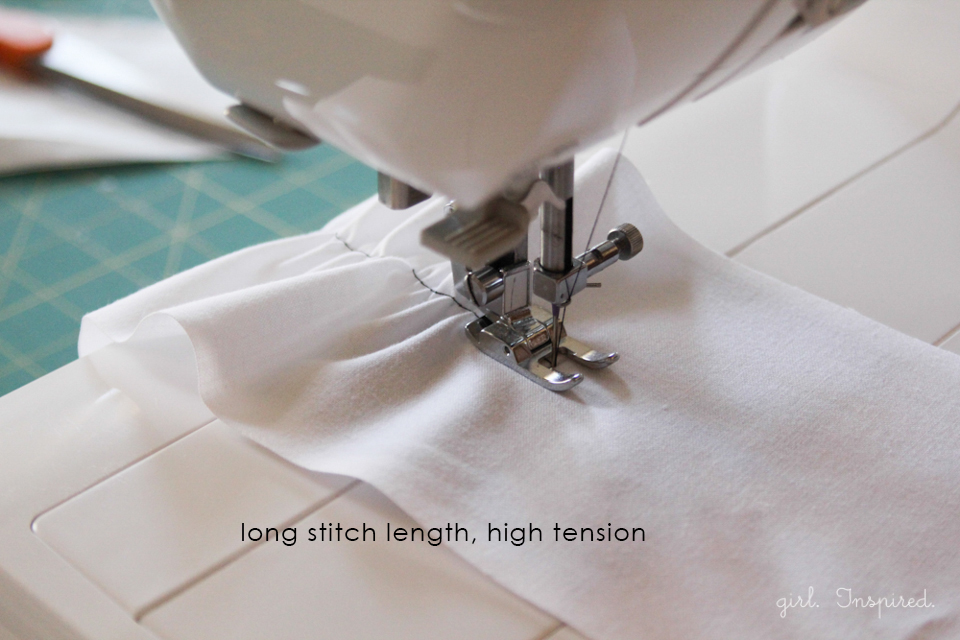
One last method that is really fun for producing a quick ruffle where precision isn’t necessary, is to place the fabric strip in your machine, increase the stitch length and crank UP the tension, so it is super tight. Then, just stitch down your fabric and that tight tension will ruffle the fabric for you.
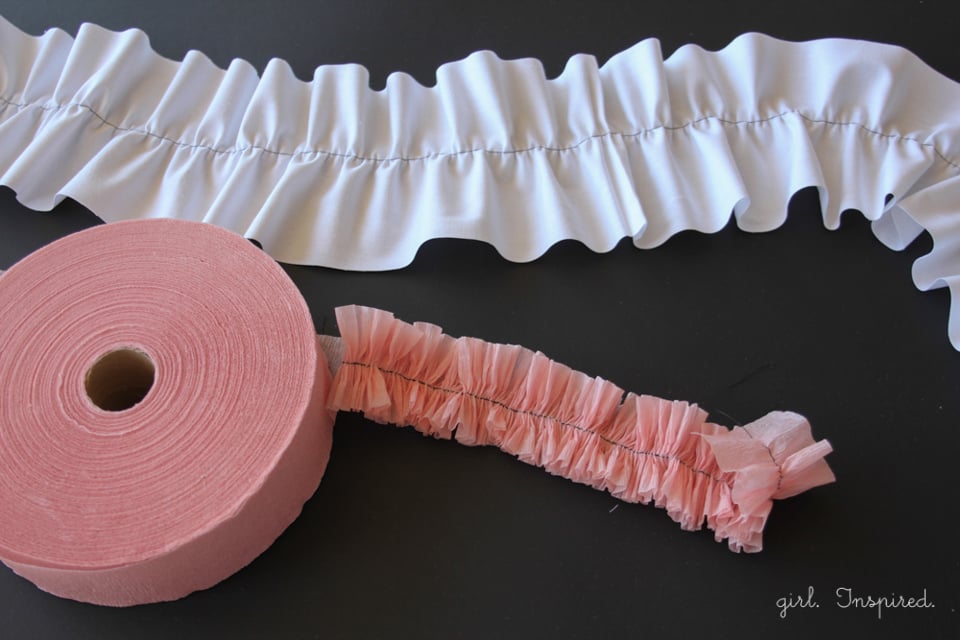
This method doesn’t really allow for much adjustment in the gathers, but it is probably my favorite method for quick craft project ruffles or even creating party décor, such as ruffling crepe paper, like in the picture above. So, go experiment with these ruffling techniques and get to know the method you’re most comfortable with and which settings work best on your particular sewing machine. For more tips on gathering fabric and attaching a ruffle to another piece of fabric (such as attaching a gathered skirt to the bodice of a dress), you might like this Sewing Basics: Gathering.

Once you have your gathering/ruffling technique down, the options are really limitless. You can find full tutorials for some of the projects shown in the collage above by visiting the Sewing Tutorials and Patterns tab or by clicking below:
Layered Ruffles Skirt Tutorial
Party Hat DIY
Pettiskirt Tutorial
30-Minute Mermaid Skirt Tutorial


Comments & Reviews
fattema says
This is really nice 😀 … and I looooove the last method ..I didn’t know about it before .. I will try it very soon
thank you so much ^_^ this is so helpful ♥
Kelly says
The easiest way for me is to gently pinch my thread on top and it ruffles it right up! Adjust how hard you pinch to adjust your ruffle. The key is to leave a little longer threads at the beginning and end because you usually have to loosen your ruffle, which is much easier, instead of pulling threads to make the ruffle. The threads are less likely to break this way too.
girlinspired says
Thanks for sharing Kelly, I’ve heard about that technique, going to have to try it.
cynthia anderson says
Love all these ruffle items !
Kelsey says
Another method is to zigzag stitch over a piece of dental floss or heavy thread. Pull the floss or thread & you’ve got a ruffle. I like to use this for heavier fabrics where basting stitches with regular thread might be more likely to break when pulled.
Mignonne Henderlin says
This seems the easiest way to ruffle longer strips. Was searching for a quick method to ruffle for bed skirting.
Thank you so much for sharing.
Lila says
For longer ruffled lengths or heavier fabric, I will use a zig – zag stitch over dental floss. Pulling the floss creates the ruffles. Floss doesn’t break as easily as sewing thread, doesn’t cut into fingers while pulling, and is easy to remove after stay stitching the ruffle.
Charity says
I love ruffles, although I don’t use them much! I have a ruffling foot too, but I don’t use it often for exactly the reasons you mentioned. It’s really nice to have for ruffle trims though!
Cathy M says
I pull out enough top and bottom thread to the length of ruffle wanted. Then I zigzag over the double string. Makes the best ruffles.
Anne says
Great post! I have a ruffler foot, but unless I’m going to be pulling loooooong ruffles, I just baste and pull them myself. I’ve got a Craft Gossip post that links to your tutorial scheduled for this morning: http://sewing.craftgossip.com/tutorial-several-ways-to-sew-a-r-uffle/2014/03/18/
–Anne