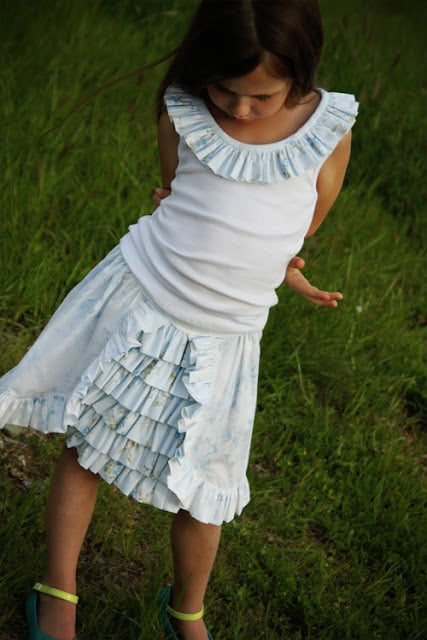
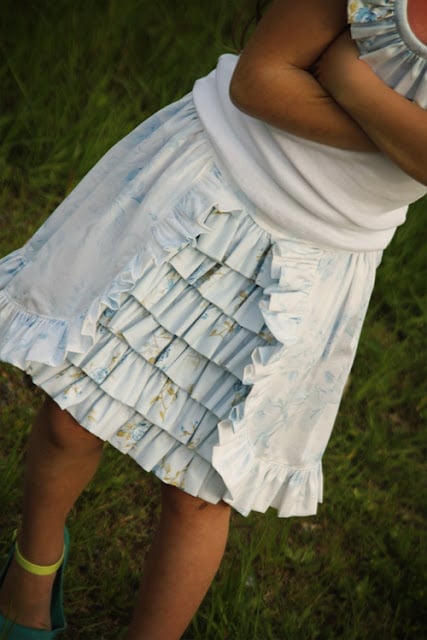
This skirt has been on my to-do (again) list for months. I made an initial version of the layered ruffles skirt as a dress (the “light and breezy dress“) for Olivia’s birthday last fall. I do like how it turned out in skirt version this time. To make this style, you are going to make two layers of skirts. The wrap-around, outerskirt is one long rectangle with a curved corner at the base of each side and a ruffle attached all the way around the edge. The underskirt has stacked, horizontal ruffles that peek out when the outerskirt separates at the center front. If the initial steps to construct the skirt are confusing, scroll down a bit to see how it all comes together at the end – I think that will help.
So, let’s get started. Cut a rectangle from your main fabric to form the outerskirt – cut from selvage to selvage for the width and calculate desired length (you will have to decide how long you want the finished skirt, factoring in the length added by the ruffle, 2″, and also the length added by the waist piece, or where you will attach the skirt onto a bodice). So now you have a big ol’ rectangle. Fold the rectangle in half, selvage edges together. Trim the selvage edges. Using a round object, draw a curved line on the bottom corner as shown.
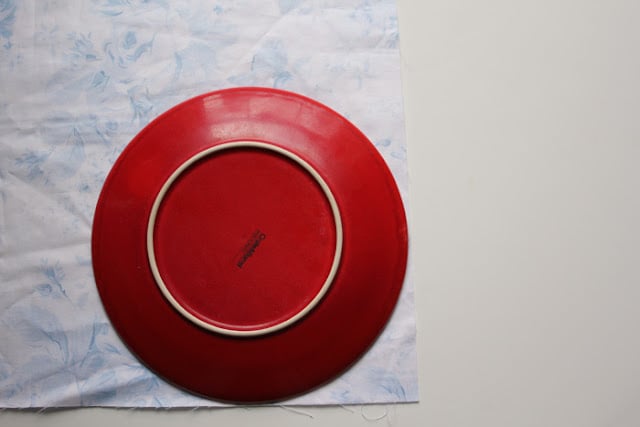
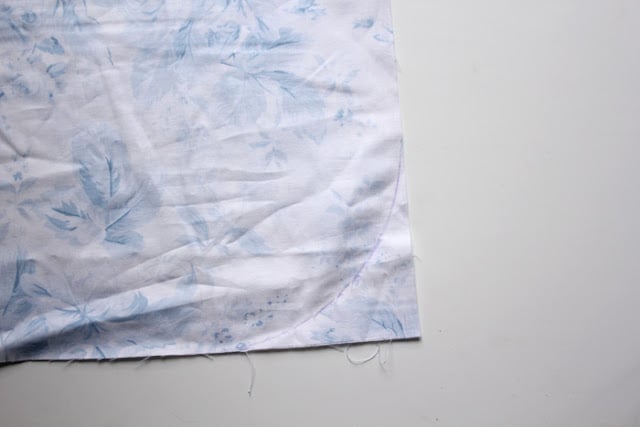
Cut the fabric along the line, cutting through two layers so that you have two matching bottom corners.
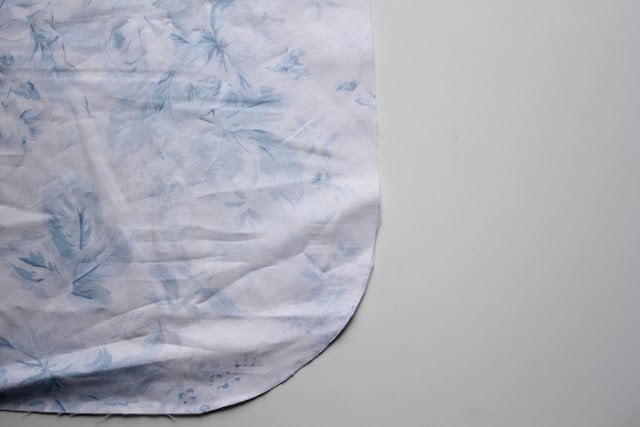
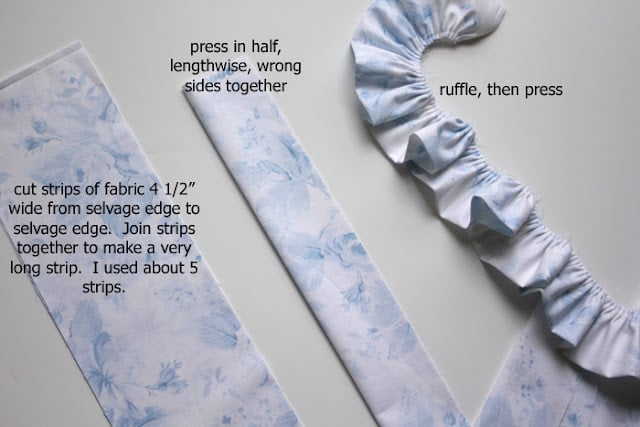
Next, you will attach a ruffle down the side, around the curve, along the bottom, and back up the other side’s curve to the top. Does that make sense? To make this ruffle, you will cut strips of fabric 4 ½″ wide. Connect one strip to the next to form a very long strip. I think my strip was about 200″ long. Press the strip in half, lengthwise, and gather it. I definitely recommend using a ruffler foot for this, but it’s not necessary – when I did Olivia’s birthday dress, I didn’t have a ruffler foot, and it turned out just fine. However you ruffle the strip, be sure to press it afterward.
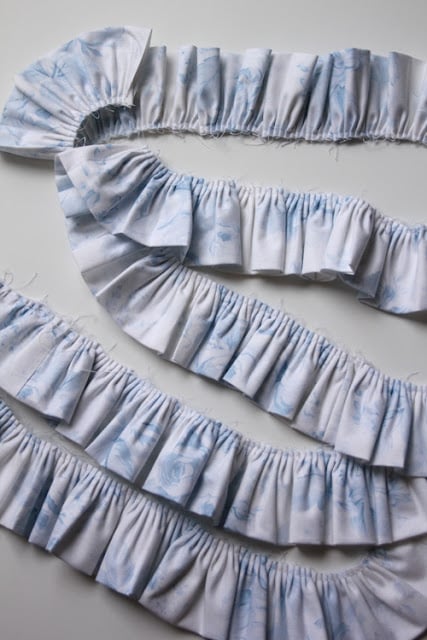
Then match raw edges of the ruffle and the right side of the skirt fabric, and stitch together your ruffle and skirt.
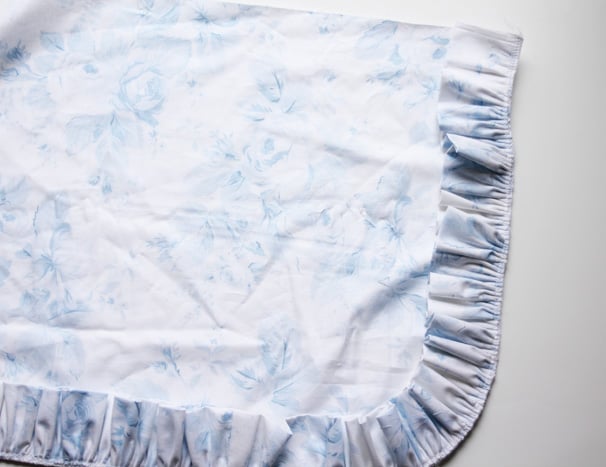
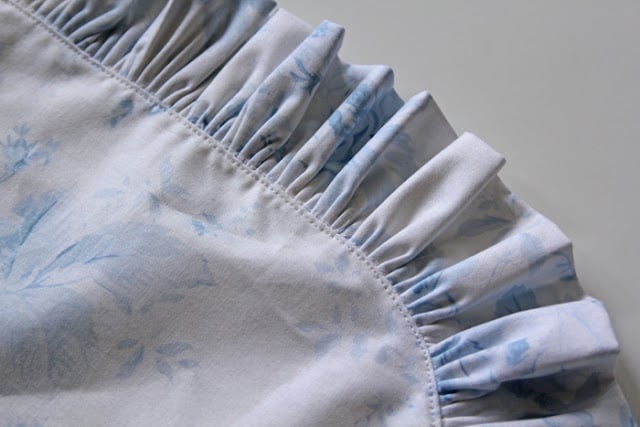
Turn the ruffle out and topstitch. Set the outer skirt layer aside.
To make the underskirt, you have a couple options. For this skirt, I was stingy with fabric, so I just made a 9″ wide strip of underskirt, which you’ll see in the pictures. I folded the outerskirt over this and stitched the outerskirt down onto the underskirt to close the whole thing up. However, when I made the “light and breezy dress”, I made a whole second skirt underneath and added the ruffles in a center strip on the underskirt. Do as you please. So, the stingy way is this…. Cut strips of a contrasting fabric (4 ½″ wide), fold in half, gather, and press just as you did for the outerskirt ruffle. The only difference here is that you do not need to join the strips together. Also, serge the edge that you’ve gathered or use a zigzag stitch to finish it off. This edge will be concealed under each row above it, but it should still be finished to prevent fraying. Use the first ruffle to finish the hem on the underskirt by matching raw edges and right sides and stitching together. Turn down and press.
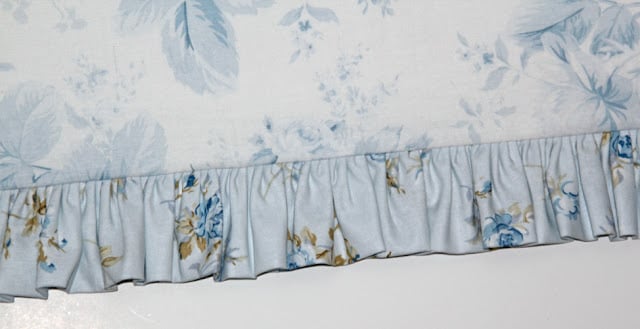
Next, start layering the ruffles, one by one.
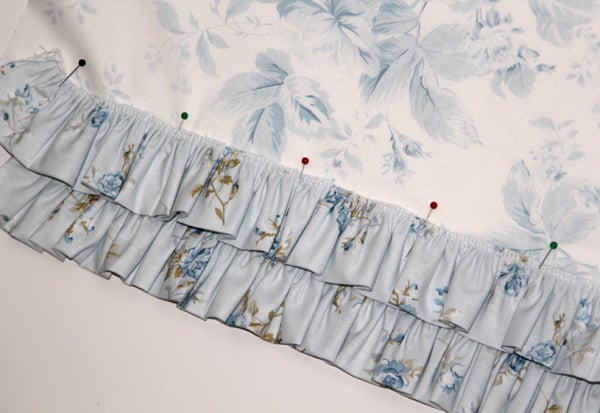
Stitch one down at a time, being sure that the bottom of the ruffle falls over the row below it by about ½″.
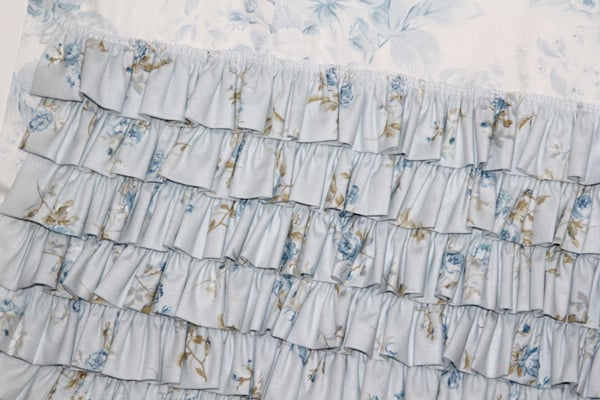
Take your outerskirt and spread it out right side down. Mark the center top of the outerskirt and the underskirt. Place the underskirt piece right side up on top of the outerskirt, matching centers.
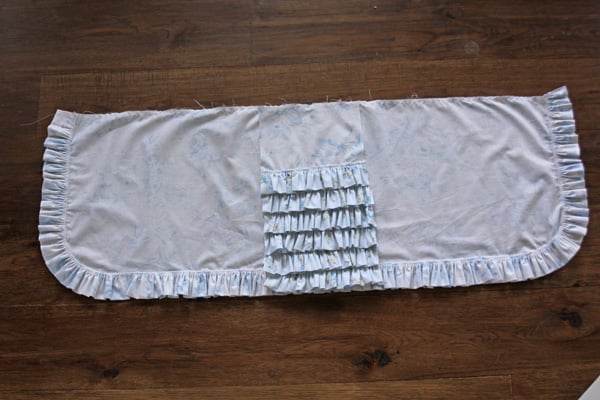
Fold the outerskirt over and place the sides in the center, leaving a one inch gap. (You may notice that my underskirt ruffles do not come up to the top edge in these pictures. I trimmed off a big chunk from the top of the skirts when I figured out what type of waist I was going to use.)
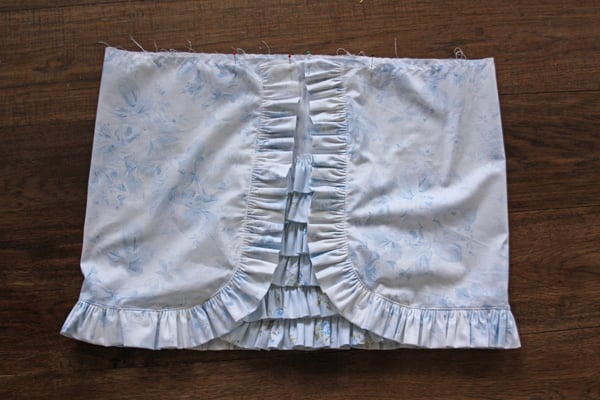
Baste together the outer and underskirts along the top edge. Now, run two parallel gathering stitches around the top of the skirts, gather, and attach to a waist piece or a dress bodice. On this particular skirt, I added a wide, flat-front waist with elastic in the back. Finally, if you’ve used the “stingy” method, you’ll need to stitch the outerskirt onto the underskirt ruffle piece. I just stitched directly over my topstitching on the outerskirt ruffle, from the waistline down on each side.
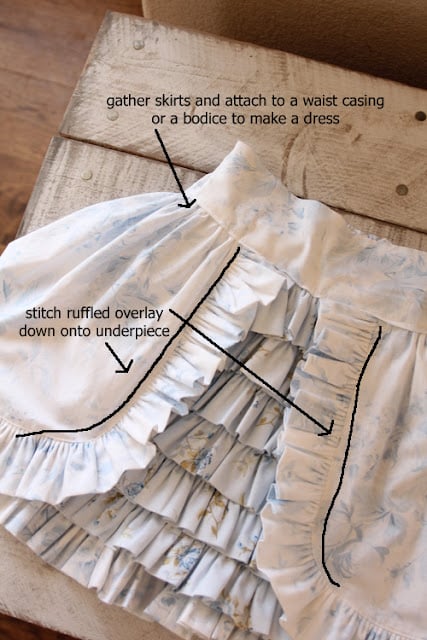
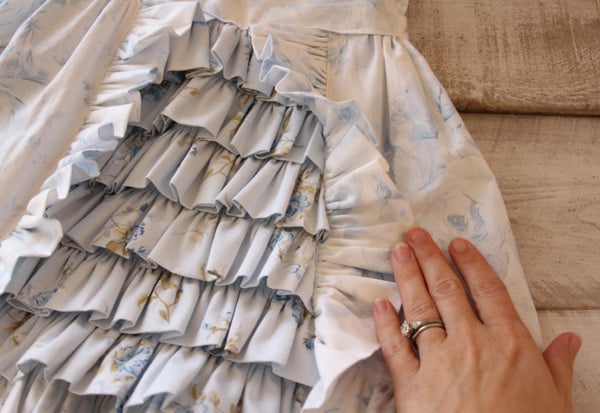
Then, I serged off the extra fabric from underneath. It’s a bit of a botch job. I’d recommend “for home use only.” If you want to be professional about it, make a whole second skirt underneath and leave the outerskirt to flutter freely over the top.



Comments & Reviews
Judy says
I JUST LOVE THE TANK AND THIS SKIRT.THE COLORS ARE SO SOFT AND PRETTY .SO YOU JUST MADE IT UP IN YOUR HEAD? NO PATTERN? YOU ARE ONE CREATIVE LADY… THANKS FOR SHARING I HAVE LITTLE GREAT GRAND DAUGHTERS TO SEW FOR I MIGHT HAVE TO TRY THIS IF I GET BRAVE ENOUGH I’LL SEND YOU A PHOTO,,,,GIGI HAS A ROOM FULL OF GOOD INTENTIONS…LOL
/
Donna says
I’m thinking about making this for my granddaughter for Christmas. Thank you for the tutorial.
Kami says
I am going to use this tutorial to make a skirt with the rufflesame in the back for my daughter’s Halloween costume…Rainbow Dash. Can’t wait to complete it for her. Thanks for the wonderful tutorial!
ariel says
This could also look really cute as the back of a skirt or dress – Love it!!
vernagrace says
Thank you so much! You are definitely an inspiring girl!
Anonymous says
thanks !!! love your blog !!!
Anonymous says
STef, this is absolutley adorable! I would love to make this for my little girls for an upcomming wedding! How much fabric did you use? Could you give a few dimensins?
Judy says
Stef its gorgeous and your timing is perfect for me. I saw something similar last year in Perth ands have been keen but reluctant( still wasnt 100% sure how I would do it) but this gives me enough info to get it done. The one I saw the overskirt was joined in the side seam and could be tied up over ruffles or turn skirt and tie over straight skirt with ruffled back ( if that makes sense)!!
neslininatölyesi.blogspot.com says
gorgeous, thanks for sharing..
Amy says
This is gorgeous! Pinning this.
I LOVE your blog! I’m your newest follower!
Emily says
Just gorgeous! Love the fabric choices and how perfect your ruffles are and the stingy method and the not stingy method. Pinning so I can remember to make this.