It’s TIIIIIIMMMEEEE!!! Time to bust open the storage unit and start hauling out the Halloween decorations or maybe craft some new. I started opening the bins and with an inspiring little trip to all the craft stores, found myself drawn to a different color scheme for my family room Halloween decor this year – PINK! What? I didn’t even know it was going to happen until it did, but I’m obsessed with this pink pumpkin decor.

My favorite time of year to craft and decorate. Remember my Halloween Murder Mystery Party and my Witch Dinner Party? Yes, I love Halloween. I brought home some cute little pink craft pumpkins, made myself a pumpkin spice latte, and fell down the crafting rabbit hole. Now – if pink for Halloween isn’t your thing – you can use absolutely any color scheme and incorporate these same techniques. No matter what you use you’re going to end up with the cutest DIY slightly spooky Halloween pumpkins this world has ever seen. Not only that, but if you’re not really up for changing out your decor completely as Thanksgiving rolls around, I’ll show you how to tweak these just a tad for some beautiful DIY Thanksgiving pumpkins. LOL. Ready to get crafting?

Alrighty, let’s gather our supplies. I’ve included links (some affiliate) to the supplies I used for easy shopping. You will need:
craft pumpkin
Antique wax and Dust of Ages
stippling brush and/or coarse paintbrush
spanish moss
faux roses or florals
miniature skeleton garland
Halloween picks – eyeballs, skulls, witch legs, whatever you’d like
pinecones or other bits you can collect on your morning Autumn stroll
Hot glue gun and glue sticks

Let’s begin! This is totally optional, but the fake craft pumpkins are a little too shiny and plastic-y for my visual taste of authenticity (and yes, I do realize the irony in my need for authenticity in these fake pumpkins that are, in fact, pink) Nevemind that, I wanted to grunge the plastic up a bit. I grabbed my Antique Wax and Dust of Ages powder and it was the perfect touch.
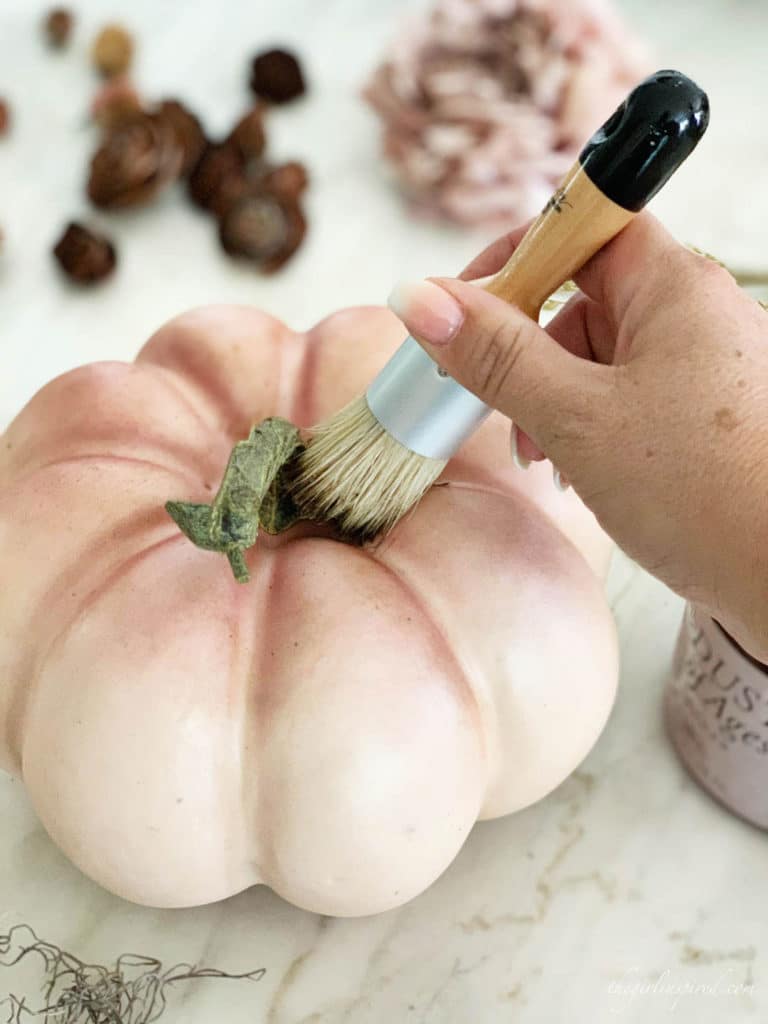
So easy to use, dip the tip of a stippling brush into the wax and then just smudge it around, working it into the cracks and crevices. Don’t forget that plastic stem! Stipple until your pumpkin is antiqued to your liking.
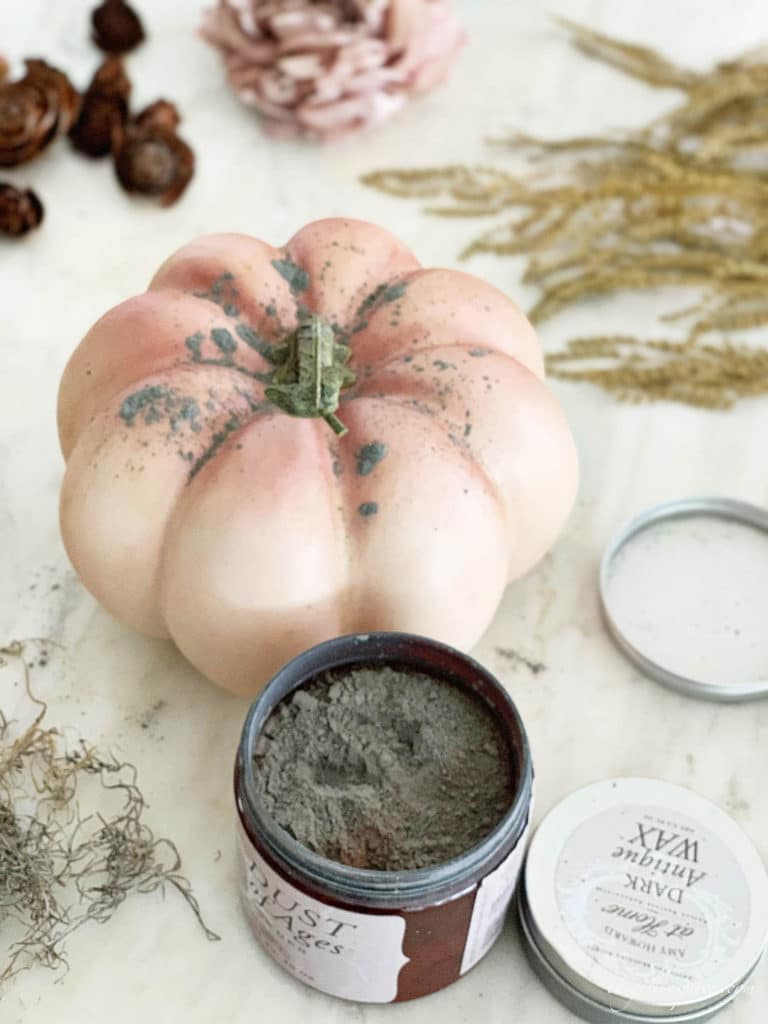
Now, we’re going to give it an even more aged, matte look with the Dust of Ages. You can sprinkle a little on or just dip a fresh stippling brush into the pot.
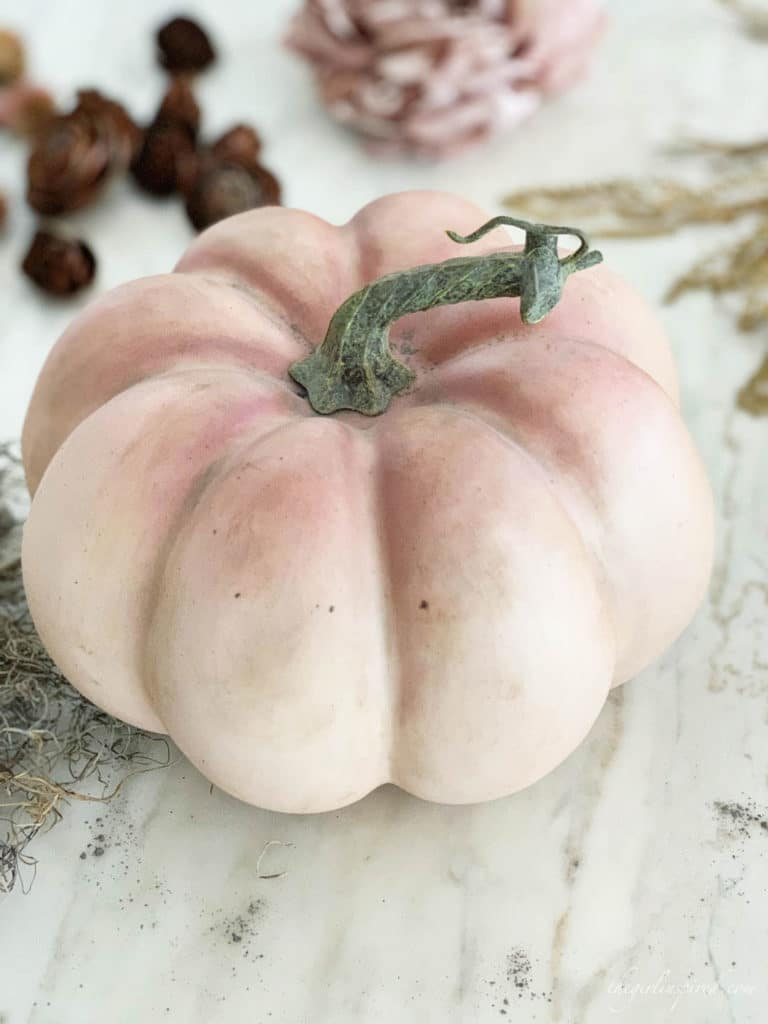
And …. dust. Spread the dust around, allowing it to settle into the cracks and crevices that you waxed so well. Smudge until you have a nice finish. Wipe the excess dust back into the container.
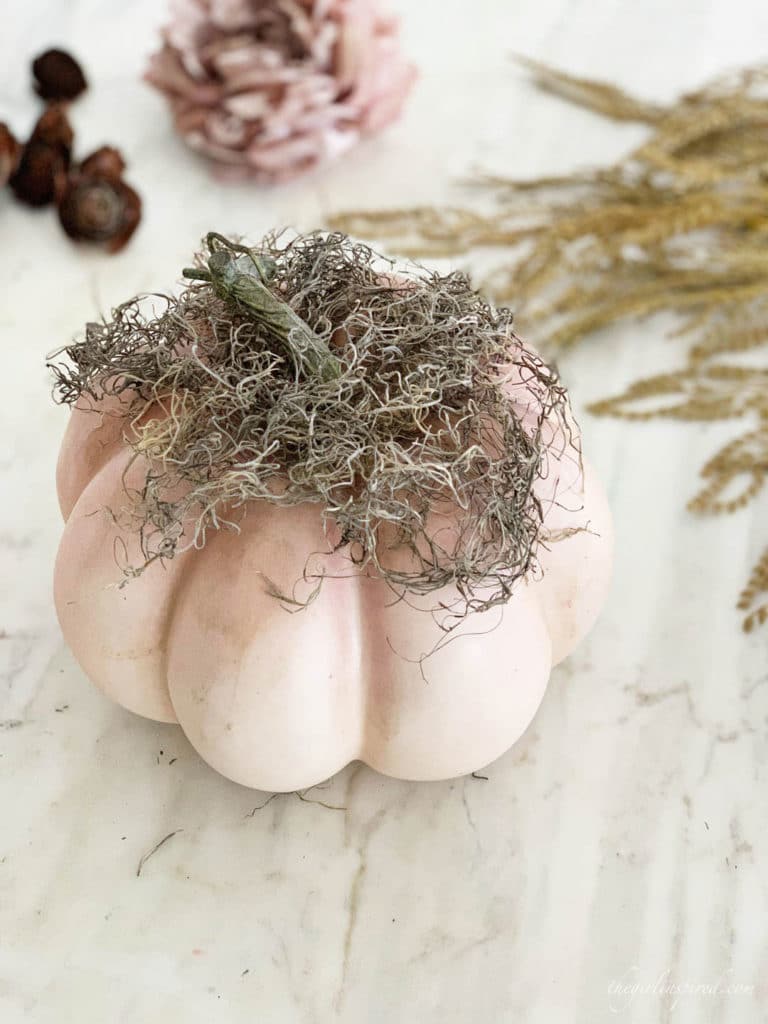
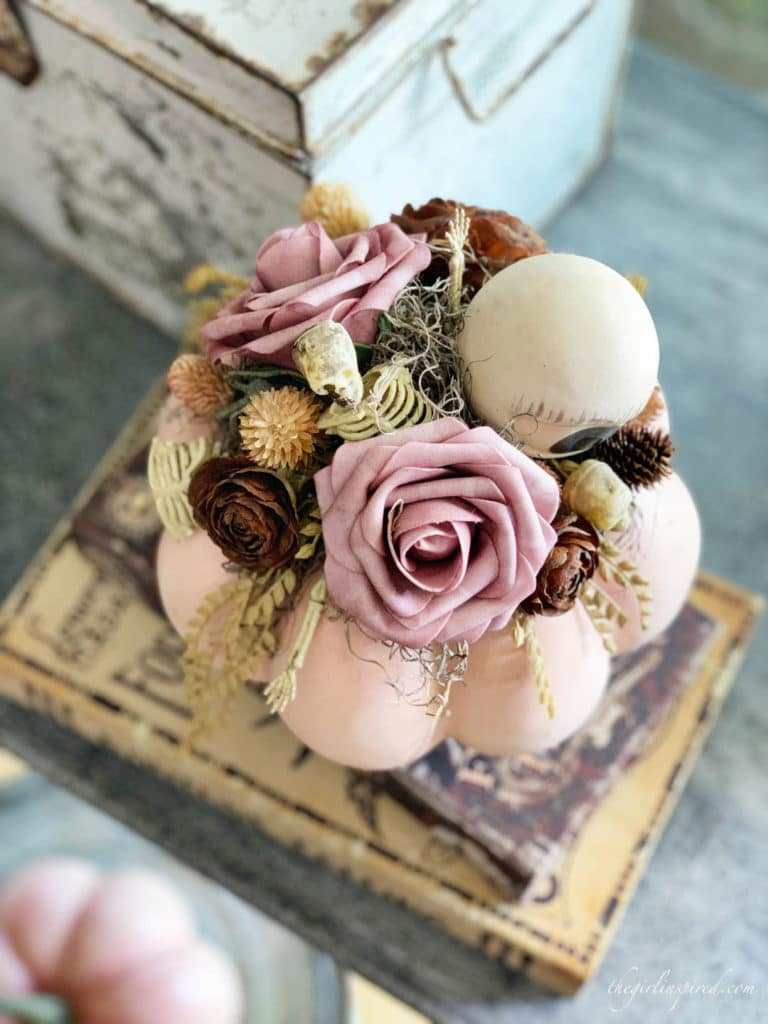
Okay, let’s start building the toppings! Start with a bed of Spanish moss. This gives it a real nice Fall base, but also lends itself well to a creepy vibe. Arrange the moss around the stem – enough that it will show under the rest of the toppings.

Lift the moss here and there and secure to the top of the pumpkin with hot glue. Not too much – you don’t want the moss to be flat and you don’t want the glue to show through the moss. Visible glue? Not authentic.
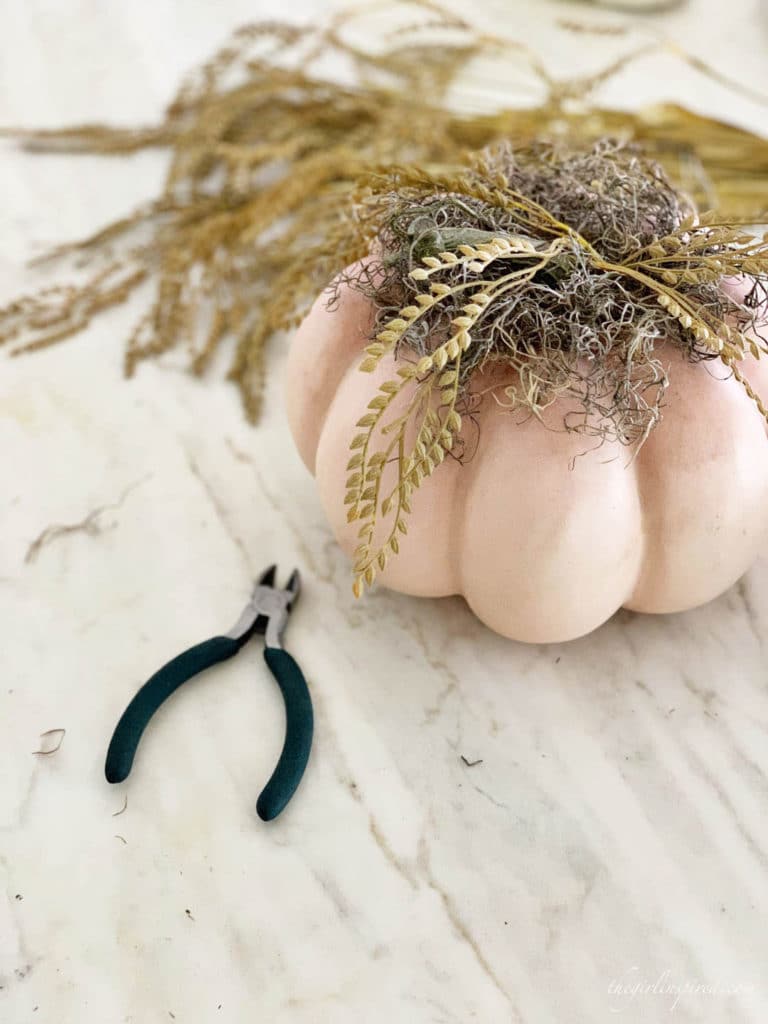
Next, we need some additional fluffery – choose whatever faux (or real dried) florals you like. I love the very harvest-time look of this sprig. Use floral wire snips to make the most of one larger floral spray and add bits here and there. Secure at the base of the stem with hot glue.

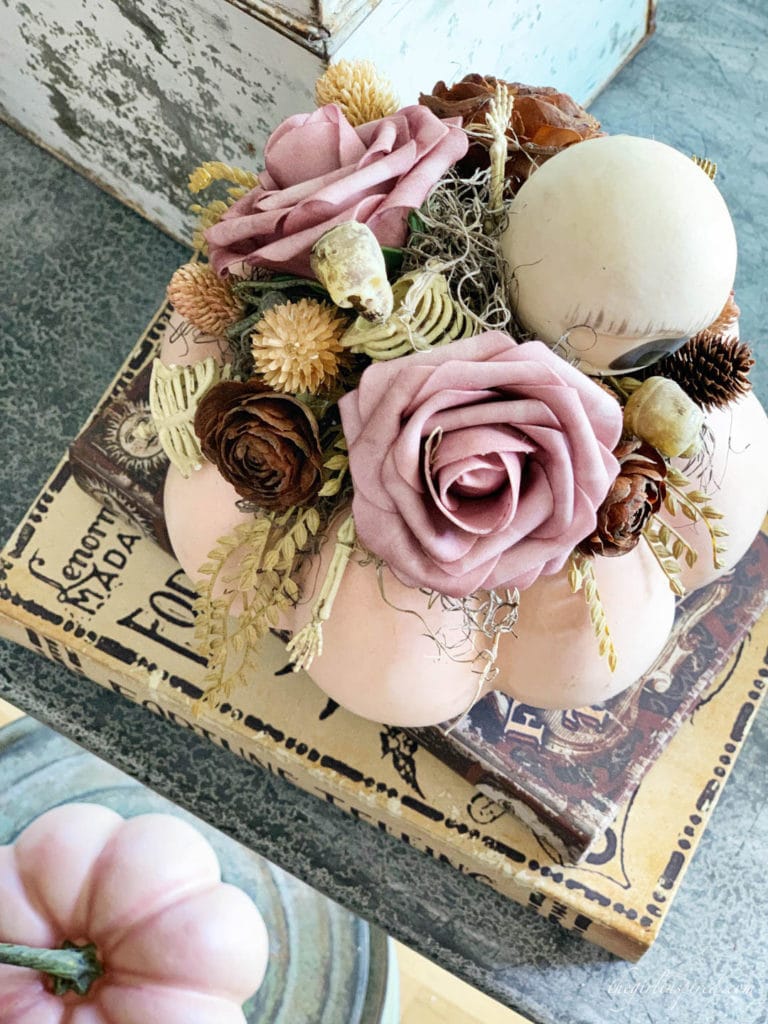
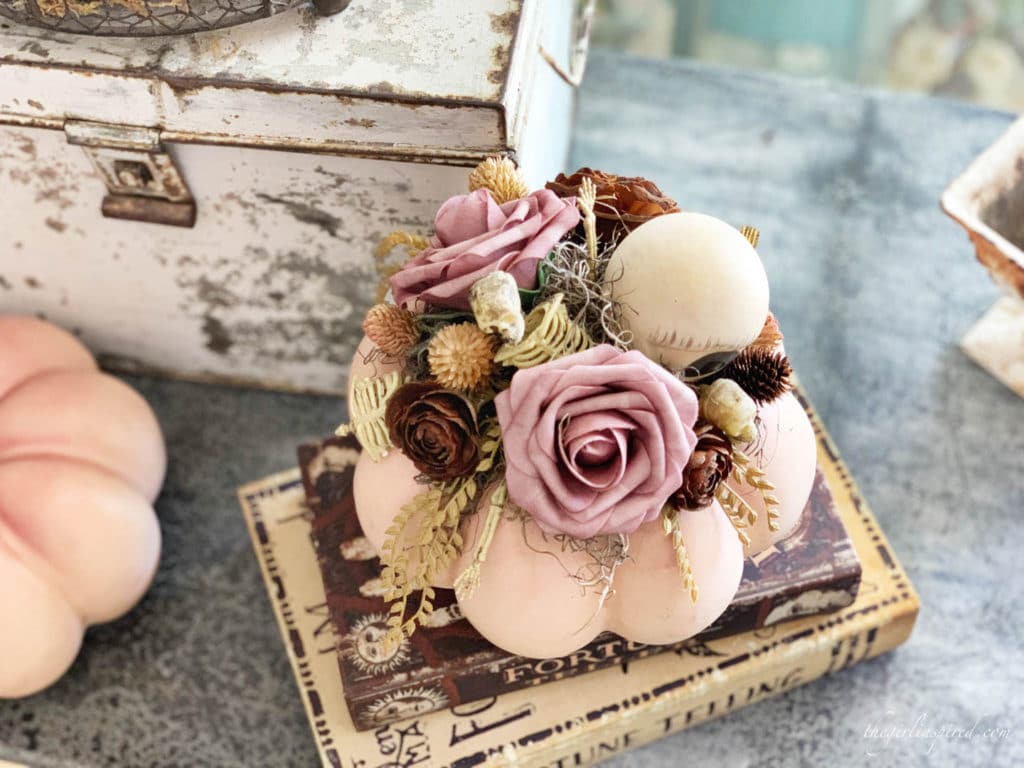
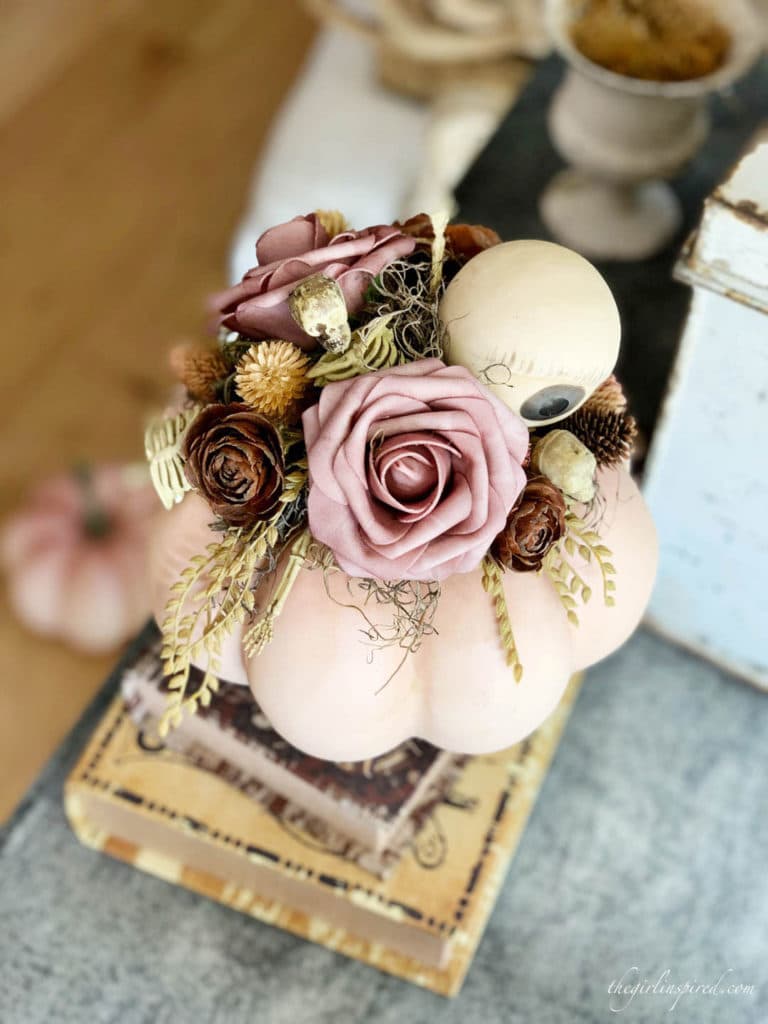
Let’s start adding the florals. If you have roses on a wire stem, cut the stem to a few inches in length and press it right into the top of the pumpkin, planning to space an odd number of large focal florals on the top (this size pumpkin lended itself to three main flowers, a large pumpkin might need 5 or 7, etc.)

These wire stemmed roses worked nice to be able to bend/maneuver the direction that the rose faced once it was poked into the pumpkin. If you’e using just the flower head of a floral arrangement, you’ll need to hot glue the flower in place. Try to spread the moss and other toppings slightly so you can get the glue into direct contact with the pumpkin.
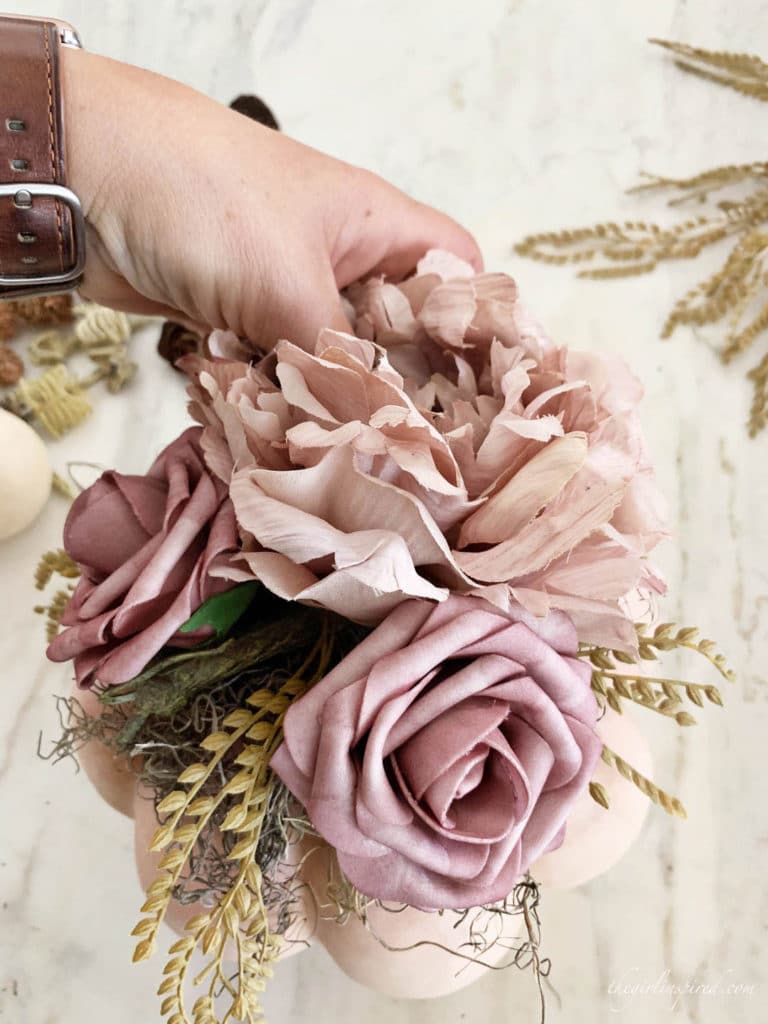
Okay, here we go. I have three main flowers here and IF I was going for a Pretty Pumpkin or a Thanksgiving pumpkin or an Autumn pumpkin, I’d glue this big peony on right here. But friends, I’m going for a slightly spooky pumpkin, so….
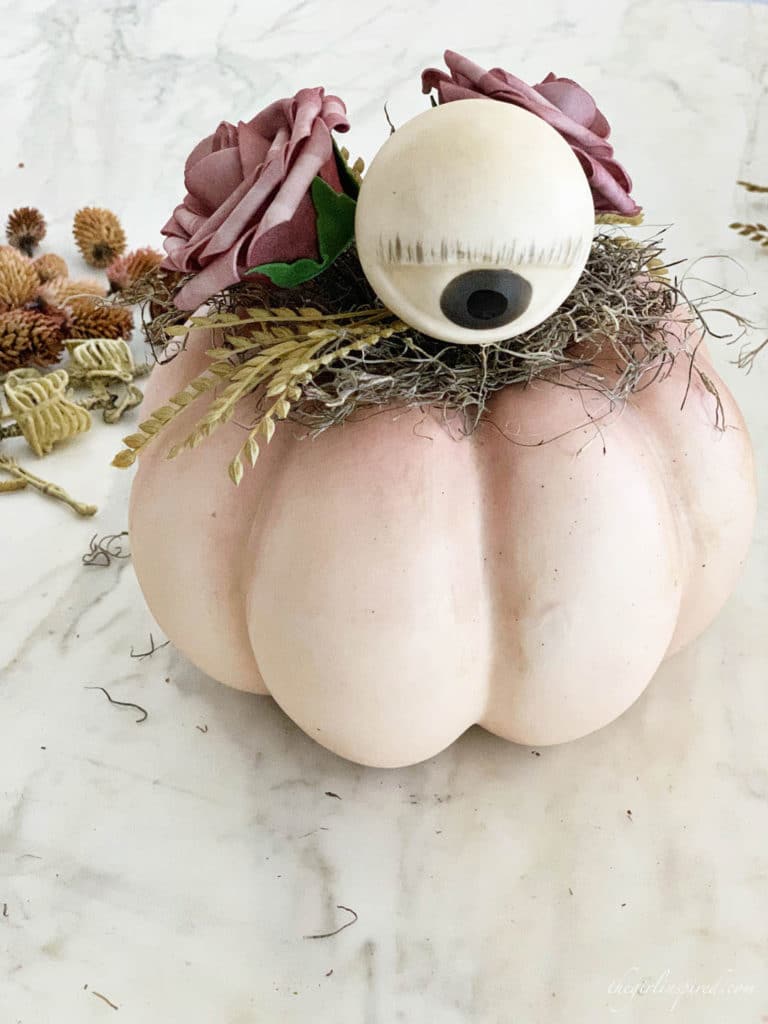
I swapped the big peony for an eyeball pick. LOL. Isn’t it fantastic? The craft stores has ALL kinds of picks for alllll the holidays and I’m obsessed. Use whatever you like! I am loving this eyeball.

Once you have your main toppers in place, it’s time for some filler! Use mini pinecones, seed pods, leaves, whatever you like. I used some snippings from a couple other floral picks as well as these flower-shaped pinecones we collected on a neighborhood walk last Fall. Hot glue them in to create a full, balanced pumpkin topper.
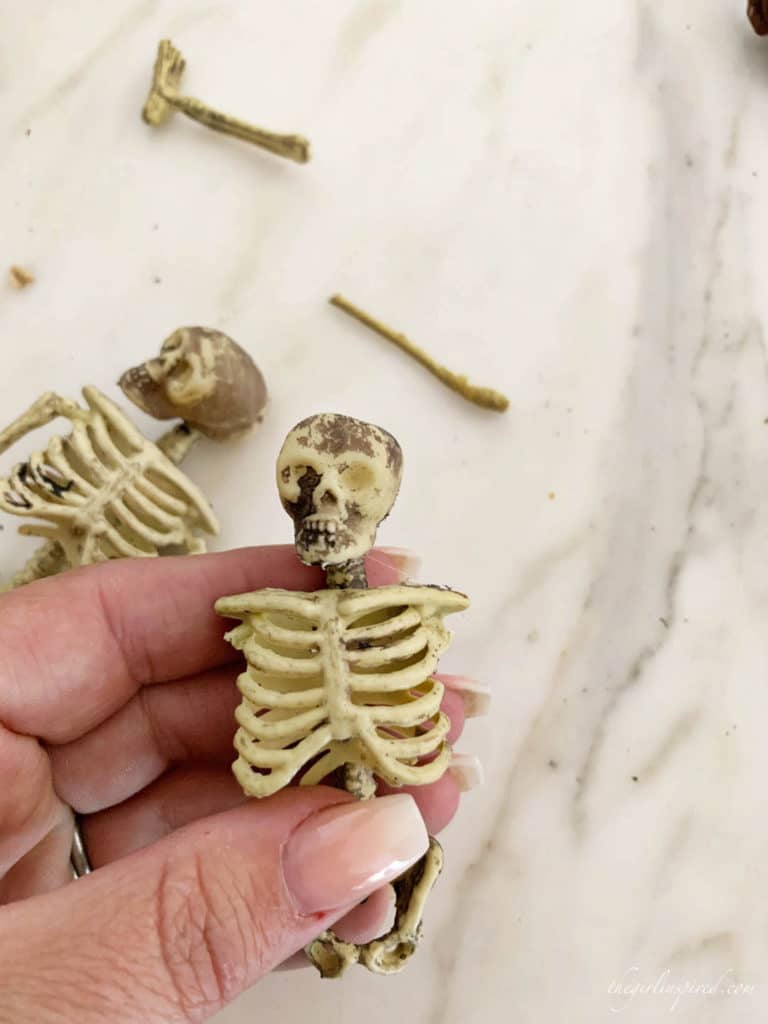
You didn’t think I was going to spook out this pumpkin with JUST an eyeball, did you? No way. I have a whole bunch of these little miniature skeletons that come as a garland. I load them up into apothecary jars for decor and I also have a bag of broken bits and pieces…..PERFECT for pumpkin toppings! And if yours aren’t already broken, they snap apart with very little effort.
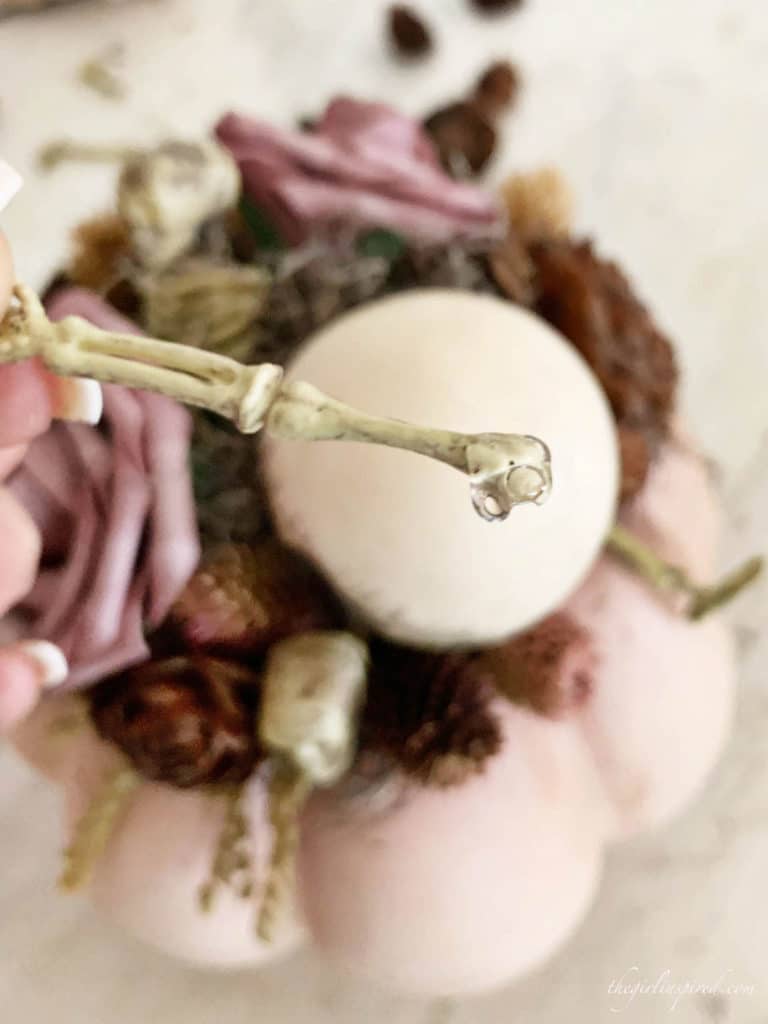
Dab a blob of hot glue onto a severed limb and wiggle it down into your floral arrangement.
Perfection!!!!
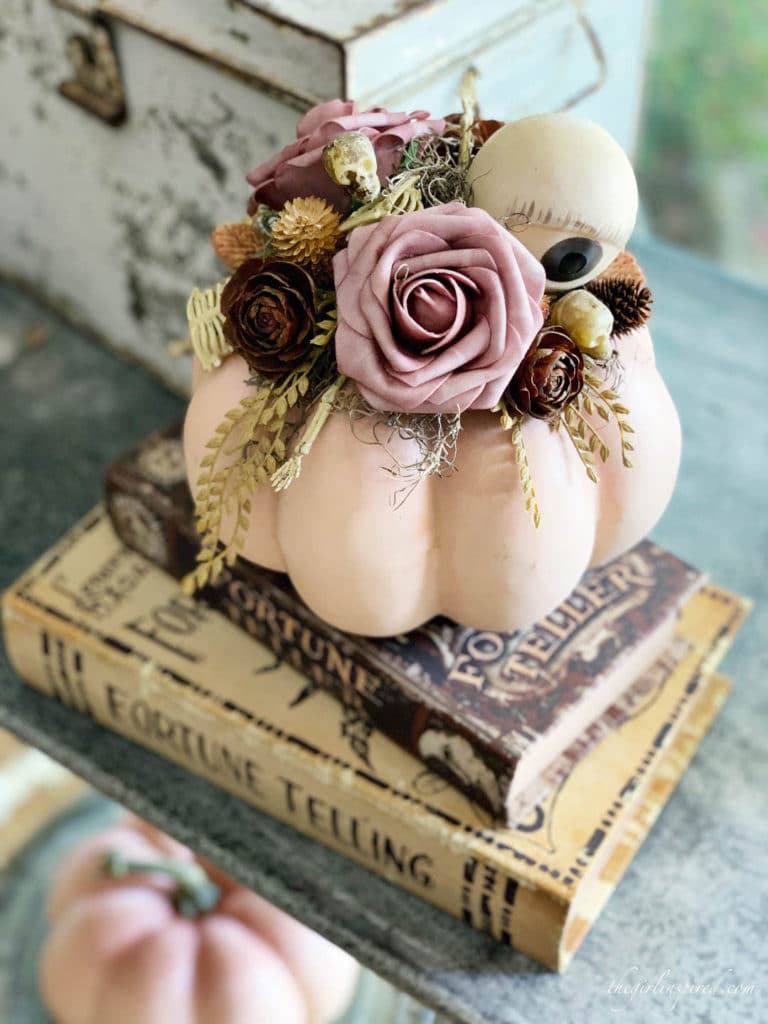
So how’s that for making a DIY slightly spooky Halloween pumpkin to put on your mantle? SO FUN!! I’m obsessed. Would love to see yours if you make one! Tag me on Instagram or Facebook….or in the comments. Need more Halloween crafting fun? Definitely make a Dia de los Muertos wreath and check out some of these other amazing Halloween ideas! Happy Halloween crafting!!!
Need a festive Fall treat to snack on while you’re crafting up a storm? Try our favorite pumpkin cinnamon rolls or these sinful gingerbread pumpkin ice cream sandwiches!


Leave A Reply!