
Adding an invisible zipper is one of the best ways to give a lined skirt a polished, professional finish. In this tutorial, I’ll show you how to sew an invisible zipper into a skirt and neatly attach the lining so the zipper is enclosed and the inside looks just as finished as the outside. This technique is especially helpful when sewing a lace skirt with lining, where you want to preserve the delicate finish of the lace while keeping the construction clean and secure.
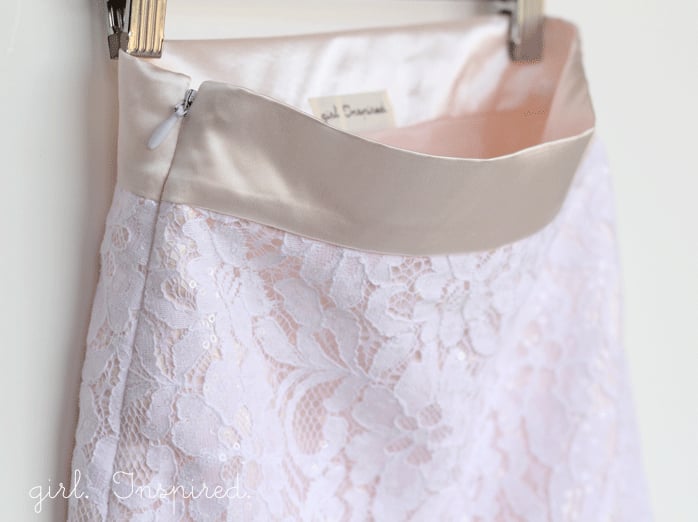
Today, I thought I would share a step-by-step tutorial for making a straight or A-line skirt that is lined with an invisible zipper. To draft your own skirt pattern, you want the waist to measure out to your child’s waist with room for seam allowances, then fan out just slightly over the hips, and end at your desired length for the hem (plus room for hemming). Because the skirt I’m sharing today has a zipper that rises to the top of the waist, you can create a skirt that pretty much just conforms to the curves of the wearer. This skirt was made in a girl’s size, so the curves and fit were more forgiving than if you’re drafting an adult pattern.
Okay, so let’s get started – again, we’re mainly concentrating on how to install an invisible zipper for this lined skirt. I was working from my stash and couldn’t help but use some of this gorgeous lace leftover from a dress I made for myself back in January.
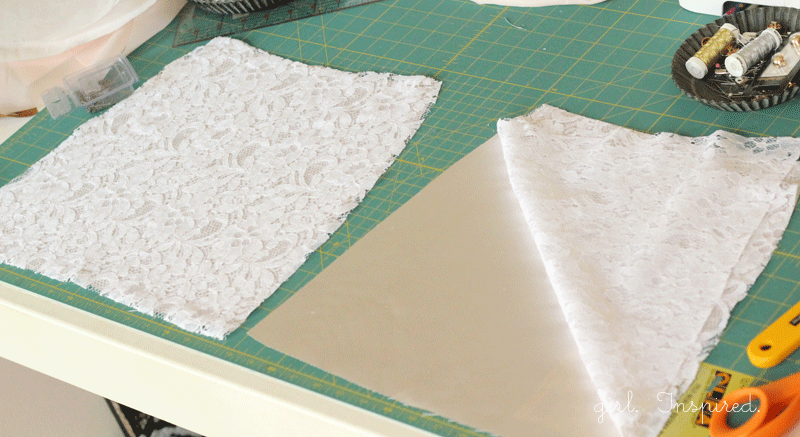
I cut a front and back skirt piece from the lace and a heavier cream satin fabric. I basted the lace onto the other fabric pieces to form one “main” front and one “main” back piece of fabric.

I then stitched the front to the back along the left side seam. I also cut out a front and back skirt piece from a separate lining material and joined those at the left side seam to make one lining unit.
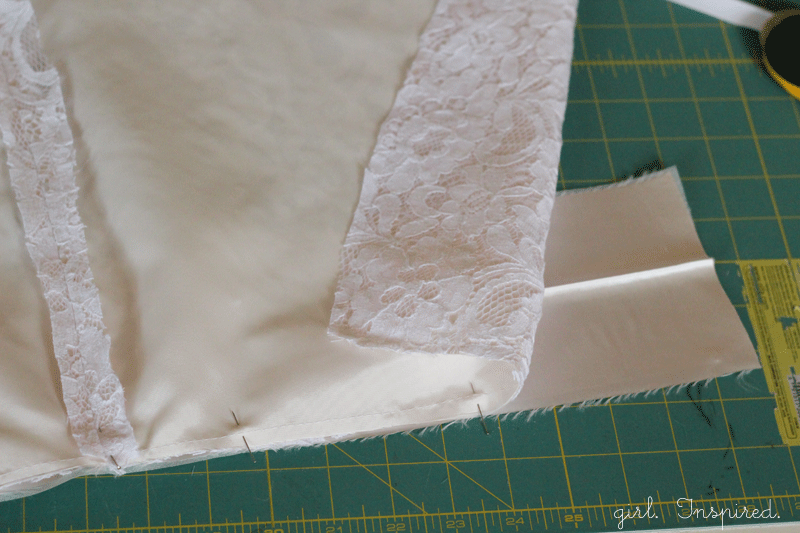
Next, I cut a piece of fabric for the waistband. It should be approximately 4 ½ inches wide and the length of the waistline of the skirt (simply lay your skirt piece along the waist piece and cut to the same length). I also backed the waistband with some fusible interfacing to stabilize and add sturdiness. Now press the waistband in half along the length and open it back up. Next, with right sides together, align one raw edge of the waistband with the top raw edge of the main skirt piece. Pin and stitch together to join the skirt to the waistband.
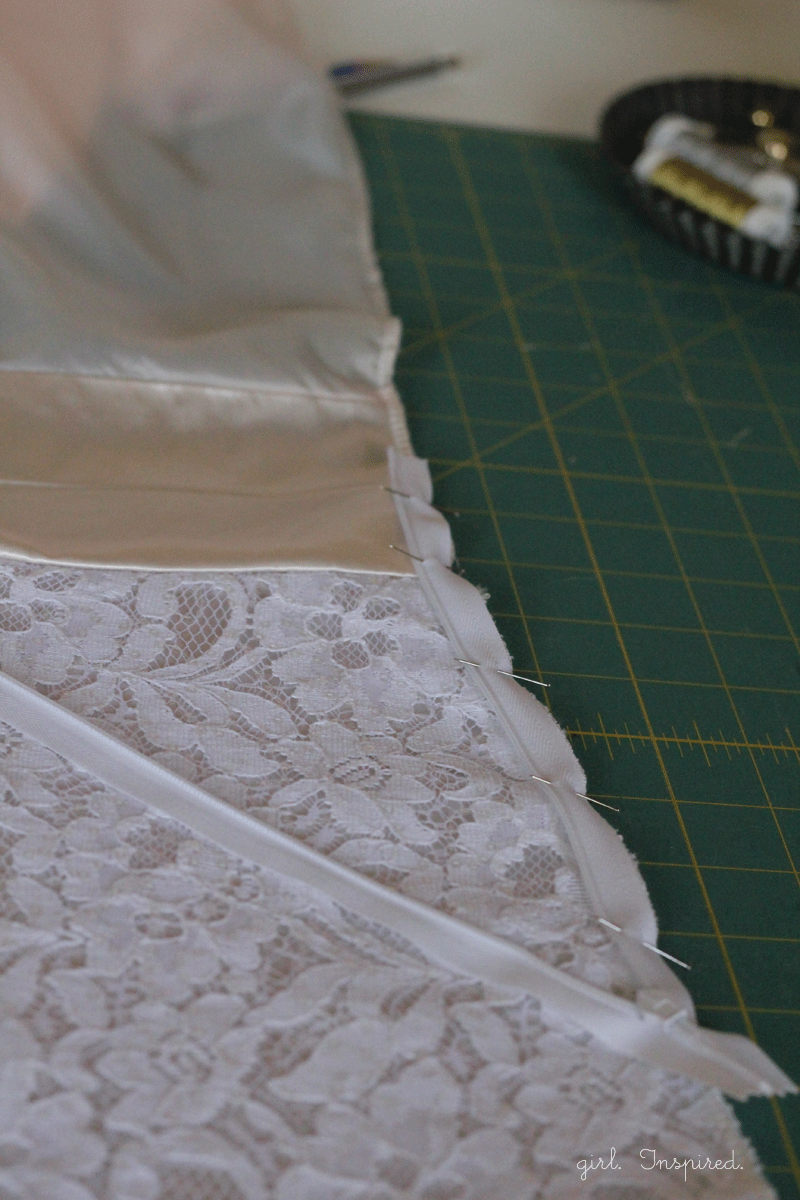
Repeat this step on the other side of the waistband to join the lining to the waistband. When you lay your stitched piece out, you will have the hem of the lining pointing up with the waistband in the middle and then the main skirt piece with hem pointing down – does that make sense – all three pieces are now one. Next, we will begin installing the invisible zipper. Be sure to follow the package instructions on the zipper to press the teeth flat on each side. Place your skirt in front of you, right side up with the waist at the top – you’ll be working on the right-hand side of the skirt (essentially, the back of the skirt). With the zipper fully open, place your invisible zipper right side DOWN along the side of the skirt. Align the top of the zipper with the center seam in your waistband (so halfway up your waistband piece) and pin the zipper to the edge of the skirt.
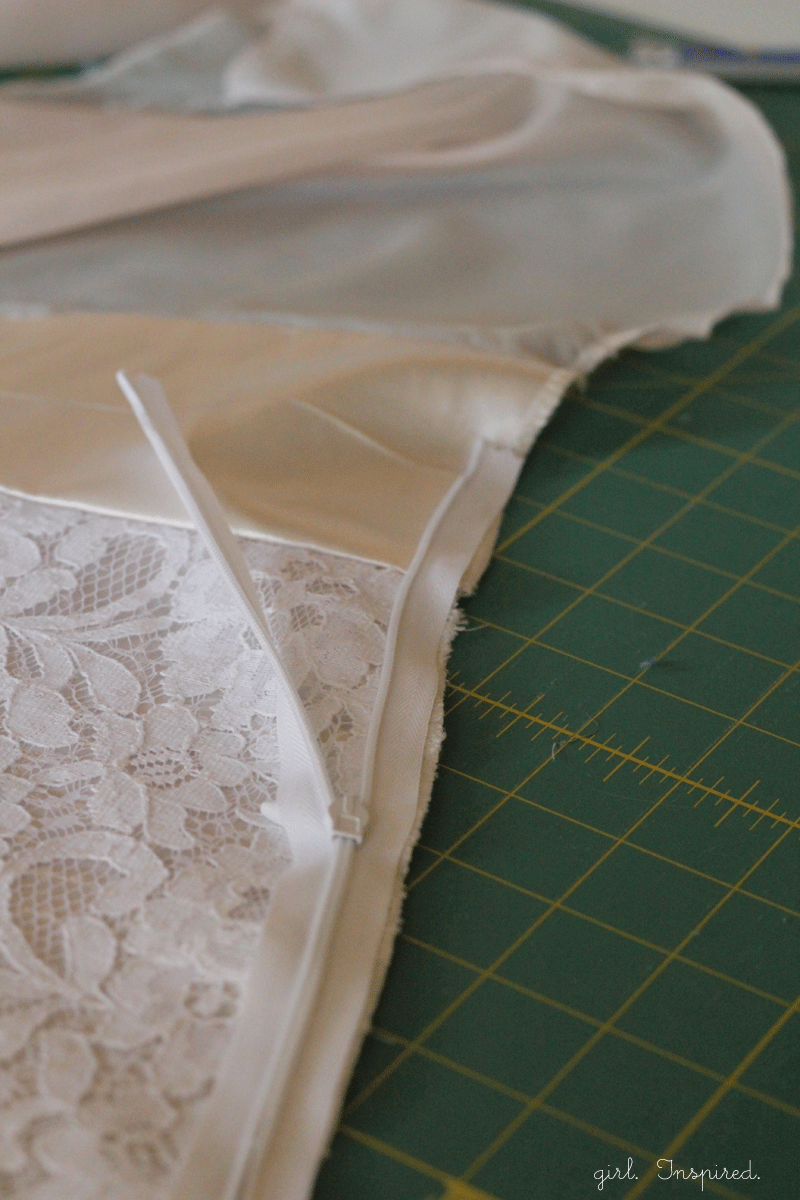
Use a zipper foot on your sewing machine and baste the zipper in place. You are only going to stitch as far as you can before the zipper pull gets in the way – do not maneuver your zipper up to finish stitching down the length of the zipper – this will be done in the final step.
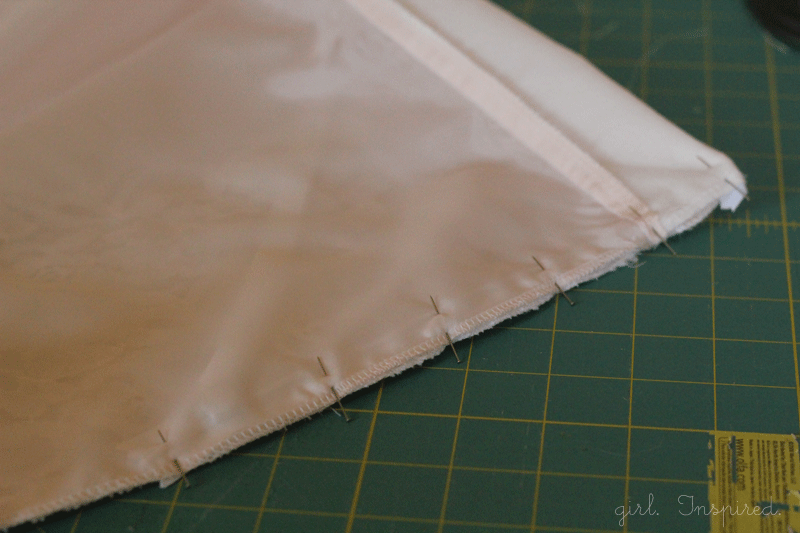
Okay, so you have your zipper basted onto the main skirt piece along the side – NOW, fold the lining down over the zipper so that the right side of the lining is now together with the right side of the skirt. The hemlines should align and the waistband should be folded (inside out) on that center fold. Also check to make sure that the extra tab part of the zipper (that is above the top of the zipper) is folded into the seam and not in toward the skirt. Pin everything in place. Now stitch along the zipper to join the main skirt to the lining with the zipper sandwiched in between. Again, stop when you get to the zipper pull at the bottom.

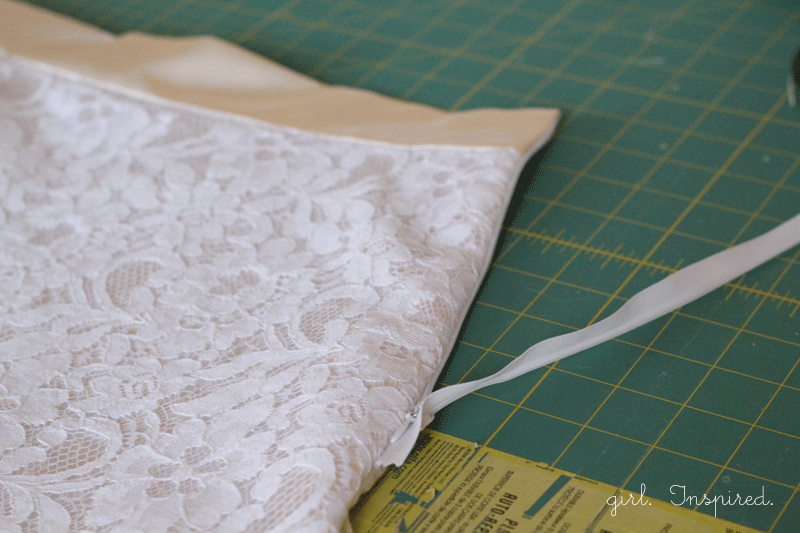
Turn the skirt right side out and you should have one side of the invisible zipper done! It should be fully contained within the side seam of the skirt – press the seam and pull the zipper up and down to ensure you haven’t stitched through the zipper teeth anywhere and that everything is working!
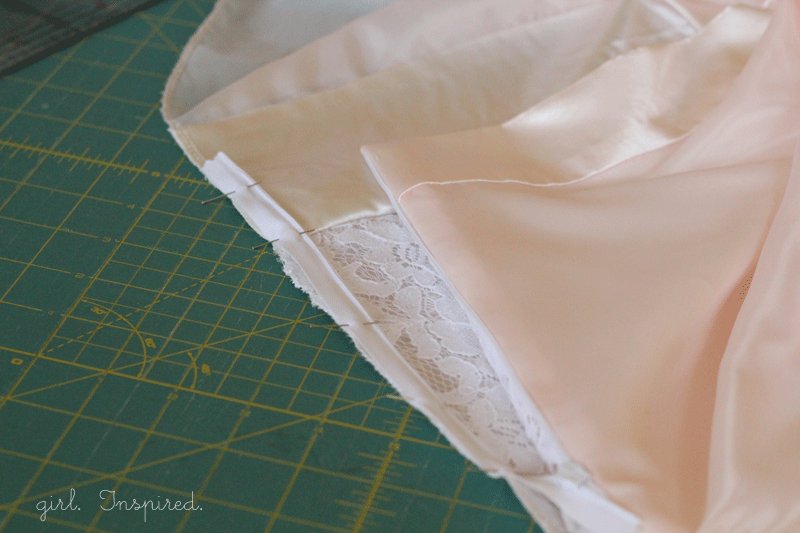
Now, we’re going to do the other side of the skirt. Open the zipper all the way up and open the other side of the skirt up – repeat the steps above – align the raw edge of the main skirt piece with the other side of the zipper – be sure the zipper isn’t twisted. Baste the zipper in place, fold down the lining right sides together with the skirt and stitch along the zipper again.
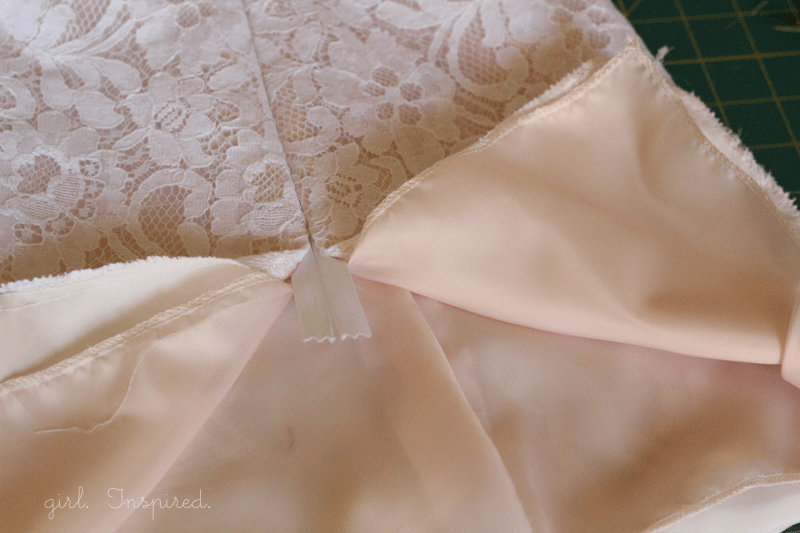
When you turn this other side out, press, and zip up the zipper – the above picture is what your skirt will now look like – joined along the zipper and open at the base and below the zipper. Now, we’re going to finish the side seams of the main skirt and lining separately. Lift the main skirt pieces off of the lining and turn them to join right sides together. Do the same for the lining.
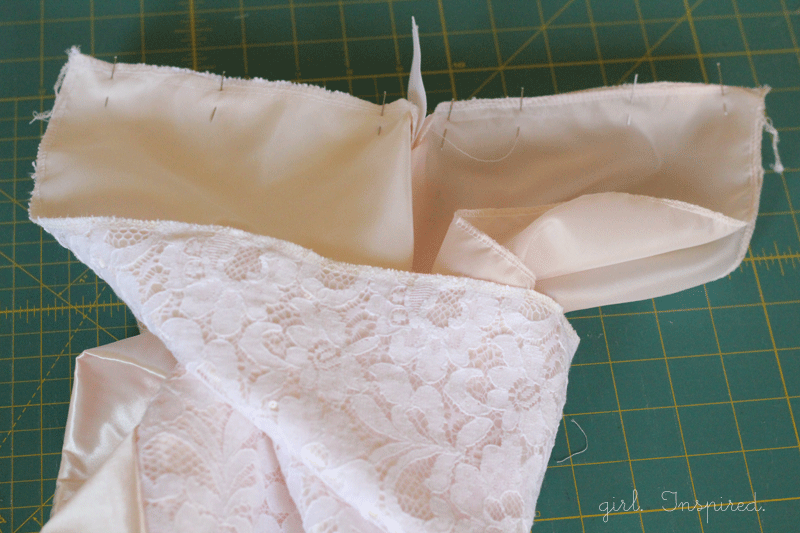
Working on one set at a time from the wrong side of the fabric, stitch the side seam up to the zipper, making sure to join up with your seam from the zipper installation. It gets a little tricky up by the base of the zipper – just go slow and be sure that you’re not catching the lining in the main fabric seam, and vice versa. Repeat with the lining and press everything out really good – you should be all set! Now, just hem the skirt and the lining and you are DONE!!

I hope you’ll be tempted to use an invisible zipper for a skirt (or even bodice) closure with this tutorial. It can be intimidating at first, but the end result is SO clean and beautiful, it is really worth giving it a try!
Looking for more zipper tutorials? If you’re working with a lined project but want to use a regular zipper, check out my tutorial for sewing a zipper into a lined clutch or pouch. For another example of sewing an invisible zipper, see my tutorial for adding an invisible zipper to a pillow cover.









Comments & Reviews
Abigail Jones says
This is so gorgeous! Great job
Sharon says
The skirt is so pretty! Thanks for sharing. I have some red lace that i could work with though a red laced skirt sounds really bold!
kristin says
So pretty, Stef!! Great tutorial, too. 🙂
Emily says
Such a gorgeous skirt!!
Corinnea says
Your skirt and tutorial are both beautiful!
Teresa says
What a beautiful skirt. It is so simple yet striking. I’ve only made one pencil skirt and I need to adjust my pattern a bit, but I would love to give this lace version a try.
justine says
Stef this skirt is so beautiful, like a pretty cake! And excellent looking craftsmanship as well. I really enjoyed meeting you this weekend!
Abby says
Oh Stef, this is gorgeous! You are so talented, I really think you don’t give yourself nearly enough as much credit as you deserve! And ditto to the fabric coma, haha! I haven’t even opened up my suitcase yet cause I know how overwhelming it’s going to be!
Charity says
Love this zipper installation… beautiful. Love the lace skirt too. =)
Johanna says
This looks just like the jcrew skirt I purchased last year!
Mie @ Sewing Like Mad says
This is a beautiful beautiful skirt !!!
Susan says
I’m guessing fabric weekend coma is a little like Alt coma. 🙂
Such a cute skirt! Thank you for sharing. My four year old would love it!
Olga Becker says
The skirt looks beautiful! Thank you for the tutorial!
kate says
this is so pretty! and I love it with the polka dot carousel top! i love your style
Julia says
This skirt is gorgeous! So much sewing talent that I am jealous of! The colors and weight are perfect for spring and summer. I am truly amazed at how beautiful this is! Thank you so much for sharing!
Cheers,
Julia
It’s Always Ruetten