


Ditch the store-bought tubs and instead, open your fridge to creamy, tangy homemade yogurt, crafted exactly to your taste, texture, and dietary needs thanks to this easy Yogurt Maker Recipe! This simple process transforms just two ingredients into a healthy and satisfying staple – perfect for breakfast, added to smoothies and dressings, and so much more!

Making homemade yogurt from scratch is simpler than you may expect and quickly becomes a rewarding weekly ritual. Once you experience the satisfaction of transforming just milk and a yogurt starter into a fresh, probiotic-rich staple, you’ll find endless uses for it, from your morning smoothie to a creamy salad dressing.
This yogurt maker recipe gives you complete control, allowing you to ferment it to your preferred level of tanginess and thickness. Add it to your morning bowl of granola and fresh berries as a nutritious and delicious way to fuel your day!
Jump to:
🫐 Ingredients:

This homemade yogurt contains a number of basic ingredients, and all of them are easy to find at your local grocery store. Let’s talk about the most important ingredients.
- Milk – Feel free to use whole milk, reduced fat milk, or skim milk for this homemade yogurt recipe.
- Plain yogurt – Use plain, unsweetened, and unflavored yogurt.
For a full list of ingredients and their measurements, 📋 please view my printable recipe card at the bottom of the post.
Equipment Needed:
You’ll need a food thermometer to ensure that the milk is first heated to scalding point (nonfat, whole, 1%, powdered) in order to kill any bacteria, subsequently cooling it off, then adding yogurt starter to the cooled milk, and finally bringing the mixture back up to a warm temperature for an extended period of time to grow the “good” bacteria and thicken the mixture.
Another important piece of equipment for making yogurt at home is a yogurt maker. Alternatively, you can use a homemade contraption to keep the yogurt at a warm/consistent temperature.
(A note about the yogurt makers – they are an investment and not necessary. If you are simply curious about homemade yogurt, try making it using a method that doesn’t require you to purchase a machine. There are all sorts of instructions on the internet, including warm water baths in ice chests and using the pilot light in your oven. I have made yogurt using a couple of these methods in the past – they totally worked! but they also required a lot more babysitting and adjusting to ensure that the temperature of the yogurt stayed consistently warm!)
Substitutions and Variations
- Thicker yogurt – Ferment the homemade yogurt for longer than 4-5 hours if you prefer a thicker consistency and a stronger flavor.
- Type of milk – Depending on your dietary preferences, you can make this homemade yogurt recipe with full-fat whole milk (for a creamier result), reduced fat milk, or skim milk.
- Flavoring your yogurt – Once the yogurt is done fermenting and chilling in the fridge, and you’re ready to enjoy, feel free to add in your choice of sweeteners (honey, maple syrup, jam, or fruit preserves), or turn it into a savory condiment, such as tzatziki, by adding seasonings and other savory elements.
🔪 Instructions:
PREP: Ensure that all your equipment, tools, and yogurt jars are sterile before you start making your yogurt.

Step 1: Pour the milk into a dry, clean pan and place it on the stovetop. Heat the milk over MEDIUM heat just until it simmers and reaches about 185-190 degrees Farenheit.

Step 2: As soon as your milk hits the simmering point, turn the heat off – it’s time to cool the milk so that, when we add the yogurt starter, the heat doesn’t kill the good bacteria. Fill a slightly larger saucepan with ice water and place the pot with the hot milk right into it. BE CAREFUL that not a single drop of water gets into your milk mixture!! Cooling the milk using this ice bath method takes about 10 minutes.

Step 3: Check the thermometer frequently and swirl the warm milk to redistribute the remaining heat. When the thermometer reaches 90-100 degrees, you’re ready to move to the next step.

Step 4: Add the yogurt starter, whisking into the milk to thoroughly mix it in.
Pro Tip: Keep checking the temperature of your milk as it will heat very quickly. Trust me, cleaning burnt milk from a pot is a nightmare! I don’t recommend doing without a food thermometer for this yogurt maker recipe.
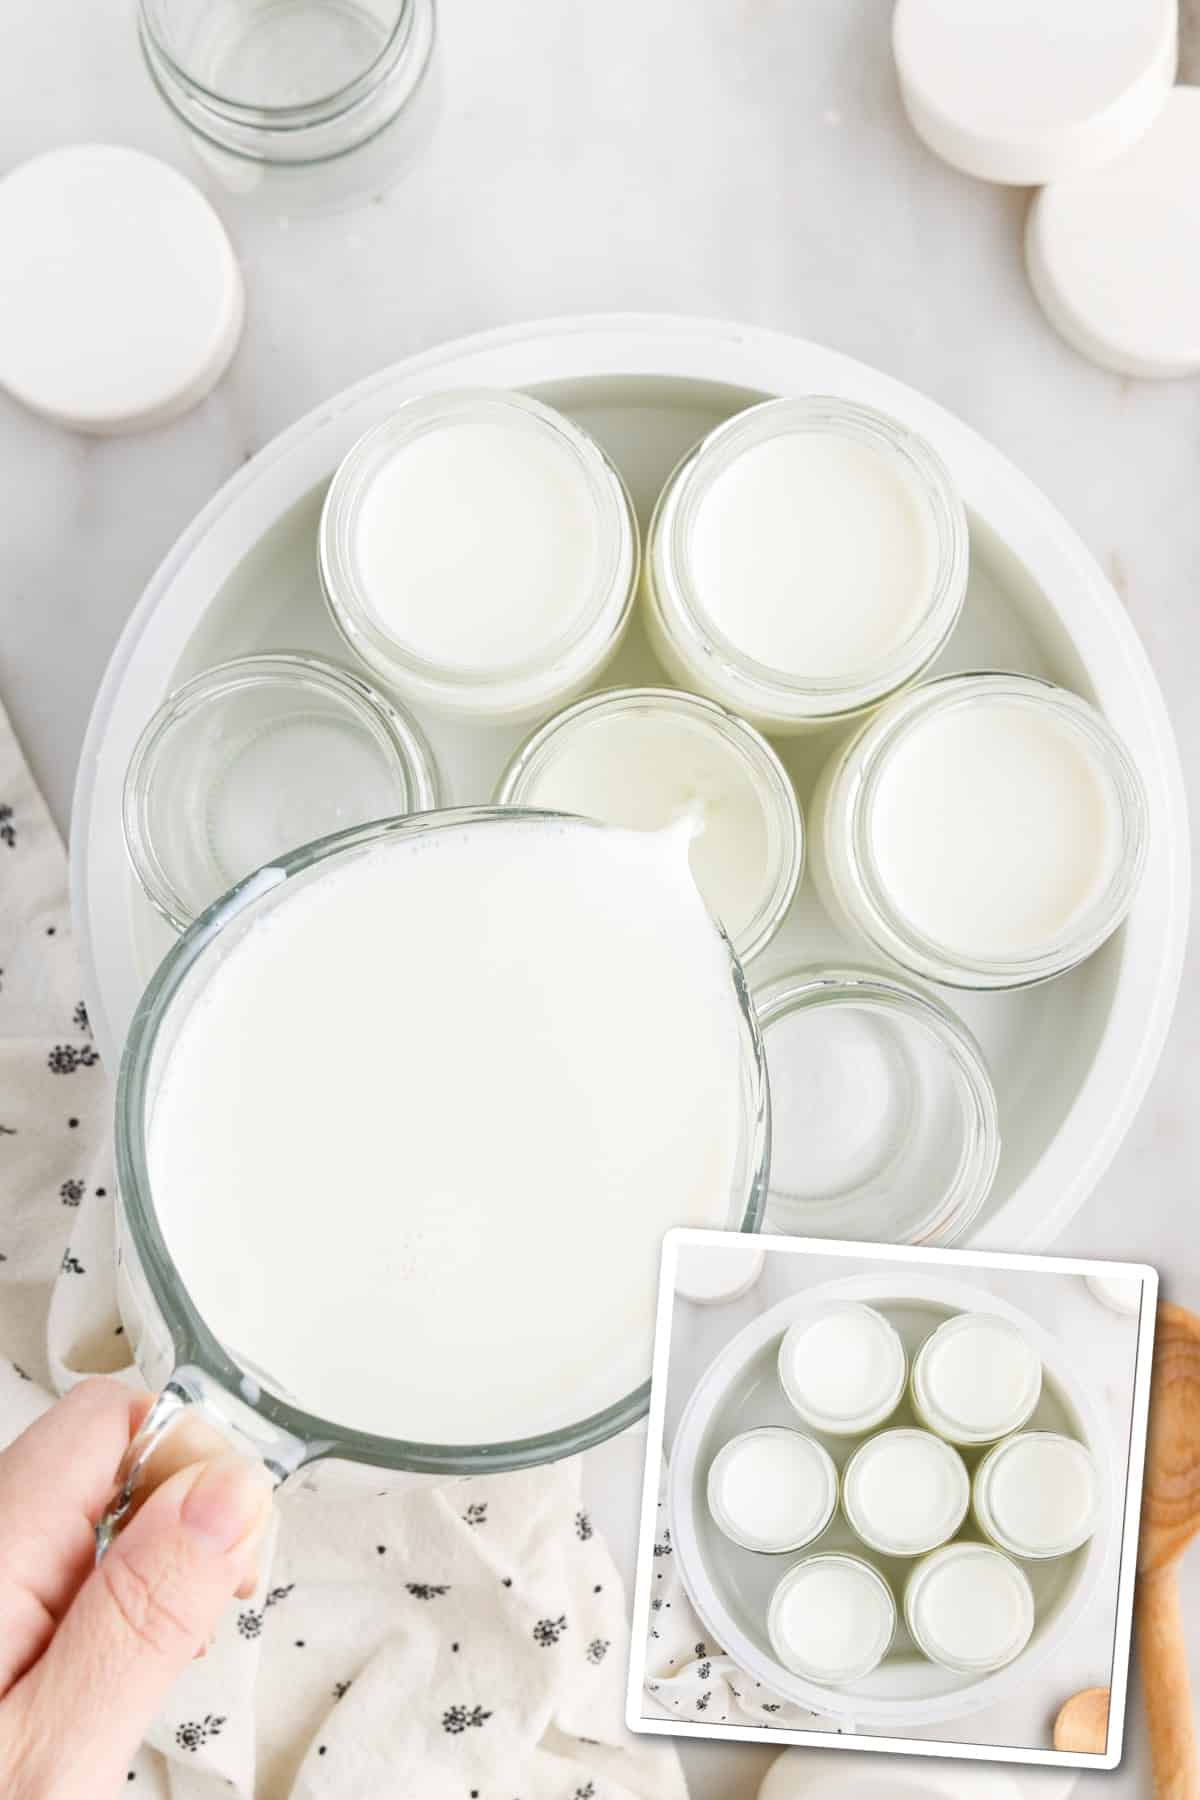
Step 5: Transfer the mixture into a glass measuring cup with a pour spout. Place the clean, sterile jars into the yogurt maker and pour the milk mixture, dividing evenly between the jars.

Step 6: Place the lid over the yogurt machine and turn it on. Program the yogurt maker to run for at least 4-5 hours and up to 24 hours.

Step 7: When the yogurt is done fermenting, cover the jars with lids and put them into the refrigerator for at least a few hours before eating.
Recipe Tips for Secondary Keyword
- It’s crucial to keep any water from the ice bath out of the milk mixture maintaining a pure, controlled environment for your yogurt cultures to thrive without interference. Water entering the milk mixture will also affect the texture of your completed yogurt.
- Always use a food thermometer to track the temperature of your milk mixture at different stages of this recipe. I clip mine on the side of the pot in order to carefully monitor the milk.
- I find that transferring the milk mixture into a glass measuring cup with a pour spout makes it super easy to transfer the liquid into each yogurt jar.
- Your homemade yogurt needs to ferment in the yogurt machine for a minimum of 4-5 hours, although you can extend this to up to 24 hours if you prefer a thicker and stronger-flavored yogurt with no presence of lactose.
- You’ll want to work fast and avoid any jiggling of your yogurt jars once you’ve filled them. I’m not sure why, but movement in the yogurt as it’s fermenting causes some changes in the texture. For the smoothest finished consistency, limit the jiggling! (And on that note, you’ll want to transfer the liquid into the yogurt maker in the location where it will be fermenting; you don’t want to be moving around the yogurt maker either!)
Fun Fact
Did you know that the specific bacterial strains in your yogurt starter culture directly impacts the final flavor of your homemade yogurt?!- Cultures for Health.

Recipe FAQs
Yes! Homemade yogurt that has been left to ferment for 4-5 hours will always have a thinner consistency and milder flavor compared to store-bought yogurt. You can leave the yogurt to ferment for longer if you prefer a thicker consistency and stronger flavor.
If you need lactose-free yogurt, make sure to ferment the yogurt mixture in the yogurt machine for 24 hours. It takes this length of time to fully eliminate the lactose in the milk/yogurt.
I like to use Fage yogurt because I like the taste and because it contains the particular bacteria strains that I can tolerate. You can use any brand of plain yogurt that you prefer, but keep in mind that the yogurt starter that you use will effect the flavor of your finished yogurt.
More Ways To Use Homemade Yogurt


If you tried this Yogurt Maker Recipe or any other recipe on my website, please leave a 🌟 star rating and let me know how you liked it in the 📝 comments below.

Yogurt Maker Recipe
Equipment
- food thermometer
- yogurt maker or homemade contraption to keep yogurt at a warm/consistent temperature
Ingredients
- 42 oz. milk whole, reduced fat, or skim
- 2 tablespoon plain yogurt
Instructions
- Pour the milk into a dry, clean pan and place it on the stovetop. Heat the milk over MEDIUM heat just until it simmers and reaches about 185-190 degrees Farenheit.
- As soon as your milk hits the simmering point, turn the heat off – it’s time to cool the milk so that, when we add the yogurt starter, the heat doesn’t kill the good bacteria. Fill a slightly larger saucepan with ice water and place the pot with the hot milk right into it. BE CAREFUL that not a single drop of water gets into your milk mixture!! Cooling the milk using this ice bath method takes about 10 minutes. Check the thermometer frequently and swirl the warm milk to redistribute the remaining heat. When the thermometer reaches 90-100 degrees, you’re ready to move to the next step.
- Add the yogurt starter; whisk the starter into the milk to thoroughly mix it in.
- Working quickly, it’s time to pour the milk mixture into the yogurt jars. Transfer the mixture into a glass measuring cup with a pour spout – this just makes it super easy to transfer the liquid into each jar. Place the clean, sterile jars into the yogurt maker. Pour the milk mixture, dividing evenly between the jars.
- Place the lid over the yogurt machine and turn it on. Program the yogurt maker to run for at least 4-5 hours and up to 24 hours. The longer that you ferment the yogurt, the thicker it will become and the stronger the flavor. A yogurt fermented for just 4-5 hours will be much thinner and mild in flavor, particularly compared to store-bought yogurt. You can experiment with different lengths of time to find the best results for your particular preference! Fermenting for 24 hours will eliminate the lactose in the milk/yogurt.
- When the yogurt is done fermenting, cover the jars with lids and put them into the refrigerator for at least a few hours before eating.
Would you like to save this?
Nutrition
Make this recipe?
Share it with me on Instagram @girlinspired1 and follow on Pinterest for more!


Comments & Reviews
Diana Setzer says
THANK YOU!
I was cleaning out a shelf and saw my yogurt maker. I bought milk and Fage yogurt. Yes, my favorite too. Then I couldn’t remember where my recipe was. I started looking on Pinterest and found people using equipment like jars. Which was perfectly okay but I had a yogurt maker. I found your site and it’s the exact same machine. You made my day!1 Again thanks for the great article.
Charity says
I’ve made yogurt once before, but it wasn’t nearly as thick as yours appears to be, and it didn’t really taste great either…. but I’ve been thinking of trying again for a while now! =)
sorahart says
My mom made homemade yogurt when we were younger and I remember how delicious it was. It brought back alot of memories reading this post! I’ve heard you can make homemade yogurt using the Crockpot. Have you tried this way before? Just curious!
Cheryl says
Interesting post. I have seen yogurt makers, but never knew how they worked. I also didn’t know you can take the lactose out of yogurt either. Thanks for sharing. I learned something new today.
beckyjopdx says
Lactose is milk sugar – like fructose is fruit sugar, etc. The bacteria, much like yeast, eats *most* of the sugar. You’re born with Lactase in your gut, so usually Lactose isn’t really the issue, but some people do have lower amounts of Lactase and/or it can diminish. – it’s the casein and whey proteins that upset most people – which the bacteria will break that down some as well and make yogurt easier to digest. goat milk has smaller proteins, and human milk even smaller. HTH. My DDs are casein/whey sensitive. I make ‘closet yogurt’ but have been tempted by the makers….more so now.