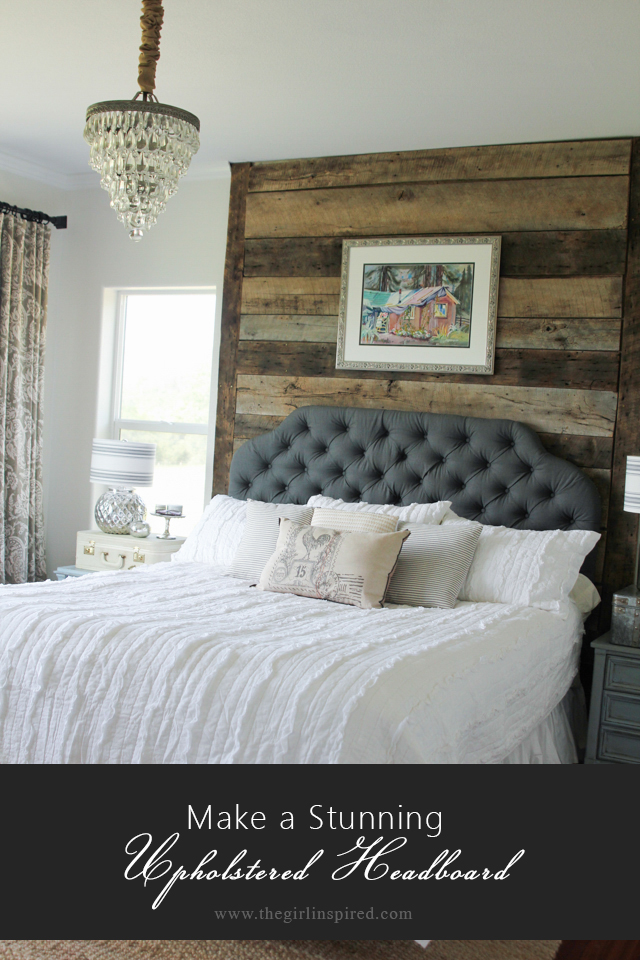
When I began my master bedroom makeover, I had a specific plan to create a luxurious looking room for as little cost as possible. I love the look of expensive things and I also love DIY, so if I can save money by doing some of the projects myself, then I can spend money on the things that I can’t make myself. I have reupholstered several pieces of furniture in the past, so I knew I could do a headboard, too, but I was concerned about the time investment. After seeing the thousands of dollar price tags on store-bought upholstered headboards, I finally bit the bullet and set out to make my own. The thing about upholstery is this – I really think anyone can do it. It seems overwhelming when you look at the finished product, but it really just requires some patience. I absolutely love how my headboard turned out – I think it looks expensive, lavish, and professional, but I only spent about $100. Most of all, I feel proud every time I walk into my bedroom and see my own handmade piece of work!! Today, I’m going to show you how you can make your own headboard and I hope you’ll give it a try!
Supplies:
- full sheet of ½″ MDF or plywood
- jigsaw for cutting base
- flexible ruler or template to create curve/shape
- Sharpie or marking instrument
- yardstick or large ruler
- 2″ thick upholstery foam (this comes in 24″ wide sheets, you’ll probably need two sheets cut at whatever length you require – for my headboard, I used 4 yards (two sheets at 6 feet each)
- quilt batting (hi-loft), enough to cover your headboard with two layers
- upholstery fabric – enough to cover your headboard plus 18″ excess on each side) – I chose a heavy linen from Jo-Ann Fabric and Craft Stores and purchased 3 yards)
- upholstery stapler
- upholstery buttons (see note below about prong buttons)
- wall cleats (for mounting headboard to wall)
Let’s get started!

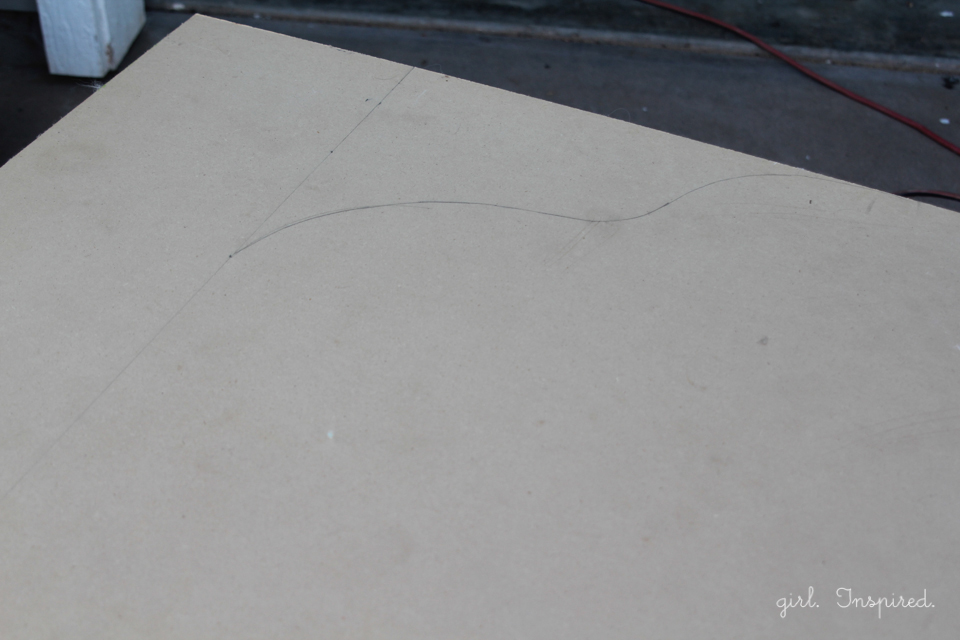
1. Begin with an MDF or plywood base for the headboard – we used ½″ MDF. Cut the base to size as a rectangle – for our Cal-King bed, we started with a 6′ wide x 3′ tall base. Determine the desired shape for your headboard. I used a flexible ruler and adjusted its shape until I was happy with it. Use a pencil to draw a guide for cutting the headboard. (p.s. the pic above was a re-make to get a sample picture, so it looks a little different than the actual headboard process below.)
 2. Use a jigsaw to cut along your line to create the final headboard shape.
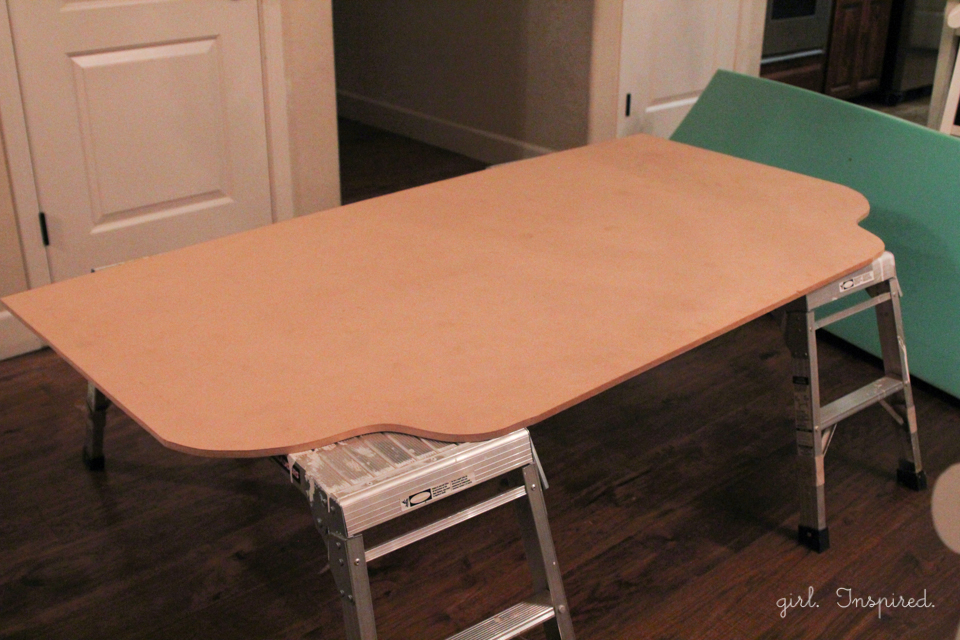
3. Set up the headboard on a raised work surface where there is open access underneath – this will be helpful as you drill the holes and add the upholstery.
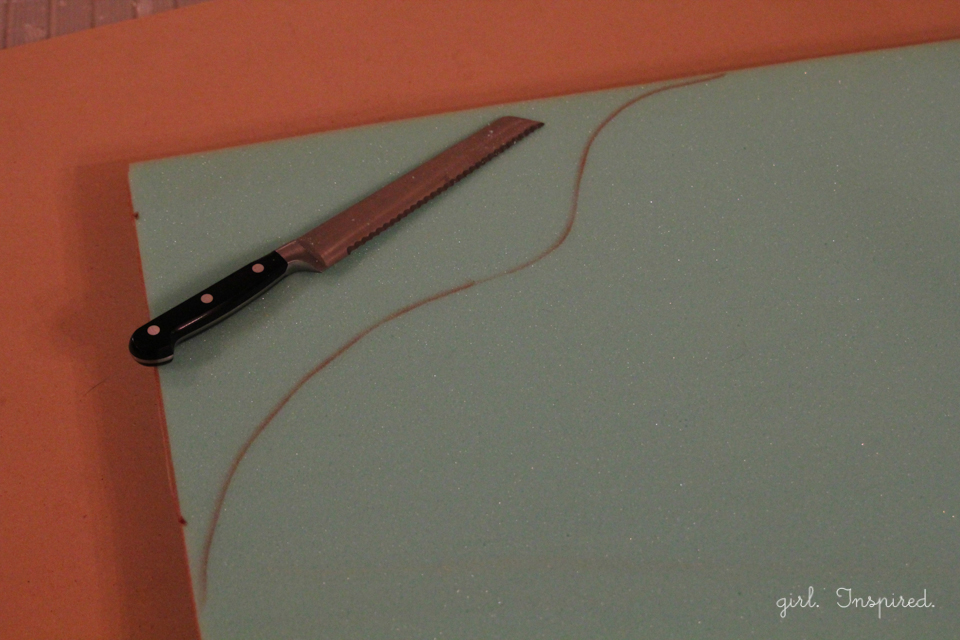

4. Next, layer your 2″ foam over the entire headboard. Trace the detailed shape onto the foam and cut. You don’t need one of those fancy electric knives, a simple kitchen bread knife will work fine.
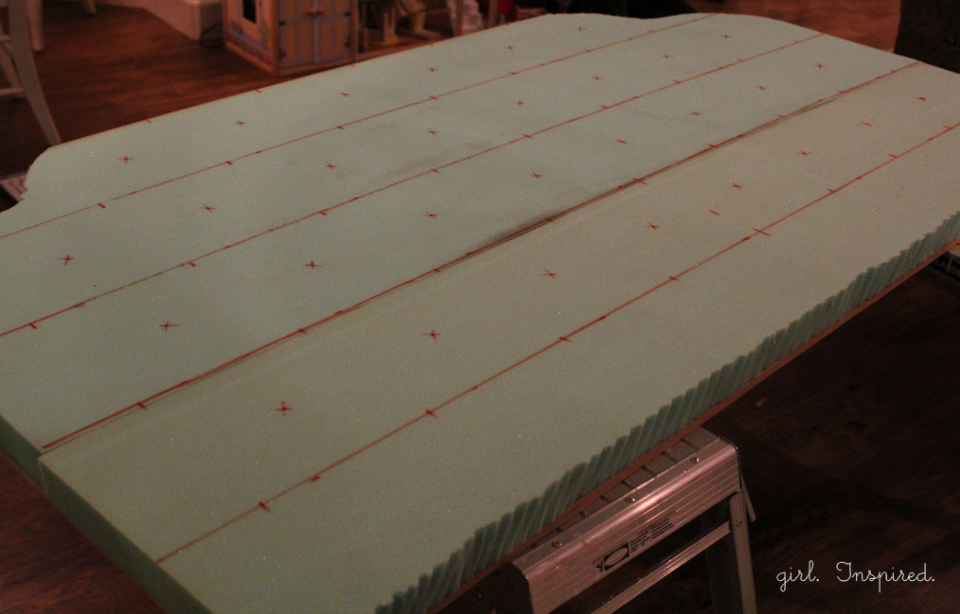
5. Mark the headboard for the button placement. This looks complicated, but it just takes some measuring and patience. Begin at the top of the headboard and draw a line 8″ down from the top, then every 8″ down from that. I ended up with four horizontal lines. Make a mark at the center of each horizontal line (each mark should all be on the same vertical line). Now measure out 8″ to the side of each mark and continue along the horizontal lines, marking every 8″. Finally, using a large ruler, connect one mark with the diagonal mark on the line above (or below) it and mark the center point. You can see my “center points” marked as an “x” in the picture above.
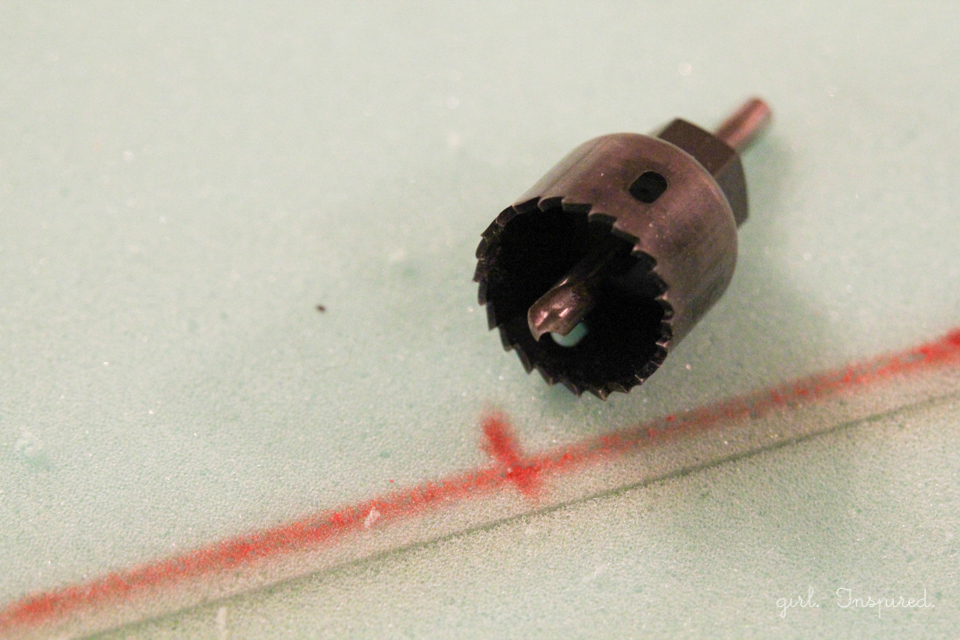
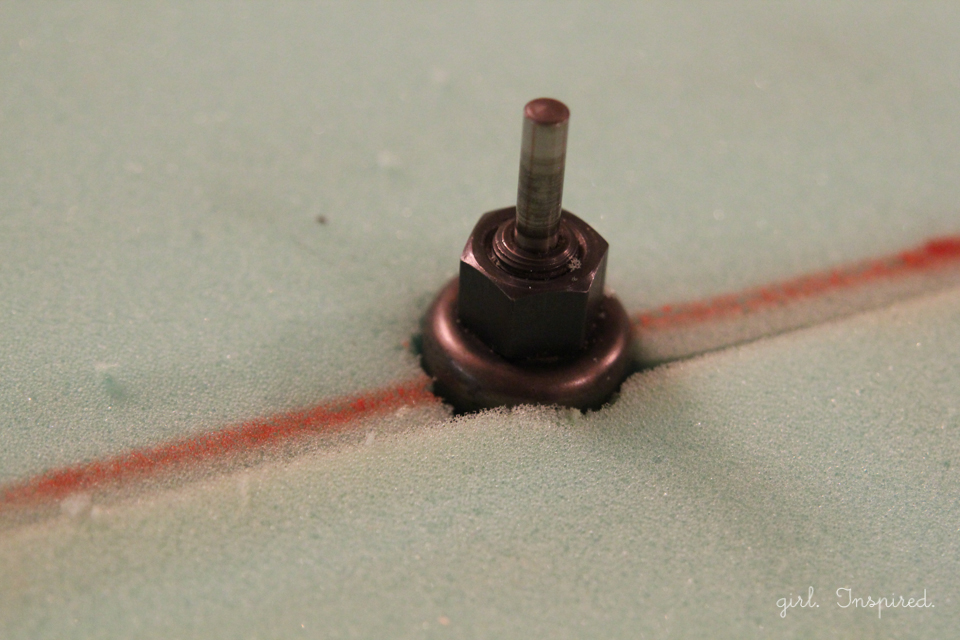
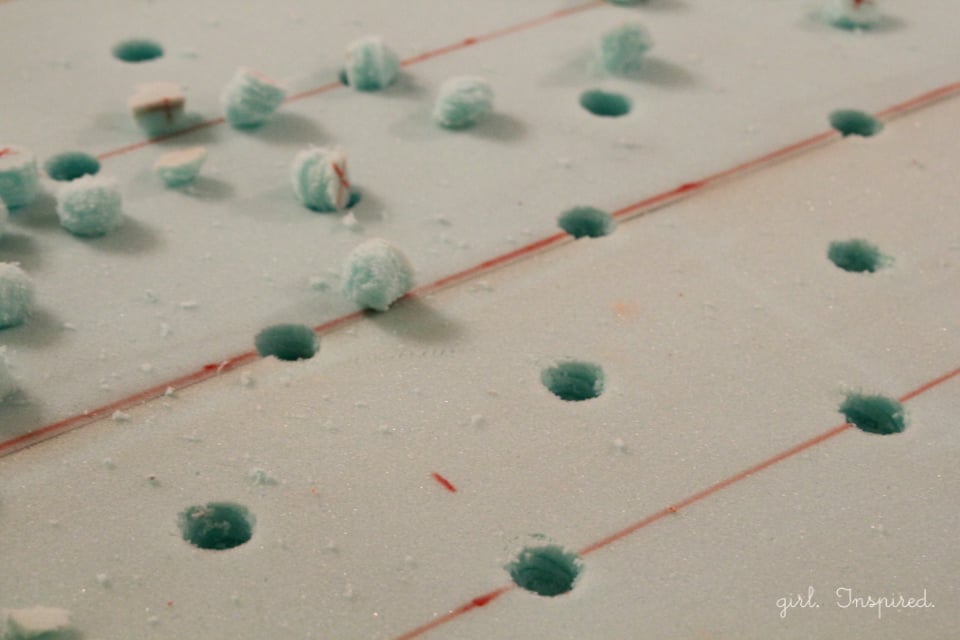
6. Now we’re going to pull out a little “divot” from every mark to create a recessed area where the buttons will sink in for the tufting. I’ve read about people using all kinds of contraptions to do this, but I used a hole saw drill bit (disconnected from the drill) and it worked easily – this was not the cumbersome task that I expected it to be. You can use the bit on the drill as it just catches on the foam and twirls the foam into a mess. Anyway, just twist the saw drill bit back and forth a couple times into the foam, then pluck the foam out with your fingers. The hole should be most of the way to the MDF base – try to keep the depth of the holes consistent.

7. Next, we need to drill holes in the MDF for our buttons to go through. We actually did this prior to cutting the holes out of the foam, but I’m going to suggest that you do it after because I think you will be able to drill through the thin layer of foam in the bottom of each hole and down through the MDF. If not (or in our case), use a nail or screw to scratch a mark into the MDF so that each hole with line up with the center of the foam hole above it. Drill holes large enough for your button shank to go through.
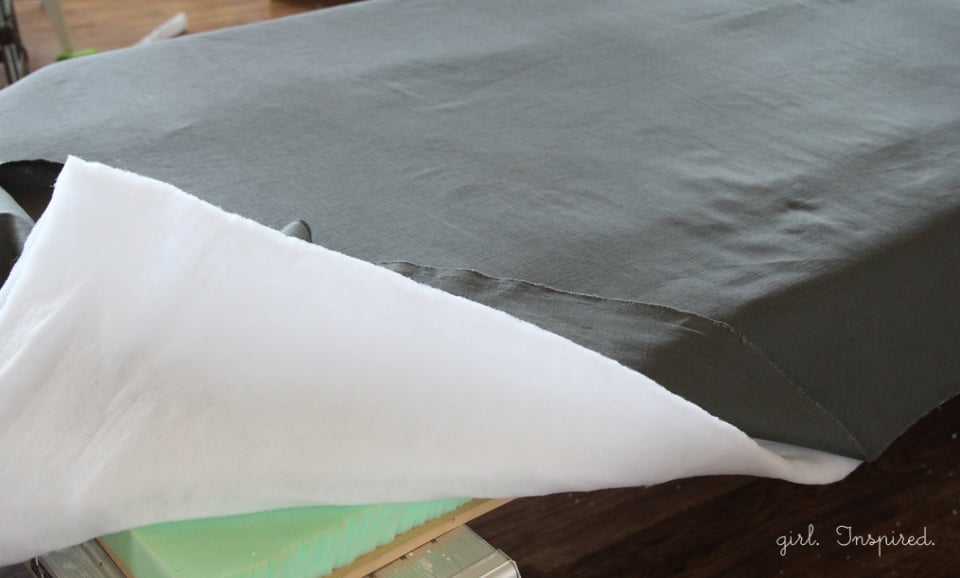
8. Time for upholstery! Place the foam back down over the MDF base. Cover the foam with two layers of quilt batting. If there are wrinkles in the batting, I like to hold my iron a couple inches above the batting and steam it, then smooth the wrinkles out. Finally, place your upholstery fabric over the entire thing – leaving at least 15-20″ of excess on each side.

9. Prep your buttons. Now, I really like to do things “the right way”, but I also wanted this project to get finished and not cost me a million dollars. When I reupholstered my 1930s couch (still haven’t blogged about that one!), the couch had prong buttons which were a thousand times easier to use than the wire eye buttons that I’m used to. I was able to find the prong buttons at an online store for $12. What a deal! Only problem is that the tools to actually cover the buttons cost about $200. I read a suggestion here to simply hot glue the fabric over the buttons, so I decided to give that a go. And you know what? It worked like a charm. Nevertheless, covering a bazillion buttons with little circles of fabric was the most tedious part of this project.

10. Alright, your buttons are prepped and your headboard is in place. I started at the middle of the headboard and began. Tuck the fabric down into the first hole, pierce through the fabric with the prongs of the covered button, and thread the prongs through the pre-drilled hole in the MDF. Press the button down from the top with one hand and open up the prongs from below with the other hand (or a friend’s hand if you’re lucky enough to have help). Place buttons upward and downward in the vertical line; you don’t want the fabric pulled tight, but you don’t want it really loose either. As you work, tuck the fabric into the holes around the one you’re working on to test out the tautness of the fabric and make sure it’s going to spread out evenly.
11. Now, move on to the buttons to the sides. Leave a little slack in the fabric. You’re going to do those “diagonal” buttons (the ones we marked as an “x”) last. You’ll want some slack in the fabric to tuck everything into a neat diamond shape. For now, you’re working directly to the side. I worked in smaller sections – doing several buttons in a couple vertical lines, then tucking in the diagonal ones to finish that small section.

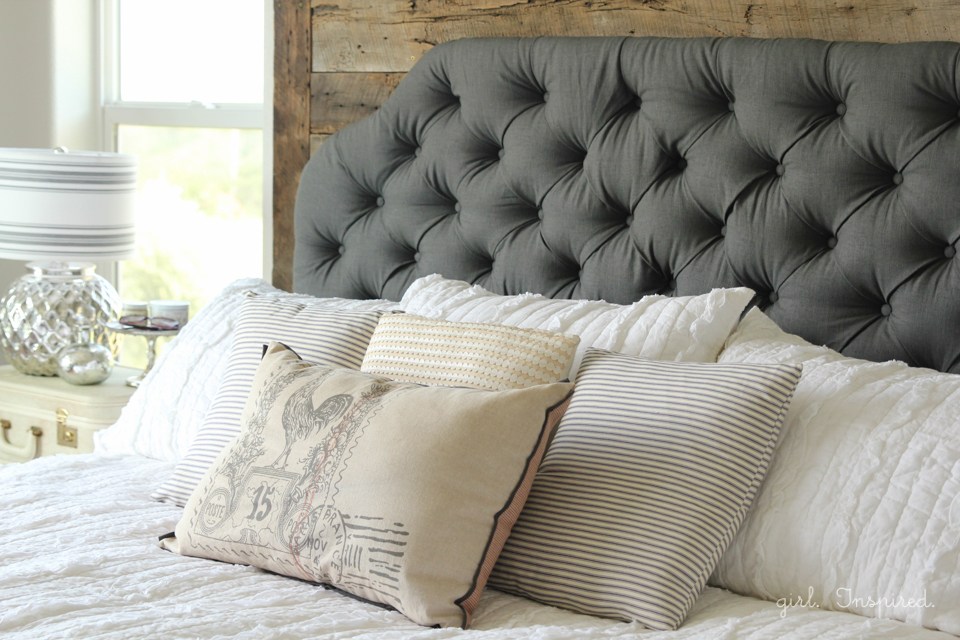
12. When you’re ready to add the button to the diagonal centers, as you press down, you’ll see the fabric from the four corner buttons all tuck into the center. Fold the excess fabric neatly into the diagonal lines to form the tufting. All of the folds should face down – notice this in the picture above. This keeps everything looking neat and uniform. Continue for your entire headboard! (This part of the process took me about 6 hours working by myself with three kids at home – so the usual continual interruptions and “assistance.”) Not too bad, but not terribly quick.

13. Once all the buttons have been placed, it’s time to finish the sides. Trim the excess batting so that it reaches completely around the sides/top/bottom, but does not tuck around to the back of the headboard. Create folds in the excess fabric coming straight out from the buttons to the edge, pull the fabric taut and even to the back of the headboard and use an upholstery stapler to staple it in place.

14. You can add decorative nailhead trim around the edge of the headboard if you like. I used this “cheater” trim because I was short on time, but I wasn’t terribly thrilled with the coloring of it. It WAS fast though. If you have the time, I’d add individual nailheads, but you can also skip this altogether.
15. Mount the headboard to your wall at the desired height. We used a couple metal wall cleats – you get these from Home Depot or any hardware store. They look like two rectangular plates. You mount one to your headboard and one to the wall (actually we used a few sets to cover the distance of the headboard) and then just hook the headboard cleats over and into the ones on the wall. I wish I had a picture, but they’re really straightforward to use, you’ll figure it out.
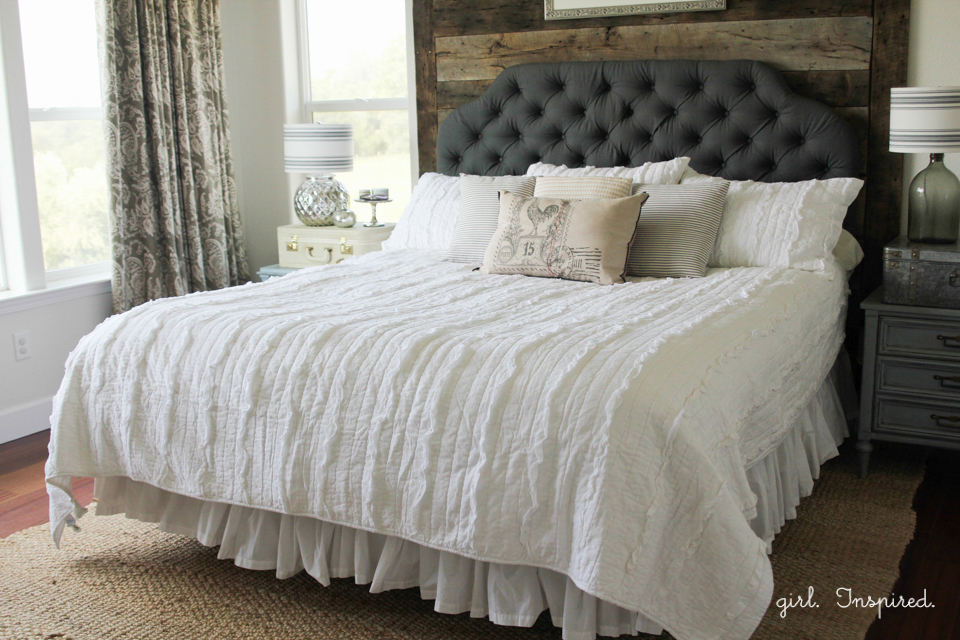
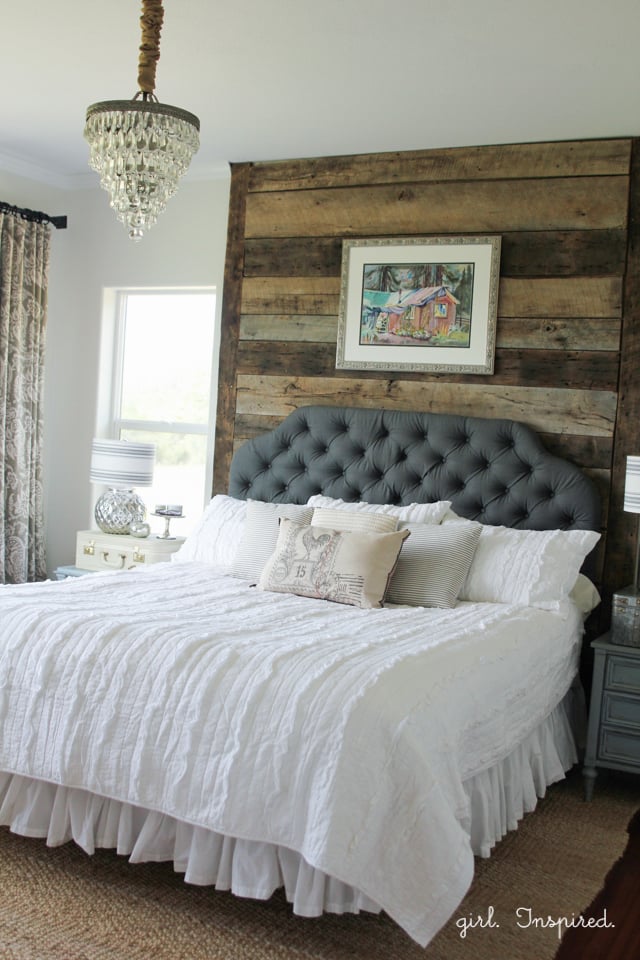
And you’re done! This project is so satisfying! I had some of the supplies on hand, but I calculated the total cost would be about $150. The upholstered headboards I was looking at to purchase were over $1000 so this was a HUGE savings. And it looks amazing! This DIY is here to stay for a long time!
I really do hope to inspire you to make your own headboard. This was a lot of information – if you have any questions, please ask and I will do my best to help you out!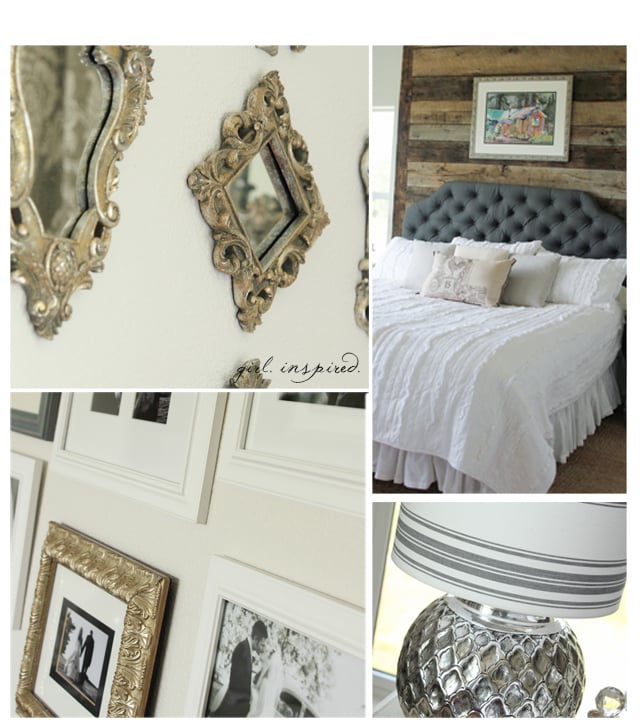
Be sure to see the entire before and after of my Master Bedroom Makeover here.


Comments & Reviews
Carol Allison says
ur headboard is quite stunning and your directions are spot on.
I had a beautiful upholstered headboard from the 70: The fabric was GOLD – also from the 70’s. I found some cream fabric and a reasonable reupholsterer. For the buttons: I removed the gold buttons and sprayed them with an ivory fabric paint. Worked perfectfully. I’m still using the headboard and because of the neutral color, it goes with any decorating scheme that’s currently fashionable.
Liz says
What a great job – it is really beautiful! Do you have any idea what it cost you, all told?
girlinspired says
Gosh, Liz, it’s been a while, I think I figured about $150-200. If you can score your upholstery fabric with a Black Friday coupon, you’ll be in great shape!
anna says
Looks great! I’m going to use your instructions to make one! Where did you get your bedding? And do you remember the name of it?
girlinspired says
Thanks Anna, I got the bedspread and shams from Target! It’s part of their Shabby Chic line!
corinnea says
Gorgeous.
moushka says
Stunning! You’re headboard is the one I’ve coveted for years. Talk about Old Hollywood Glamour! I’m going to share this with DH. Maybe I can convince him that between the two of us we can do this. Your room is gorgeous and so inspiring. I just found you on Pinterest and will subscribe. Thank you for sharing your fabulous know-how.
girlinspired says
Aw, thank you so much Moushka! I hope your husband jumps on board and you create the room of your dreams! It really makes such a big difference to fall asleep in a special space.
Amy Hindman says
This is amazing!! looks absolutely perfect!
Heather says
This is awesome! My daughter wants one of these SOOOO bad and now I have no excuse. Thank you so much for sharing.
ps- the room looks over the top amazing. I so want to live there!
Charity says
I love this! I’ve always wondered how to get that deep tufting without hurting myself… thanks for the how to! If I ever get a bed frame a headboard will be next. =)
marissa | Rae Gun Ramblings says
pretty much every time I see your house I think I want to force you to fix mine. I do not have the decorating gene this is gorgeous
Abby says
Stef, this is so stunning! Your whole room belongs in a magazine, so beautiful!
Bonnie P says
Well it is beautiful! Almost inspiring…almost! LOL Maybe one day I may do it but in the meantime may you know you’ve done a great job doing it and sharing your knowledge for other brave souls out there. Enjoy your “job well done.”
Joanne roth says
Wow that looks fantastic! You did a great job. Thank you for the information -I may add a headboard to my summer project list!
Mary L says
Congratulations on a beautiful bedroom Stef! It came out marvelous! I love the fabric you chose. Like you say, making it yourself is such a nice satisfaction, you got everything you wanted in a headboard and at a fraction of the cost of purchasing it already made!