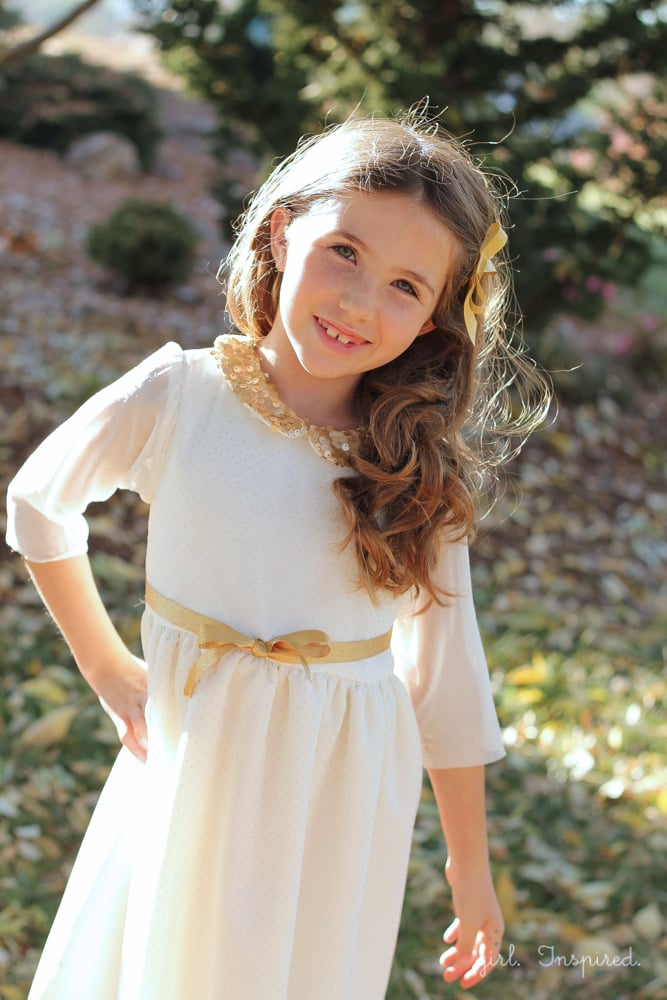
I like a little puff on the sleeve of little girls’ dresses. They give a dress that feminine, soft look. You can convert a pattern for a regular sleeve into a puff sleeve easily and today I’ll show you how. As I shared last week, there is a free downloadable sleeve pattern. (You can also use this sleeve pattern and tutorial to sew the sleeves for the man’s dress shirt to girl’s play dress upcycle tutorial. This sleeve pattern is made to fit right into the armhole of the 5&10 dresses. In order to give the top of the sleeve a little puff, we need to add some extra fabric that can be gathered. Here’s how to do it.
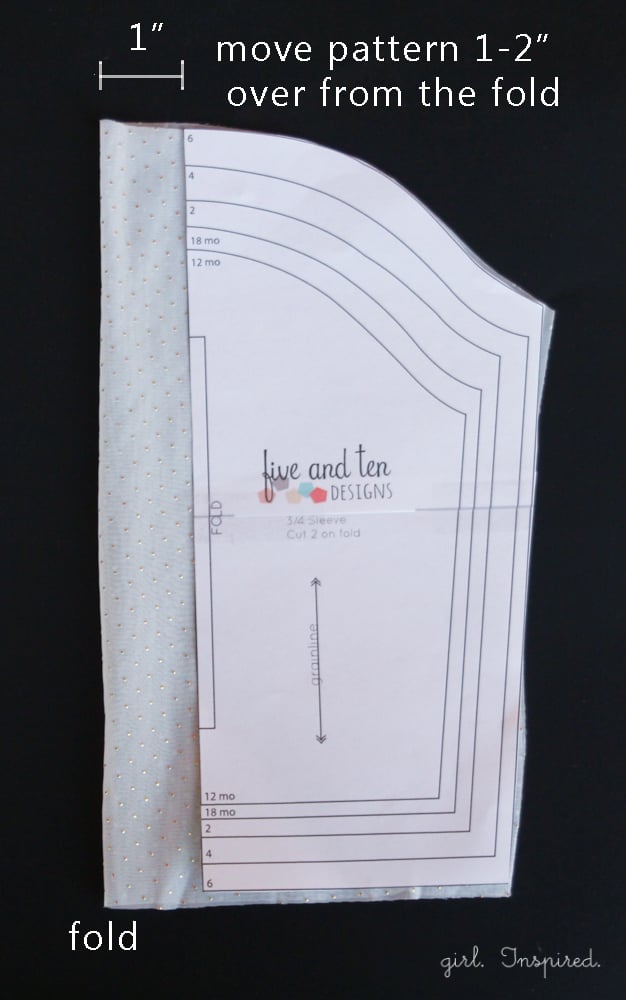
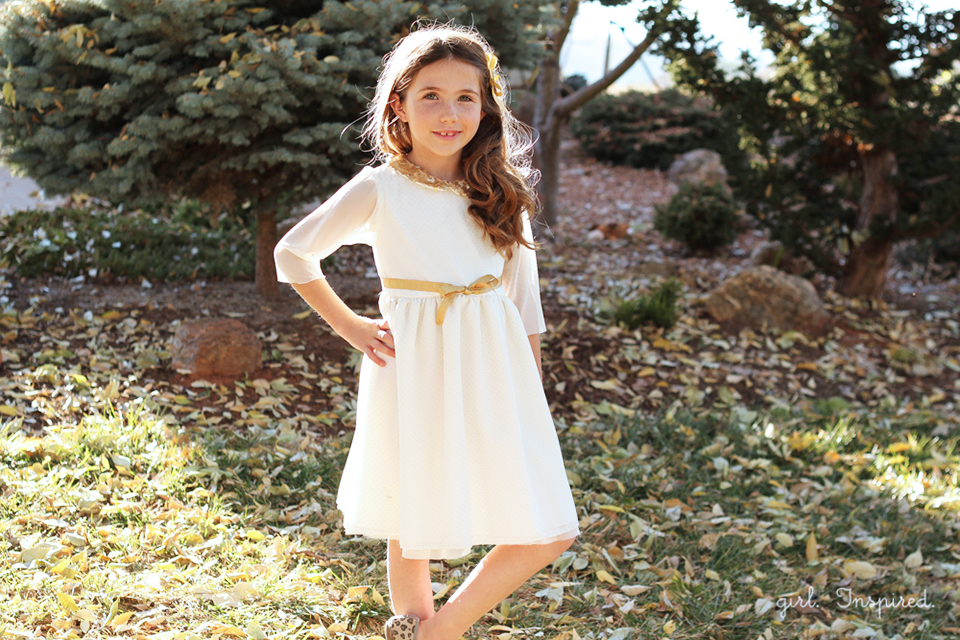
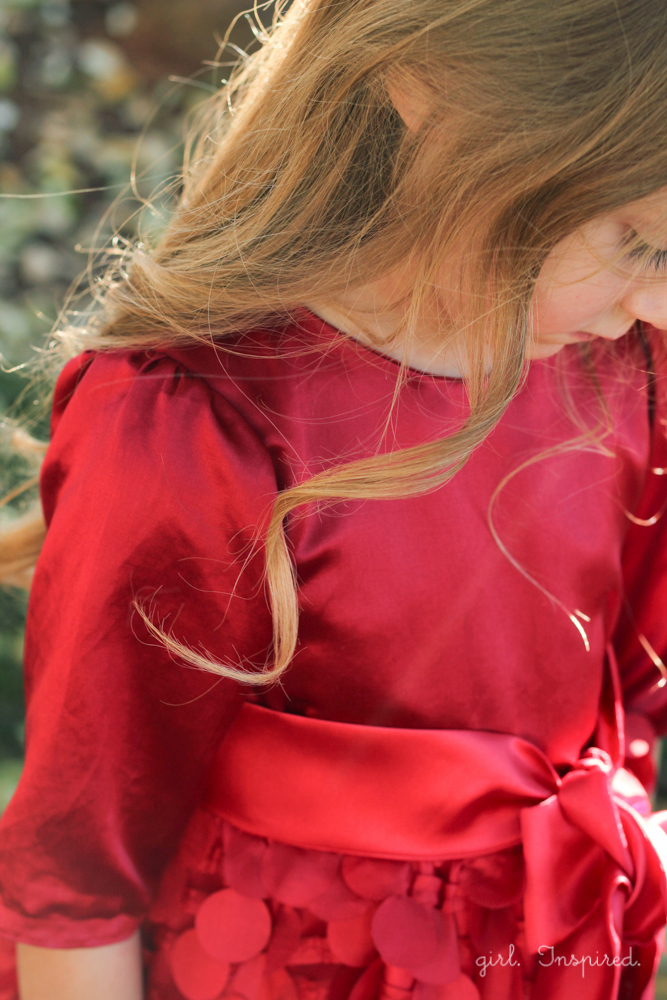
Lay out your fabric, folded as you would prepare it to cut the basic sleeve. Now, simply move the pattern over from the fold 1-2″. For the cream and gold dress that I made Olivia, I wanted just a small amount of gathering, so I moved the sleeve pattern over 1″ (giving 2″ extra total, since there’s an inch on each side of the fold). For the red dress I shared, I added 2″ to the pattern (giving 4″ extra total). Now, cut the sleeve out around the pattern piece, adding the extra width to the center of the sleeve.
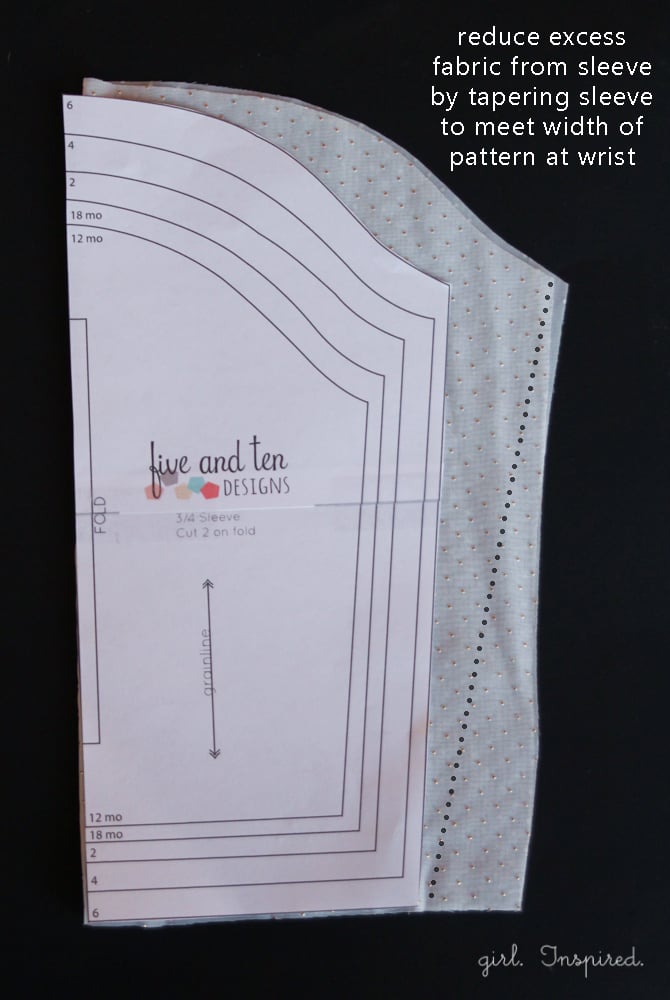
Next, we’re going to shave off some of the extra bulk that’s been added to the rest of the sleeve. Match the edge of the pattern piece with the fold of the fabric and mark the width of the sleeve pattern at the wrist.
Make a straight line from the adjusted underarm edge tapering down to the original wrist width. Cut the second sleeve in the same manner.
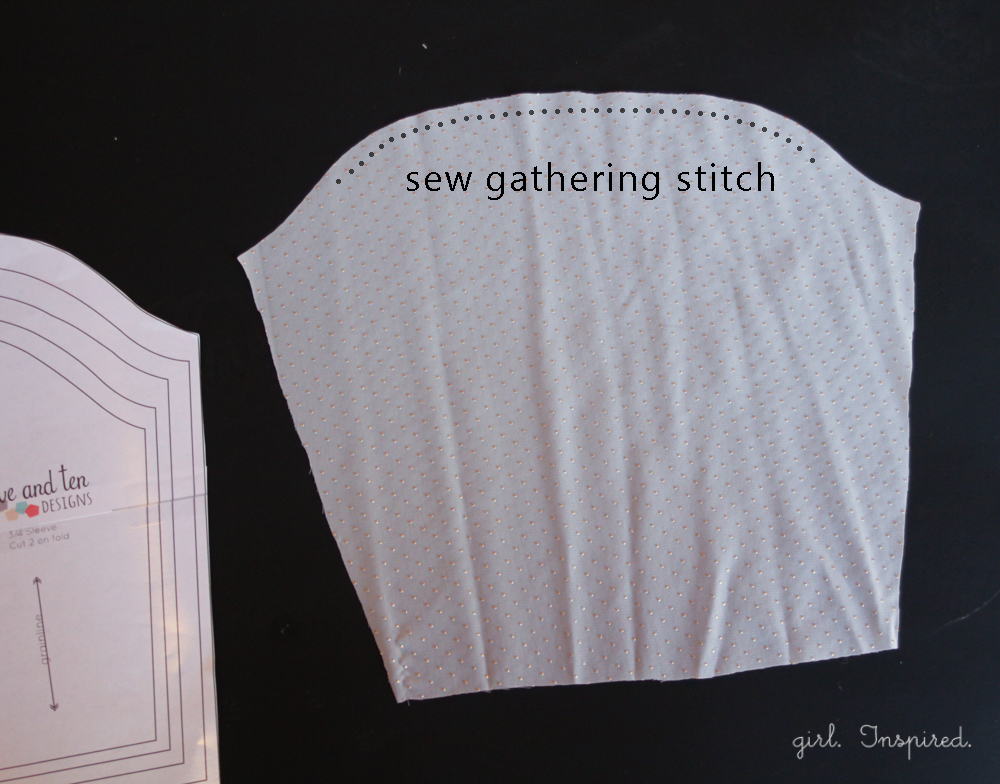
To set the sleeve into the dress, there are a couple more preparatory steps. First, sew a gathering stitch along the center ⅔ of the sleeve pattern – see the markings in the picture above for the approximate placement of the gathering stitches. You can sew two parallel rows of gathering stitches to make setting the sleeve easier, but it’s not necessary.
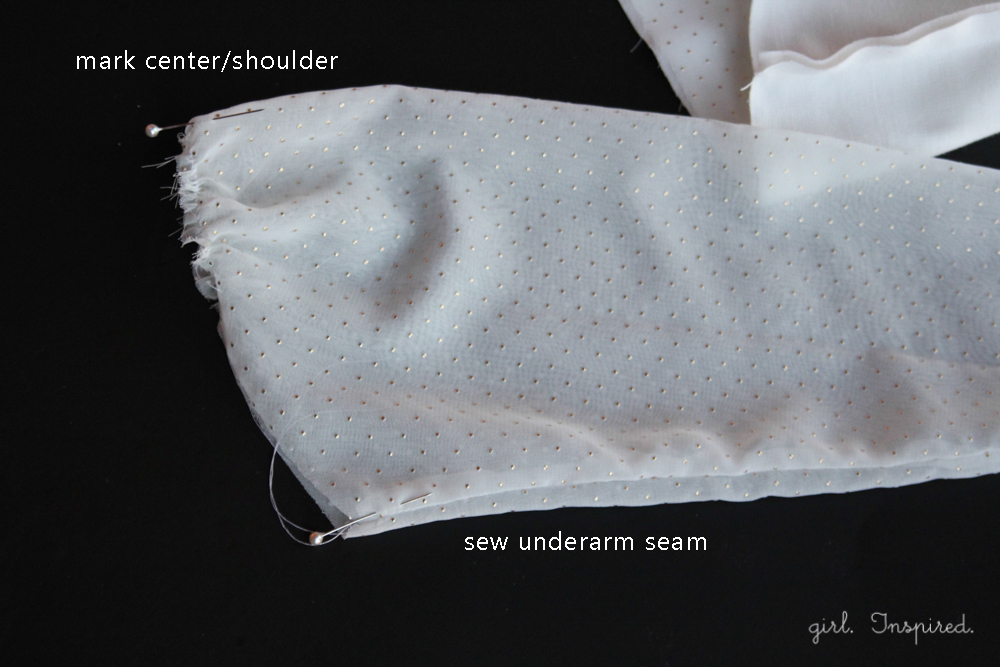
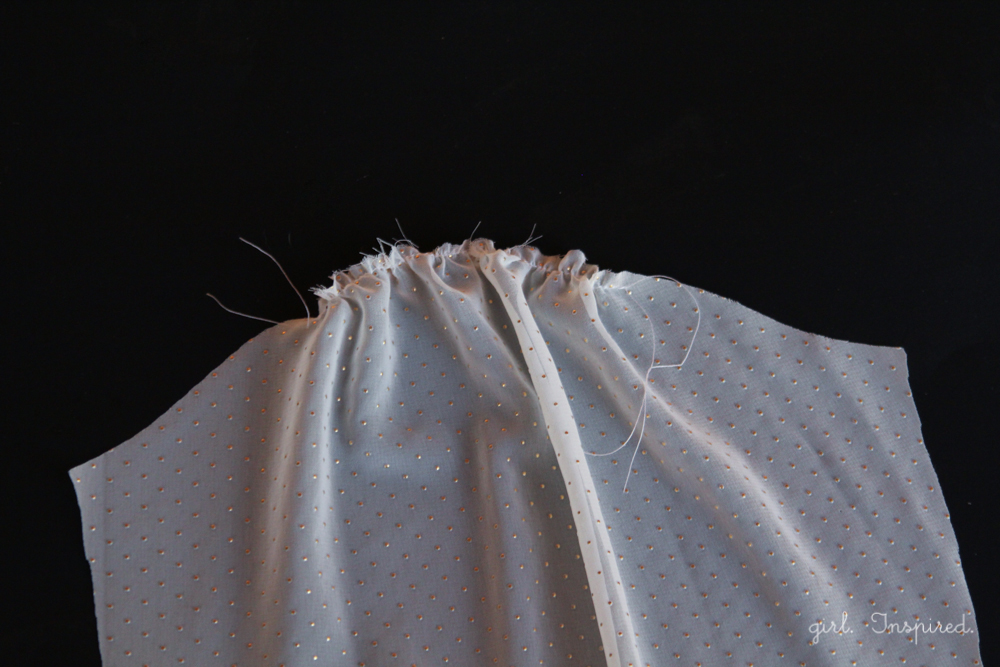
Fold the sleeve in half, right sides together, and sew up the underarm seam of the sleeve. Place a pin at the underarm sleeve and the top center of the sleeve. You’re ready to attach the sleeve to the dress.
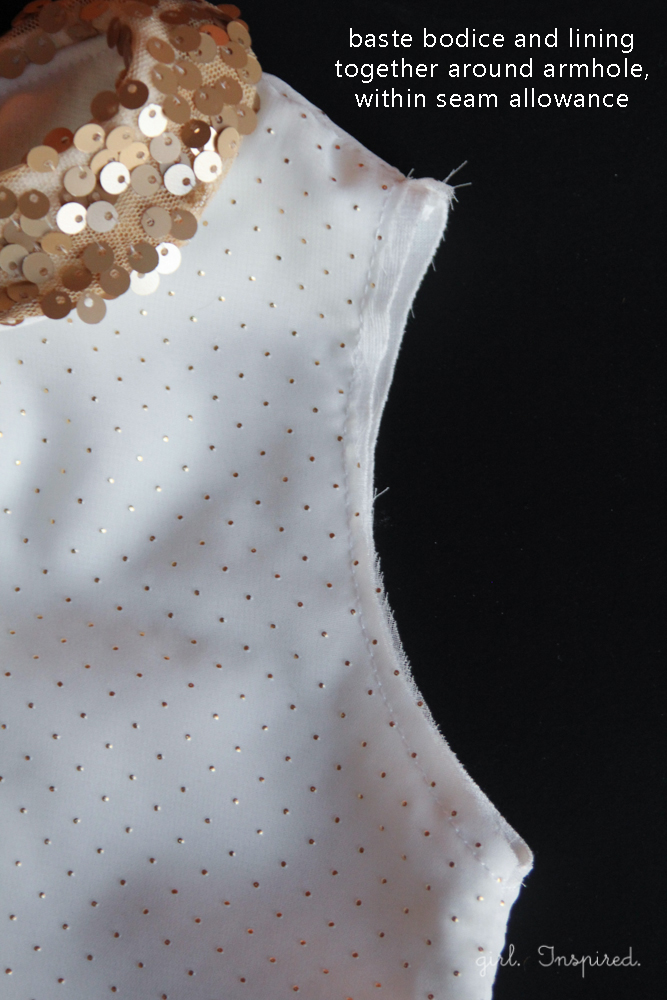
Baste the armholes of the main bodice and the lining together. Be sure your stitching is within the seam allowance so that the stitches don’t show once you’ve attached the sleeve (you can always pull the stitches out, too, so don’t worry).
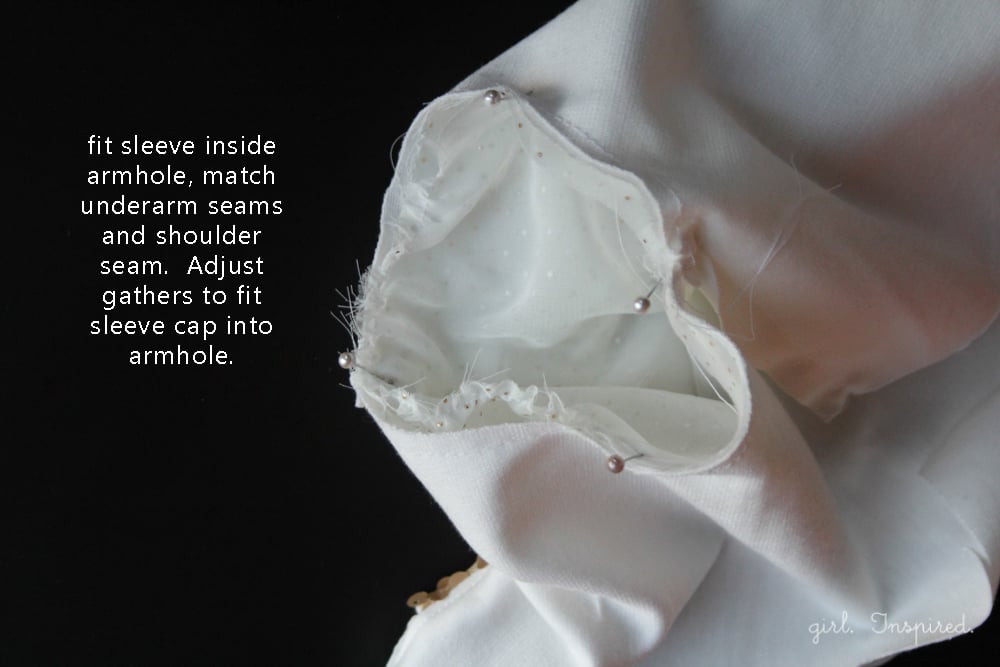
Turn the bodice inside out and place the sleeve inside the bodice armhole. Be sure right sides are facing each other. Match and pin the underarm seams of the bodice and the sleeve. Match and pin the shoulder seam to the center top of the sleeve. Pull the gathering stitches on the sleeve so that the sleeve fits into the armhole and the gathers are concentrated around the top of the sleeve. Stitch together.
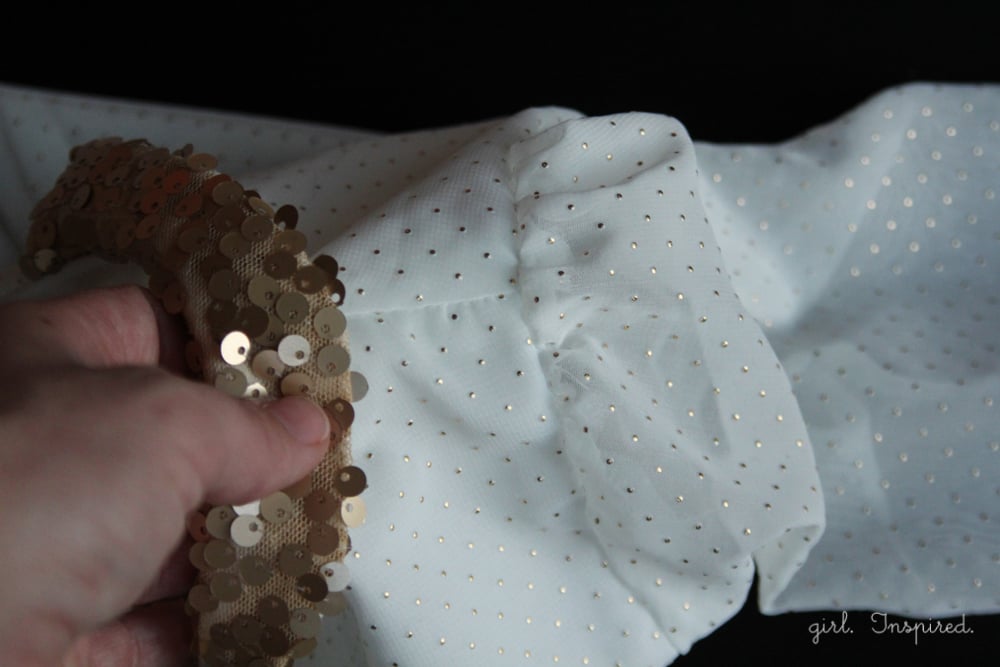
Turn the sleeve right side out and check all your stitching and the evenness and placement of your gathers. Remove basting stitches and serge to finish the armhole seams if you want. You’re done!
Cute little puff sleeves!!


Comments & Reviews
Anne says
Beautiful dresses!! I’ve linked to your tutorial over at Craft Gossip:
http://sewing.craftgossip.com/tutorial-make-a-puff-sleeve-from-a-plain-sleeve-pattern/2013/12/02/
–Anne
girlinspired says
Thank you so much, Anne! Did you make a dress for your daughter yet this year?