
How is your holiday sewing coming along? Are you making dresses for your little ones? I shared Addison’s Christmas dress a couple weeks ago. Here’s a sneaky peek of one of my other dresses….

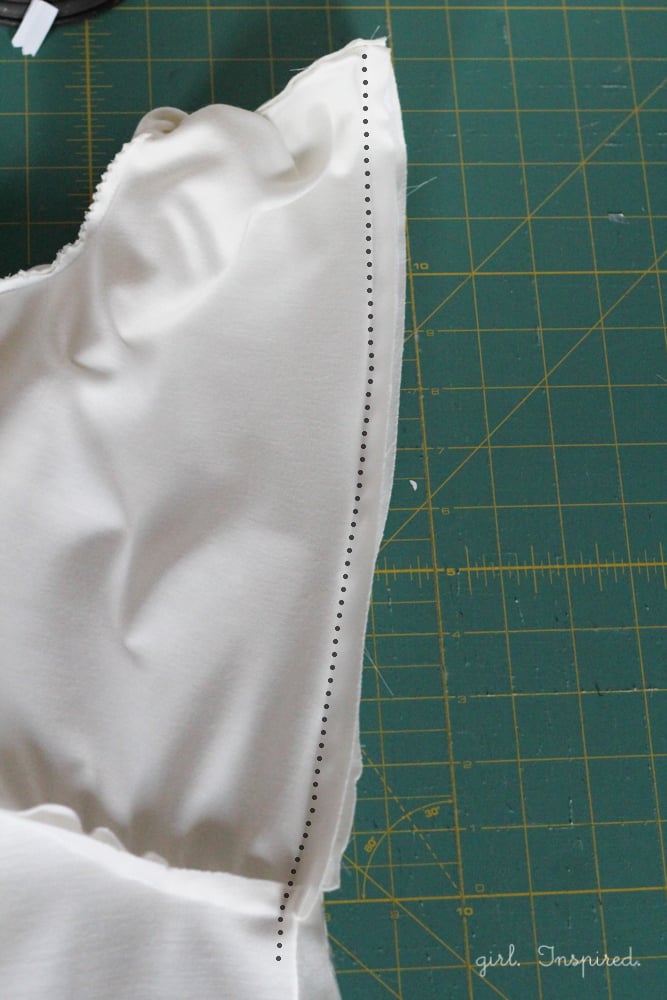
Today, I want to show you how to install an invisible zipper on a lined dress. Sometimes I prefer the look of an invisible zipper over button closures, particularly on fancier dresses. An invisible zipper on a lined garment is not so complicated to install and I’ll walk you through it step by step. The zipper will be the final step when you are sewing your dress. If you are using the 5&10 basic bodice block pattern, you will add only a ½″ to the pattern piece at the center back for a seam allowance – you do not need any extra for “overlap” where you’d otherwise be sewing buttons – make sense? When completing the dress assembly steps, be sure you do not sew any seams into the open sides/the center of the back bodice pieces. The lining and the main fabric should be separate, connecting only along the neck seam. You will also want to attach your main skirt to the main bodice and your skirt lining to the bodice lining. The back will be open from the neck all the way down to the hem.
Now, for the zipper. Remove the zipper from the packaging and set it out along the back of the dress to help visualize the orientation of the zipper relative to the dress. Unzip the zipper and press it with your iron along the teeth to flatten it out. This step is really important to make sure you can stitch close to the teeth, but not through them – don’t skip the ironing of the zipper!!!
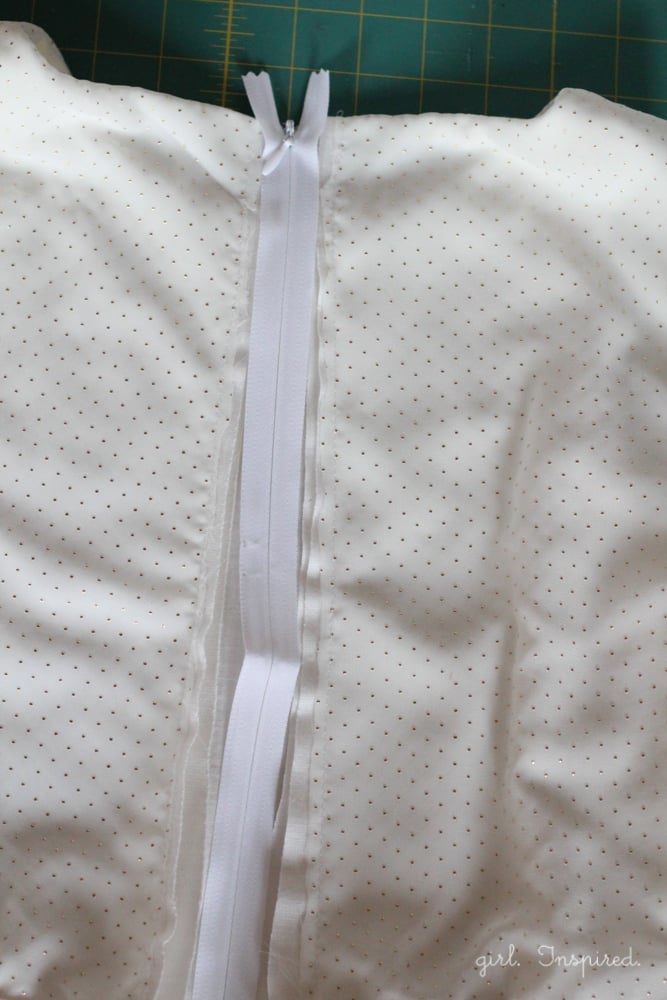
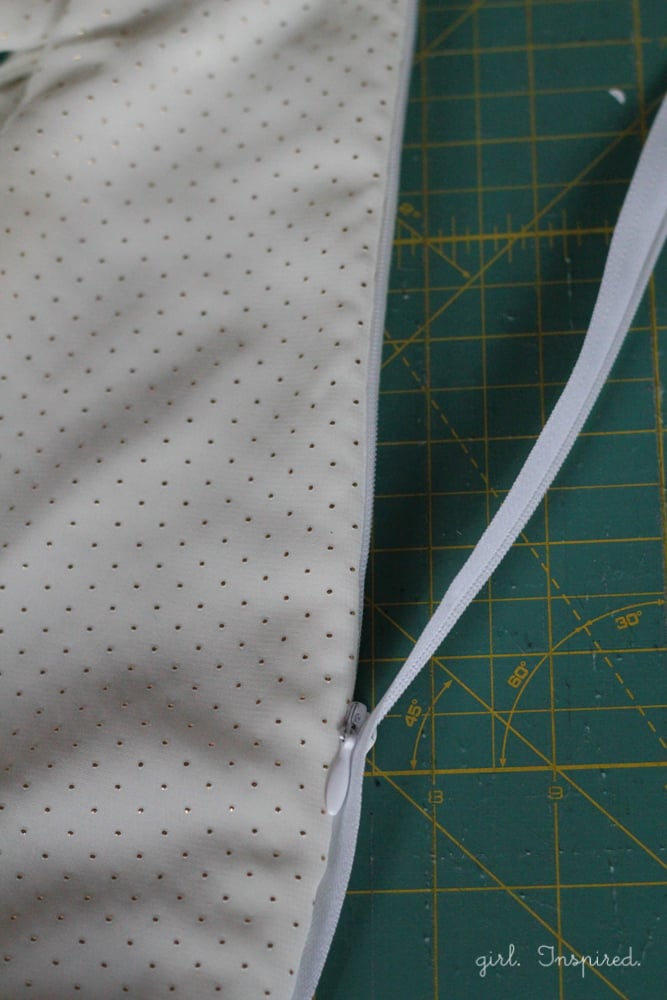
Now, take your zipper and turn it upside down. Separate the main dress from the lining. Place the raw edge of the left-hand side (the right-side now that the zipper is face down) along the raw edge of the left back bodice piece.

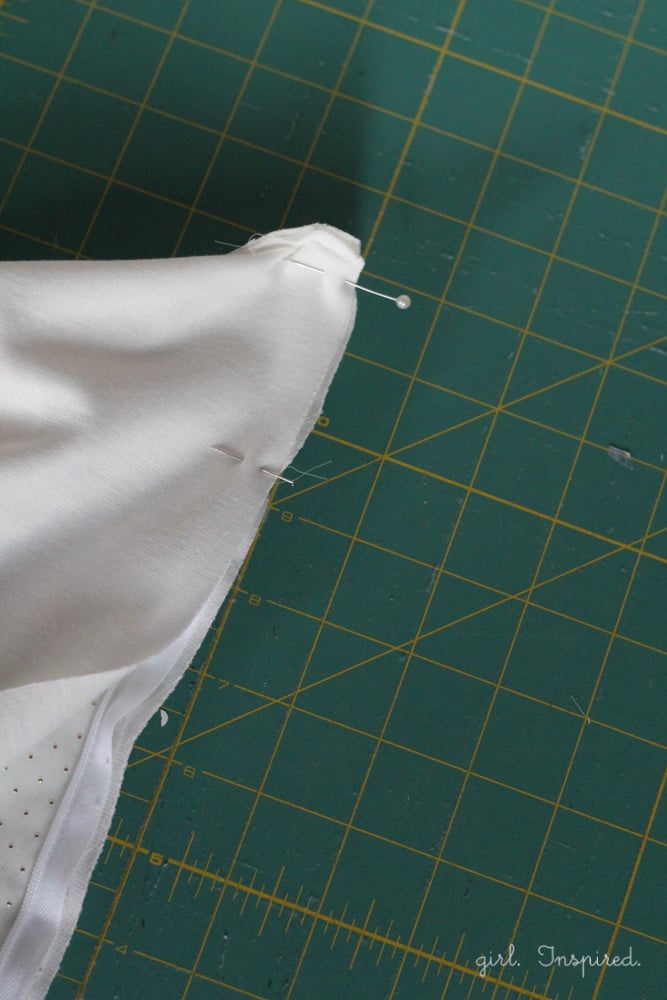
Pin in place, lining up the zipper stop with the neck seam where the main bodice piece meets the lining. There is a small tab of zipper above the plastic stop piece – that can flap above the stitch line for now – you can fold it away from the zipper edge and trim it down. Be sure to pin the zipper to the main bodice only, NOT TO THE LINING.
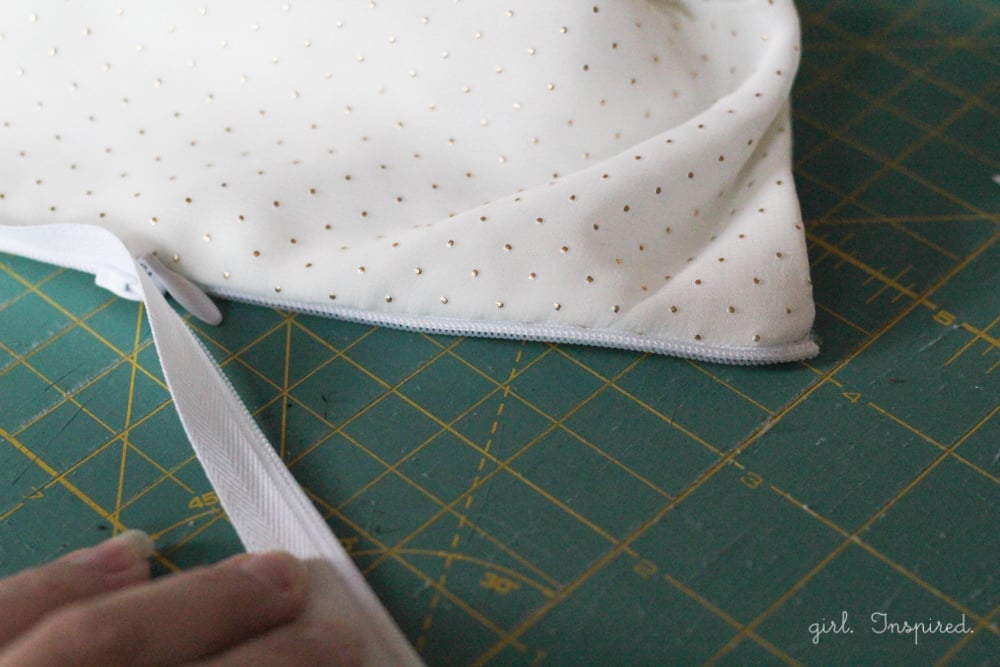
Using a zipper foot on your sewing machine, baste the zipper to the bodice, continuing down at least an inch or two below the waist seam. You may need to remove the garment from your machine, pull up the zipper tab past your stitching, and then continue sewing the rest of the zipper on.
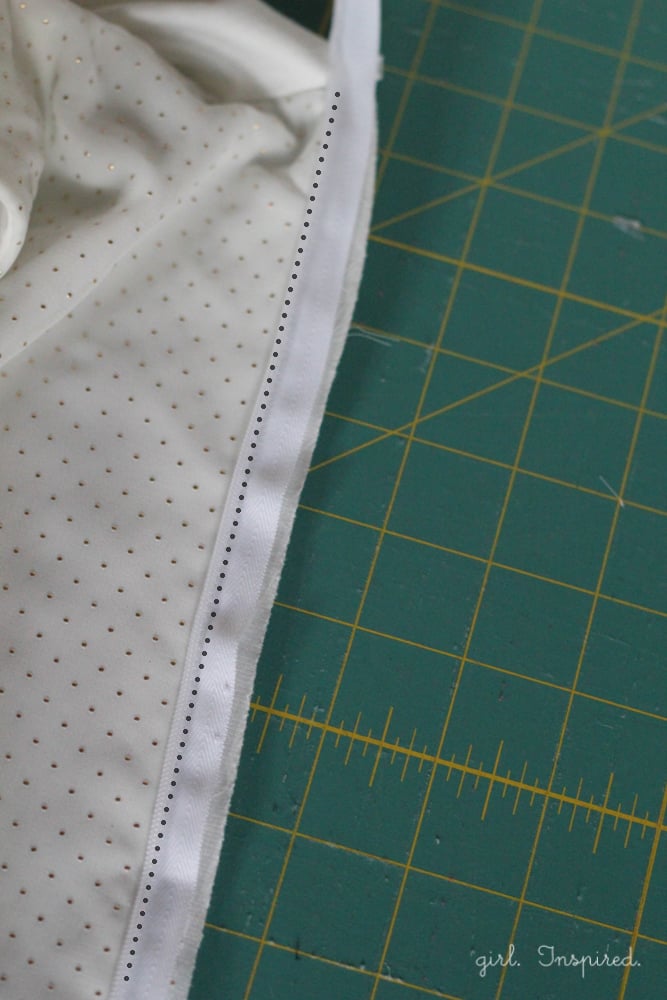
Now that the zipper is basted in place, fold the lining down over the zipper – the right side of the lining will be touching the zipper and the right side of the bodice. Use the zipper foot and stitch the lining down to encase the zipper between the bodice and the lining.
Stitch as close as you can to the zipper teeth without stitching through them. I like to move my needle over just slightly to get as close as possible.
Turn the bodice right side out and check the zipper to make sure it zips up completely and is facing the right direction. Remember when you laid the loose zipper on the back of the dress – is the correct side of the zipper attached where it should be? Best to remove stitches and fix it at this point than wait until you’ve sewn in the whole thing.
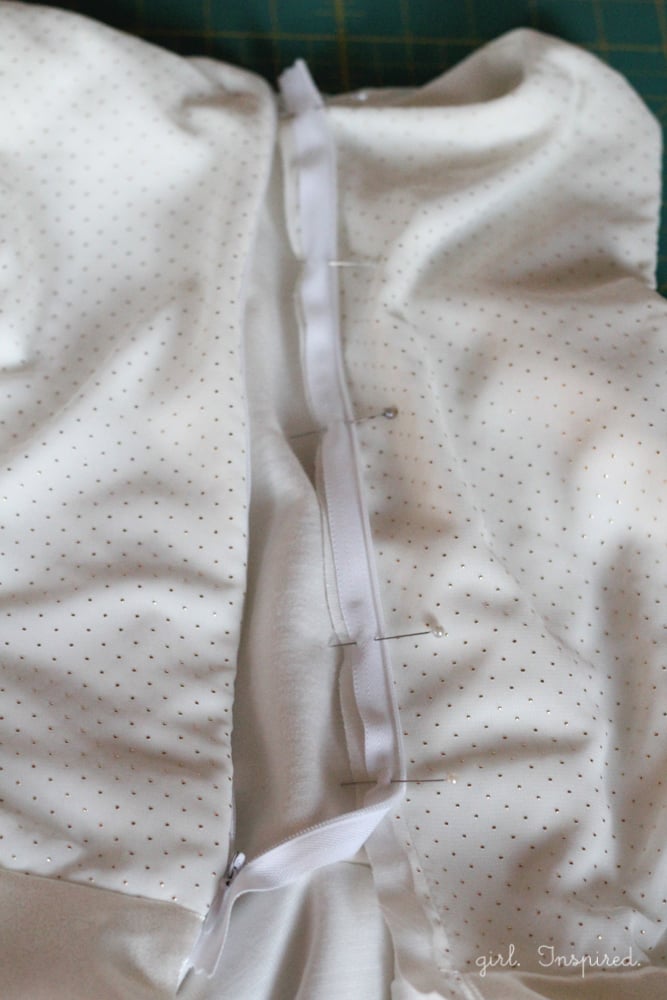
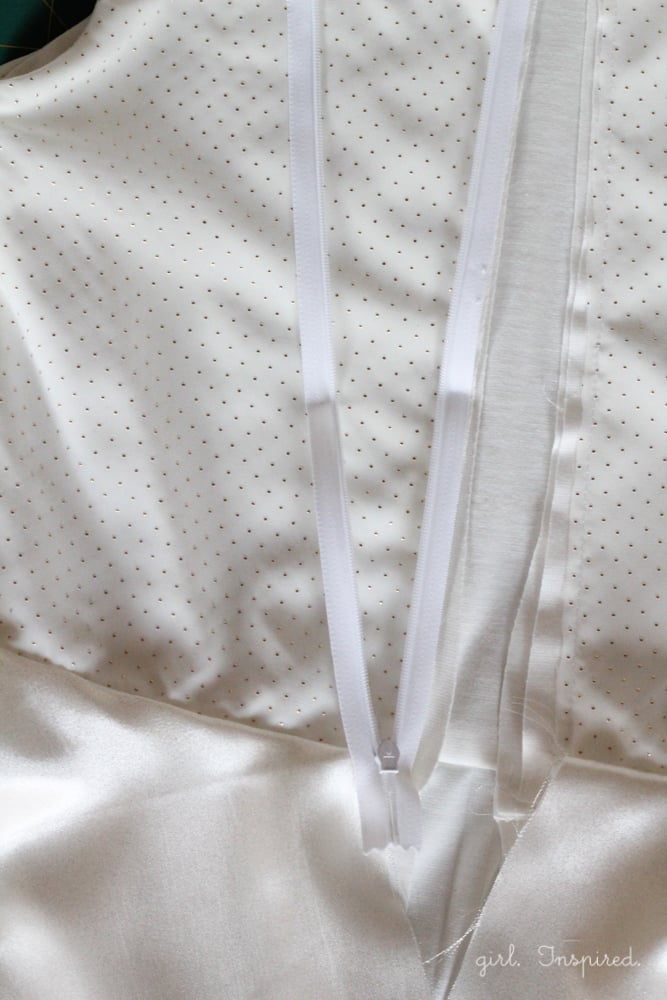
Now, we’re going to repeat the process with the other side of the zipper. Separate the right side of the bodice from the lining and place the other side of the zipper right side down onto the bodice. Be sure the zipper is rotated correctly and not twisted. Check the close-up picture below – does yours look the same?
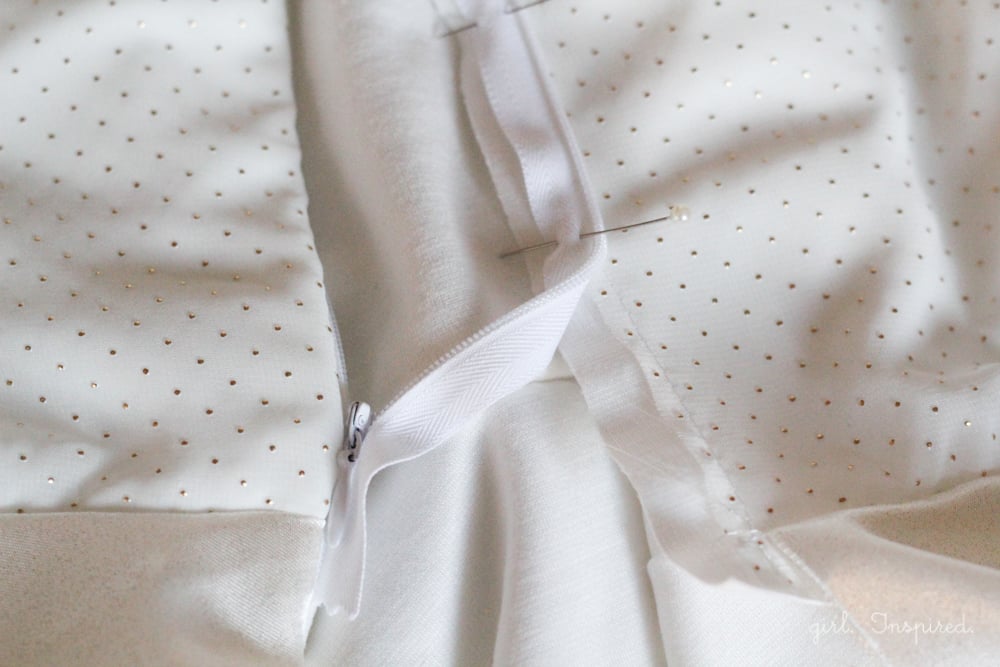
Now, repeat the same process of basting the zipper into place, turning down the lining, and stitching the back bodice, zipper, and lining together.

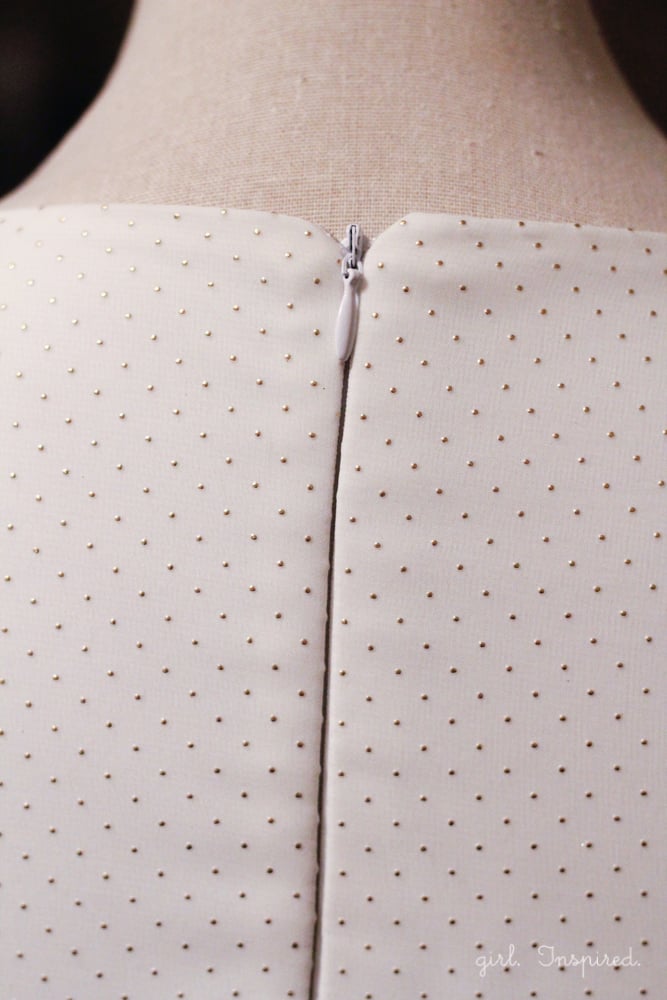
Check your zipper – doesn’t it look awesome?? Now to finish the dress, you’ll need to sew up the back seams of the skirt and the skirt lining. Do these separately and stitch right up until you meet the stitching for the zipper installation. This process gets a little crowded, but just go slow and when you’re done, everything will be contained and look nice and neat.


Comments & Reviews
Kathleen says
This has been so helpful! I got to the end of dress for a friend and realised i had never put a zip in a lined dress. This has saved the day and is something i will definitely use all the time from now on!
Nancy says
Thanks for a simple but eloquaint tutorial! We are repurposing used
clothing and making designer pillows. Some laces need a lining and this is the perfect solution.
Aby says
Thanks for this tutorial. I wasn’t careful enough (too tired after a night of sewing to finish 1hour before the party) but it save my dress. I will use it again. Thanks!
Lezette Thomason says
Great tutorial! This my personal sewing goal for the new year 2015 as older girls want zippers not buttons. I am going to learn it this weekend. This will be my guide. Thank you. Lezette, Children’s Corner Patterns
Aby says
Thanks a lot for this tutorial. Easy, nice and neat ^^ My dress looked gorgeous. I just found this tutorial (too late for me) but I thought I will share to complete yours : http://nicolemdesign.blogspot.fr/2008/11/zips-dont-have-to-be-scary.html
Michelle says
Thank you for this tutorial! Did you use an invisible zipper foot, or just a regular zipper foot? I guess it would be hard to use an invisible zipper foot with the zipper sandwiched in between the 2 layers of fabric, or would it?
girlinspired says
Hi Michelle – just a regular zipper foot!
Anneliese says
Thank you so much for this! I am just getting ready to put in an invisible zipper and the dress is lines…and I was hoping to look it up instead of figuring it out. You saved me a bunch of time!
Keeli says
Thank you so much for this tutorial! I’ve been searching for one where there was a lining. All the others I’ve found had only the main garment.
Lucy says
Was very happy with the instruction provided. so simple and so clear
thanks
mary castillo says
¡ me encantó !, siempre había tenido problema de como coserlo y este tutorial es muy bien explicado, gracias por compartir, abrazos.
Charity says
This is how I sewed the zipper when I made a flower-girl dress earlier this year, although I’ll admit that it took me quite a while to puzzle out how to do it! And instead of sewing it last, it was one of the first things I sewed. =) It will be very handy in the future to have this post to reference, thank you.
I really love the fabric you used here… I’m looking forward to seeing more photos of the dress! =)
Jess M says
Thanks! I have so much trouble with invisible zippers, they always show 🙂 Now I know where to look for picture instructions!
Heidi says
Great tutorial! That fabric is so divine, Stef!
Jess Abbott says
so so cool! What a great tutorial / tip! Thanks so much Stef!!! I adore that dress 🙂
Erin says
That is absolutely beautiful! (as always). You make it seem so easy. Somehow my invisible zippers are never completely inivisible. lol
Abby says
Great tutorial Stef! I love invisible zippers!