Have you learned how to make Hot Chocolate Bombs? I am OBSESSED and so is my whole family. These fun treats are a feast for the eyes as much as they are so much fun to give, use, and eat (drink?!) There are so many different ways to make hot cocoa bombs, but today I’m going to show you the best way to make a hot chocolate bomb recipe using tempered chocolate.
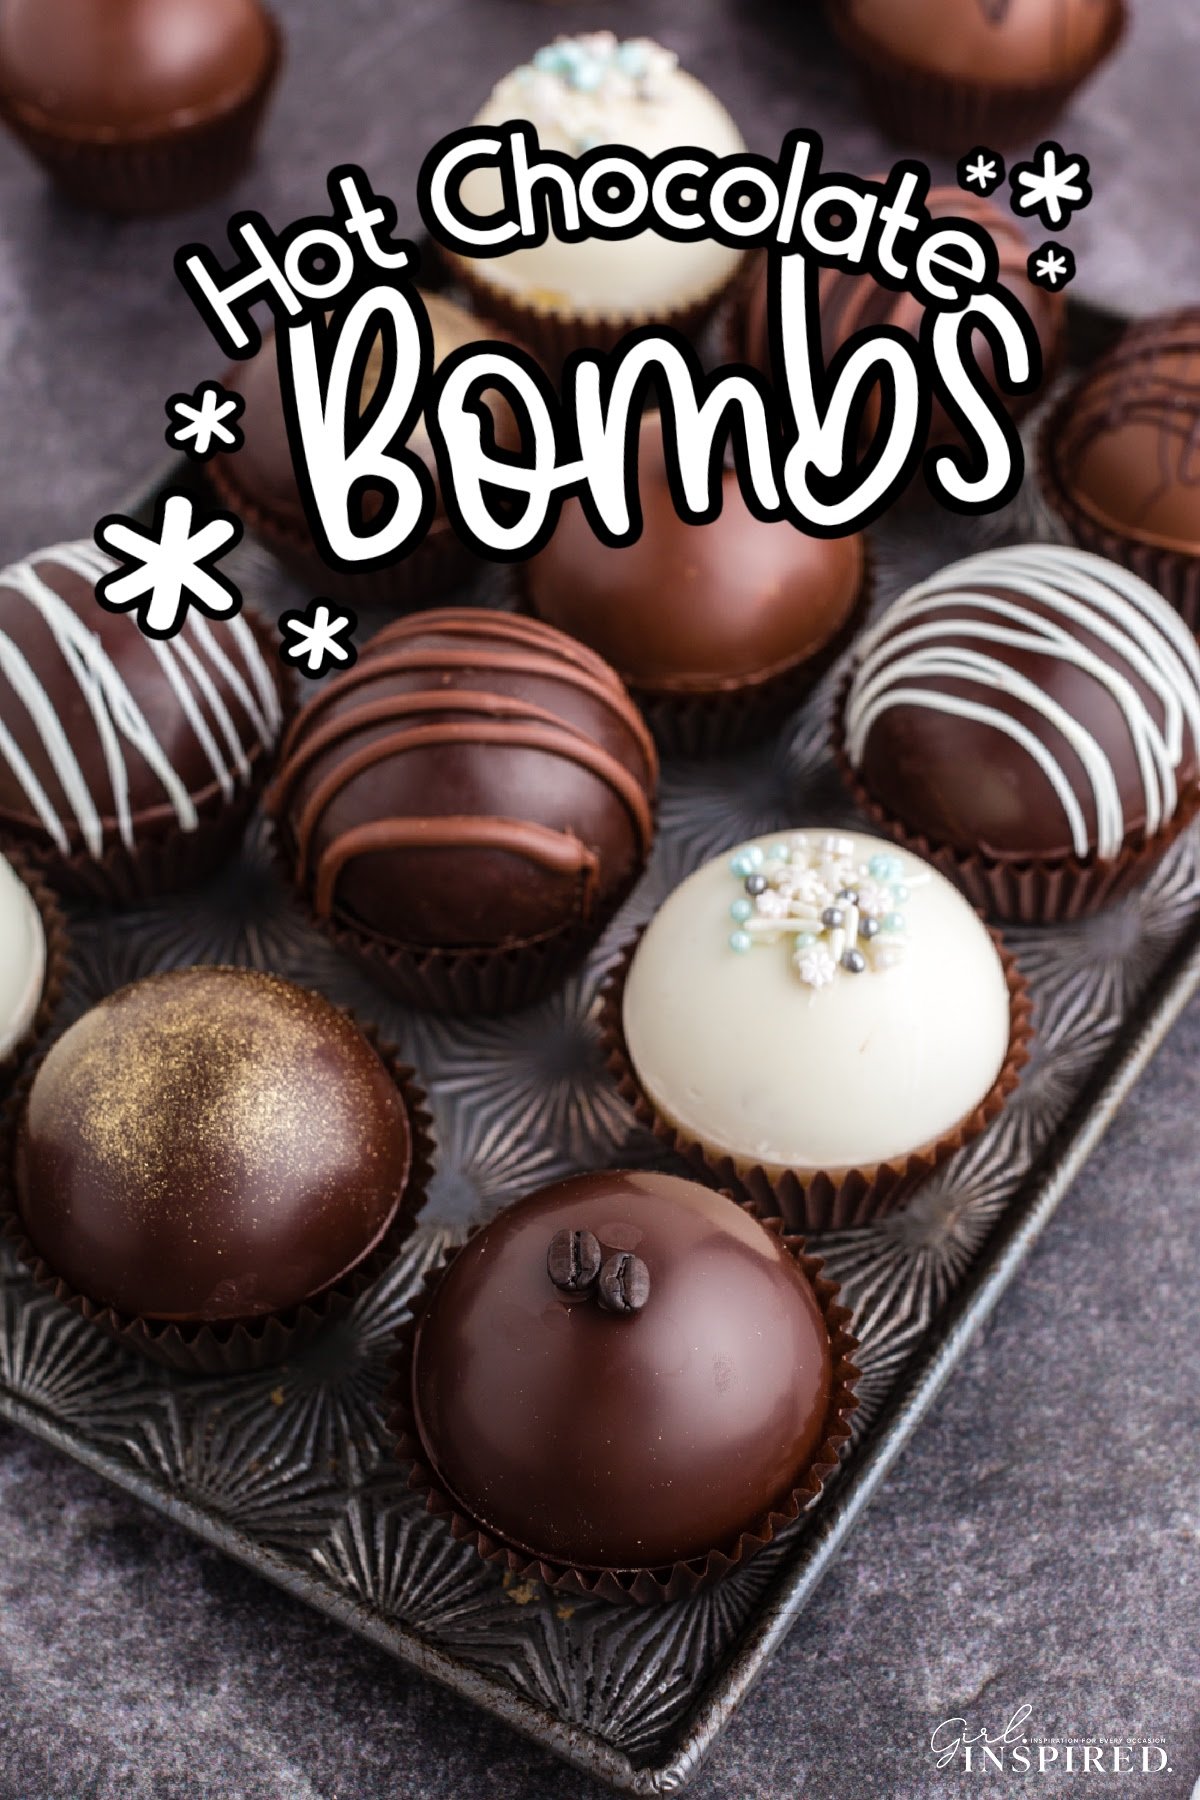
You will learn how to properly temper the chocolate so that you can make hot chocolate bombs from real, delicious chocolate and not the candy coating that is all about convenience rather than flavor.
Tempering the chocolate is not too difficult if you follow my instructions and you’ll end up with a chocolate sphere that is perfectly glossy chocolate with a wonderful snap. Tempered hot chocolate bombs will also withstand time and will not discolor after just a day or two, making them suitable for giving to friends and family or even selling if that’s your thing.
I do love a rich, chocolate-y drink. In the summertime, I’ll take my chocolate rum cocktail 😉 but this winter, I’m all about warm, rich chocolate straight from a fun hot chocolate bomb shell. These Valentine’s hot chocolate bombs we tinted pink and they couldn’t be more cute. Sometimes I need a caramel fix with my chocolate and these Salted Caramel Hot Chocolate Bombs hit the spot! We’ve also done White Hot Chocolate Bombs, Peppermint Hot Chocolate Bombs, and Coffee Chocolate Bombs.
Jump to:
What is a Hot Chocolate Bomb?
Hot chocolate bombs became all the rage when they appeared on social media on Tik Tok. You have a sphere (or other three dimensional shape) of chocolate shell and inside there are all the fixings for a delicious cup of hot chocolate. Typically, the inside contents include hot chocolate mix and mini marshmallows, but the sky is the limit on what you can put inside.
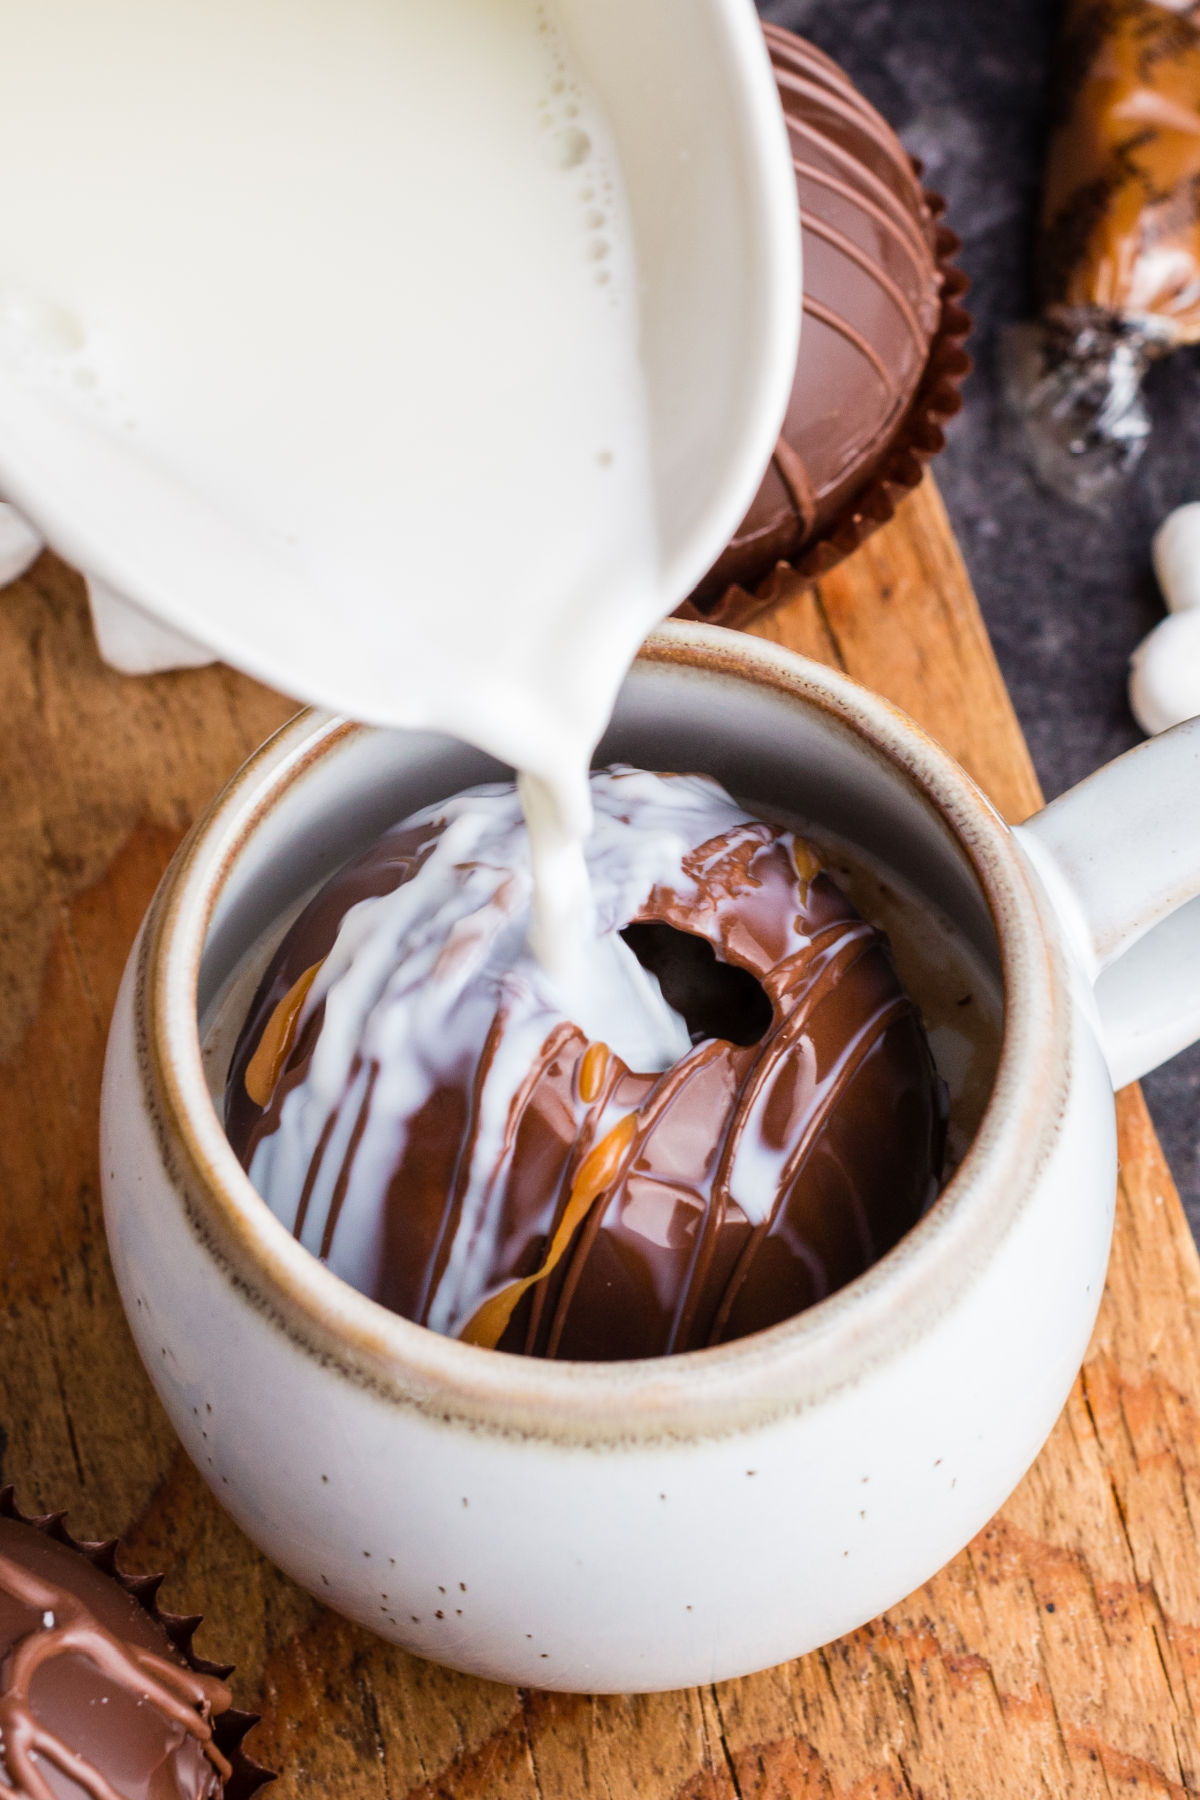
You’ll put this magical little sphere into a mug and pour hot milk over it. The milk will melt the chocolate bomb, releasing the surprise contents inside. Stir it up for a festive and delicious mug of chocolate heaven!
Special Tools:
You will need two tools to make high quality hot chocolate bombs!
Sphere Molds – I like these silicone molds (half spheres), but since we are tempering the chocolate, you could use a plastic, metal, or acrylic mold as well. The tempered chocolate will pop right out even if the mold isn’t flexible. The silicone mold is the easiest to use and most readily available – I get mine here, right through Amazon (affil).
Instant Read Food Thermometer – This has been one of the BEST purchases I have ever made for the kitchen. Check the temperature of your chocolate (or whatever you’re cooking) and it gives you an instantaneous and accurate read. Temperature regulation is important for tempering chocolate, so definitely grab your thermometer or order one if you don’t have one. You could use a candy thermometer, but the chocolate changes temperature so quickly, it may get too hot before the candy thermometer catches up.
🍫 Ingredients:
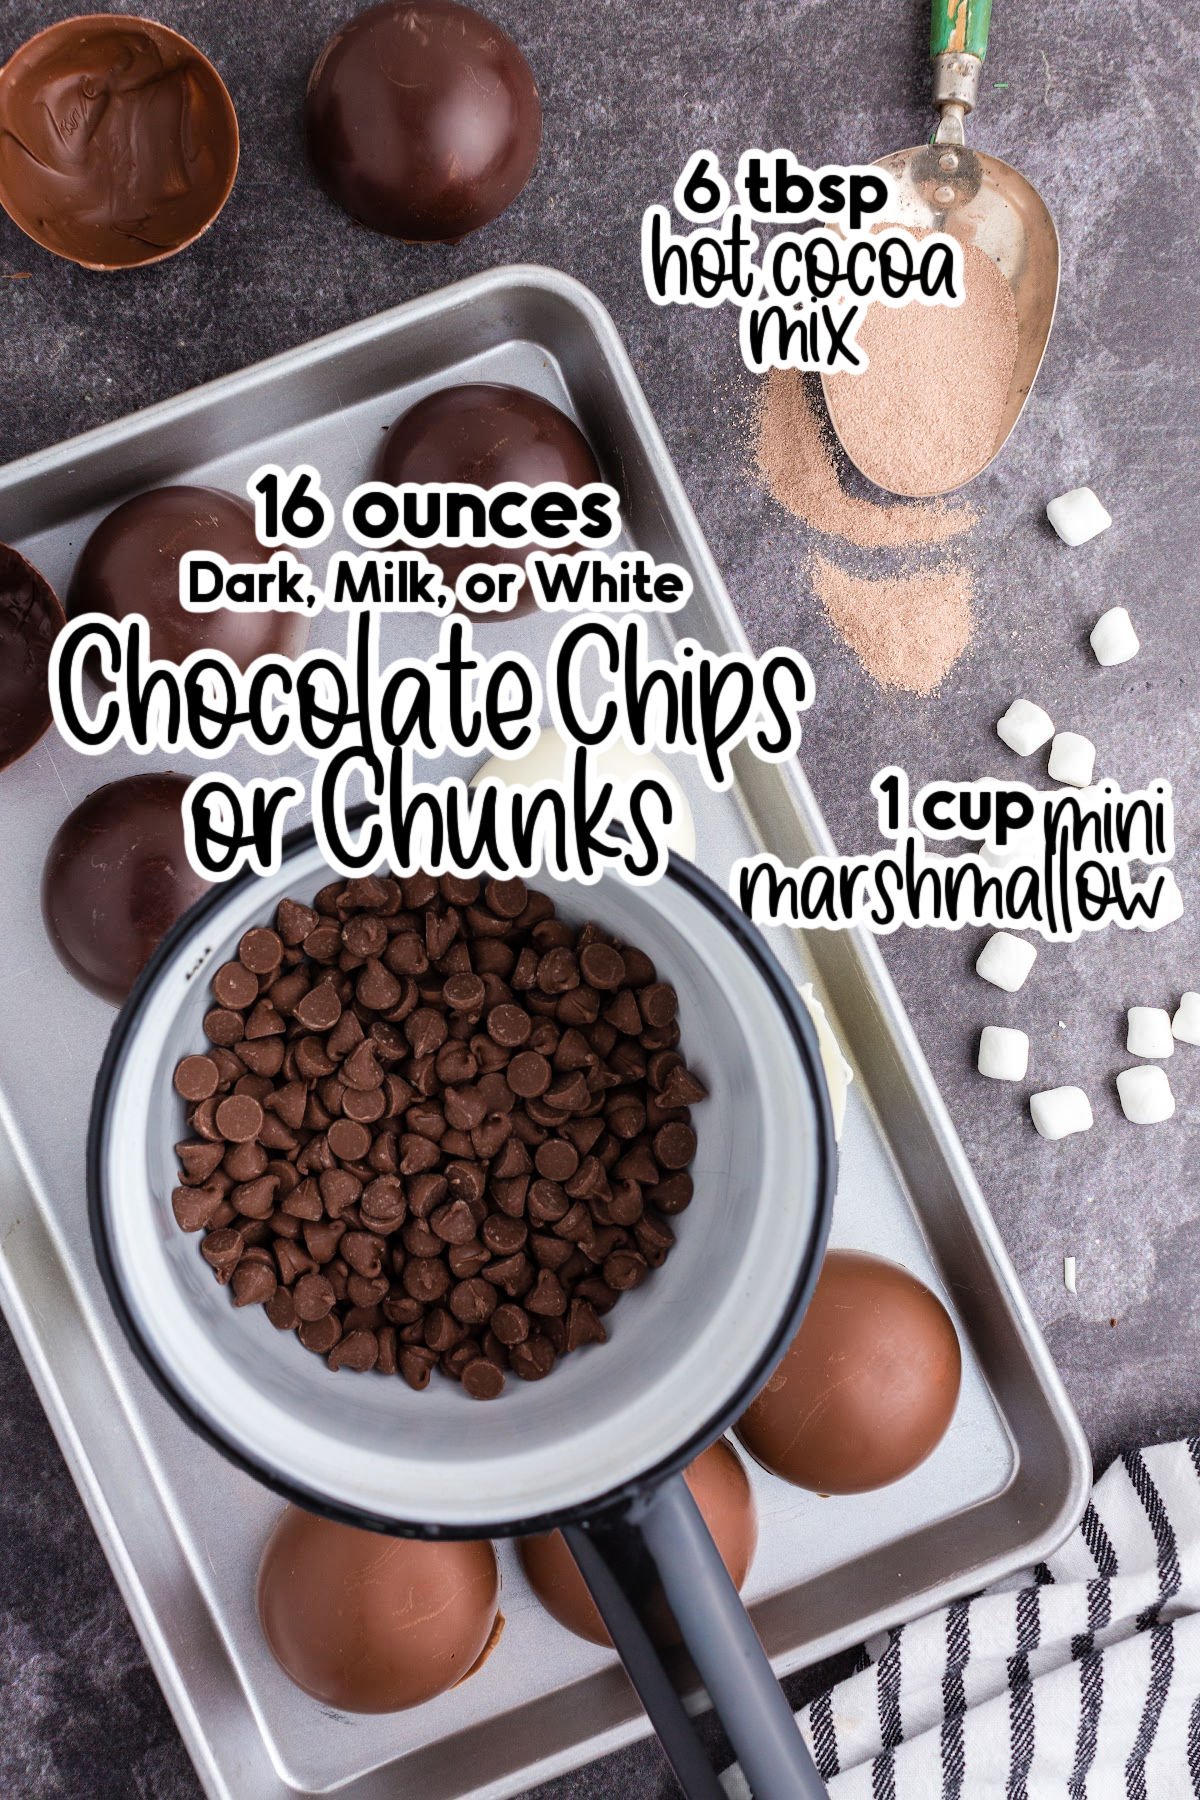
You do not need many ingredients to make amazing hot chocolate bombs – in fact, only three ingredients are needed – good quality chocolate, hot cocoa mix, and mini marshmallows!
- Good Quality Chocolate – You can use milk chocolate, dark chocolate, semi-sweet chocolate, or white chocolate. I have used chocolate chips, chocolate bars, and blocks of chocolate from high-end grocery stores. The chocolate that you use is going to effect the flavor of the finished hot chocolate, so use your favorite chocolate and you’ll love the result. For the BEST flavor, do not use inexpensive chocolate chips, chocolate melts, chocolate wafers, or “chocolate candy.” These types of chocolate have additives and oils and typically do not contain cocoa butter. They will work, but you cannot temper them – the result will be a more fragile, brittle hot chocolate bomb that will discolor quickly and taste kinda, well, gross.
- Hot Cocoa Mix – I love Ghiradelli hot chocolate mix or a dark chocolate good quality mix. It’s easiest to use hot chocolate mix that comes in a tub rather than the packets if you’re making more than just a few hot cocoa bombs, but the packets work too! Again, the mix you use is going to effect the flavor of the finished hot cocoa, so choose a mix you love. Even better, make a batch of homemade hot cocoa mix to use in your hot chocolate bombs.
- Marshmallows – Mini marshmallows are so fun to see popping out of the hot chocolate bomb as it melts into the steaming milk. Think about using different colors or fun shapes for holidays. The sky is the limit.
- Sprinkles – For customizing your bombs, go ahead and choose sprinkles that go with your theme. These can go inside the bomb and they can also be used to decorate the top. For festive hot chocolate cocoa bombs, you can sprinkle crushed candy canes on top!
How to Make Hot Chocolate Bombs:
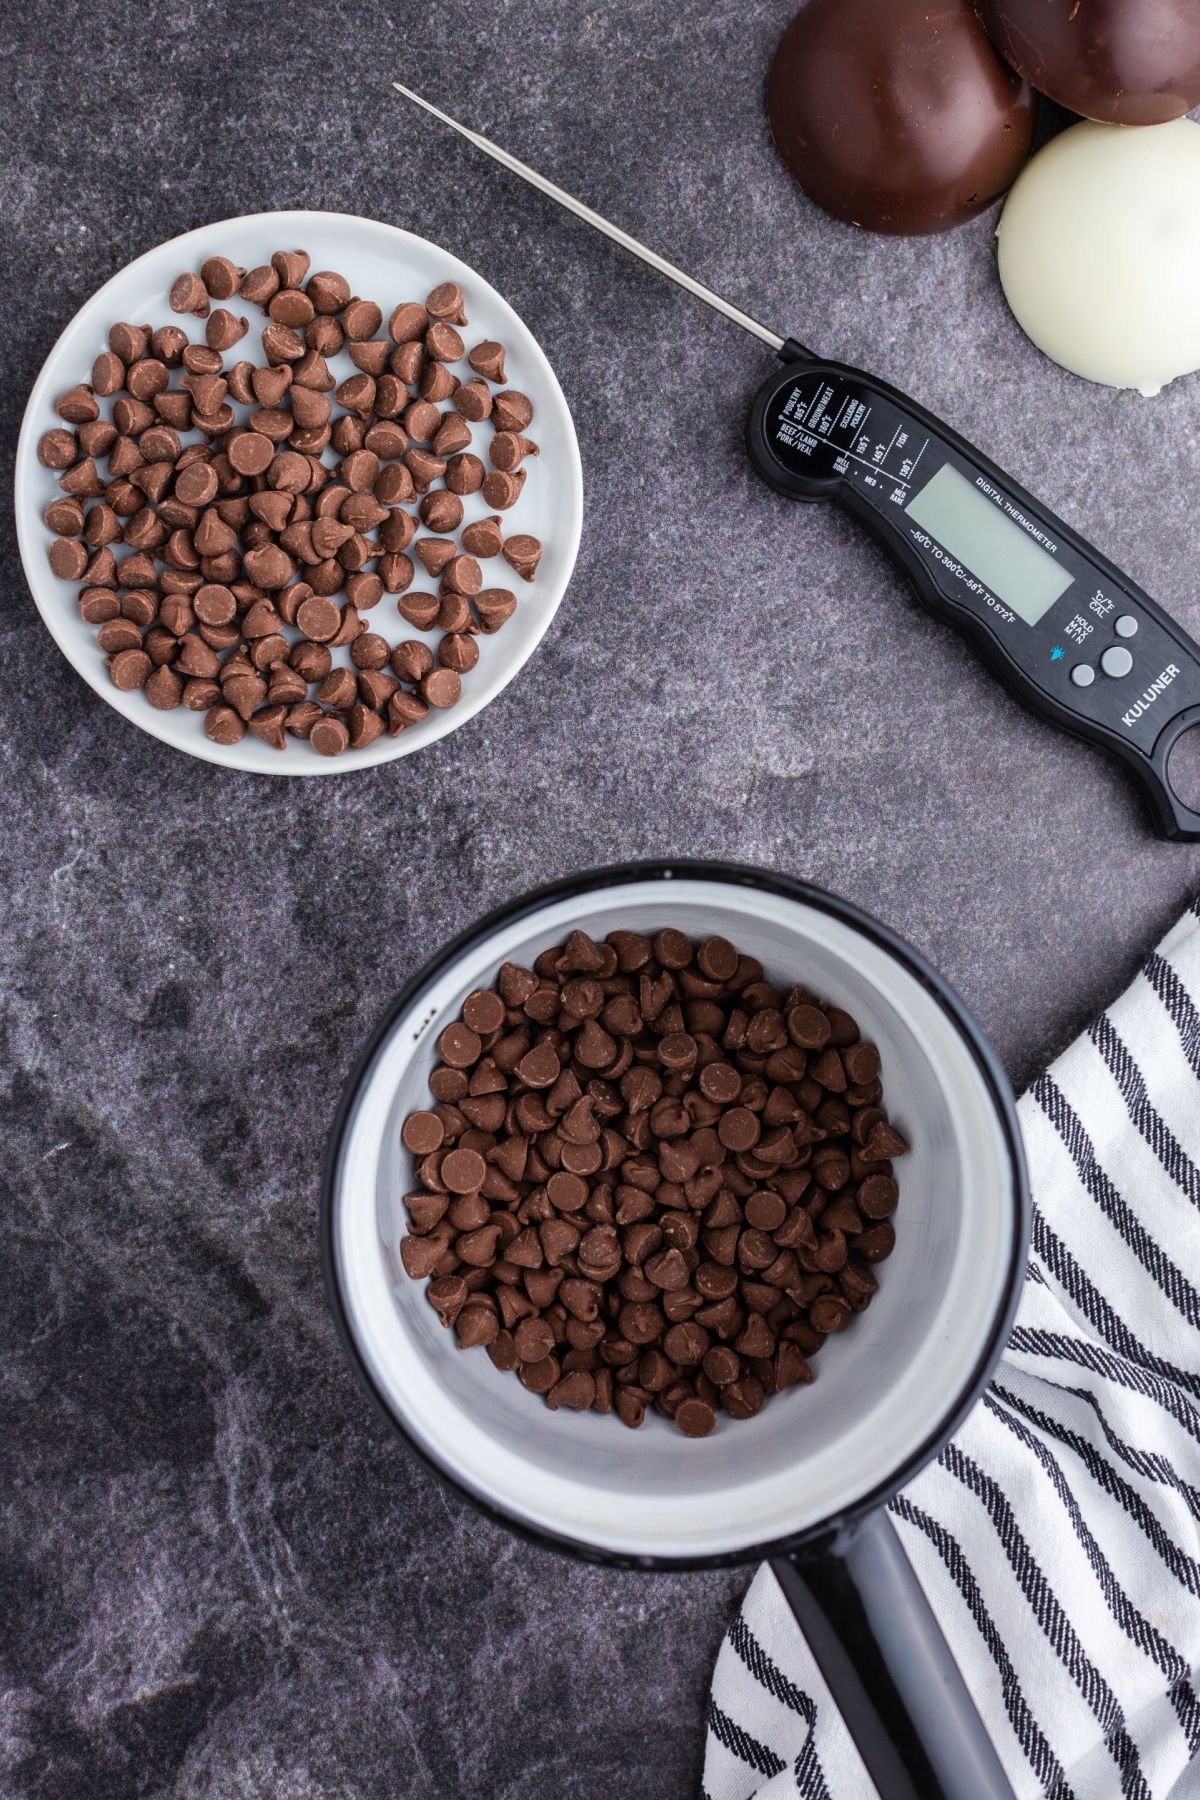
Step 1: Let’s do this! Start by chopping your chocolate into the smallest pieces possible. If you are using chocolate chips, you can chop even those smaller, but you don’t have to. The smaller the pieces of chocolate, the easier and more evenly they will melt. Place ⅔ of the chocolate into the top of a double boiler or strong glass/metal bowl. Reserve the other third of the chocolate to add in (this is the “seeding method” – the addition of the hard chocolate ‘teaches’ the melted chocolate how to get back into a tempered state).
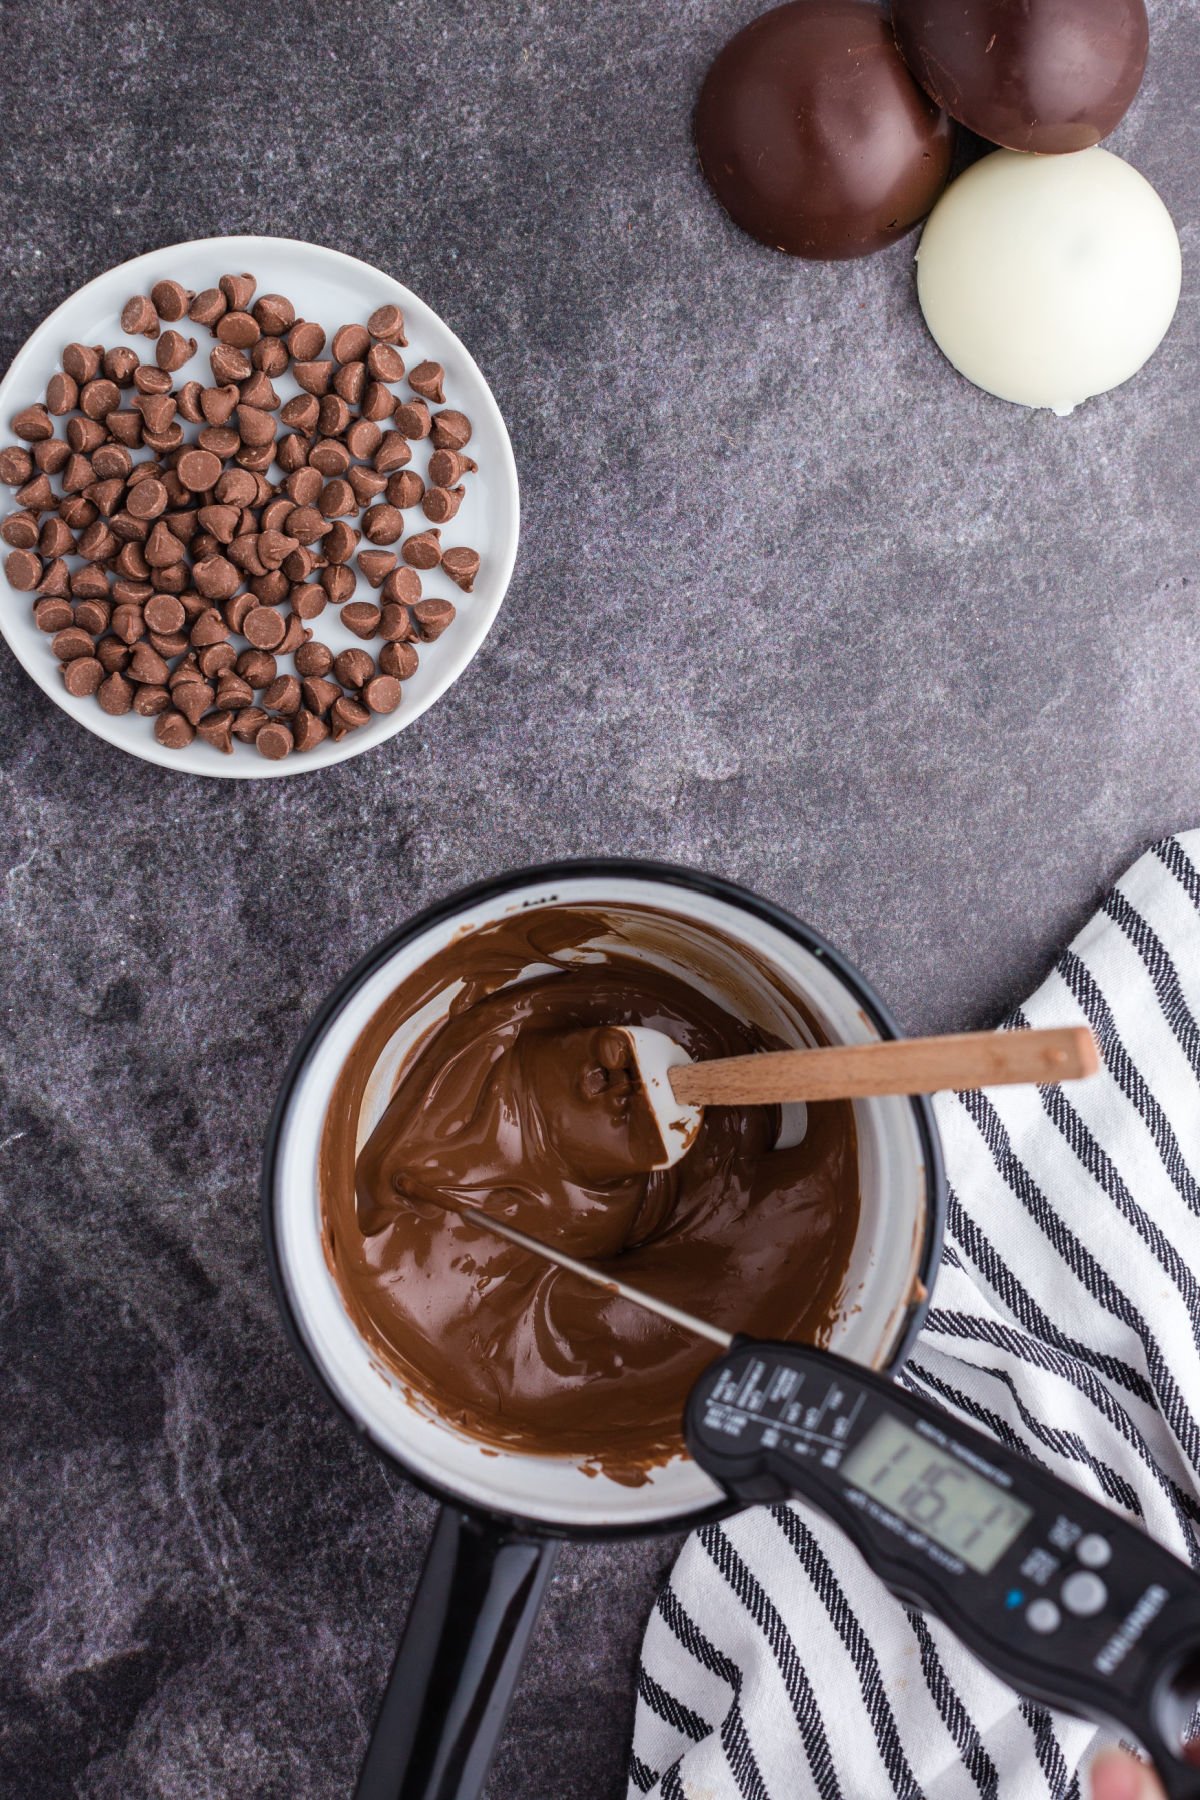
Step 2: Using a double boiler method: Place the top of the double boiler (or a bowl) over a pan of simmering water and stir until the chocolate begins to melt. As soon as it begins to melt, turn off the burner. Stir with the thermometer in the chocolate until the chocolate is mostly melted. Do not let the chocolate get to hot; we want a slow melt. (Dark chocolate should not exceed 120°F and milk or white chocolate should not exceed 105°F.) Once the chocolate begins melting, it heats really quickly, better to take it off the heat sooner rather than scorching the chocolate.
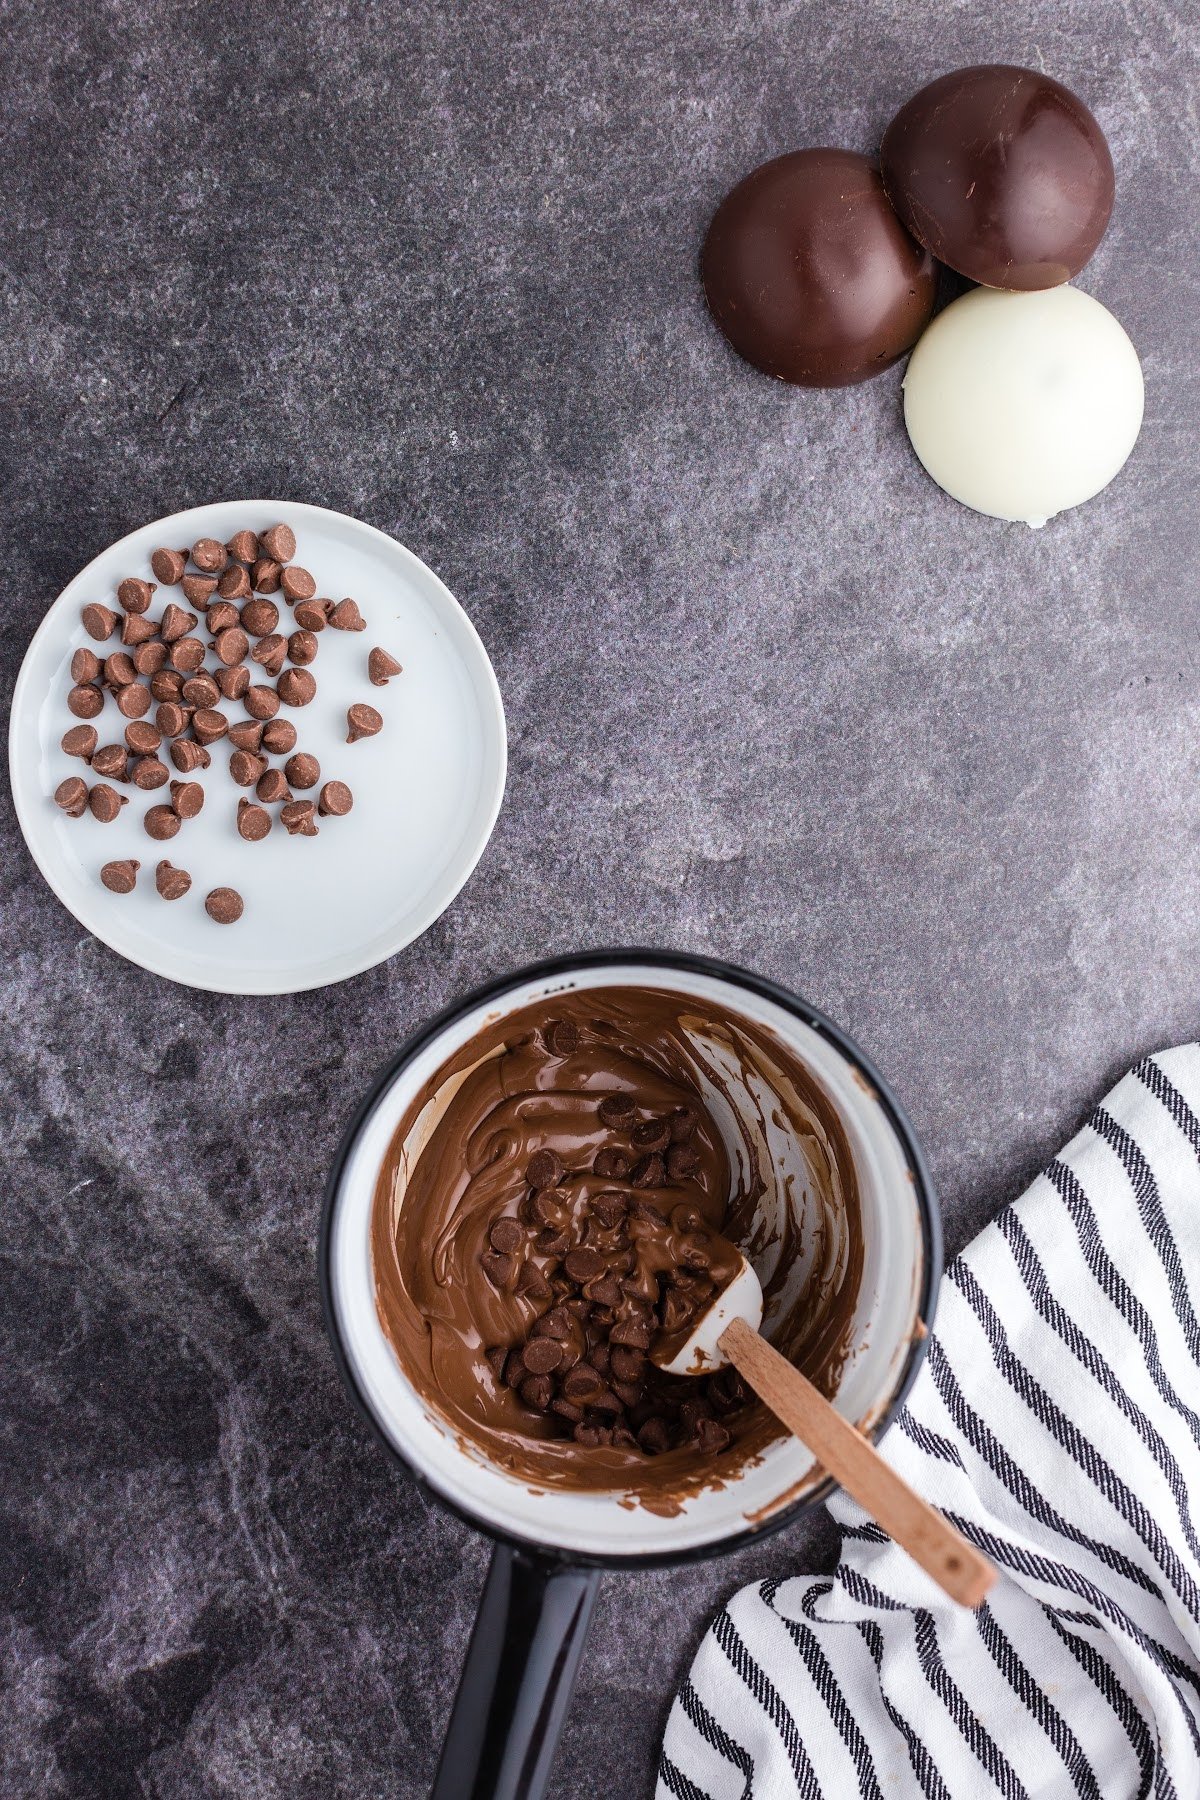
Step 3: Once the chocolate is removed from the heat, continue stirring it until all of the chocolate is melted and smooth. Add in the reserved chocolate pieces, a bit at a time and stir until they are melted also.
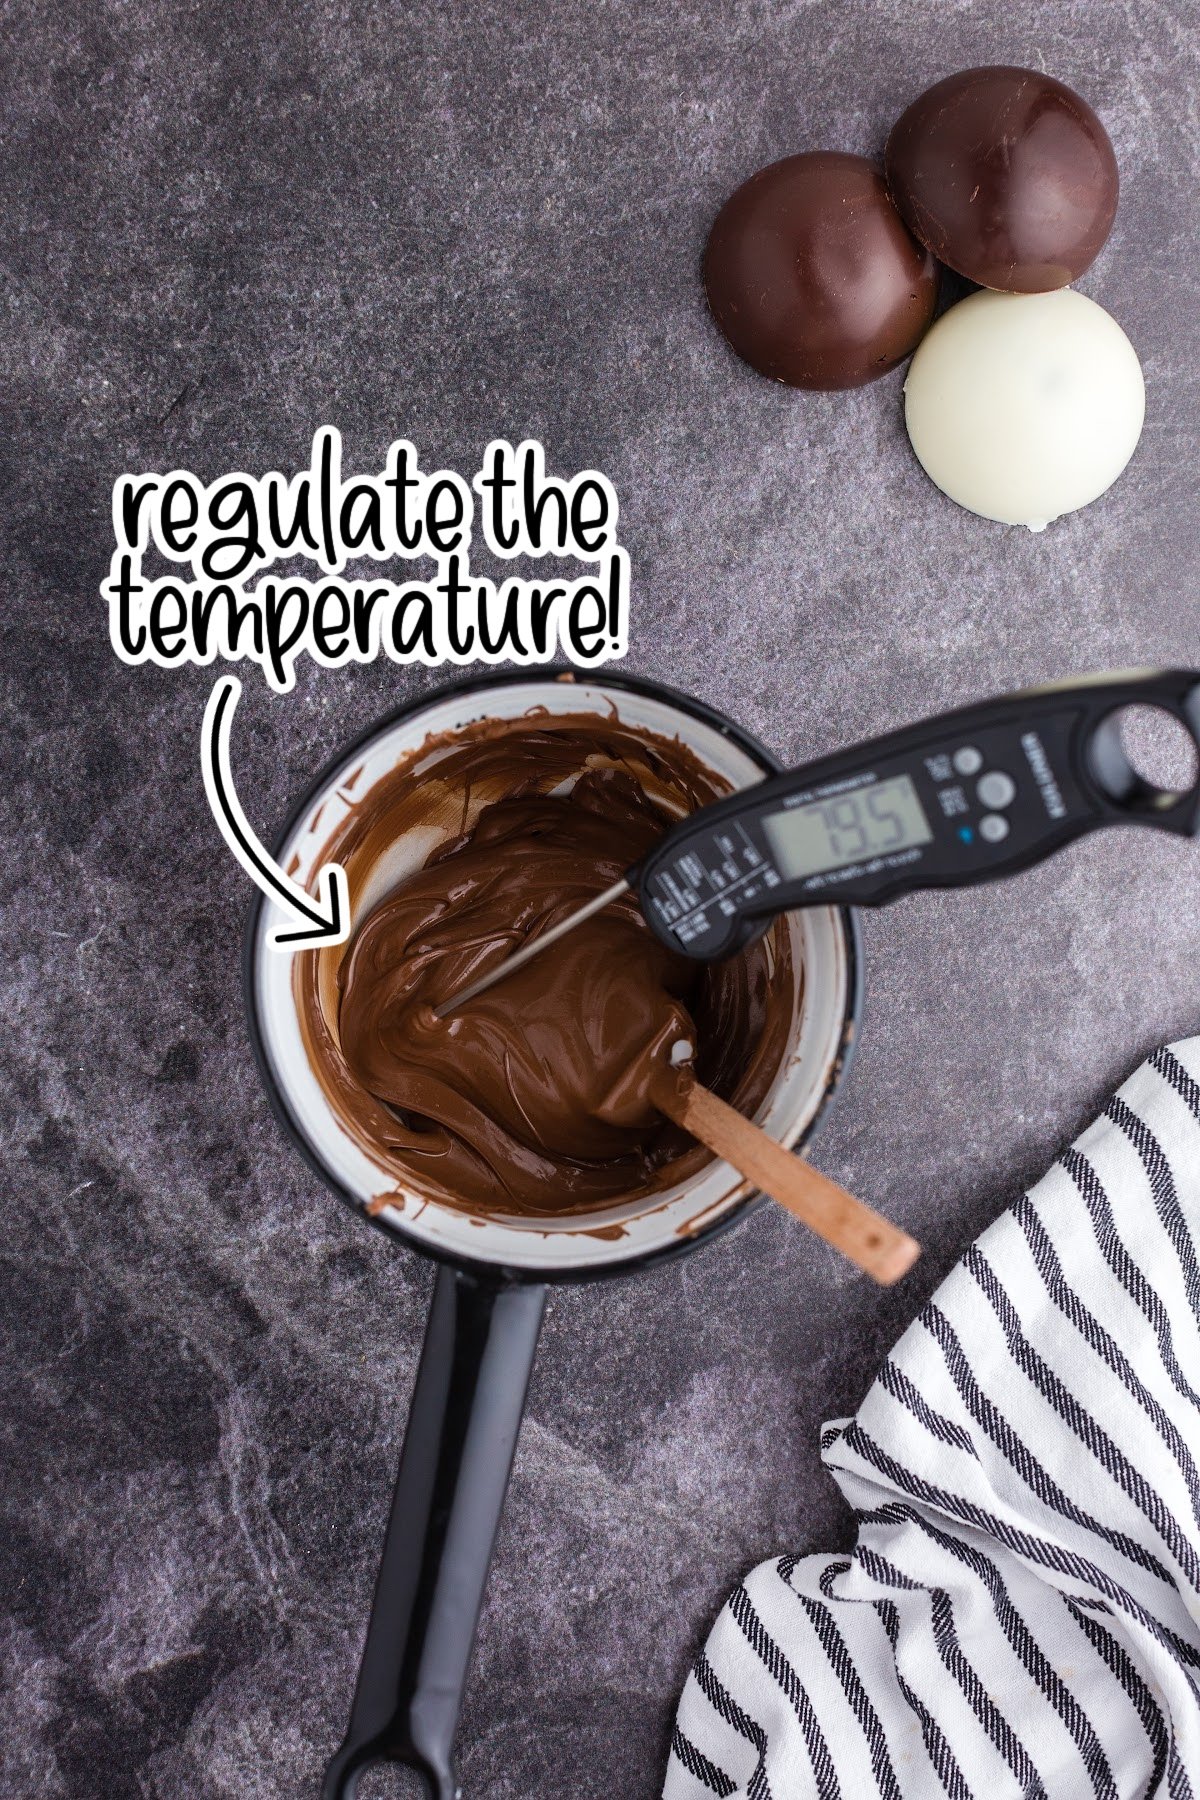
Step 4: Continue stirring the chocolate while it cools. You need to cool the chocolate down to 82°F. You can see on my thermometer that it cooled down to 79°F. That’s okay as long as the chocolate is still fluid. For milk and, especially, white chocolate, it’s going to be getting pretty thick by the time it cools down to 82°. Don’t allow it to harden.
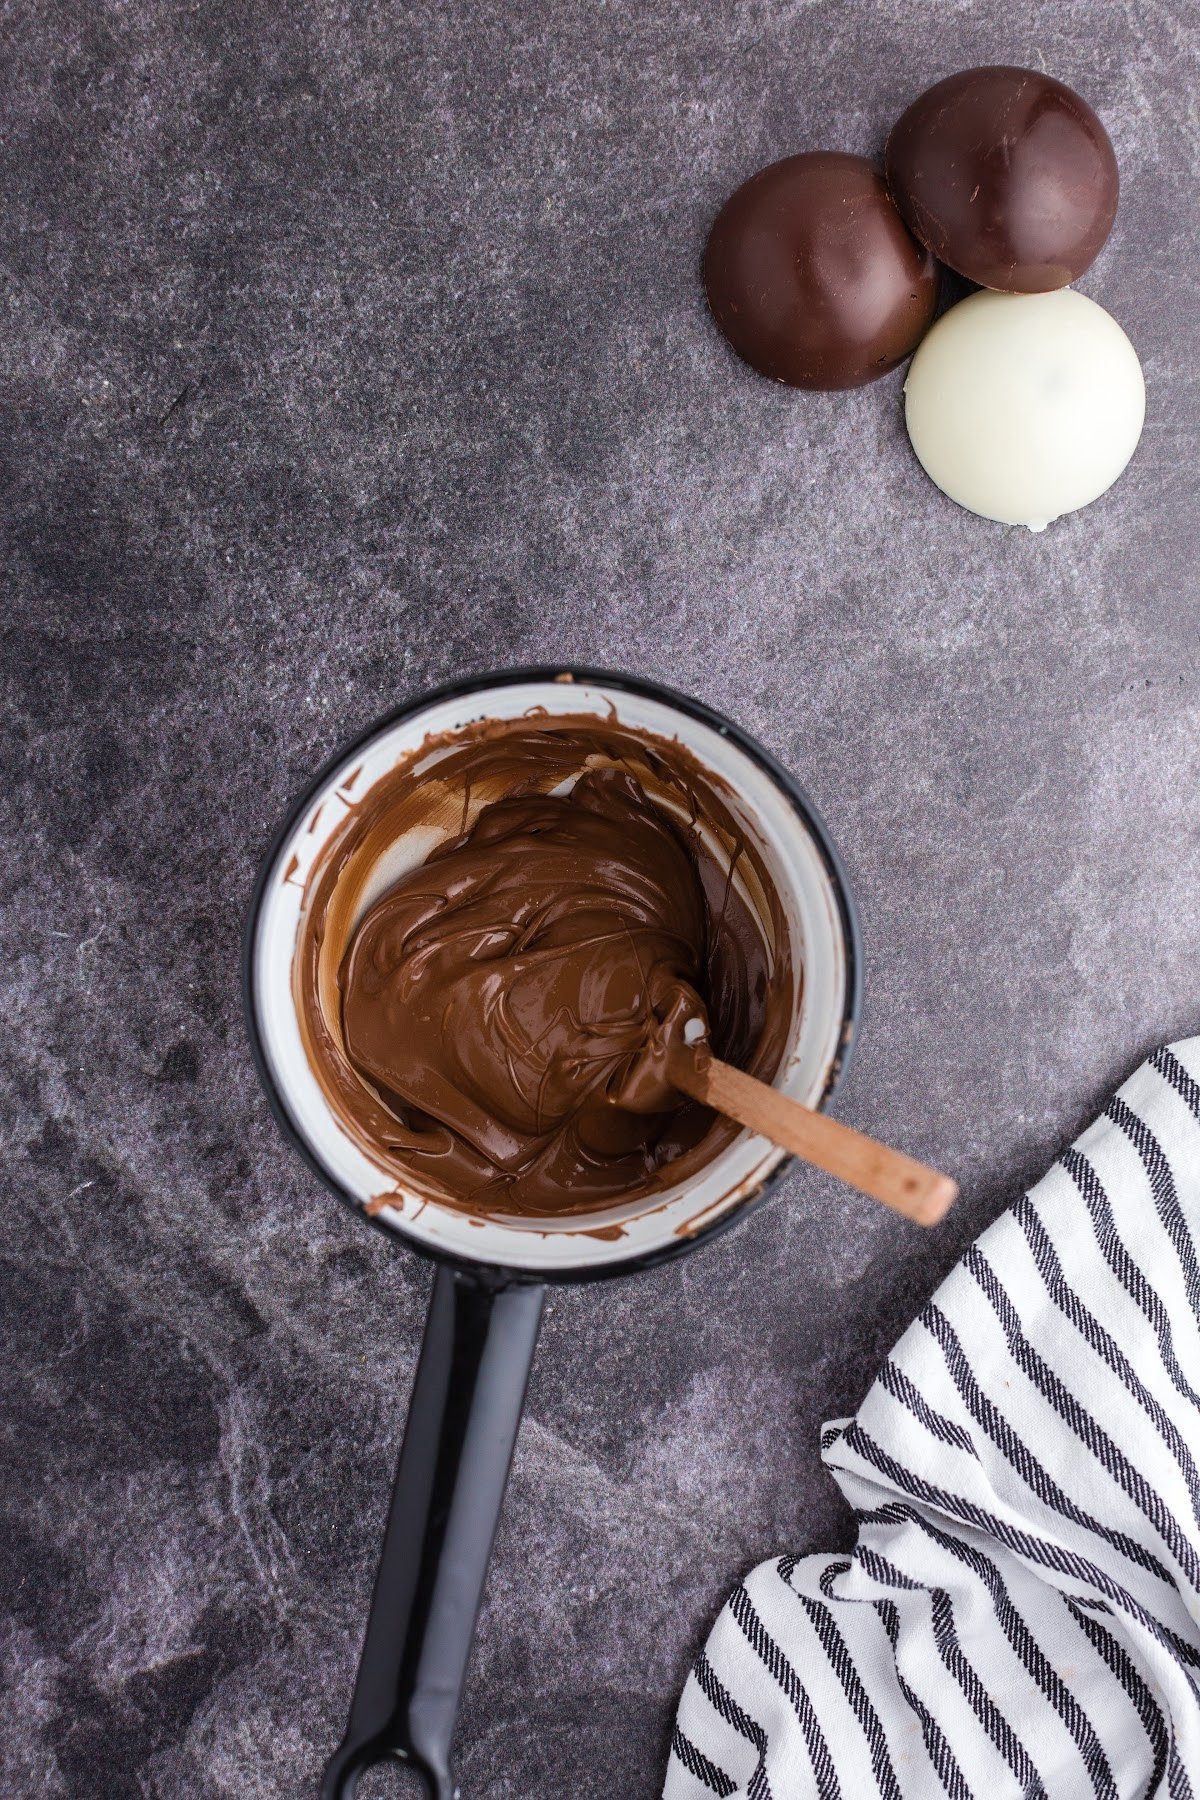
Step 5: Now, we reheat the full pan of melted chocolate so that it is spreading/dipping/molding consistency. We’re going for 88-90°F for dark chocolate or 85-88°F for milk/white chocolate. So – just a little heating. Put the pan/bowl back over simmering water just for a few seconds to reheat. If your chocolate heats more than the parameters specified above – you’re going to have to start over. The chocolate will no longer be “in temper.”
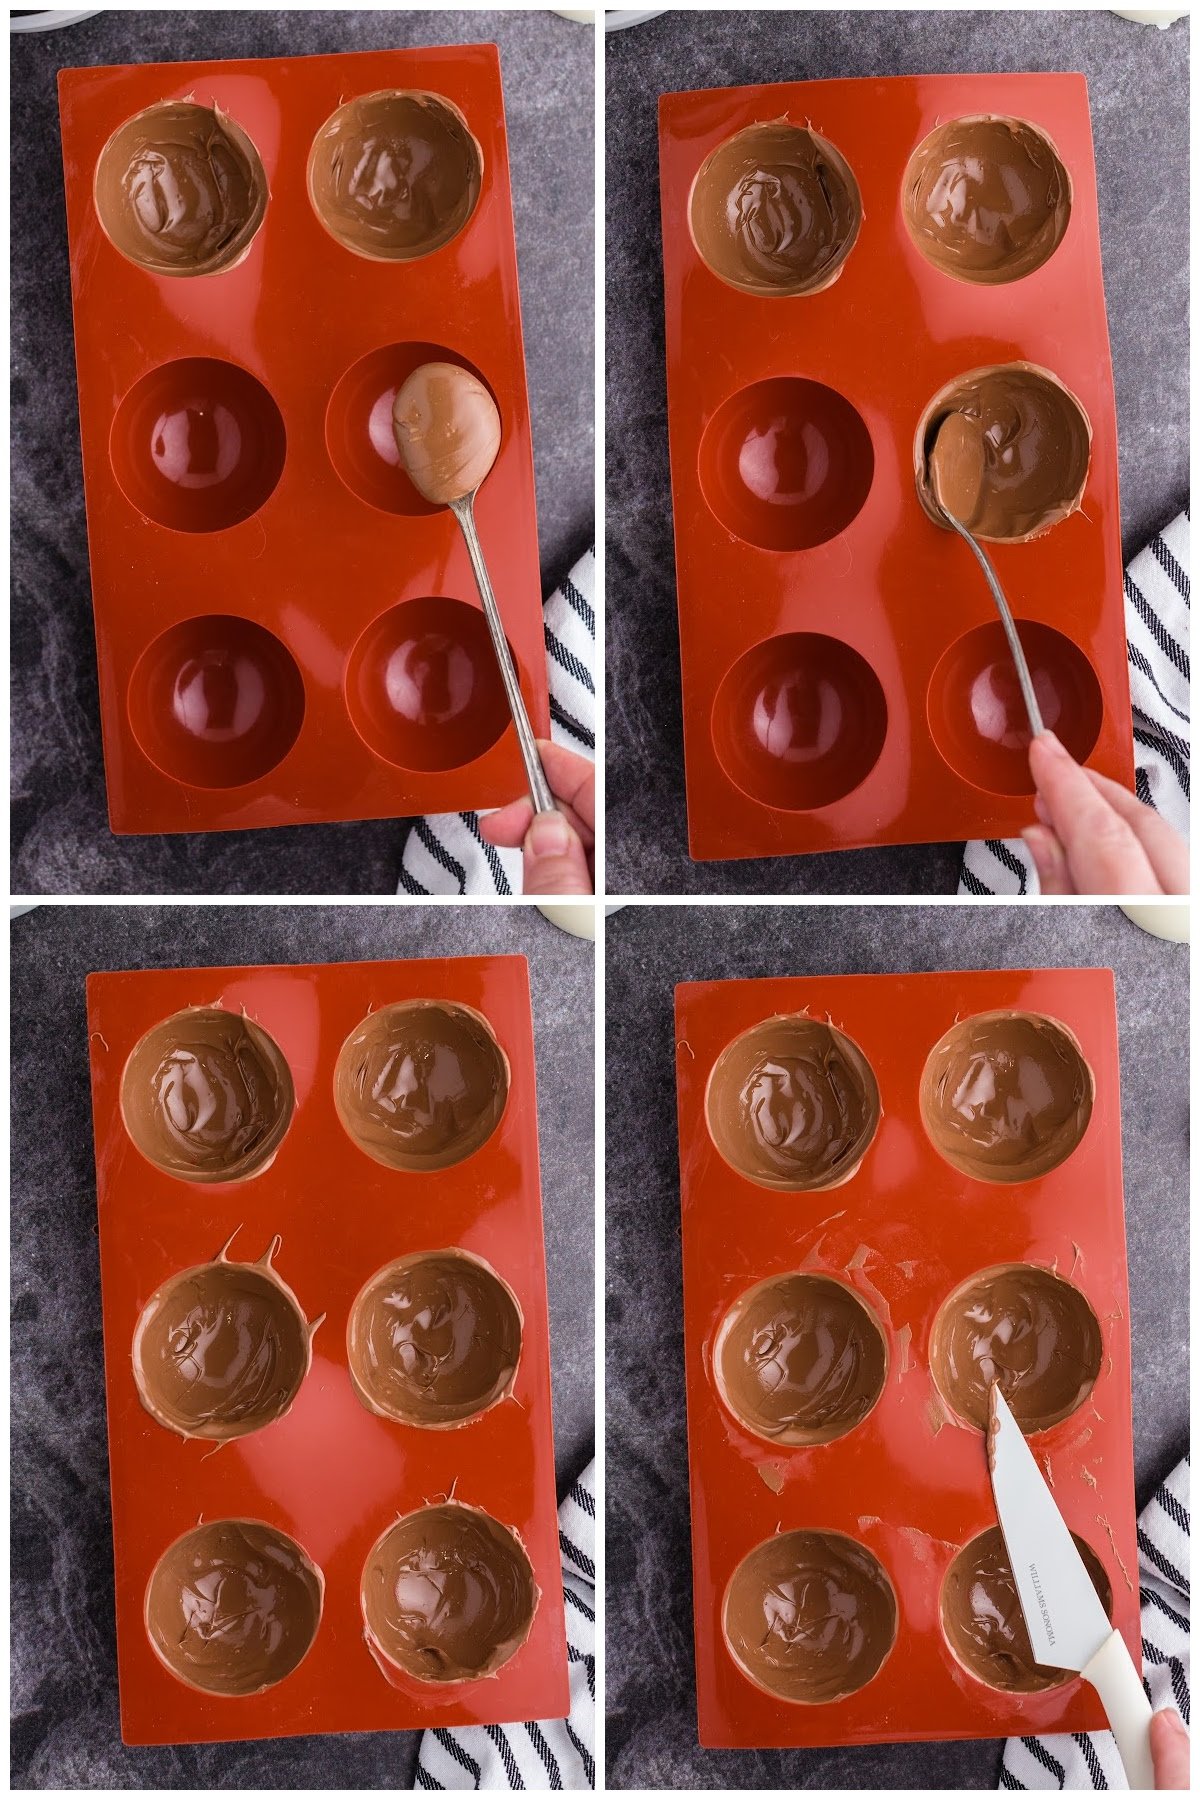
Step 6: Now, it’s time to mold that beautiful chocolate! Be sure that you’re working with a clean, DRY mold. Use a spoon (soup spoons work great!) to dollop and spread some melted chocolate into each cavity of the sphere mold. It doesn’t need to be super thick, but do be sure you coat the whole area and add a bit of extra right up around the edges where you’ll be “gluing” the two sphere halves together. Once you’ve coated all the molds, use a knife to scrape drips off the top of the molds.
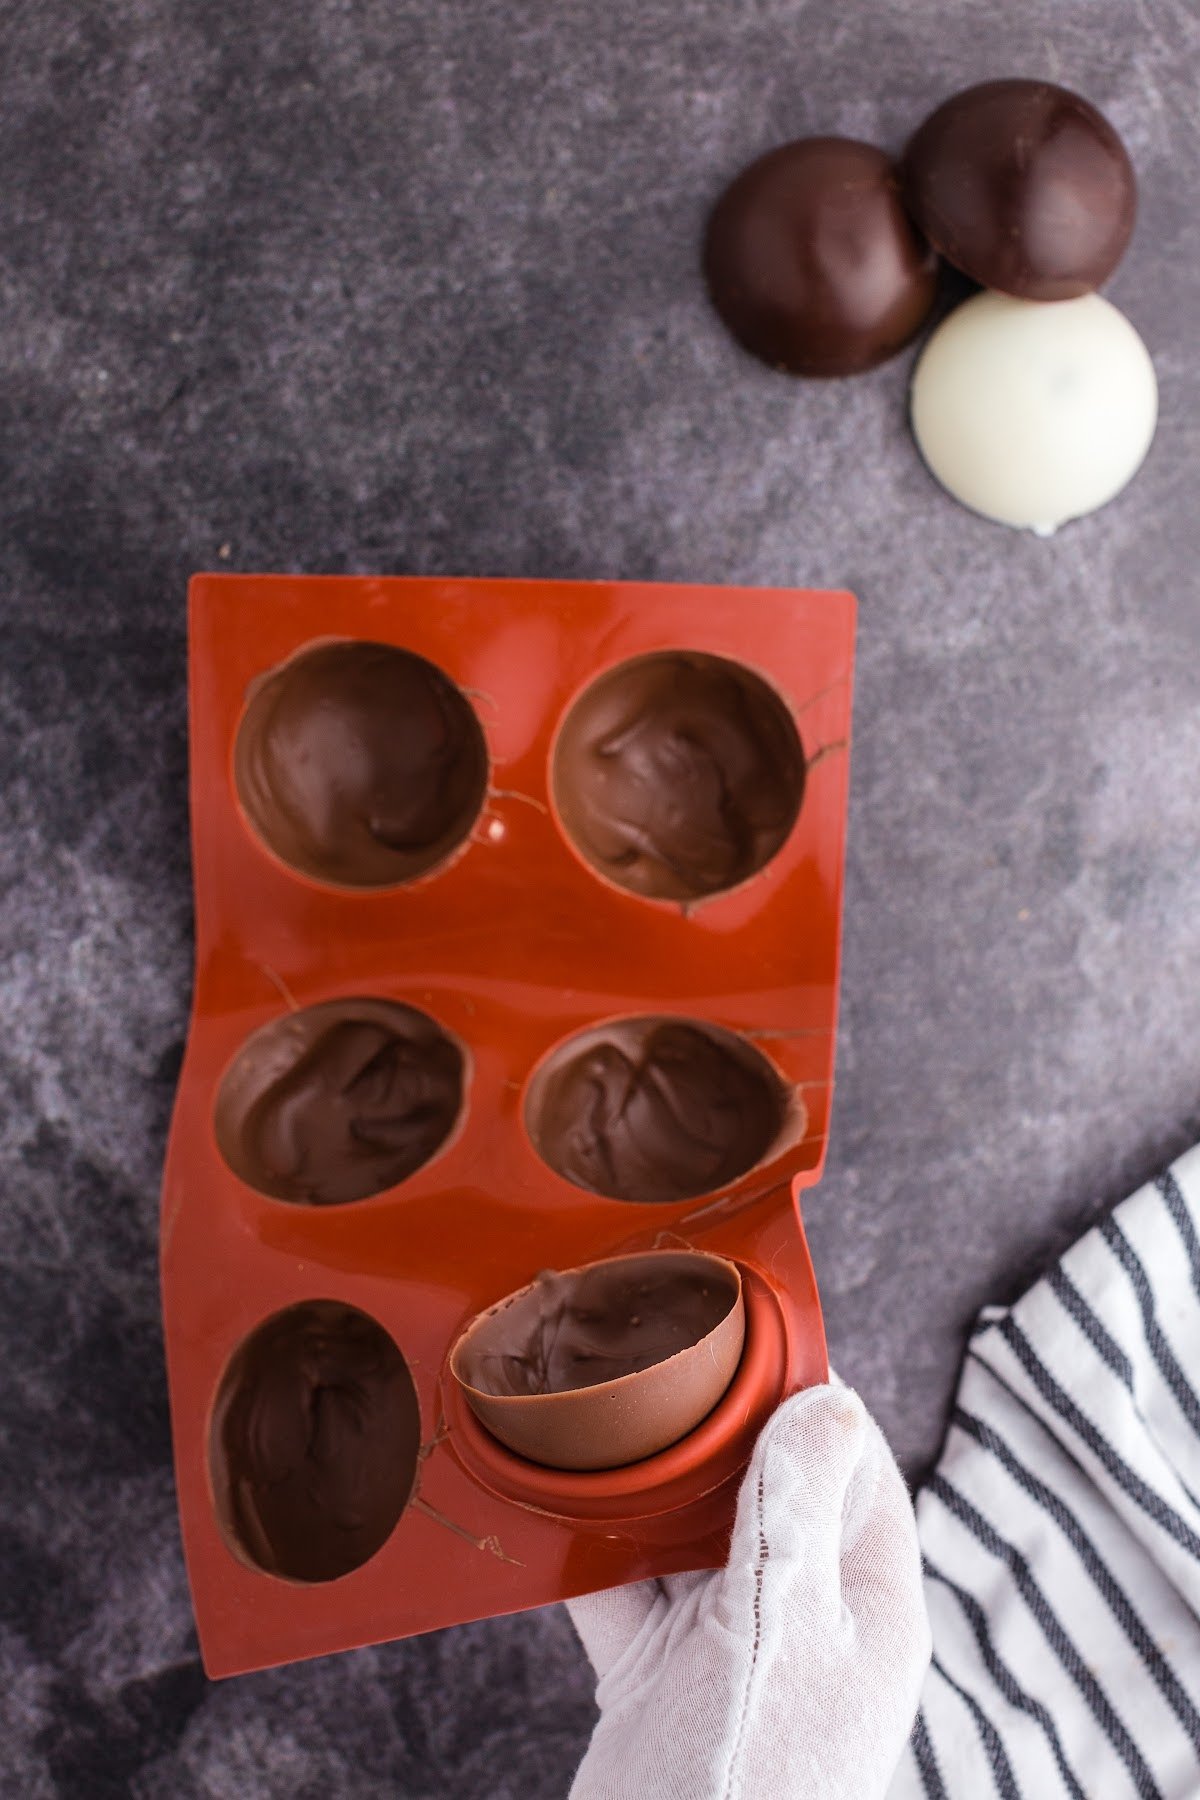
Step 7: Now, pop the mold into the refrigerator to chill. You can also leave it on the counter to set. The hollow chocolate spheres will harden up in just a couple minutes with the extra help from the fridge! When the chocolate is hard, gently pop each half sphere from the mold. They should pop out easily and be hard and glossy.
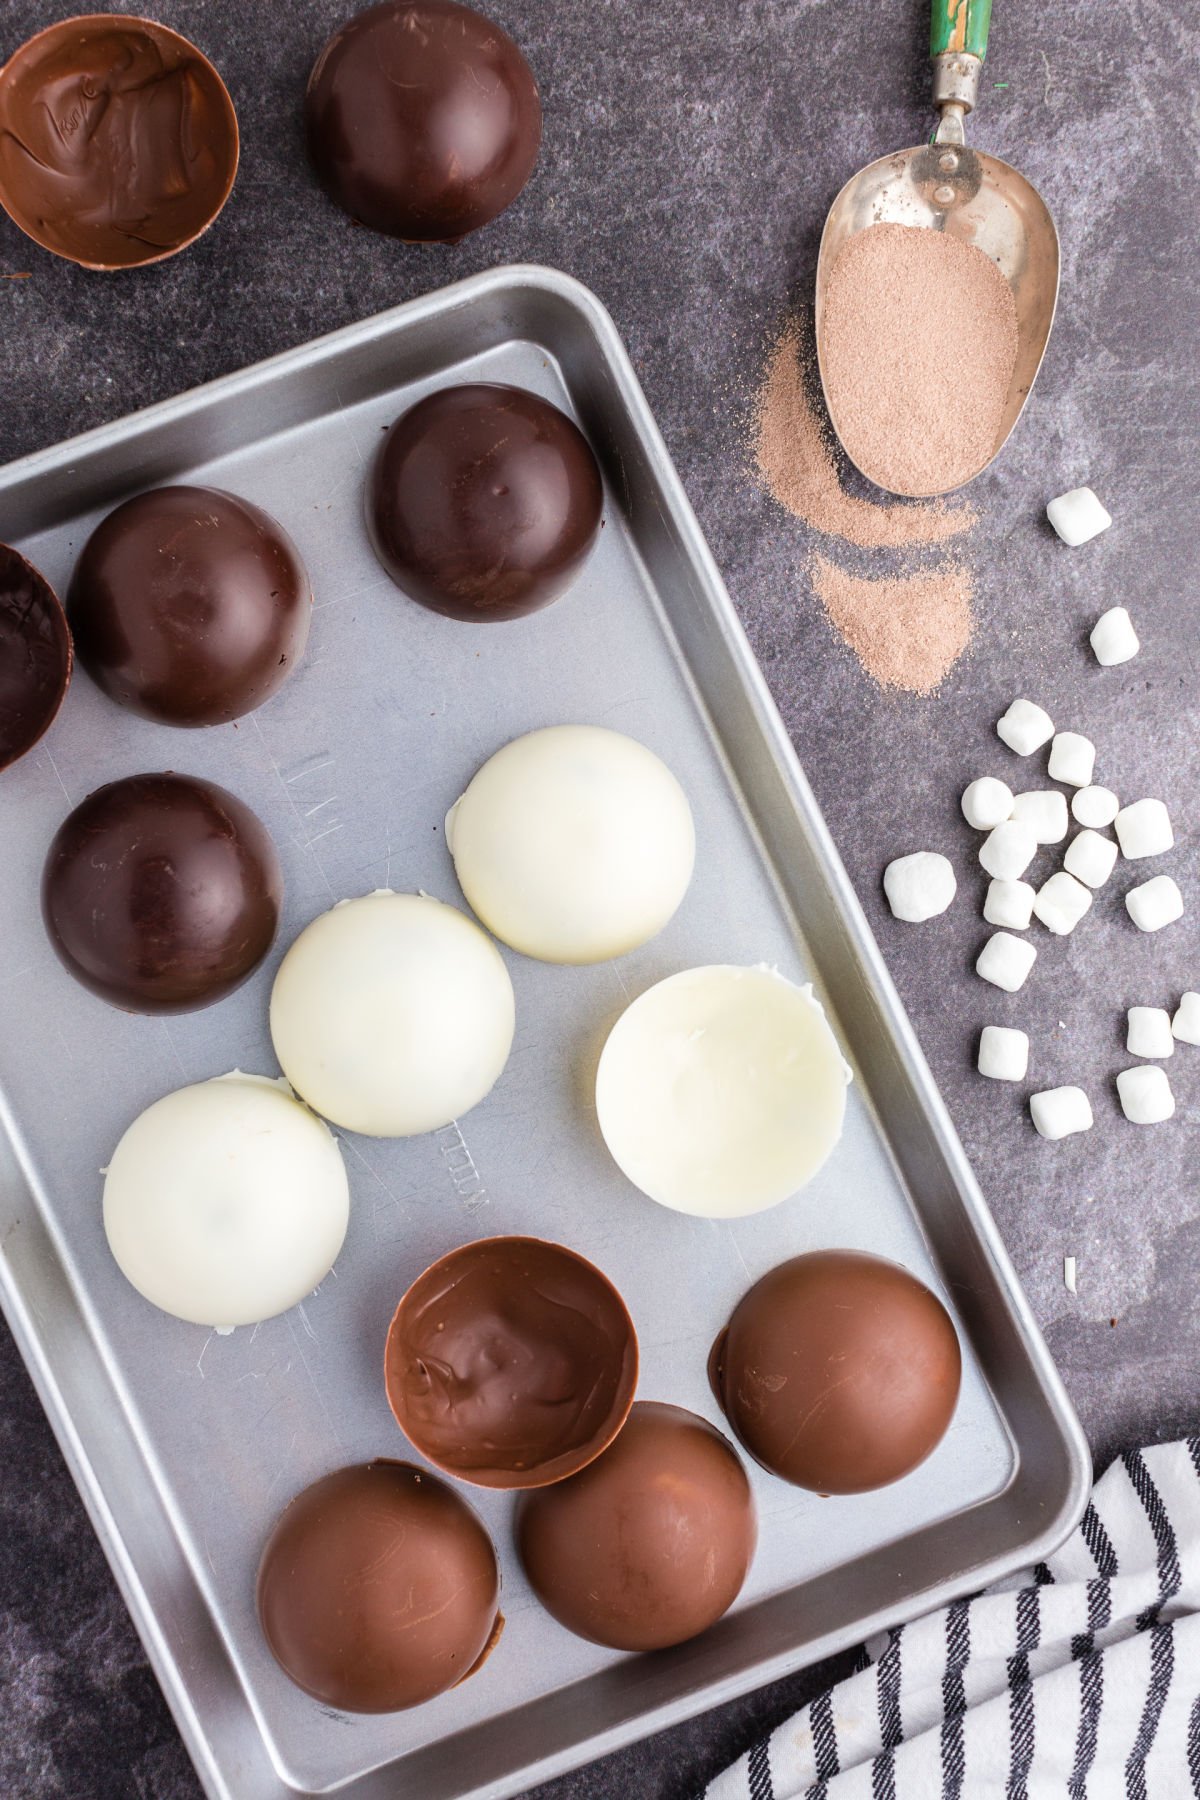
Step 8: Prepare all of your shells before assembling the hot chocolate bombs. Gather the filling ingredients like hot cocoa mix, mini marshmallows, candy pieces, sprinkles, etc.
Use gloved hands to prevent smudging on the chocolate if you’re striving for perfection! Have your hot cocoa powder ready to scoop into the shells. You won’t have time to open up the packets when you’re working. Get the marshmallows out of the bag and easy to grab.
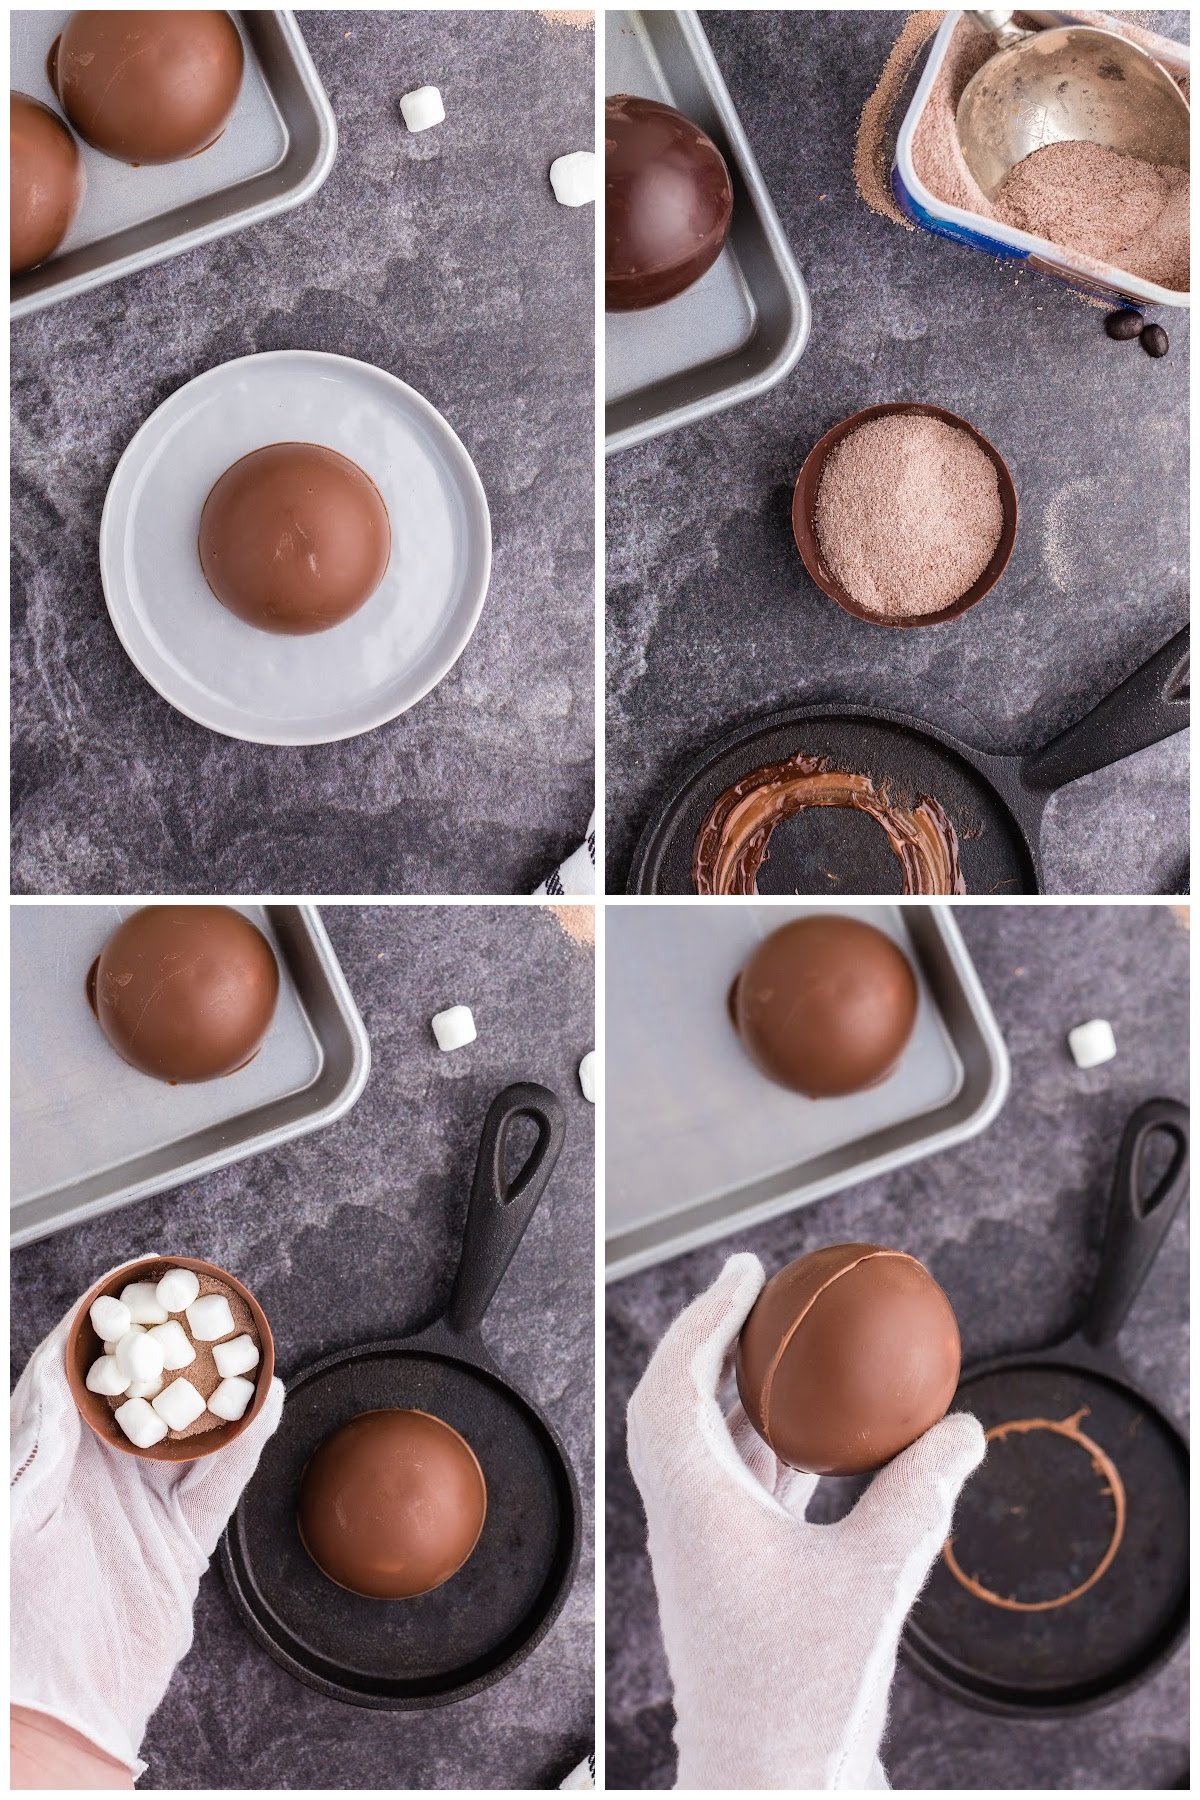
Step 9: For the best results, you’ll need to work quickly and carefully to fill and seal the hot cocoa bombs. Heat a plate or pan enough that it will melt the edge of the sphere when it comes into contact. I found using a cast iron pan works especially well because it retains the heat. I have also simply used a dinner plate heated in the microwave.
Working quickly, touch the first open edge of a shell onto the heated plate/pan. Heat it just enough that it melts around the edge just a bit. Quickly spoon a tablespoon or two of hot chocolate powder into the shell. Do not let the powder get stuck on the melty edges. Sprinkle some marshmallows in there and any other surprises you’d like inside. Touch the other half to the hot plate to melt its edge and then quickly press the sides together.
Step 10: Place the sealed hot chocolate bomb into a cupcake liner or a safe place to harden.
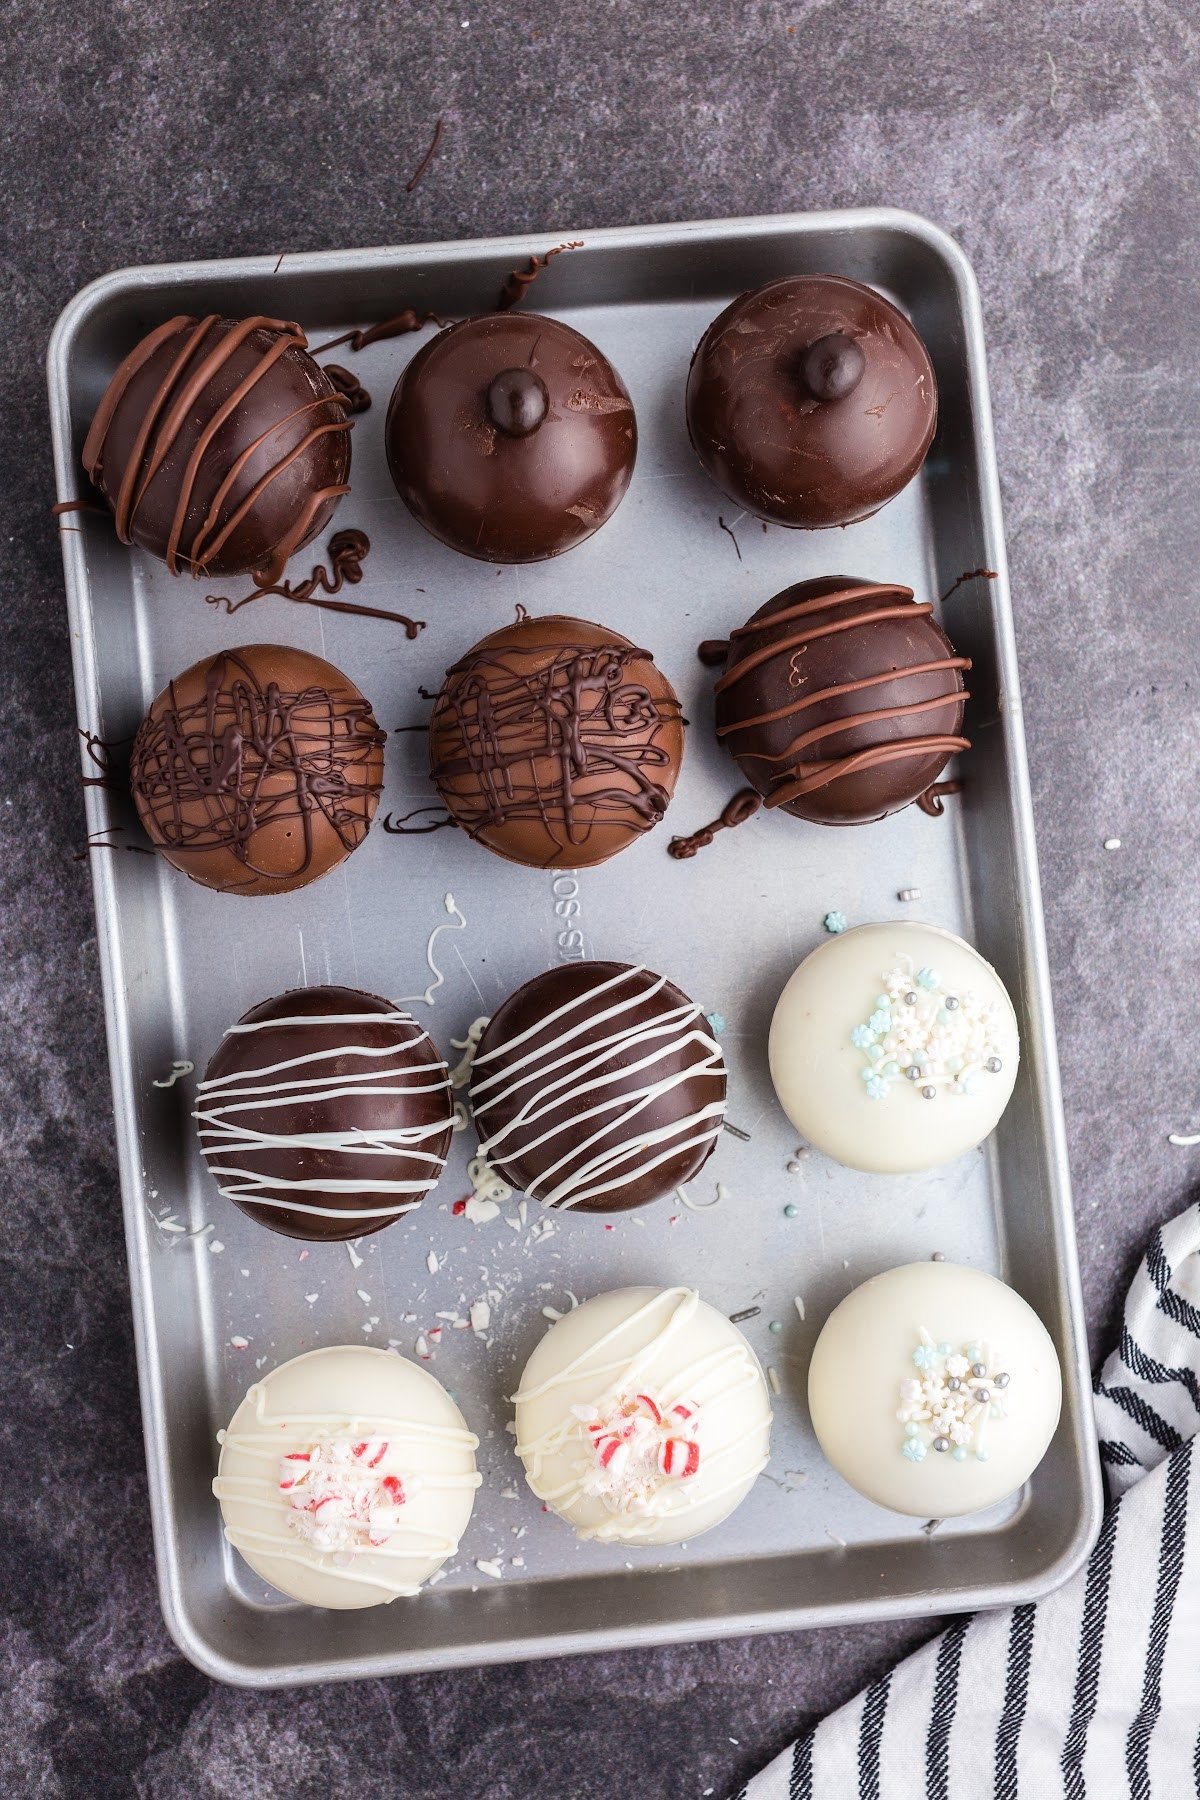
Your final step is to decorate the top if you’d like! Drizzle a bit of matching or contrasting chocolate on top! Add sprinkles or a hint of something resembling the flavor inside. Add luster dust with a pastry brush! The options are limitless.
Now – step back and admire your BEAUTIFUL work! Heat up a pitcher of steaming warm milk and give one of those bombs a whirl! This will be the most delicious cup of hot cocoa you’ve had in a long time!!
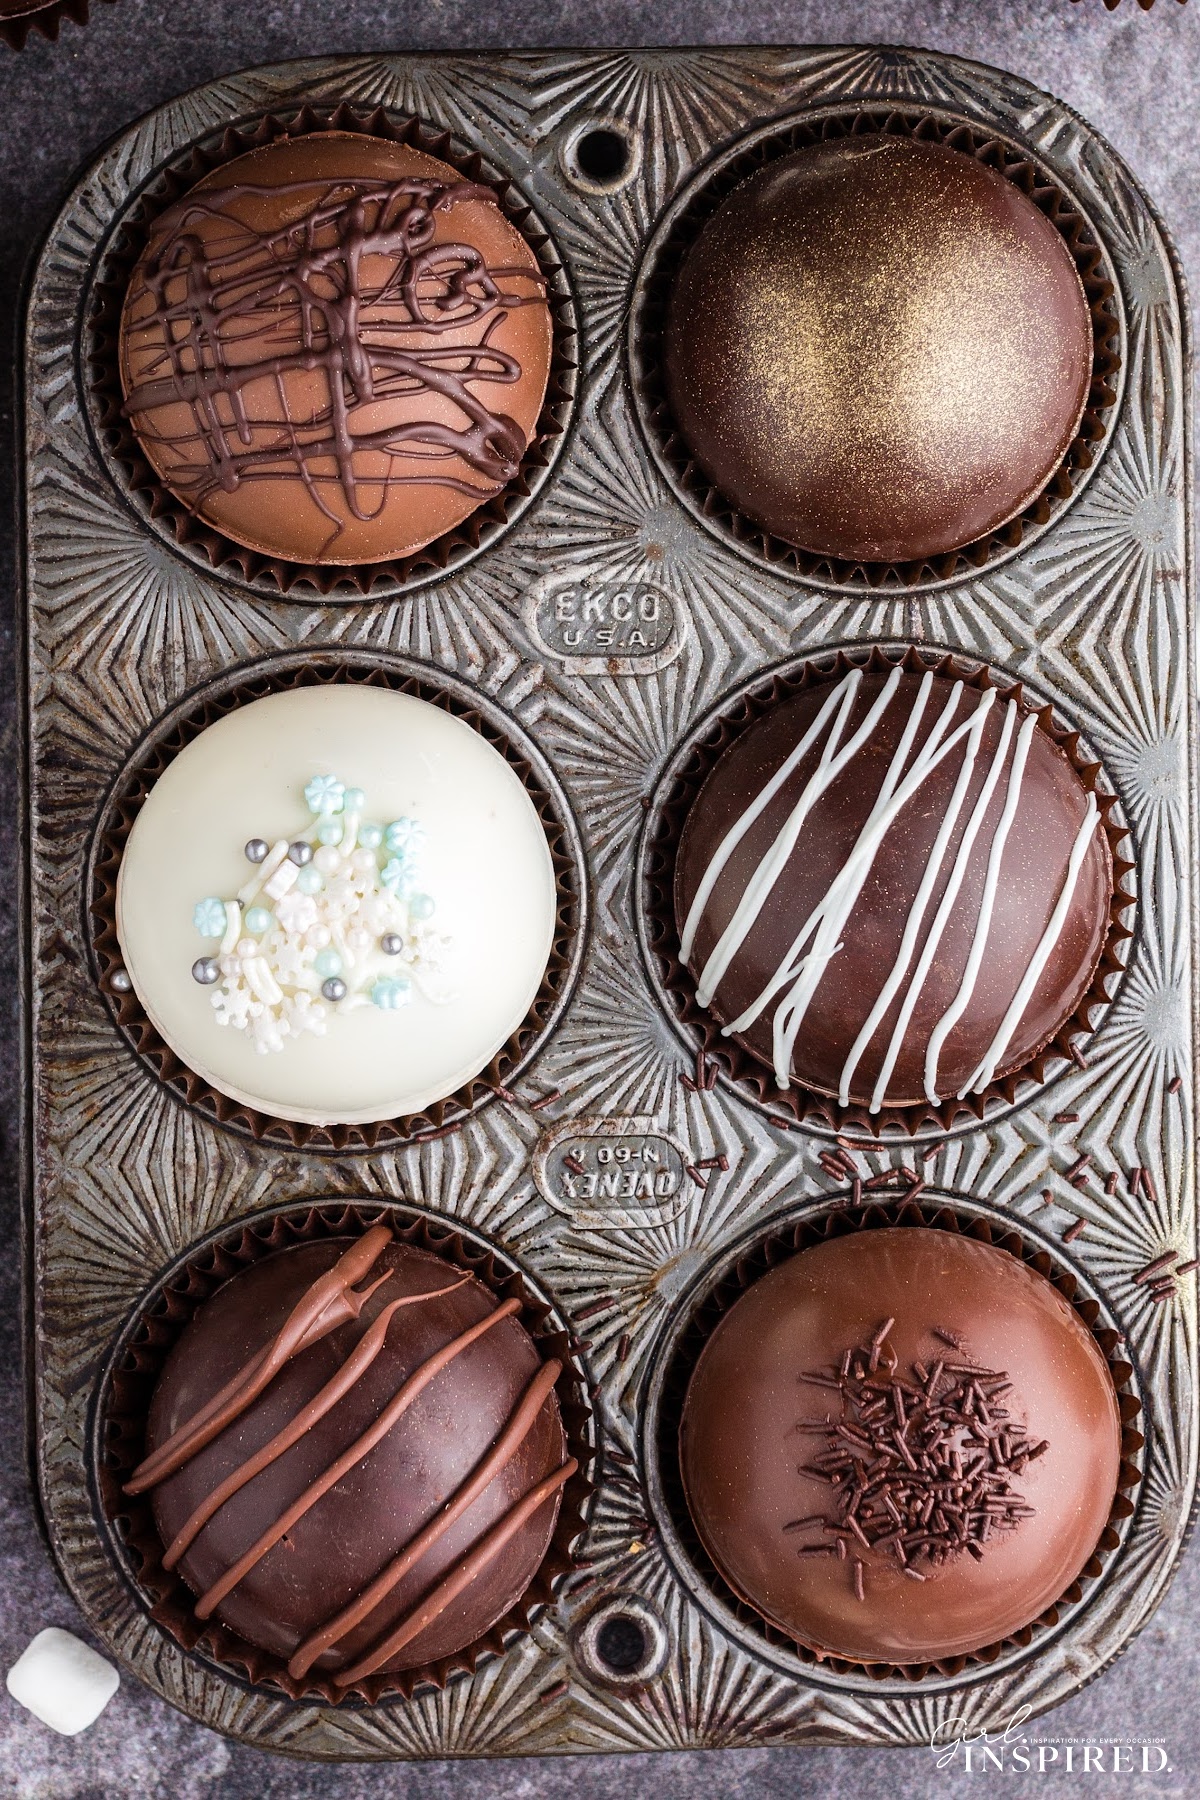
Tips for Making the Best Hot Cocoa Bombs:
When the spheres touch the plate and begin to melt, the circumference of the edges can melt and decrease also. Be sure you are just barely melting the edge. Do this equally with both sides so that the edges align when sealing,
Just remember – if you are drizzling with chocolate and you’d like for it to stay as beautiful as the spheres, you must use tempered chocolate for the drizzle as well. I like to put the melted chocolate into a Ziploc bag. Snip a tiny hole in the corner for quick, neat drizzling.
Recipe FAQs:
Tempering chocolate is a process of melting and cooling chocolate within a temperature range so that it is moldable and hardens into a durable, glossy shiny finish, hard state.
Chocolate that is not tempered will be brittle, soft, matte in appearance, and will crumble and discolor easily. Here is a picture below of a shell removed from the mold that was not tempered correctly. See how it melts just at the slightest touch and doesn’t properly hold its shape?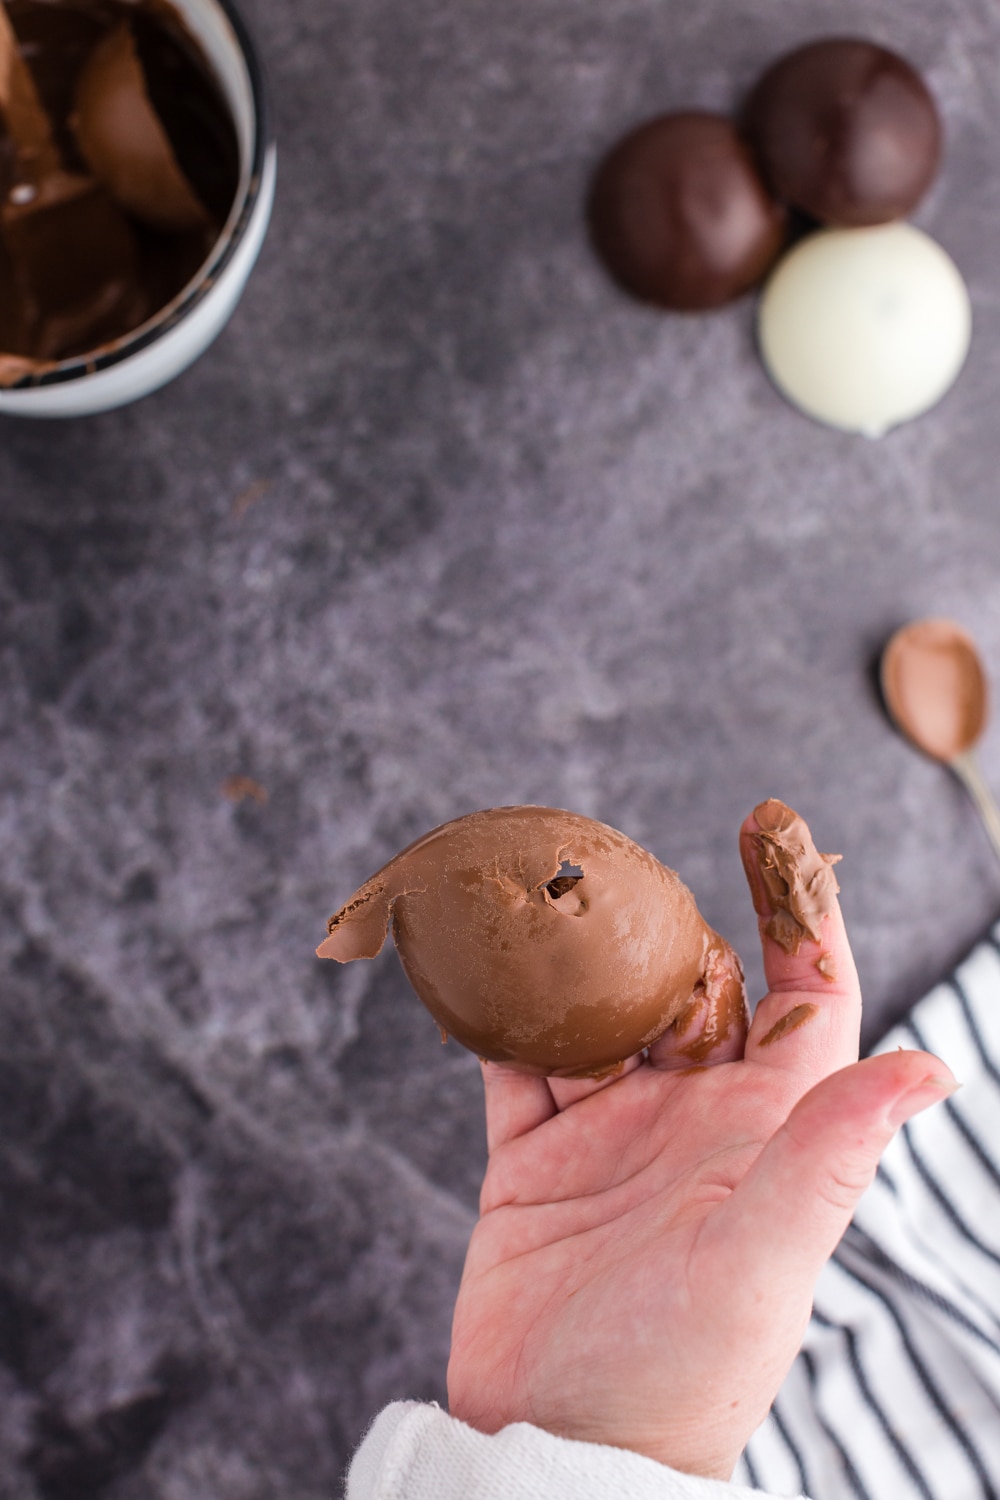
Yes! If you overheat your chocolate, do not seed it properly, or do not keep it within the proper temperature range for temper, it can be quite a disappointment. The good news is that you can save it. Place all of the remaining chocolate back into the melting bowl and start the melting/cooling process from the beginning. Please note: you WILL need to have fresh chocolate that is already in temper (new bag of chocolate chips, new candy bar, etc.) to seed the melted chocolate.
If you try these Hot Chocolate Bombs or any other recipe on my website, please leave a 🌟 star rating and let me know how you liked it in the 📝 comments below.

Hot Chocolate Bombs
Equipment
- 2.5-3" silicone sphere mold
Ingredients
- 12-16 oz. high quality chocolate dark, milk, or white
- 6 tablespoons hot cocoa mix
- 1 cup mini marshmallows
Instructions
- Chop the chocolate into smallest possible pieces.
- Place 8 oz. (or ⅔) of the chocolate pieces into the top of a double boiler or a glass/metal mixing bowl.
- Heat an inch of water to a simmer in a small pot on the stovetop. Place the double boiler or bowl over the top of the simmering water (the top bowl should NOT touch the water). Stir with a spatula while the chocolate begins to melt.
- Regulate the temperature of the chocolate carefully. Remove from heat as soon as the chocolate is melting, but there are still some solid pieces. Temperature should not exceed 120°F for dark chocolate or 105°F for milk/white chocolate.
- Continue stirring off of the heat until the chocolate is smooth. Add the remaining ⅓ of chocolate pieces, a little at a time, stirring until they are melted as well.
- Continue stirring the chocolate until it cools to a temperature of 82°F.
- Once the chocolate has cooled, place the bowl/pan back over the simmering water and reheat just a little bit until it is smooth and liquid enough for molding. (88-90°F for dark chocolate or 85-88°F for milk/white chocolate) It is important to keep the chocolate between 82°F and 88/90°F at all times until it has been placed in the mold.
- Spread a layer of melted chocolate to cover the full inside of each sphere cavity. Place the filled mold into the refrigerator for 3-4 minutes to set.
- Gently remove each half sphere from the mold.
- Heat a small plate in the microwave or cast iron pan. Prepare your workspace with the hot cocoa mix and marshmallows so you can work quickly.
- Quickly melt the edges of one half sphere on the heated plate, fill with 1 tablespoon of hot cocoa mix, and mini marshmallows. Melt the edges of the other half of the sphere on the hot plate and seal the two sides together.
- Drizzle the tops with melted chocolate and/or add sprinkles or decorations.
- To serve: place one hot chocolate bomb in a mug or heat-proof cup. Pour 6-8 oz. of steaming milk over the hot chocolate bomb. Stir and enjoy!
Notes
Nutrition
Make this recipe?
Share it with me on Instagram @girlinspired1 and follow on Pinterest for more!





Comments & Reviews
Judy Smith says
These are so nice I would like to try them thanks.
Andrea H. says
Hello,
I cannot wait to try this recipe! How do you store these? Do you have to refrigerate them or could you keep them on the counter in a container?
Stefanie says
I would keep them on the counter. In the refrigerator, they’ll get condensation. If you temper the chocolate, they can stay in an airtight container on the counter for probably a month. If not tempered, they will start to get discolored after a day or two. Can’t wait to hear how they turn out!
Minta Boggs says
Sorry for another question. but Christmas is in 3 days Can I make these like 2 days in advance? Will they still be good for Christmas?
girlinspired says
Hi! As long as you temper the chocolate, they will be perfect for at least a couple weeks. If the chocolate isn’t tempered correctly, they will discolor within a day or so. The inside may not appear as shiny because it’s not so smooth, but when you take them out of the mold, they should be very shiny – that’s a good sign they’ve been tempered correctly. They’ll still taste yummy either way though! Merry Christmas!
Minta Boggs says
Hi,
Do you think it would matter if the inside is not shiny like yours? I picked mine up at Meijers and they even look a tad bigger than yours. I have never made these before so I hope I can make them right.
Kristina says
How far in advance can these be made? Would they be okay to gift next week if I wrap them and place in a little box?
girlinspired says
Hi Kristina! If you get that chocolate tempered correctly, they will look exactly the same by next week – that’s one of my favorite things about taking the time to use quality chocolate and temper it. If not, the chocolate will get discolored within a day or so. Someone is going to be extra happy next week with their little box! Happy Holidays!
Melanie says
Hi there! I was so glad to come across a recipe for hot chocolate bombs that is focused on the importance of flavor more than just looks! (Although yours also look amazing!) I was wondering if I used a high quality plain chocolate candy bar, the kind meant for eating and not baking like Tony’s or Green & Black’s or something, do you think I could skip the tempering step? Since I imagine candy bars are probably already tempered chocolate. Thanks so much for your super helpful recipe and tips!
girlinspired says
Great question, Melanie! Yes, you can definitely use a high quality bar that you’d buy for eating. And you are right that the chocolate is already in temper. However, when you melt the chocolate it takes it out of temper, so you would still need to go through the steps of melting and cooling it correctly to get it back into temper. You can use some of the chocolate bar pieces just as you would the extra chocolate chips, to “seed” the chocolate back into temper. I hope that makes sense. Can’t wait to hear how your cocoa bombs turn out!
Glenda says
I have a question. I’m confused do you put 6tbs hot choc mix in each bomb?? How do we determine how much to put in each bomb?
girlinspired says
Hi Glenda! No, about 1 tablespoon in each bomb. Depending on what other stuff you’re trying to stuff in there, you can just fill it up. I think about a tablespoon is a good amount once the bomb melts in the milk – to make a nice, rich hot chocolate. But basically, you just want to leave enough room that you can seal the top on without the powder getting in the way, if that makes sense. Have fun!!
Ellen Shobe says
So if my bombs pop out of the mold dull does that mean they did not temper correctly?
girlinspired says
I’m not sure what you mean – if they come out of the mold easily, I’d say that’s a sign they are tempered correctly. If they’re not tempered, they’ll still come out of the molds but they’ll be less crisp and they’ll start to discolor after about a day. If you bend them and they snap, they’re probably tempered correctly, if they kind of crumble or actually bend, they’re probably not.
Kelly says
Hi,
I am new to this, did my 1st few today. A couple questions… Do you paint on some softened chocolate to hold the garnish, or it just sticks? How long did it take you to get those perfect halves perfected? Are rubber gloves OK to use? Even though my first attempt wasn’t pretty, it did work, and I put a little bit of Screwball Peanut Butter Whiskey in the drink. Hubs agreed that it actually tasted better than the virgin one!!
girlinspired says
Hi Kelly! Yes, dab just a bi of the melted chocolate on top to “glue” the garnish. You can use rubber gloves! I’ve done that many times. You’ll get better and better with practice. The key is to temper the chocolate correctly. And make plenty! I always have a couple that chip or my chocolate was too thin in a spot or something, but you make enough that those just get set aside. and YES to the Skrewball! I have a couple cocktails posting soon with Skrewball, sounds so good in hot chocolate!!
Denise Essig says
Hello! So I had to come read when I saw the luster dust bc that’s my main search right now before I order mine! 😍✨ Ok I’m overly preparing before I attempt this bc I don’t want to not have it work out 😂 But I’m having an issue finding someone who has molds like mine! My mold are 2 pieces that go together & have a hold at the top of one of the 1/2 spheres. Can I make this work? Have you seen/used this type? Idk if I’m supposed to fill from the hole with a funnel or what that’s about. 😬😂🤷🏼♀️
Trisha L Monroe says
Hey there,
If you don’t mind, I have 2 questions for you.
*What brand of chocolate do you use for the sphere? I’m more interested in white chocolate.
*Have you ever combined hot cocoa mix with a cappuccino mix? I’m wanting to but unsure what the ratio of each should be.
Thank you very much for your time 😊
girlinspired says
Hi Trisha!
I usually like Ghiradelli or Guittard, but actually I’m liking Nestle white chocolate chips for the hot chocolate bombs because they are a more pure white. The other brands (including some bulk white chocolate I bought at Whole Foods) all have come out with a slight yellow hue. Cake supply stores often sell the chocolate in wafers and I would presume those are a more pure white as well (they sell the candy melts, too, but do go to the extra effort to temper for best results.)
As for cappuccino mix, I have!! I have a post coming, but I really liked filling the bombs with that cappuccino mix made by International House Coffees – you know the kind in those cute little rectangular tins? Those turned out absolutely delicious. I used a mocha flavor and only filled it with the mix – the chocolate from the sphere itself was enough chocolate. But really, any ratio could be used!
Andrea says
Oh my goodness! These look amazing!
girlinspired says
Thank you so much! They’re a blast to make and delicious, too.