Thank you so much for your enthusiasm about the new Party Inspiration theme around here. It makes me even more excited to know that so many of you are excited, too!
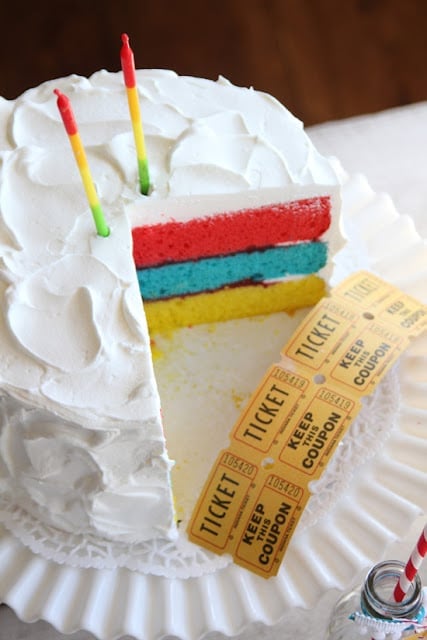
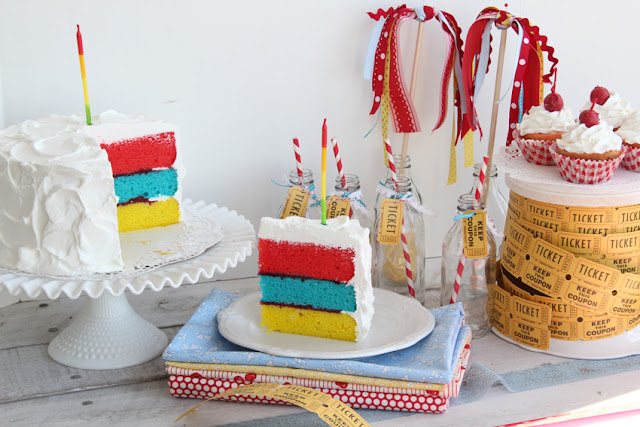
Today, I’m going to show you how I made the multi-colored, three-layer cake for the Vintage Circus themed party vignette. And before we start, I want to point something out, which is that I have no formal training in anything I typically write about on my blog. I’m just a regular girl, experimenting, seeing what works for me, sharing, in case it works for you, too. There is probably a different way, likely even a better way, to do most things that I share. So, this is just ONE way, and I hope it sparks a little something in you – to create, to celebrate, to get curious and try something that fuels your creative spirit.
Boxed cake mix, ready-whip frosting, and a simple decorating technique make The Circus Stripe Party Cake a great choice for beginners. You will need: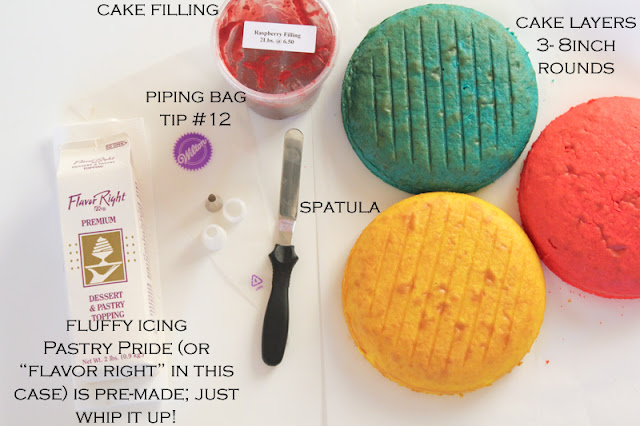

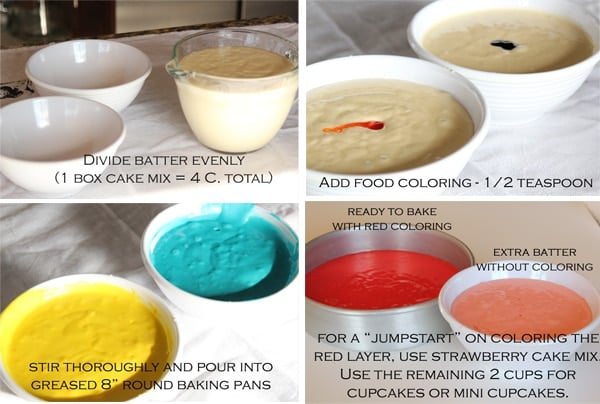
2 boxes of cake mix (prepare batter as instructed on the box) – I used vanilla cake mix for the yellow and blue layers and strawberry cake mix for the red layer – 2 Cups of batter = 1 layer285
cake filling (my personal favorite is rasberry) – available at cake supply stores
Pastry Pride Frosting – 1 quart – available at cake supply stores
gel food coloring in desired colors (I use AmeriColor)
8-inch round baking pans
offset spatula
piping bag, tip # (optional)
cardboard round and doily
First, mix up, divide, color, and bake the batter for three cake layers (each box of cake mix makes 2 layers. You will have extra batter.)
Cool the cakes for about 10 minutes when they come out of the oven, then carefully turn them out onto cooling racks and cool completely. Before assembling, whip up the frosting (I used about ⅔ Quart). The frosting is an easy, ready-whip frosting, and while it’s not suitable for detailed decoration, it is quick to prepare and makes beautiful, fluffy swirls. (Read more on Pastry Pride Frosting.) Set out the carboard round and dab a little frosting in the center; place the doily on top, then set the first cake layer on the doily. Prior to frosting the assembled cake, place strips of wax paper between the cake and doily. Once the cake is frosted, gently remove the wax paper and you will have a neat doily, ready for display. Okay, to assemble:
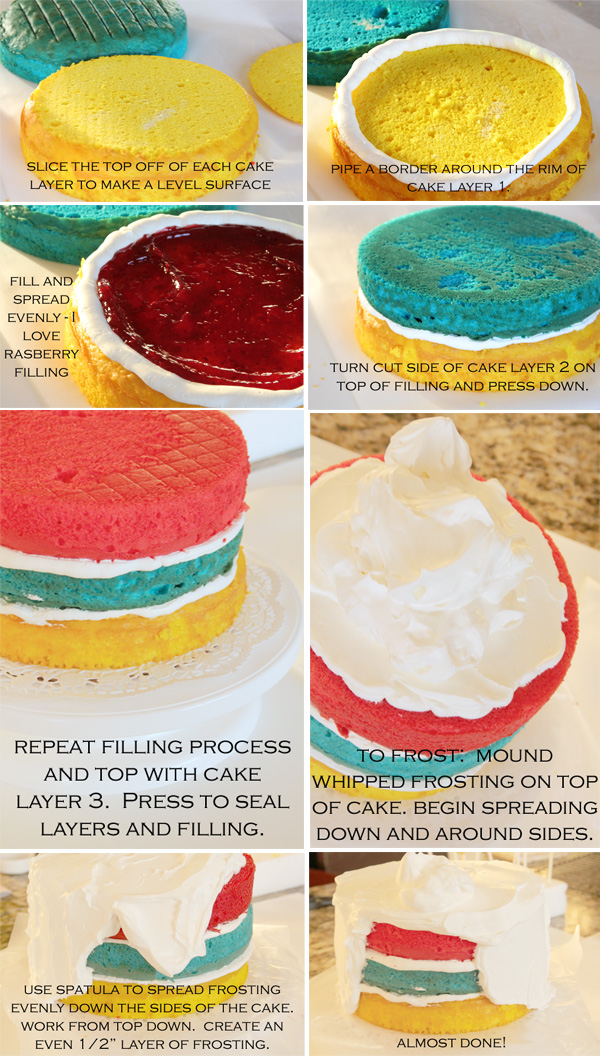
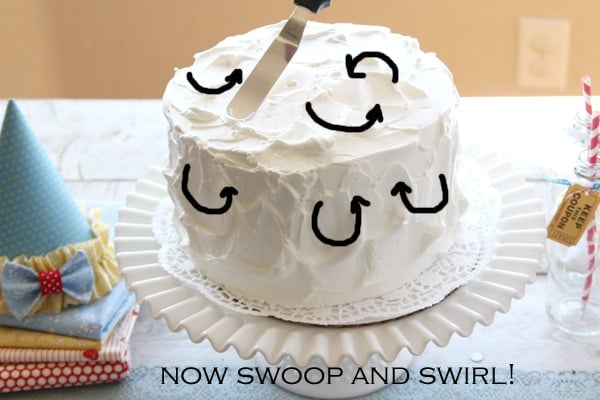
The only trick here is to make sure your spatula doesn’t dip too deeply into the frosting where it can scrape up cake crumbs and mix them into the frosting. Just keep your layer of frosting thick enough and hold your spatula parallel to the layer of frosting. Swirl until the cake looks the way you like. After it is frosted, you can store the cake in the refrigerator or freezer until party time. If you freeze the cake, take it out a couple hours before the party so that it has time to defrost before eating!
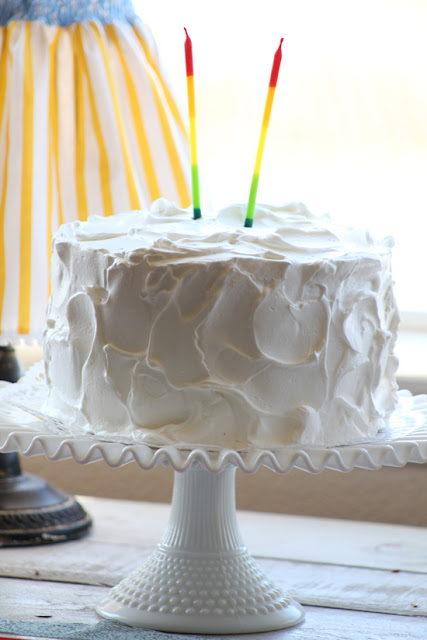
And, you’re done! Beautiful, tasty, and fast!
Other posts for Vintage Circus Party include:


Comments & Reviews
Kerry says
LOVE how easy this cake is to make, yet looks so fabulous at the same time! Thank you so much for sharing.
Midwest Scrapbook says
This one is really looking so beautiful cake. As I have really found the massive conception and information to make the same look and taste cake. It’s vitally looking crucial featured source for me. Thanks for sharing.
Jeny says
It is a very informative post……….theme parties melbourne