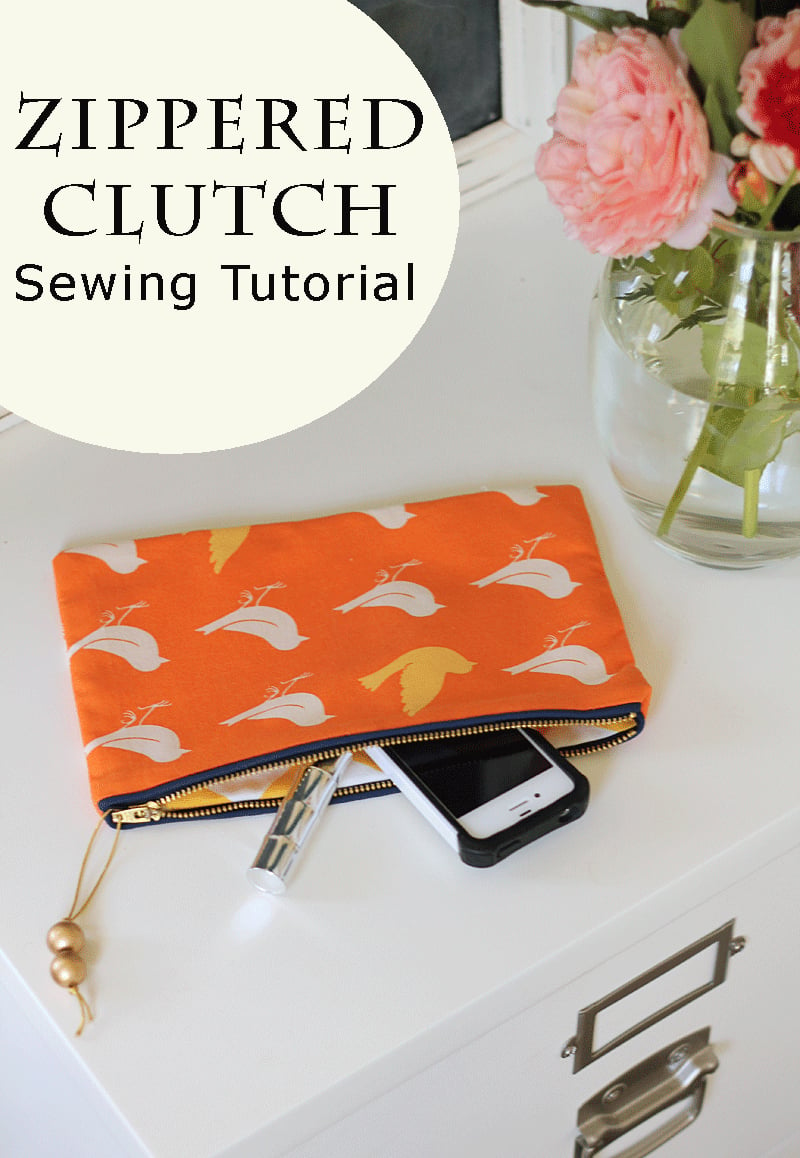
We have a really busy holiday season coming up and I’m trying to organize any sewing projects that I add to the list. It’s always nice to be able to sew a quick little clutch – they make such nice gifts for anyone! Perfect for makeup, for holding receipts or coupons, on the go sewing supplies – anything! Today’s tutorial will walk you through sewing a basic, rectangular zippered clutch. If you’re not already familiar with making a lined, zippered bag, you can practice with this easy project. It also makes a nice foundation for adding lace, piping, and other embellishments to a project or simply showcasing a favorite fabric.
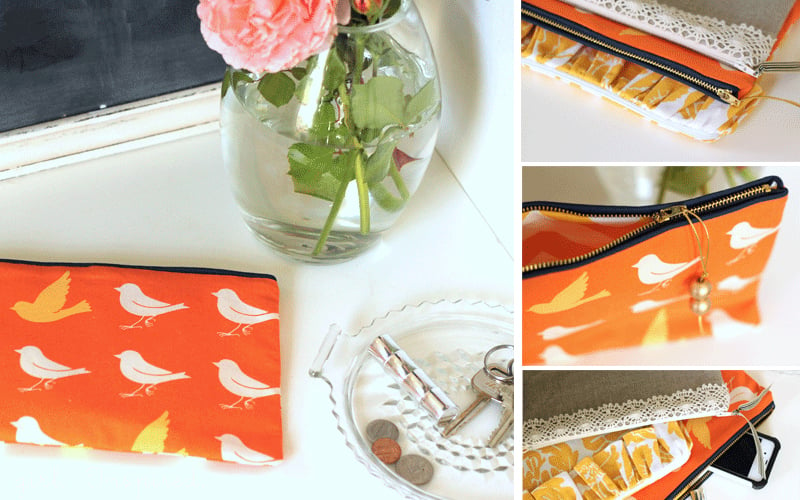
Ready to make some of these?
Zippered Clutch Sewing Tutorial
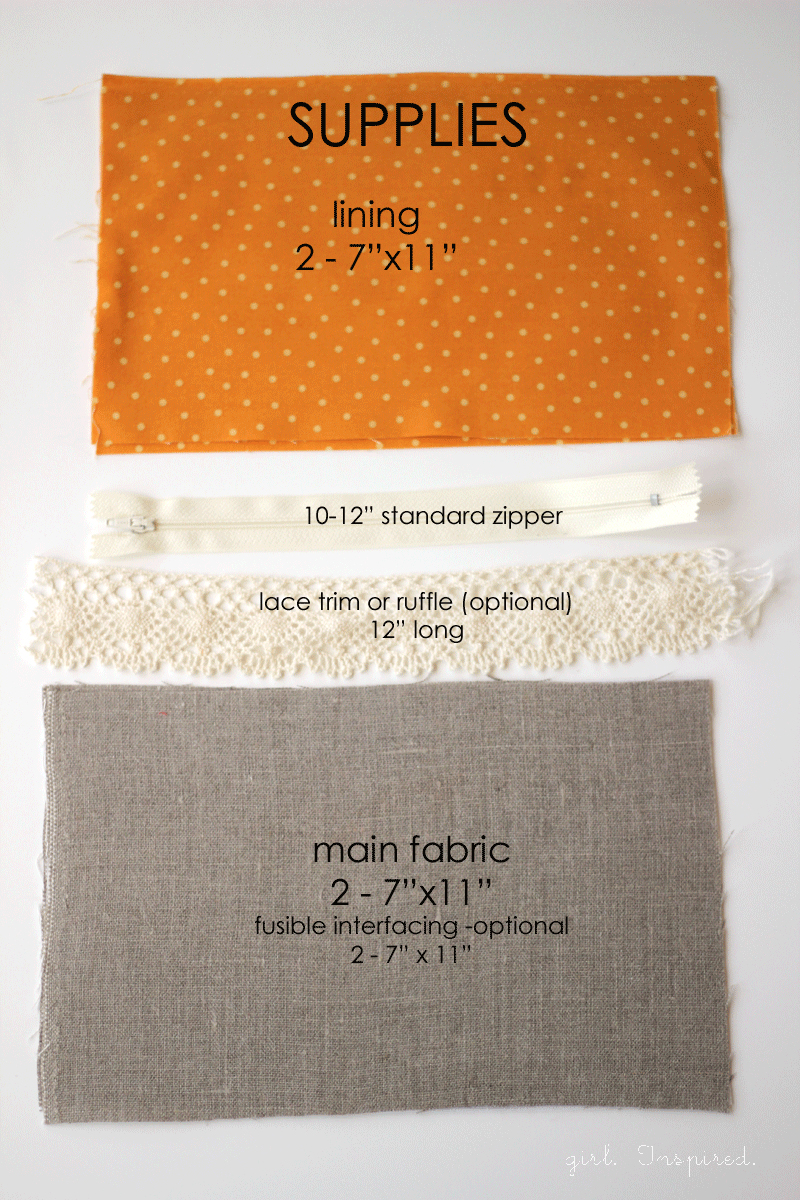
Supplies:
2 – 7″ x 11″ pieces of main fabric (upholstery weight fabric is best, but not necessary)
2 – 7″ x 11″ pieces of lining fabric
2 – 7″ x 11″ pieces of fusible interfacing (optional for lightweight main fabric)
12″ zipper
piping, lace trim, fabric ruffle (optional)
thread, pins, zipper foot for sewing machine, and sewing machine
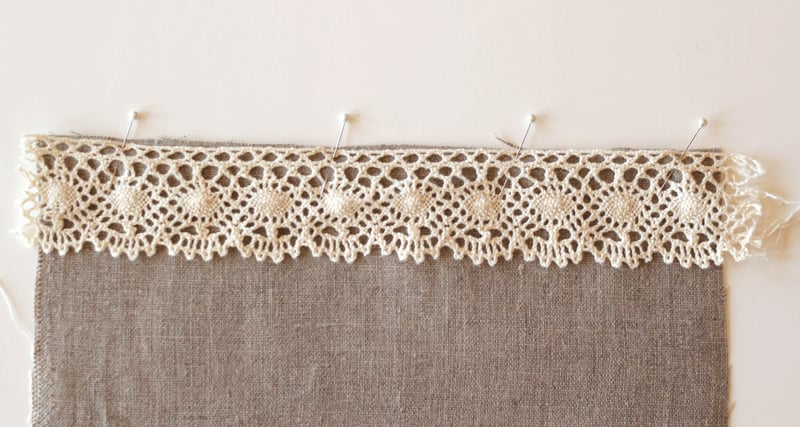
Step 1: Follow package instructions to iron fusible interfacing onto the wrong side of main fabric pieces. Now, we’ll prepare the main fabric pieces with trims or piping if desired. Place piping or trim along the top long edge of your main fabric piece – the raw edges should match. Baste into place using no more than ¼″ inch seam. For piping, you should use a zipper foot and baste the piping to the bag edge close to the piping.
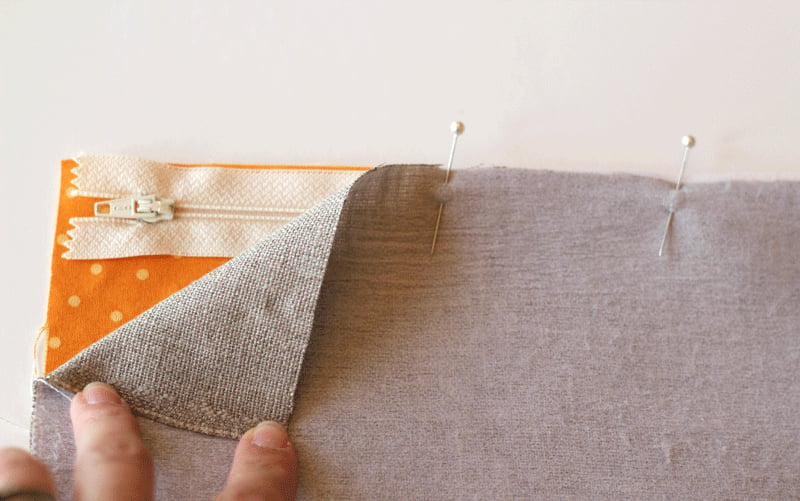
Step 2: Place lining fabric right side up on your work surface. Center the zipper, right side up, on top of the lining fabric – be sure that the stop when the zipper is closed is ½″ in from the side edge of the fabric – trim excess off of the opposite end of the zipper so that it aligns with the other edge (follow zipper package instructions to shorten zipper). Place your main fabric piece on top of the lining/zipper, right side down. So, you’ll have lining face up, zipper face up, main face down.
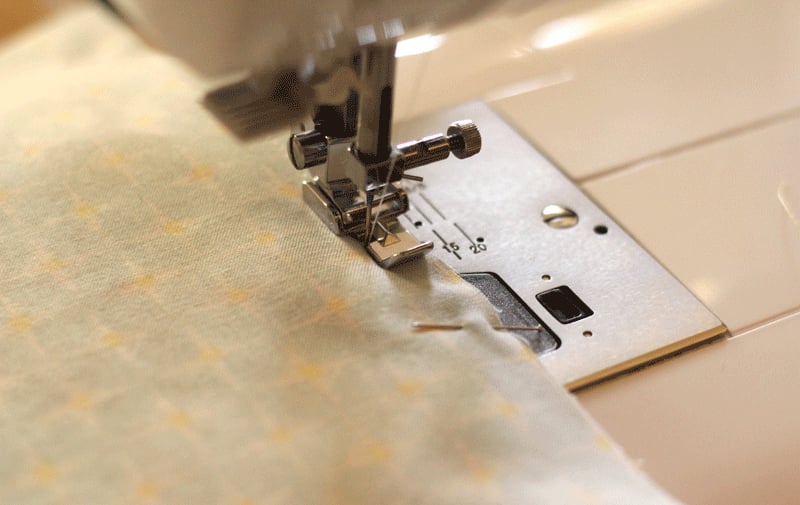
Step 3: Using a zipper foot on the sewing machine, stitch along the edge of the zipper. You will probably need to stop and adjust the placement of the zipper pull so that you can sew right along the zipper edge along the entire length of the bag edge.
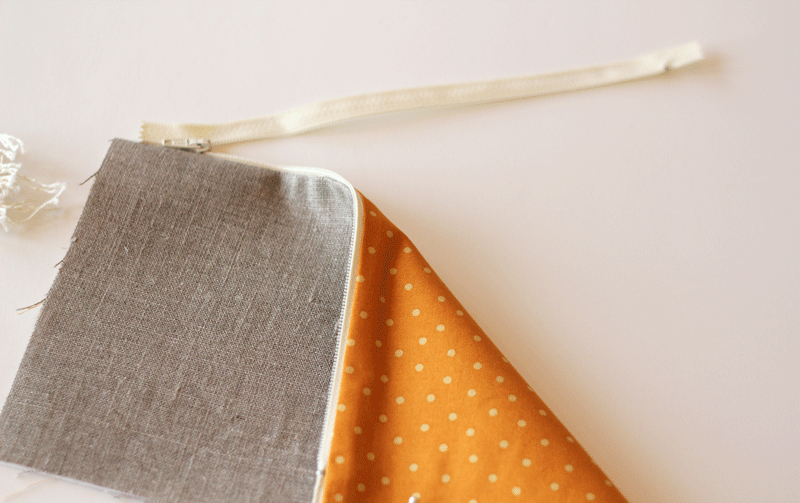
Step 4: Fold back and press the main fabric and the lining to expose the finished edges along the zipper – if your fabric does not press away from the zipper enough and the zipper is going to catch on the fabric, you can topstitch the fabric at this point to hold it away.
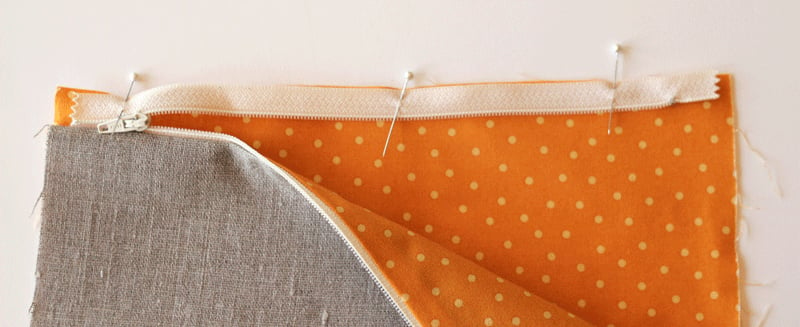
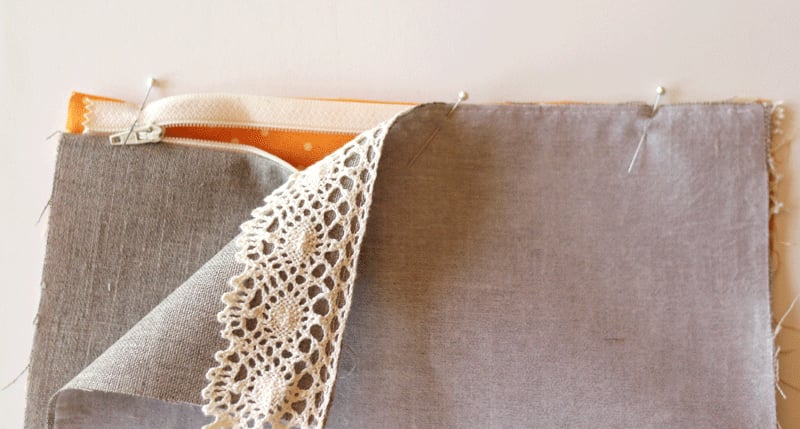
Step 5: Now, we’re going to get the other side of the bag attached to the zipper in the same way. Making sure that the first side is out of the way, align raw edges of lining (face up), zipper (face up), and main fabric (face down) – pin in place. Sew.
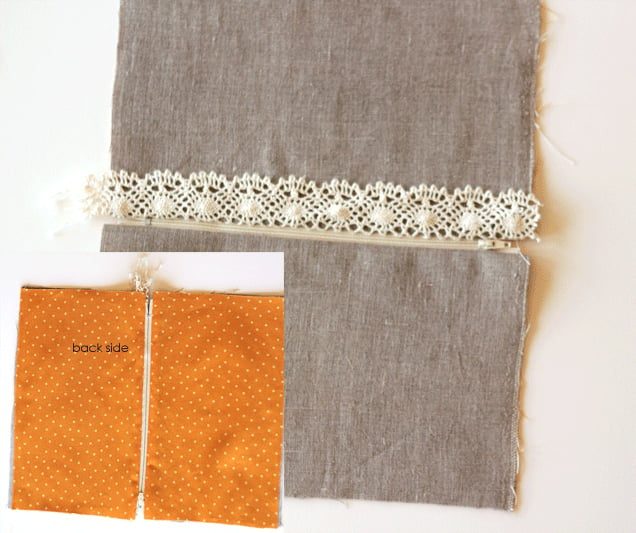
Step 6: Press open the other side of the zipper. Your bag on each side should look like the picture above.
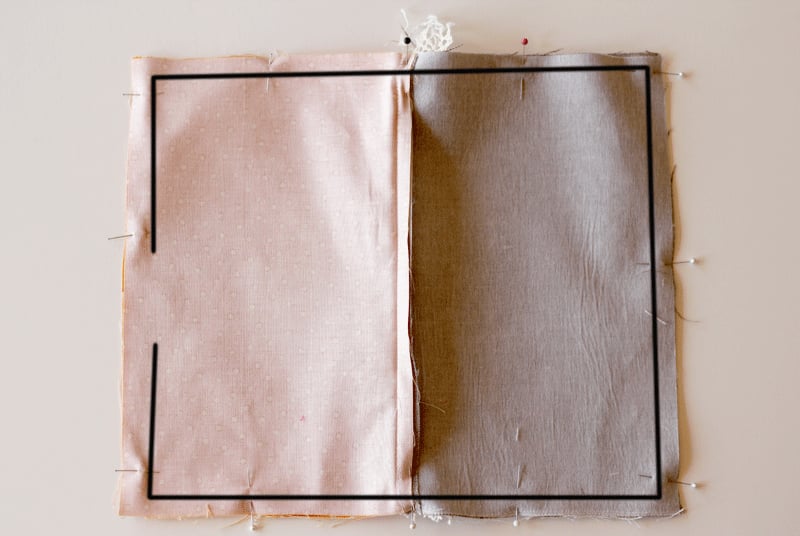
Step 7: Now we’re ready to sew the bag into one piece. Separate the main piece and lining piece on each side of the bag and fold the “flaps” so that you are matching the main fabrics right sides together, and the lining fabrics right sides together. Pin in place to form one large rectangle with main pieces to one side and lining pieces to the other side. The black line in the picture above shows your stitching line.
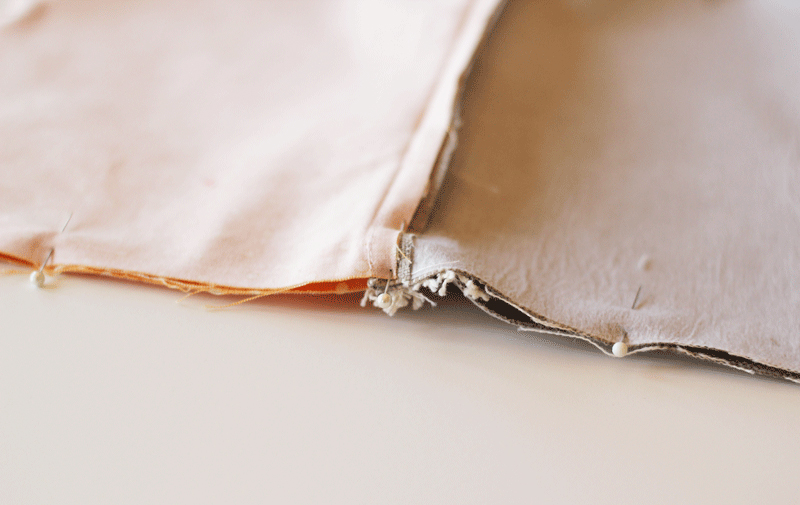
Step 8: Stitch, using a ½″ seam allowance, all the way around the perimeter of the bag, leaving a 4-5 inch opening in the LINING side of the bag for turning. Also, be sure that the seams from steps 3 and 5 are all turned toward the main fabric side – this will help the lining to stay tucked inside the bag once it is sewn.
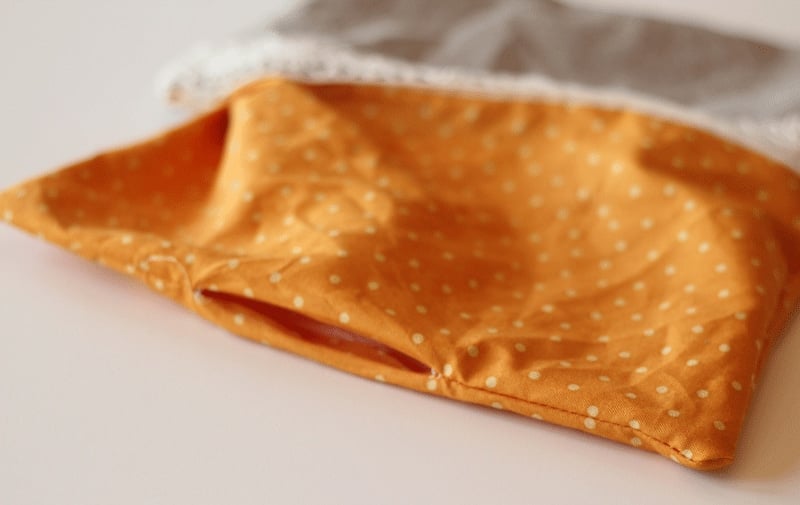
Step 9: Clip the excess fabric from the corners. Turn the bag right side out through the hole in the lining.
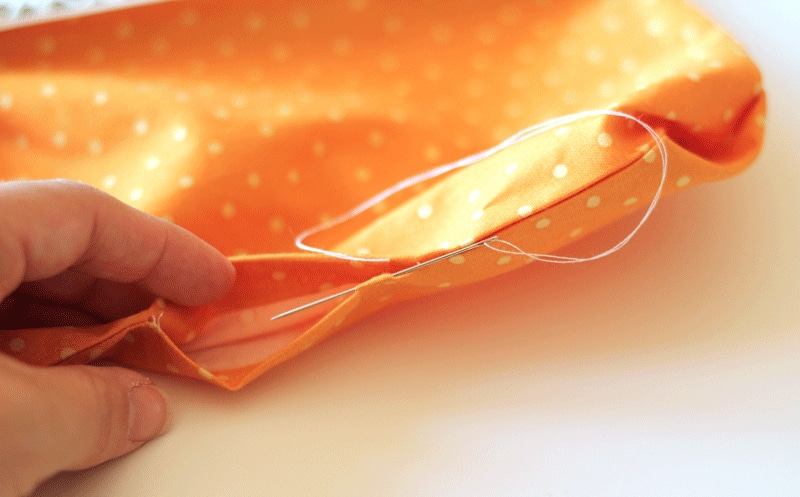
Step 10: Stitch the opening closed by hand. Press the whole thing really well.
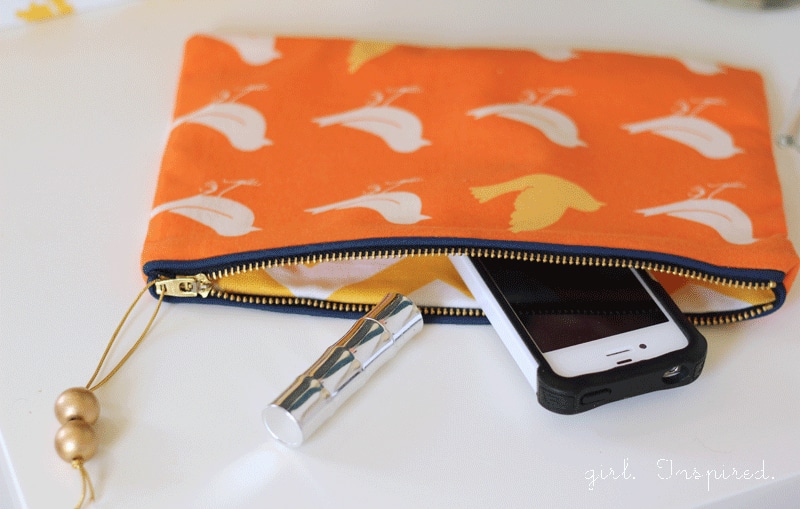
Step 11: Tuck the lining into the bag, press the whole thing again. Tie a ribbon or some elastic string with beads onto the zipper pull if you’d like – and you’re set. Now, how many of these can you sew up before Christmas? Go!!!
**This tutorial was first published as a guest contribution at I Heart Naptime.**


Comments & Reviews
Cindy says
Very well done tutorial for a zippered clutch. Thank you. Looking forward to making chicken pot pie hand pies too.
PENNY F says
great pictures and instructions
Elwood Macke says
Sweet site, super pattern, very clean and user friendly.
Lorraine says
I love this pattern. Made a few 2 years ago, now I made another one for a friend
Mary says
Don’t forget to mention to unzip the zipper 1/2 way before sewing around the edges of both fabrics cause I couldn’t get it turned inside out when finished. (I found this out by watching another video). Otherwise nice instructions. I didn’t like the invisible zipper I used. Bought a regular polyester zipper instead- more sturdy.
Carol says
Thank you so much for the easy step by step! I was staying away from zippers but following this made it very easy. I included it in a blog post! http://woldringsknits.blogspot.com/2014/11/first-zipper-project-small-clutch.html
Geny BP says
One of the best tutorials!
Elle (eatstyleplay) says
I would have never thought to sew the zipper first, thanks! I have some fur that i found and I want to make a bag out of it! Thanks for posting.
Nienke says
Great tutorial, I’ve been stalling making these pouches forever, since they looked complicated, but I think I’ll give it a go now! I pinned this one for reference 😉
Aubrey says
wow this looks kind of hard but I wanna tackle it for my next project! thanks for the idea and tutorial!
justine says
Thank you for the tutorial Stef! I made 10 today!
Lanie says
Since when do you wear Clinique lipstick?! Gah! I miss you!
I think I could do this! Zippers scare me but this looks pretty easy. Gotta get to Joann’s, but everytime I end up spending my coupon in books for Ever.
Ross says
Excelente, bonita y muy aprovechable. Gracias por la idea. Saludos