
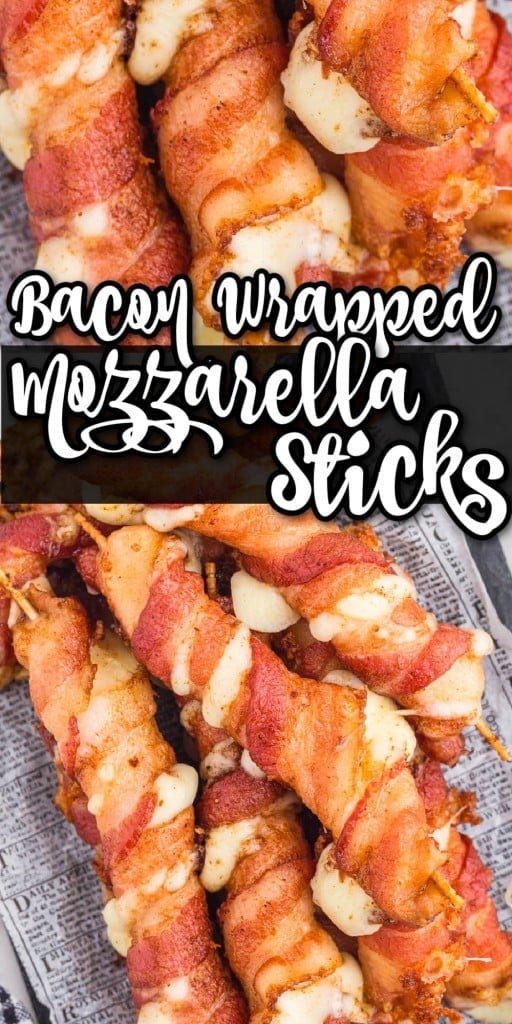
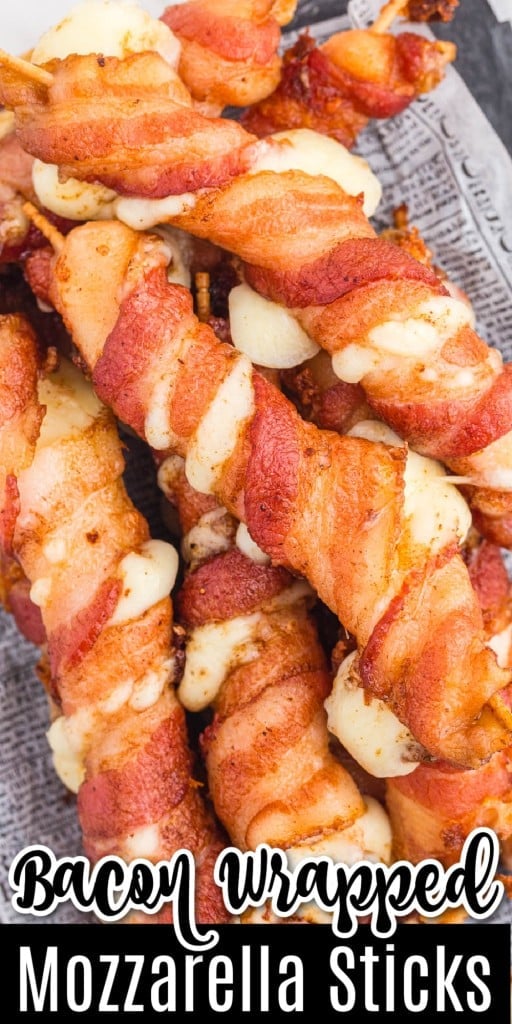
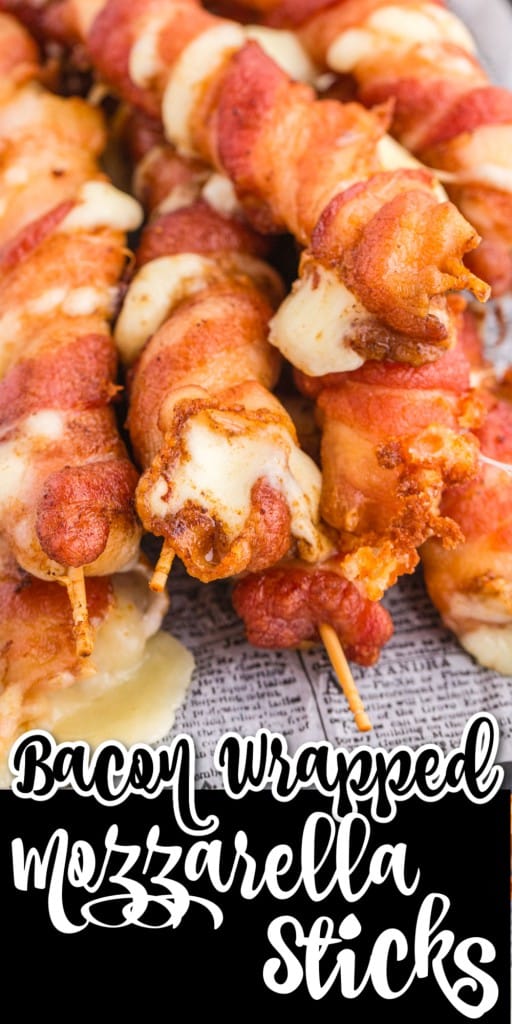
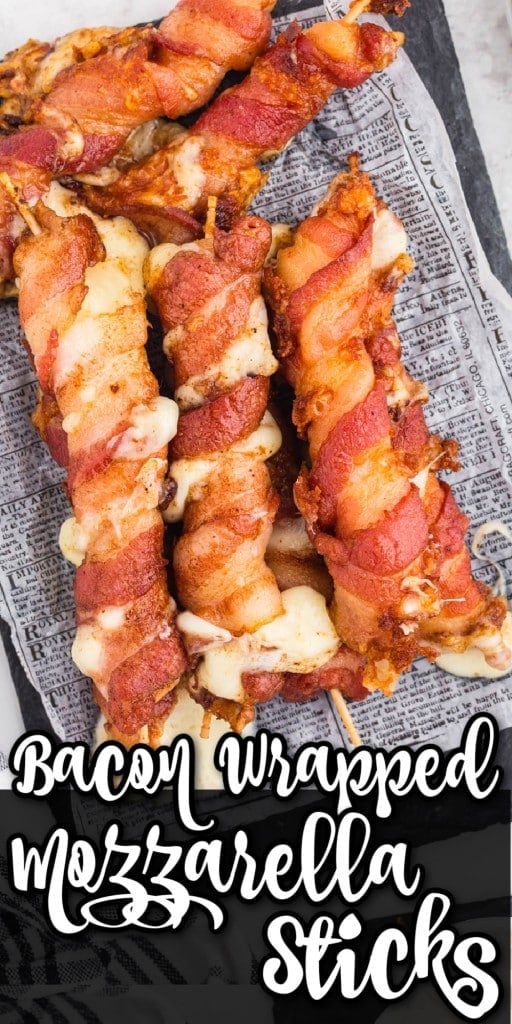
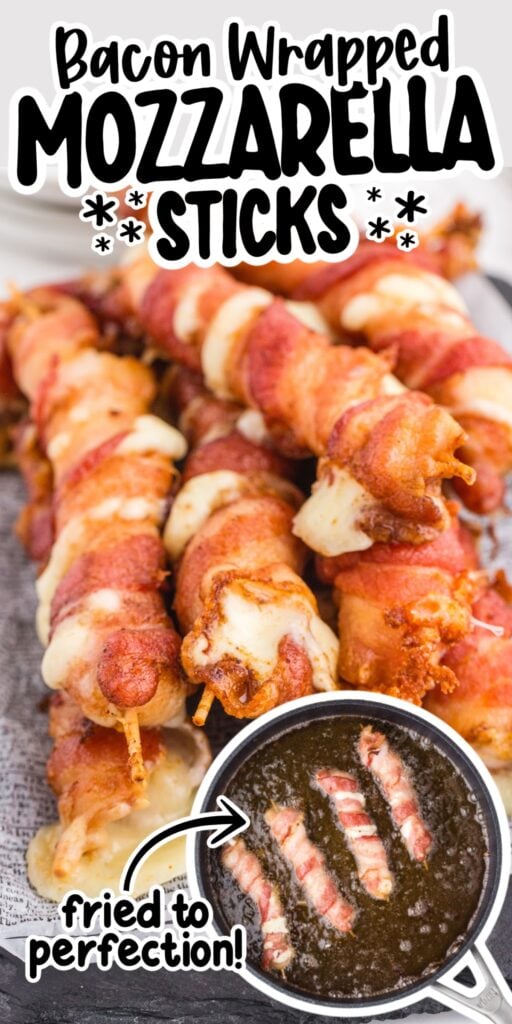
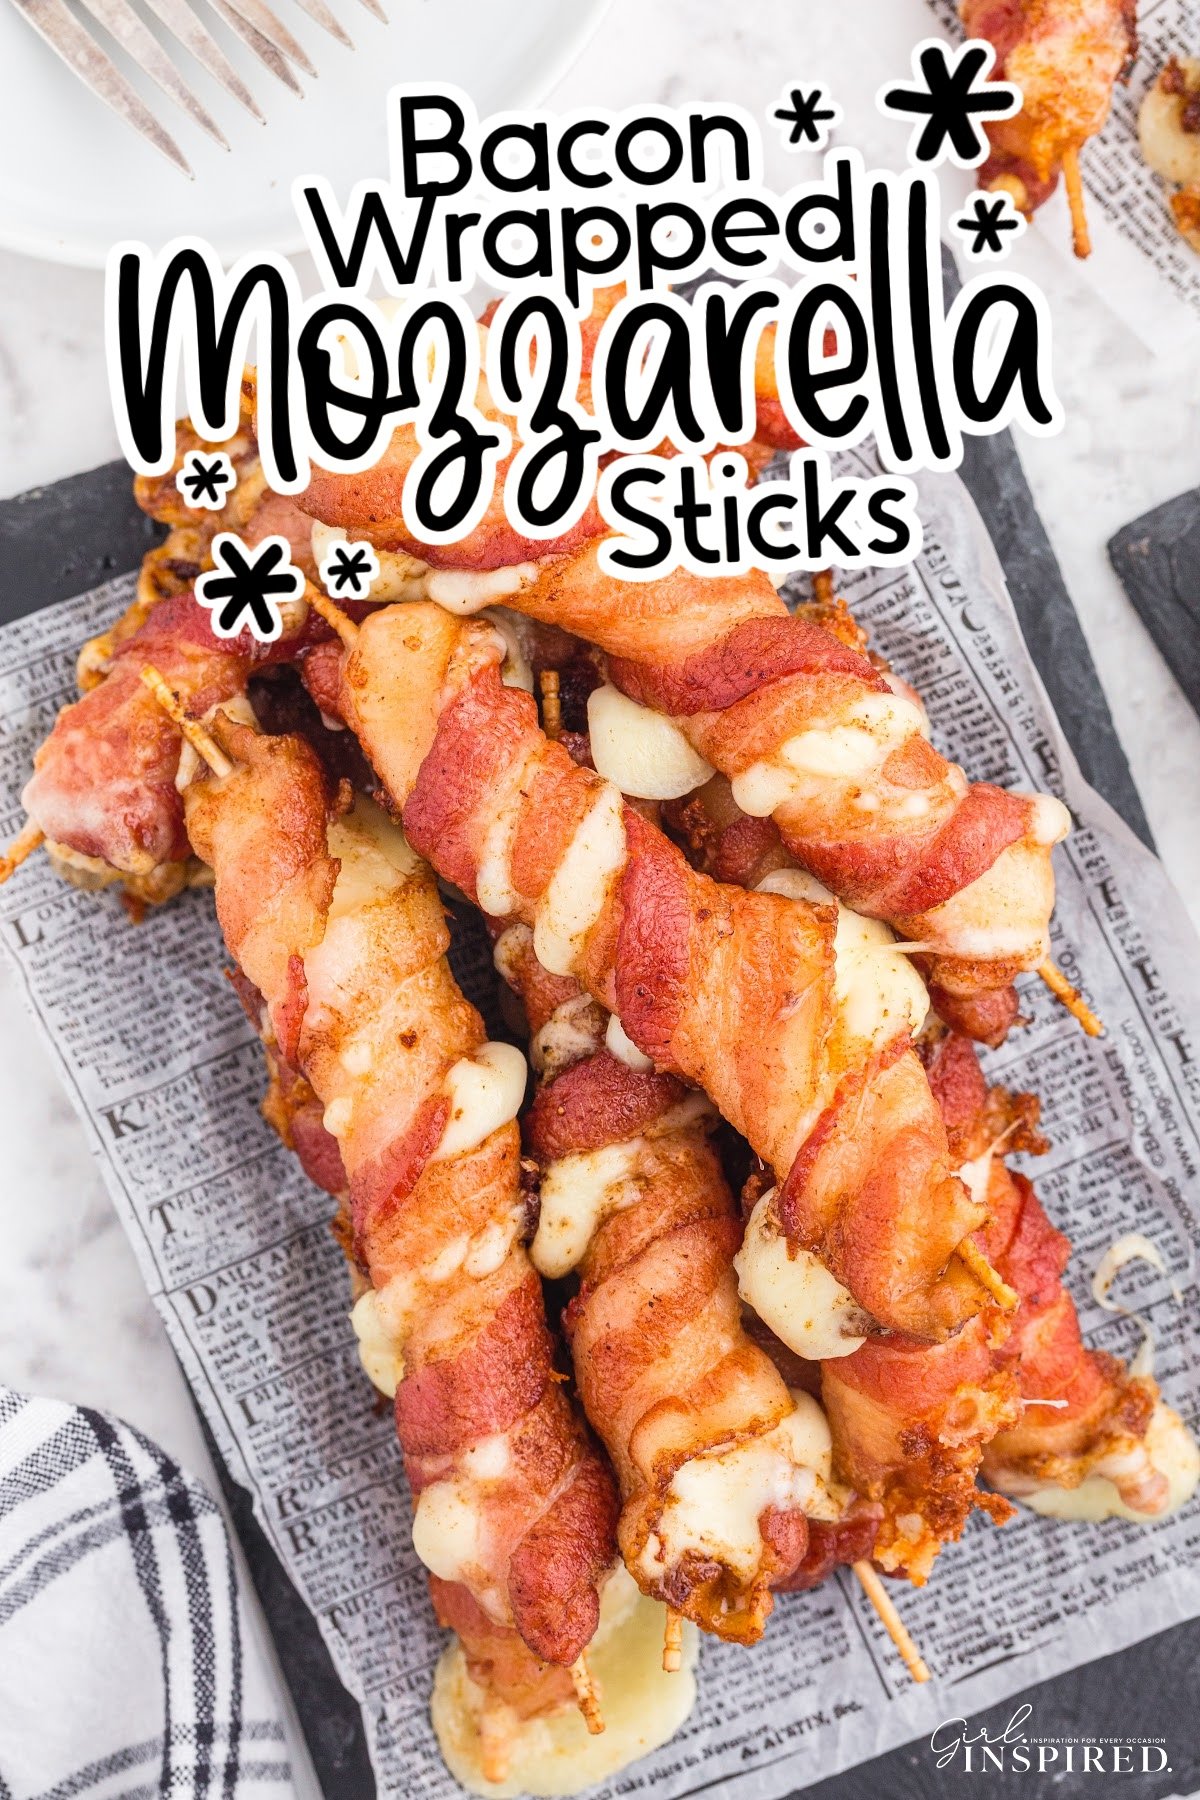
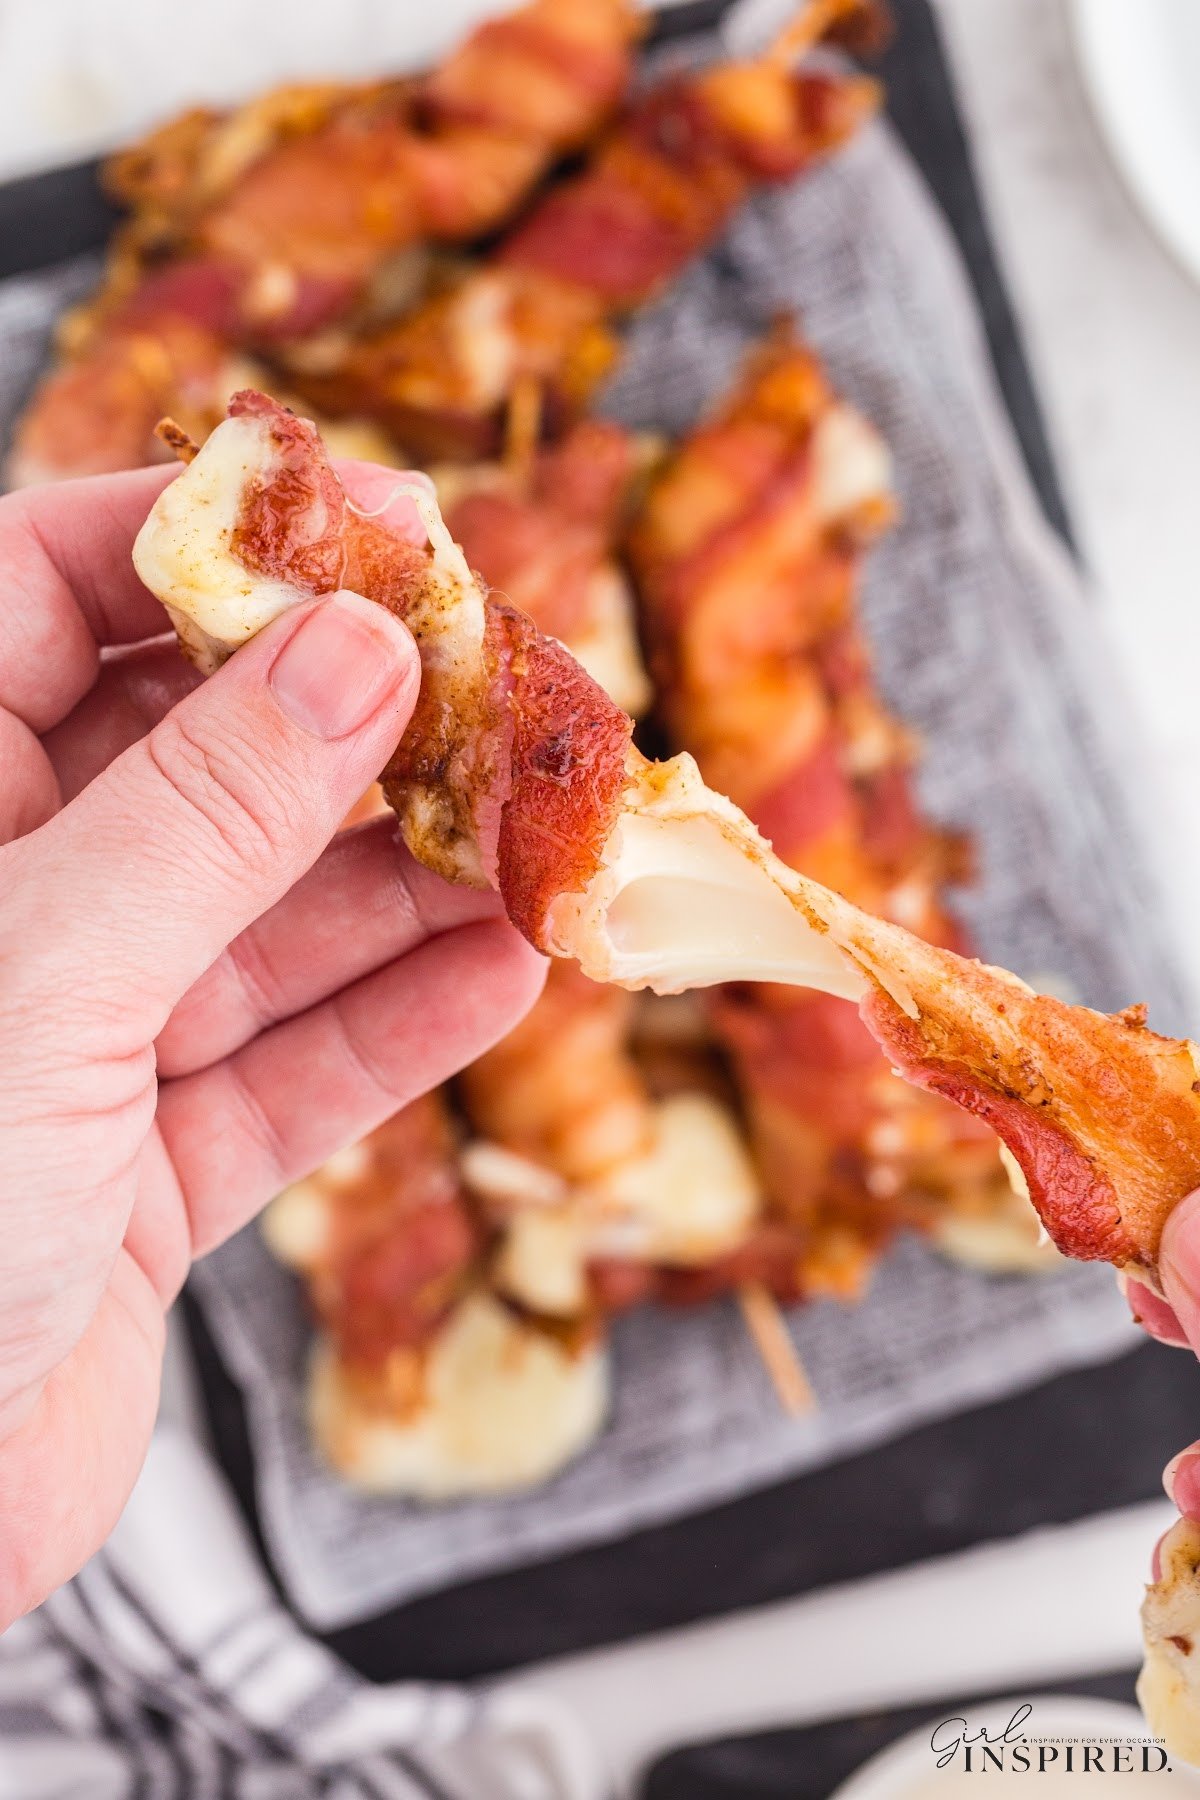
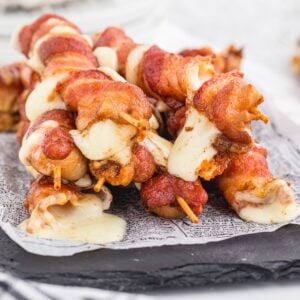
Bacon Wrapped Mozzarella Sticks are a delicious appetizer for any event, party, or preparation for the Super Bowl. You get gooey melted cheese wrapped in crispy salty bacon that you can pull apart or dip into your favorite sauce, using only 3 ingredients .
Pan-frying has come under fire in recent years, but this cooking method often produces the tastiest and crispiest results! You just have to try this Southern Fried Chicken Recipe, Fried Raviolis, and this Cannoli Recipe to understand what I’m saying. Even better, these bacon-wrapped Mozzarella sticks are keto-friendly – perfect for entertaining while sticking to a low-carb diet!
These bacon-wrapped string cheese snacks are easy to make with minimal ingredients or recipe steps. Add them to a game day platter of party finger foods such as Air Fryer Pigs in a Blanket, Buttermilk Fried Chicken Tenders, or Meatball Marinara Subs to keep the guests satisfied!
Jump to:
🫐 Ingredients:
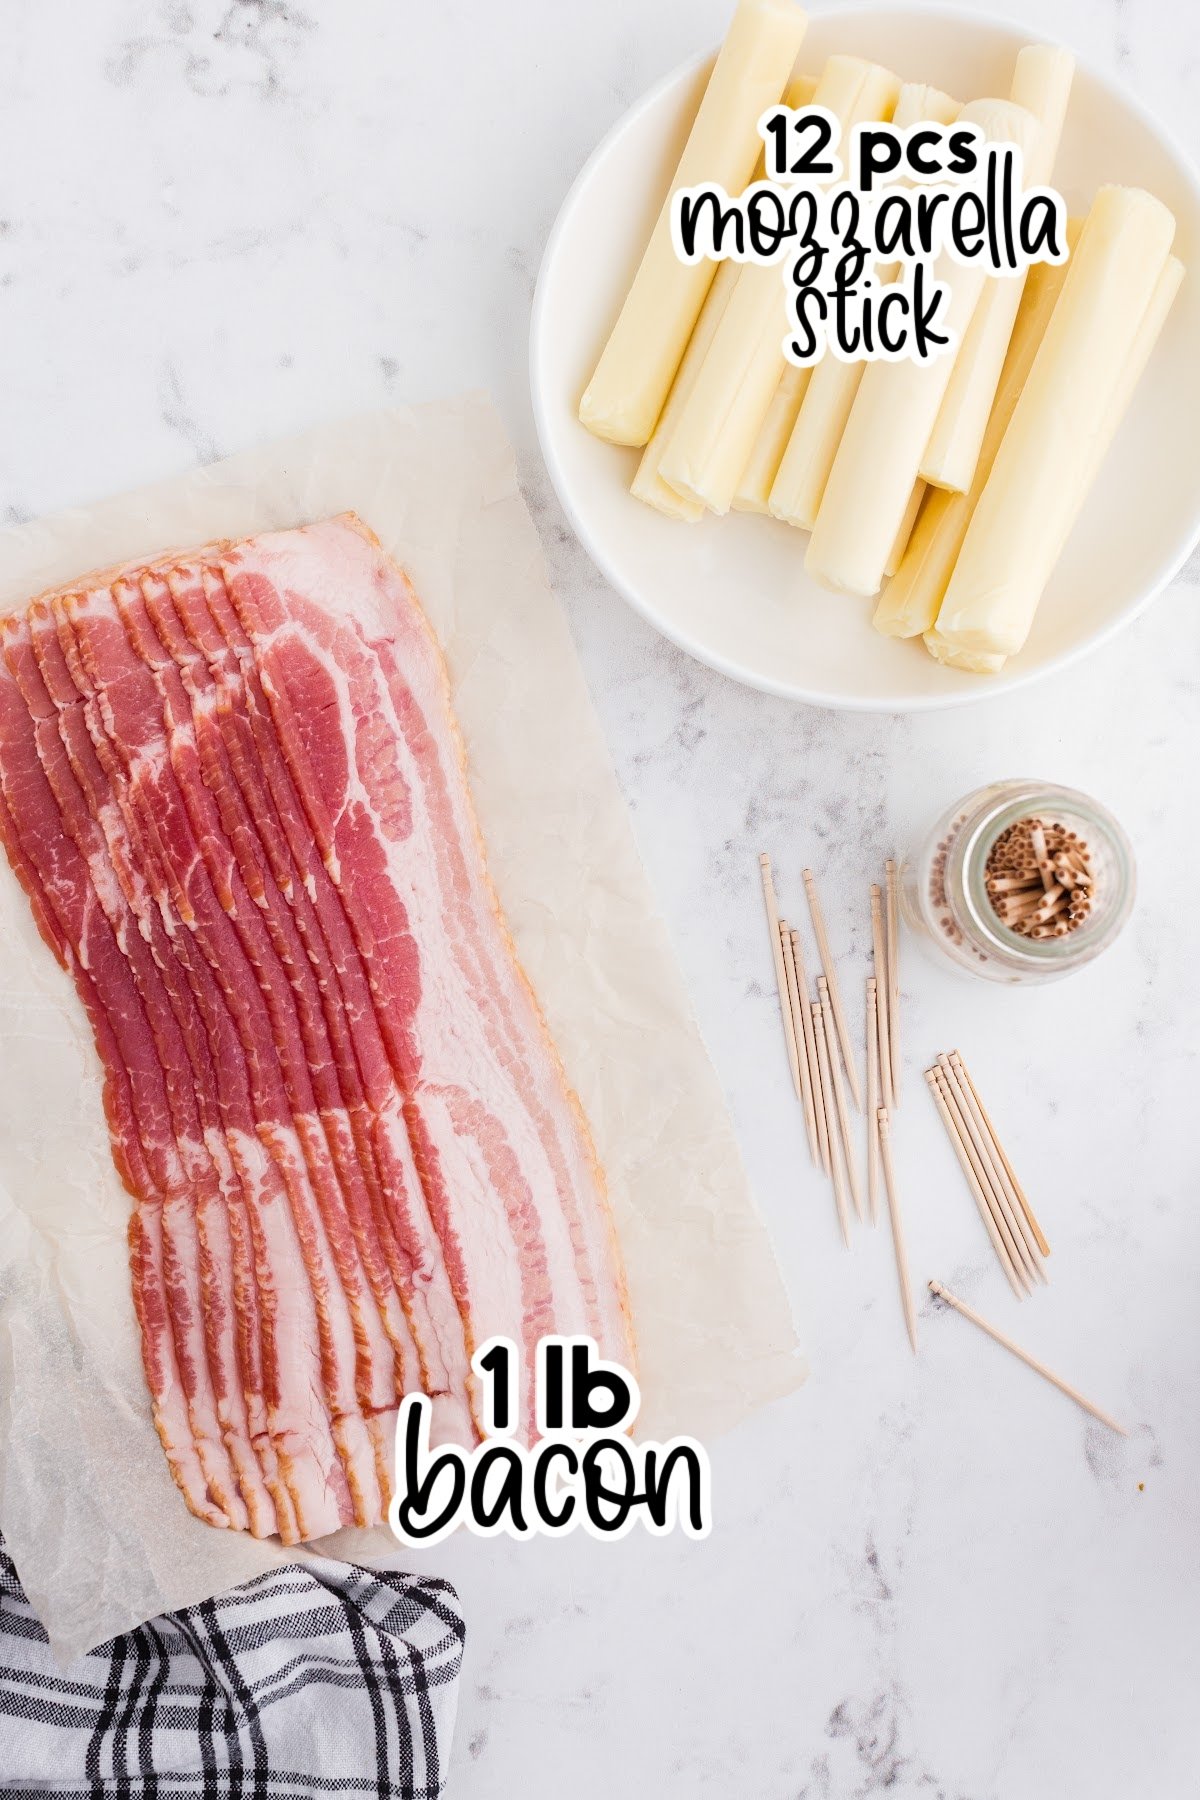
- Bacon – You’ll need one slice of bacon per mozzarella stick. Raw or pre-cooked bacon can be used, but I recommend regular-cut bacon and not thick-cut so the bacon crisps well.
- Mozzarella sticks – Use whole milk or low-moisture mozzarella sticks.
- Cooking oil – Vegetable oil or canola oil works well in this recipe. Some also prefer to use olive oil.
For a full list of ingredients and their measurements, 📋 please view my printable recipe card at the bottom of the post.
Optional Garnish:
Serve these Bacon Wrapped Mozzarella Sticks at your next party as is or beside some of your favorite dipping sauces such as BBQ sauce, ranch dressing, or marinara sauce!
Substitutions and Variations
- Kinds of Cheese: Any melty cheese could be used like pepper Jack, Colby, or cheddar.
- Flavors of bacon: Experiment with different varieties such as apple or hickory smoked, or peppered.
- Air Fried Mozzarella Sticks Wrapped in Bacon: Ensure that the mozzarella sticks are completely wrapped in the strip of bacon so that no area of the cheese sticks out, and cook at 380F for 10 minutes. Covering the cheese sticks will gooey cheese from oozing out.
🔪 Instructions:
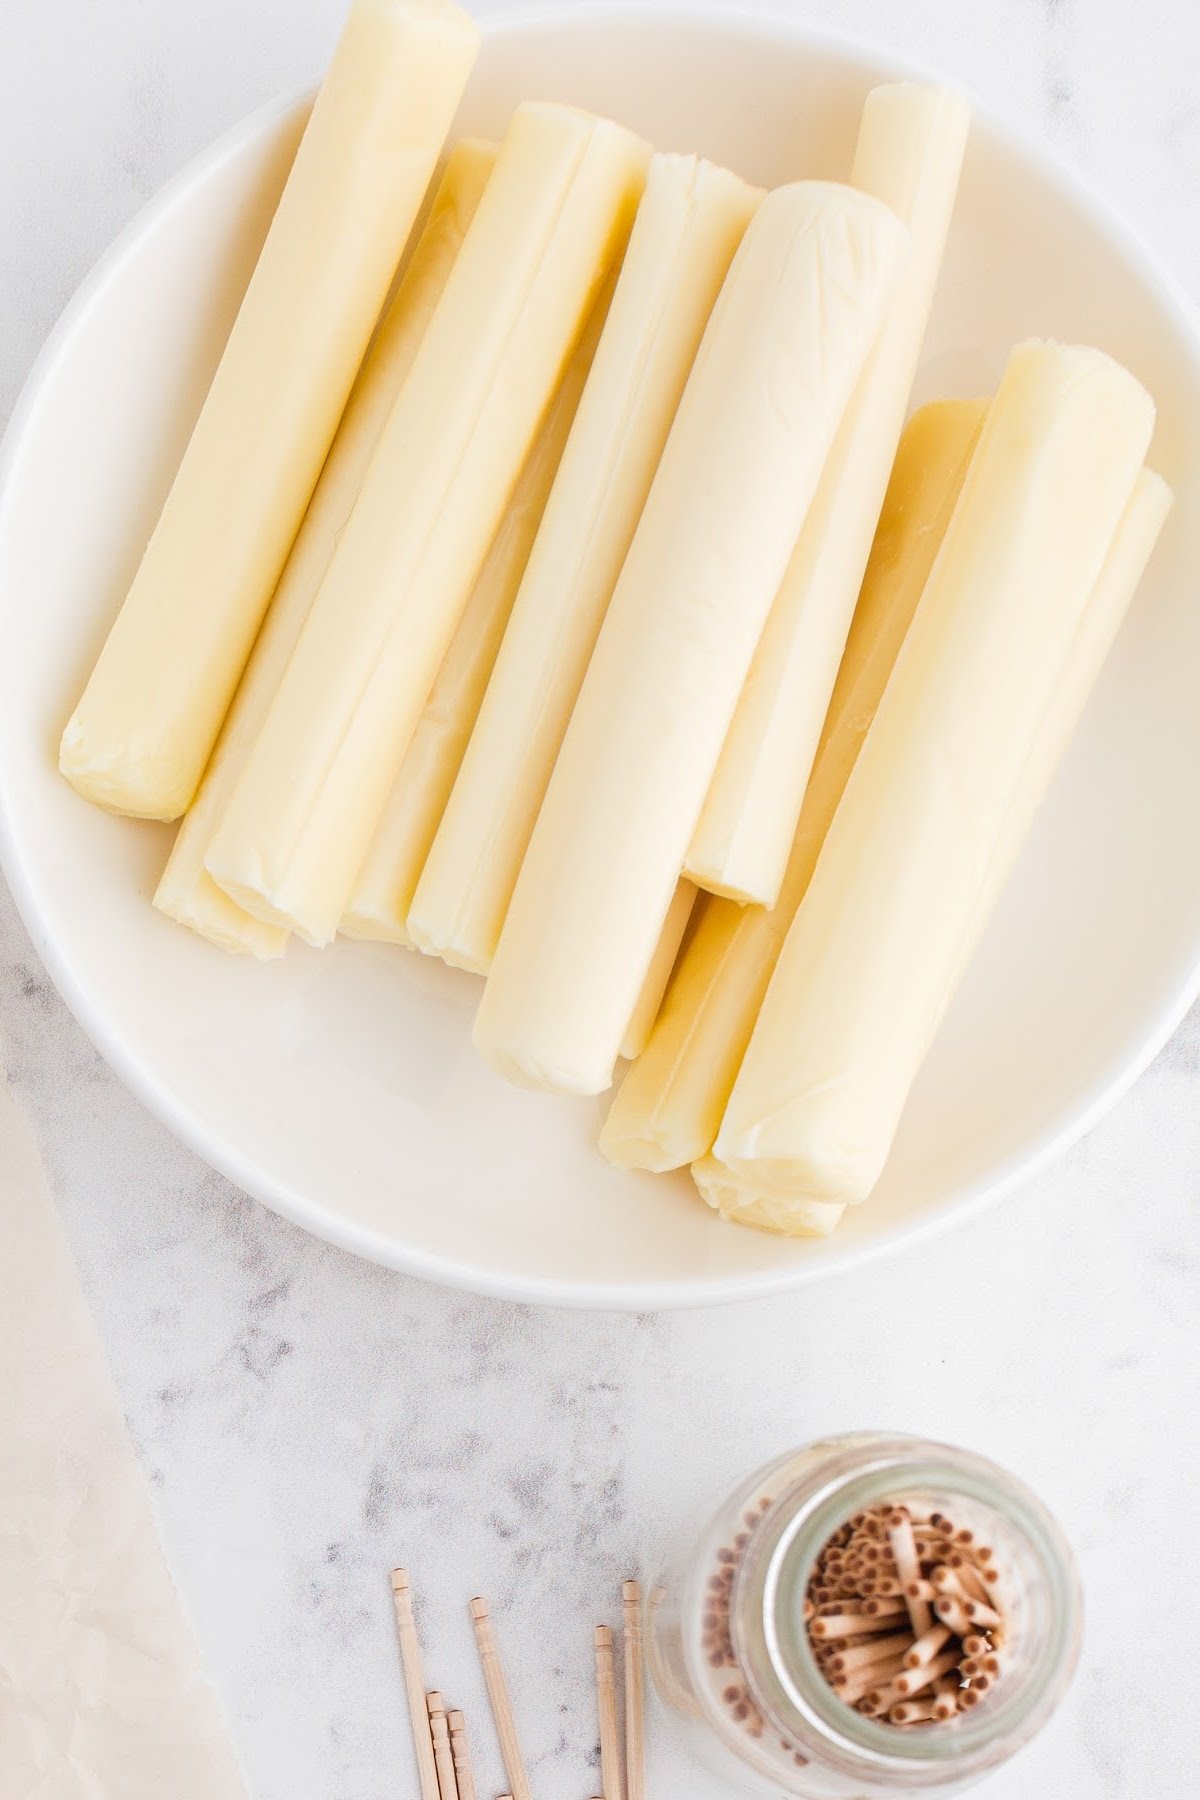
Step 1: Unwrap the mozzarella cheese sticks.
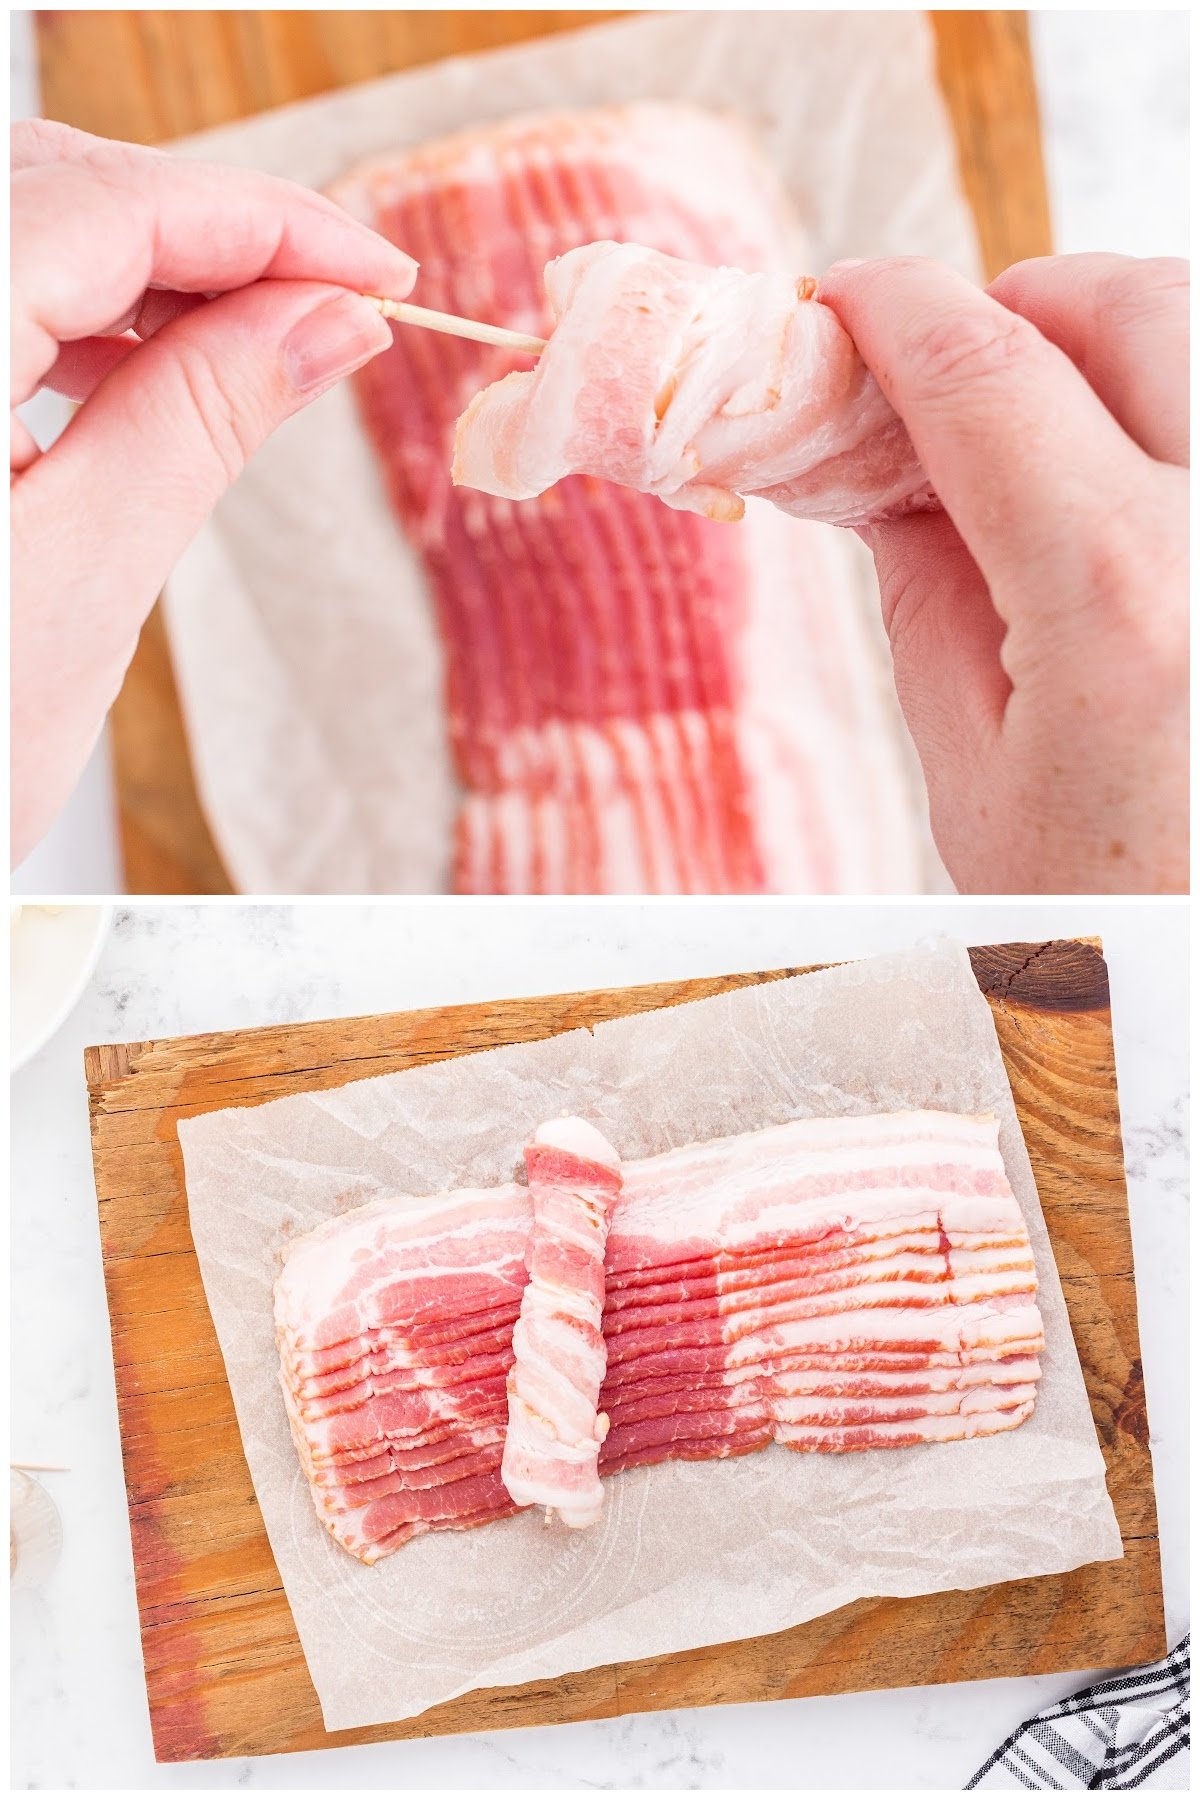
Step 2: Use one piece of bacon per stick. Wrap one end of the bacon slice over the end of the cheese stick. Secure in place with a toothpick. Wrap the bacon around the cheese, overlapping each layer just a little until the strips of bacon can be folded over the opposite end. Secure with another wooden toothpick.
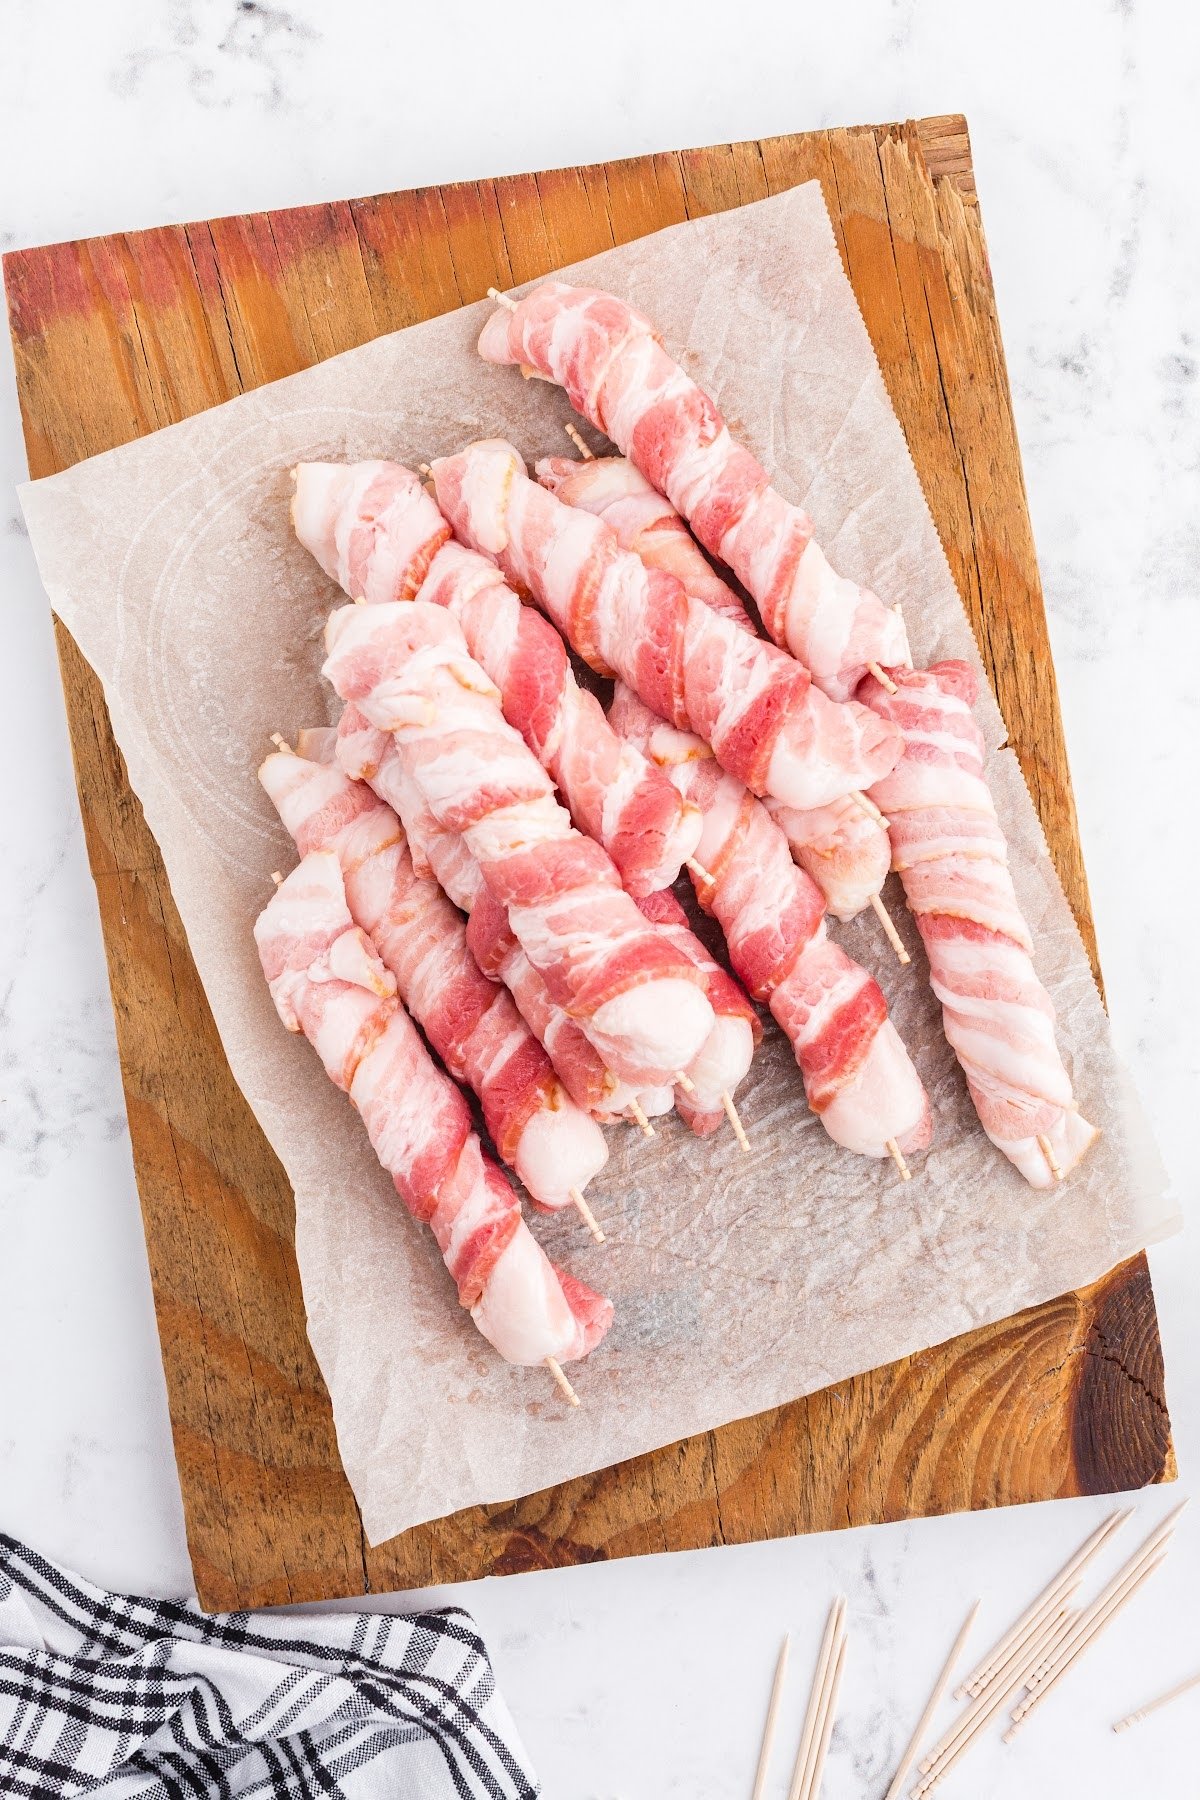
Step 3: Place on a baking sheet lined with parchment paper and repeat for the remaining cheese sticks. Freeze the bacon-wrapped cheese sticks for at least 30 minutes.
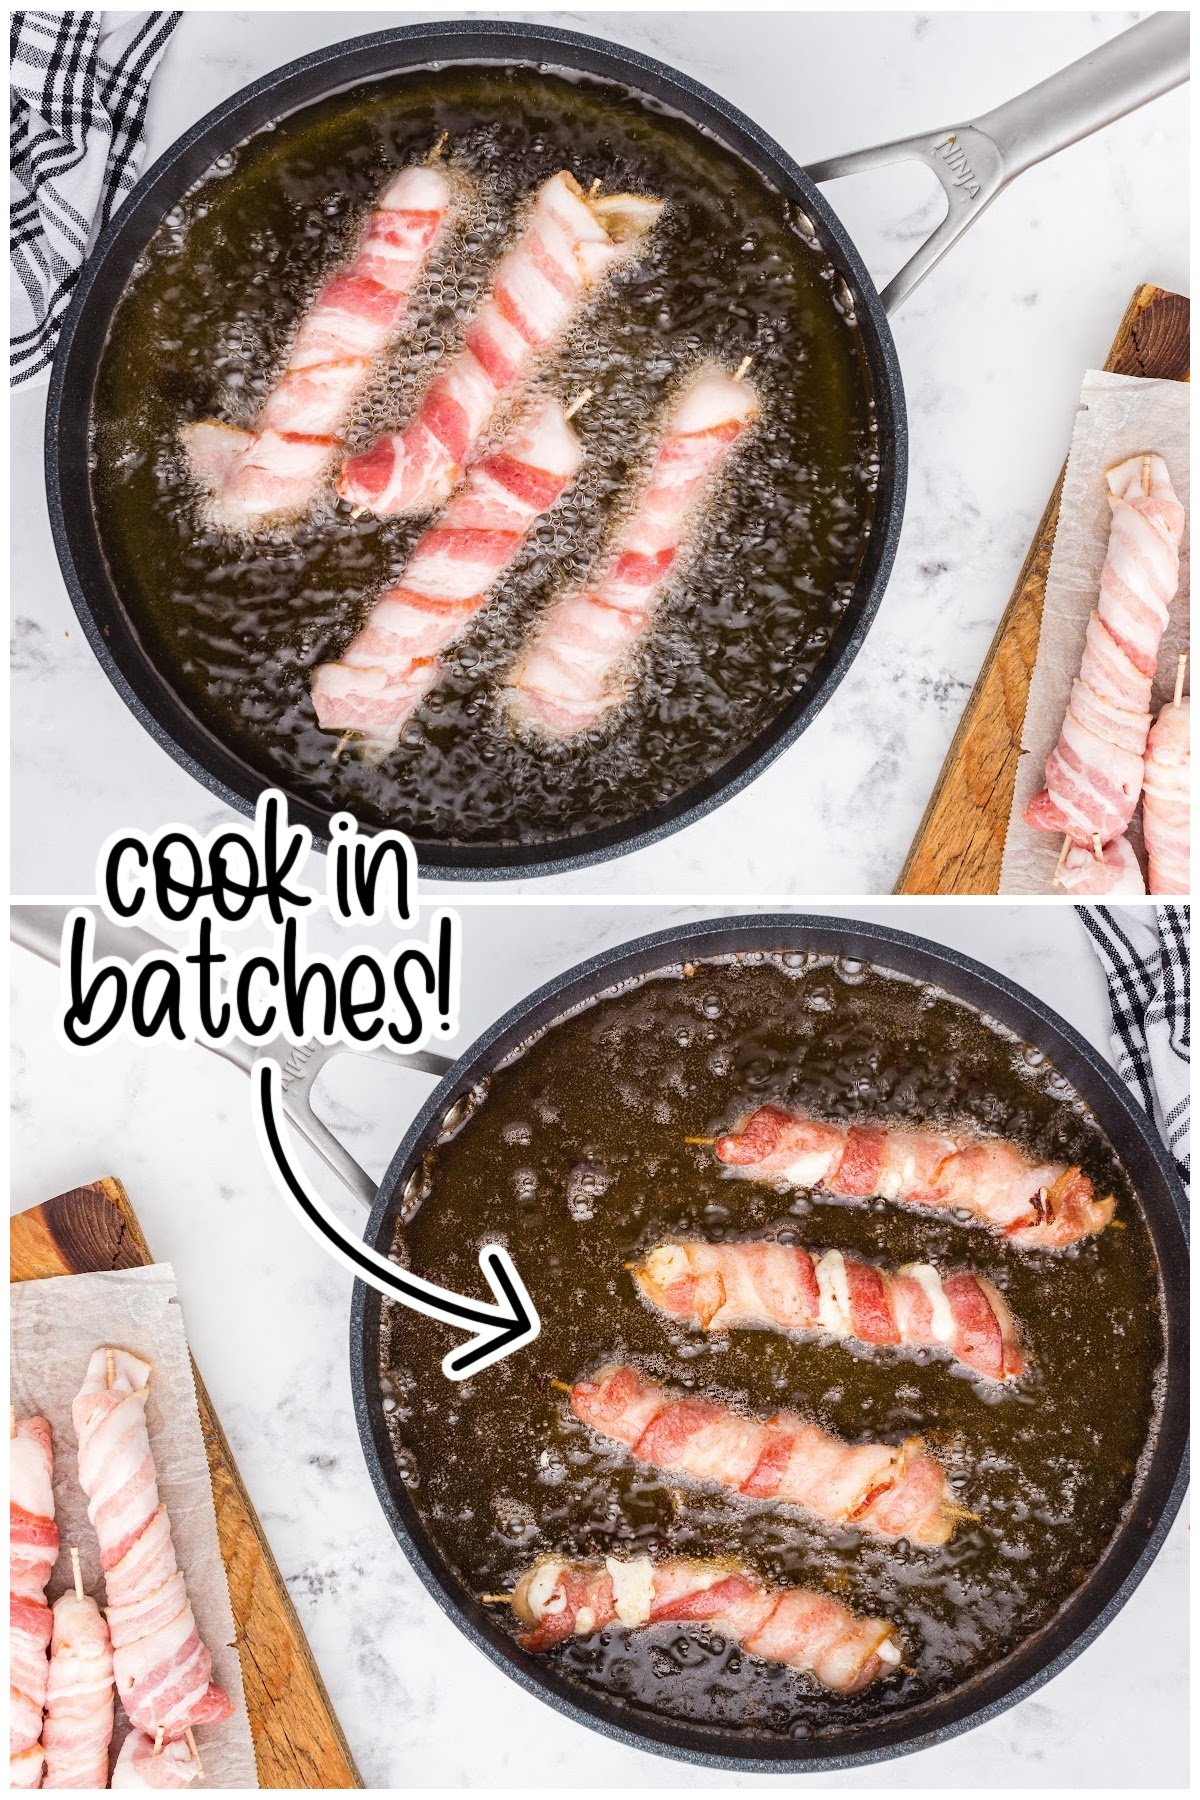
Step 4: Add 2 inches of cooking oil to a large skillet and heat to 350 degrees. Remove the bacon mozzarella sticks from the freezer (a few at the time) placing them directly in the hot oil.
Pro Tip: The oil will take some time to heat to the correct temperature. I suggest you use an instant-read thermometer or a candy thermometer to ensure the oil is heated to the correct temperature. If the oil isn’t hot enough, the cheese will ooze out of the bacon completely before the bacon is cooked completely.
Step 5: Fry until the bacon is crispy, flipping after a few minutes.

Step 6: Transfer to a paper towel lined plate to soak up the excess oil and repeat for the rest of the bacon sticks.
SERVE: Remove the toothpicks and serve with dipping sauce of your choice.
- While chilling the wrapped cheese sticks is more of an optional step, I do highly recommend taking the extra time to do so, as it seems to make quite a difference in preserving the cheese while the bacon cooks. Warmer cheese sticks tend to ooze more and will have a floppier structure when transferred out of the oil.
- To make these ahead of time, keep them in the freezer wrapped in plastic wrap, then take them out when you are ready to fry.
- Pat to the top of the cheese sticks with paper towels to blot up the rest of the bacon grease once you transfer to a plate.
Fun Fact
Many don’t realize that Mozzarella is lower in fat and sodium than many other types of cheese, which makes it ideal for a healthy snack option or as a topping to pizzas and pasta dishes.

Recipe FAQs
While I haven’t specified whether to use raw bacon or precooked bacon, you could use either of these for making your mozzarella sticks.
Raw bacon will be easier to wrap around the cheese tightly and tends to stay in place better, while you’ll get a slightly looser wrap by using precooked bacon. With that said, the directions instruct you to secure the bacon with toothpicks, so I don’t see why you can’t use precooked bacon if you wish.
I recommend that you use regular-cut bacon and not thick-cut bacon. The thick-cut bacon will take longer to cook through and crisp up, and you usually get fewer pieces of thick-cut bacon in a package compared to the regular-cut.
Yes! This bacon wrapped appetizer is appropriate for those following a low-carb or keto diet since it contains zero carbohydrates and is given the green light for foods permitted on the keto diet. Of course, moderation is key with anything, so while this tasty snack is low in carbs (and net carbs), it’s not an invitation to eat an entire batch in one sitting by yourself (even though super tempting!).
Leftover keto bacon wrapped cheese sticks can be stored in an airtight container in the fridge for up to 3-4 days, although I think they taste the best when served immediately after frying! They can also be reheated on a baking sheet in the oven.
More Appetizers To Get The Party Started

If you tried this Bacon Wrapped Mozzarella Stick Recipe or any other recipe on my website, please please leave a 🌟 star rating and let me know how you liked it in the 📝 comments below.
Bacon Wrapped Mozzarella Sticks
Ingredients
- 1 pound bacon typically about 12 slices
- 12 Mozzarella sticks whole milk or low-moisture
- cooking oil
Instructions
- Unwrap mozzarella sticks from their individual wrappers.
- Use one piece of bacon for each mozzarella stick. Wrap one end of the bacon over one end of the cheese stick. Use a toothpick to secure the bacon in place, pushing the toothpick straight through the bacon and into the center of the cheese.
- Wrap the bacon around the cheese stick, overlapping each layer slightly until the bacon can be folded over the opposite end. Secure with another toothpick. The cheese stick should be completely covered by the piece of bacon. Set aside.
- Continue wrapping all of the cheese sticks with bacon.
- Place the bacon-wrapped cheese sticks in the freezer for at least 30 minutes.
- Fill a skillet with 2” of cooking oil (vegetable oil) and heat over medium-high until the oil reaches 350°F.
- Remove several cheese sticks from the freezer at a time, adding them directly to the heated oil.
- Fry, flipping after a few minutes, until the bacon is cooked to desired crispness.
- Use a strainer to remove the fried mozzarella strip from the oil and place on paper towels or paper bags to absorb the extra oil.
- Continue cooking the cheese sticks in batches until done.
- Remove toothpicks before serving.
Notes
Nutrition
Make this recipe?
Share it with me on Instagram @girlinspired1 and follow on Pinterest for more!


Leave A Reply!