
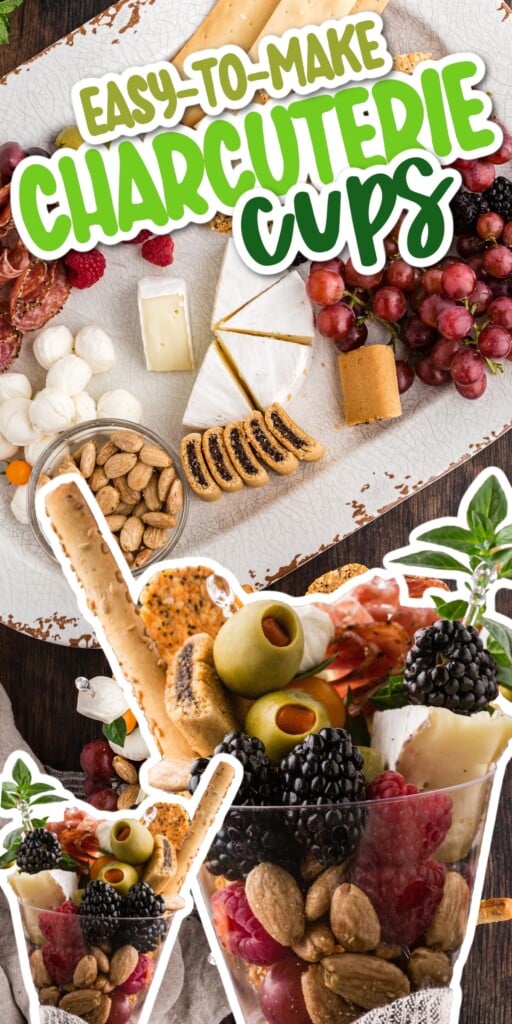

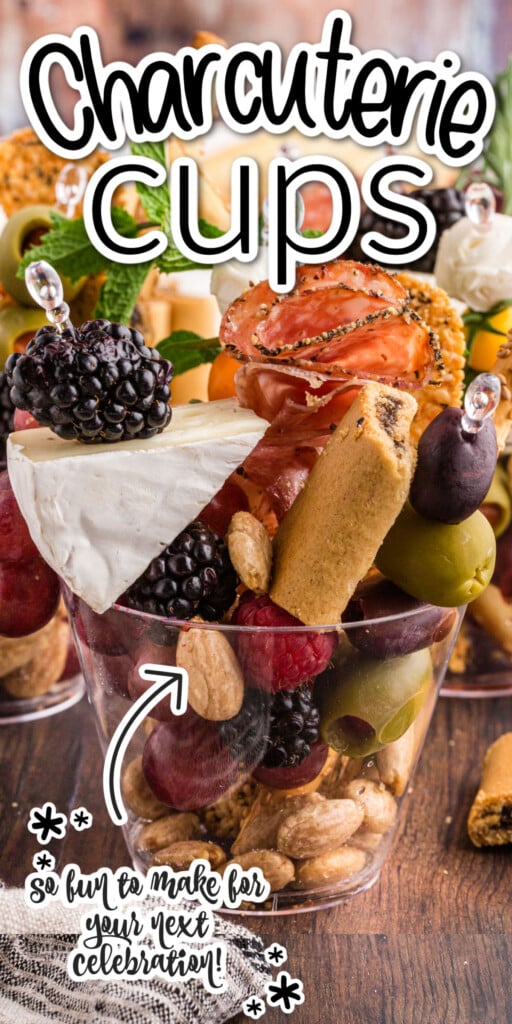


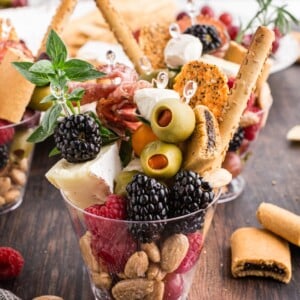
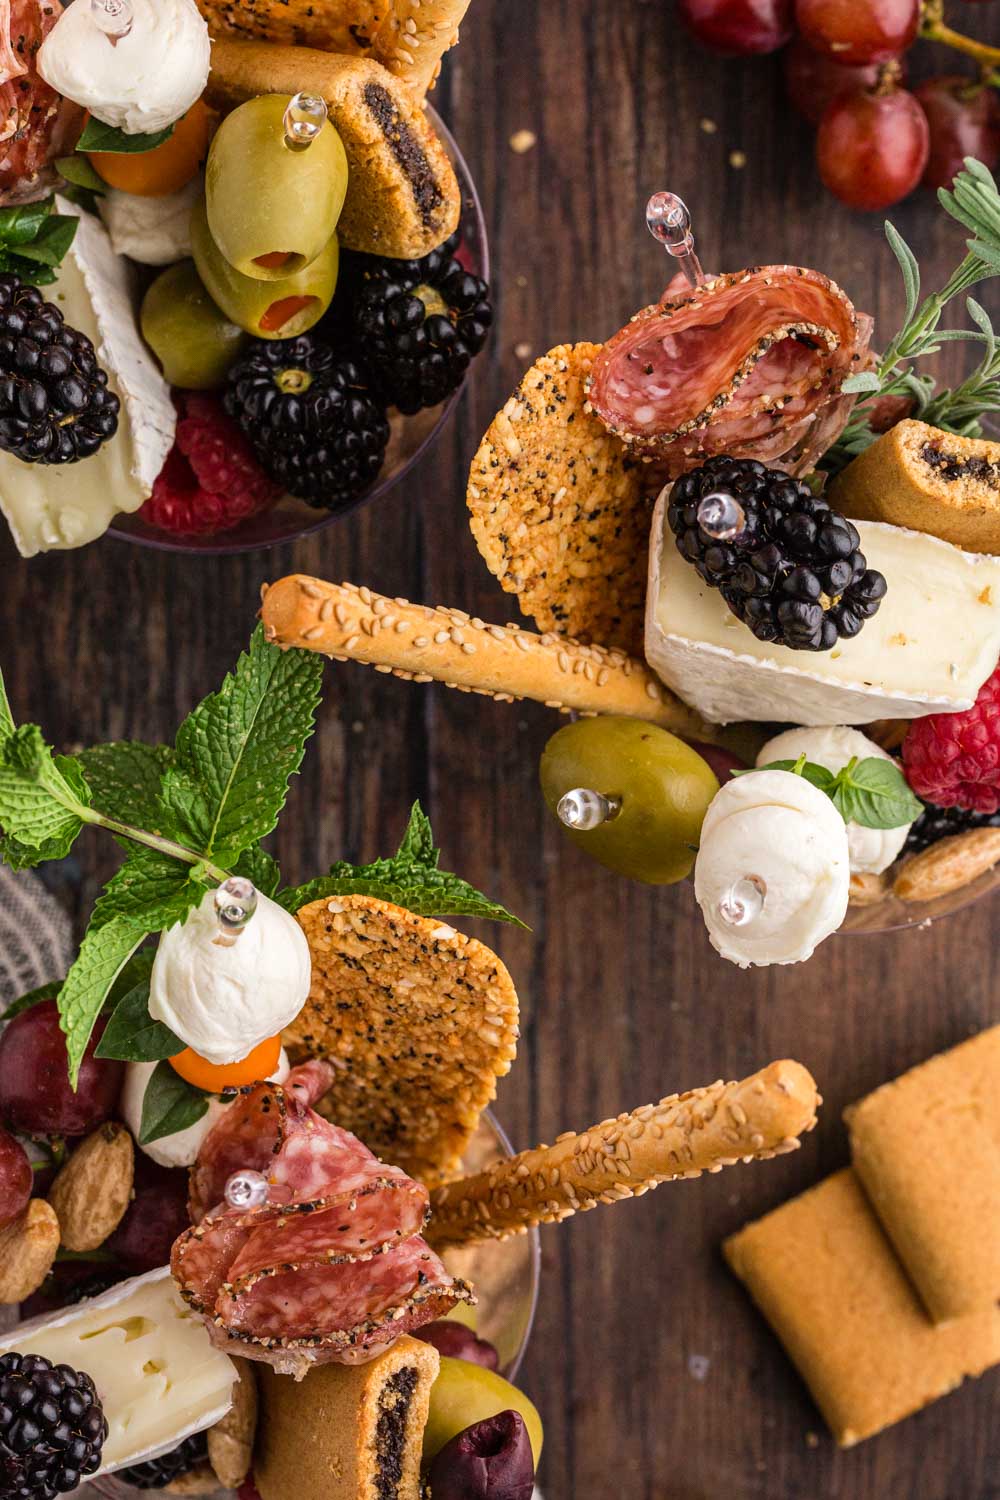
Introducing Charcuterie Cups! Many of us have enjoyed the delightful assortment of snacks offered by a traditional charcuterie board, but with this unique twist, your guests get to walk around with individual charcuterie cups filled with their own personal stash of snacks. Not only is this a fun and visually appealing way to showcase your party appetizers, but it also adds a touch of creativity to the traditional concept of charcuterie.
Traditionally, the French term “charcuterie” refers to an artful arrangement of mixed meats, cheeses, artisan bread, fruit, and nuts on a serving plate or board. However, with Charcuterie Cups, we take this concept to a whole new level. These mini charcuterie cups offer a personalized and individualized experience for your guests.
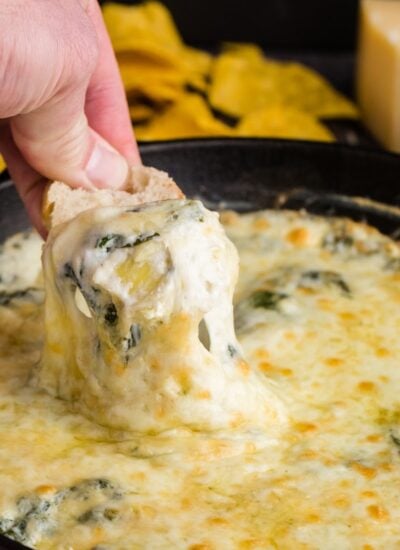
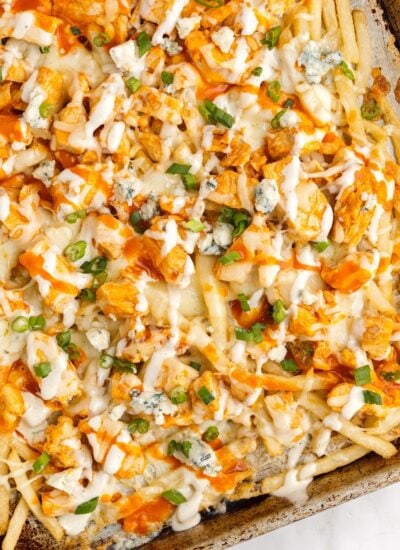
These easy charcuterie cups would be perfect for bridal showers, baby showers, game days, or larger dinner parties. Place them on the appetizer table alongside some crockpot meatballs with grape jelly, Lil Smokies pigs in a blanket, or jalapeño poppers.
Jump to:
🫒 Ingredients:
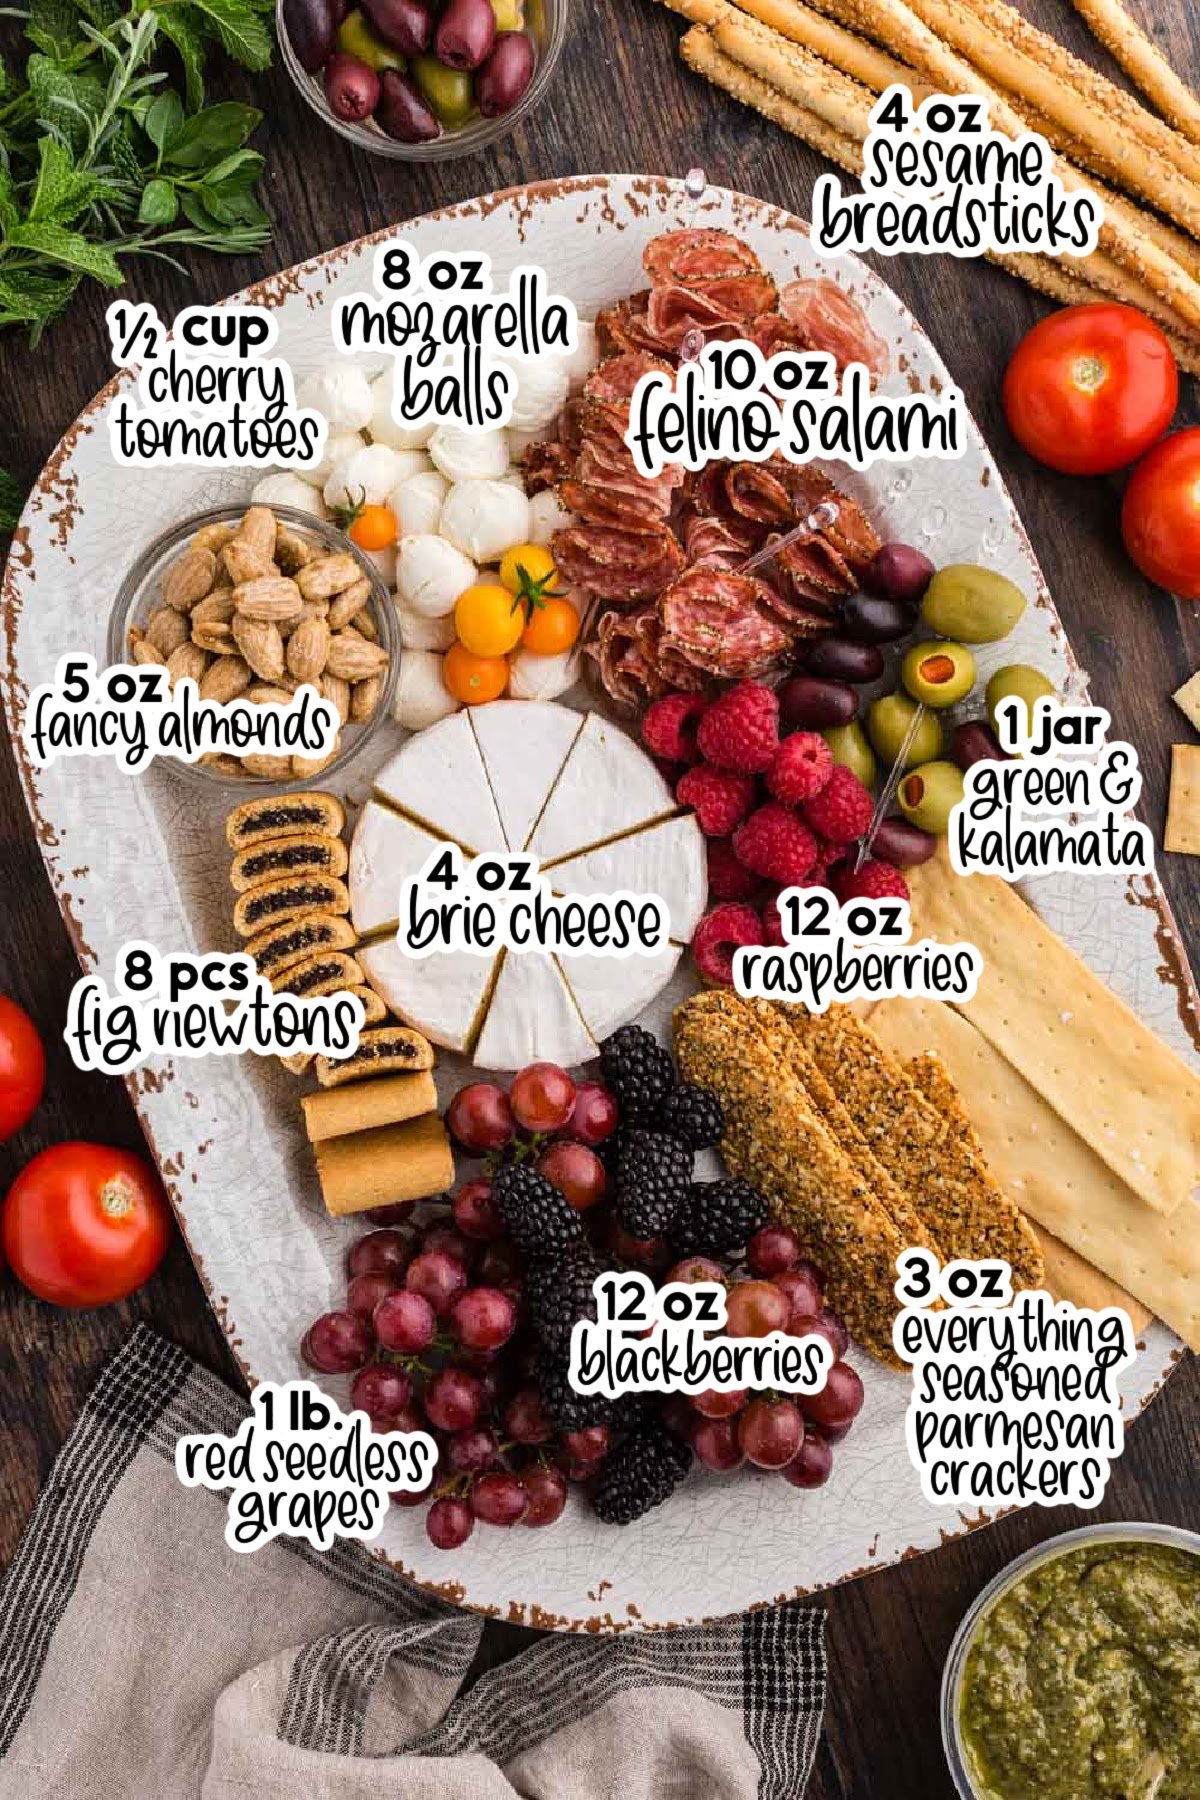
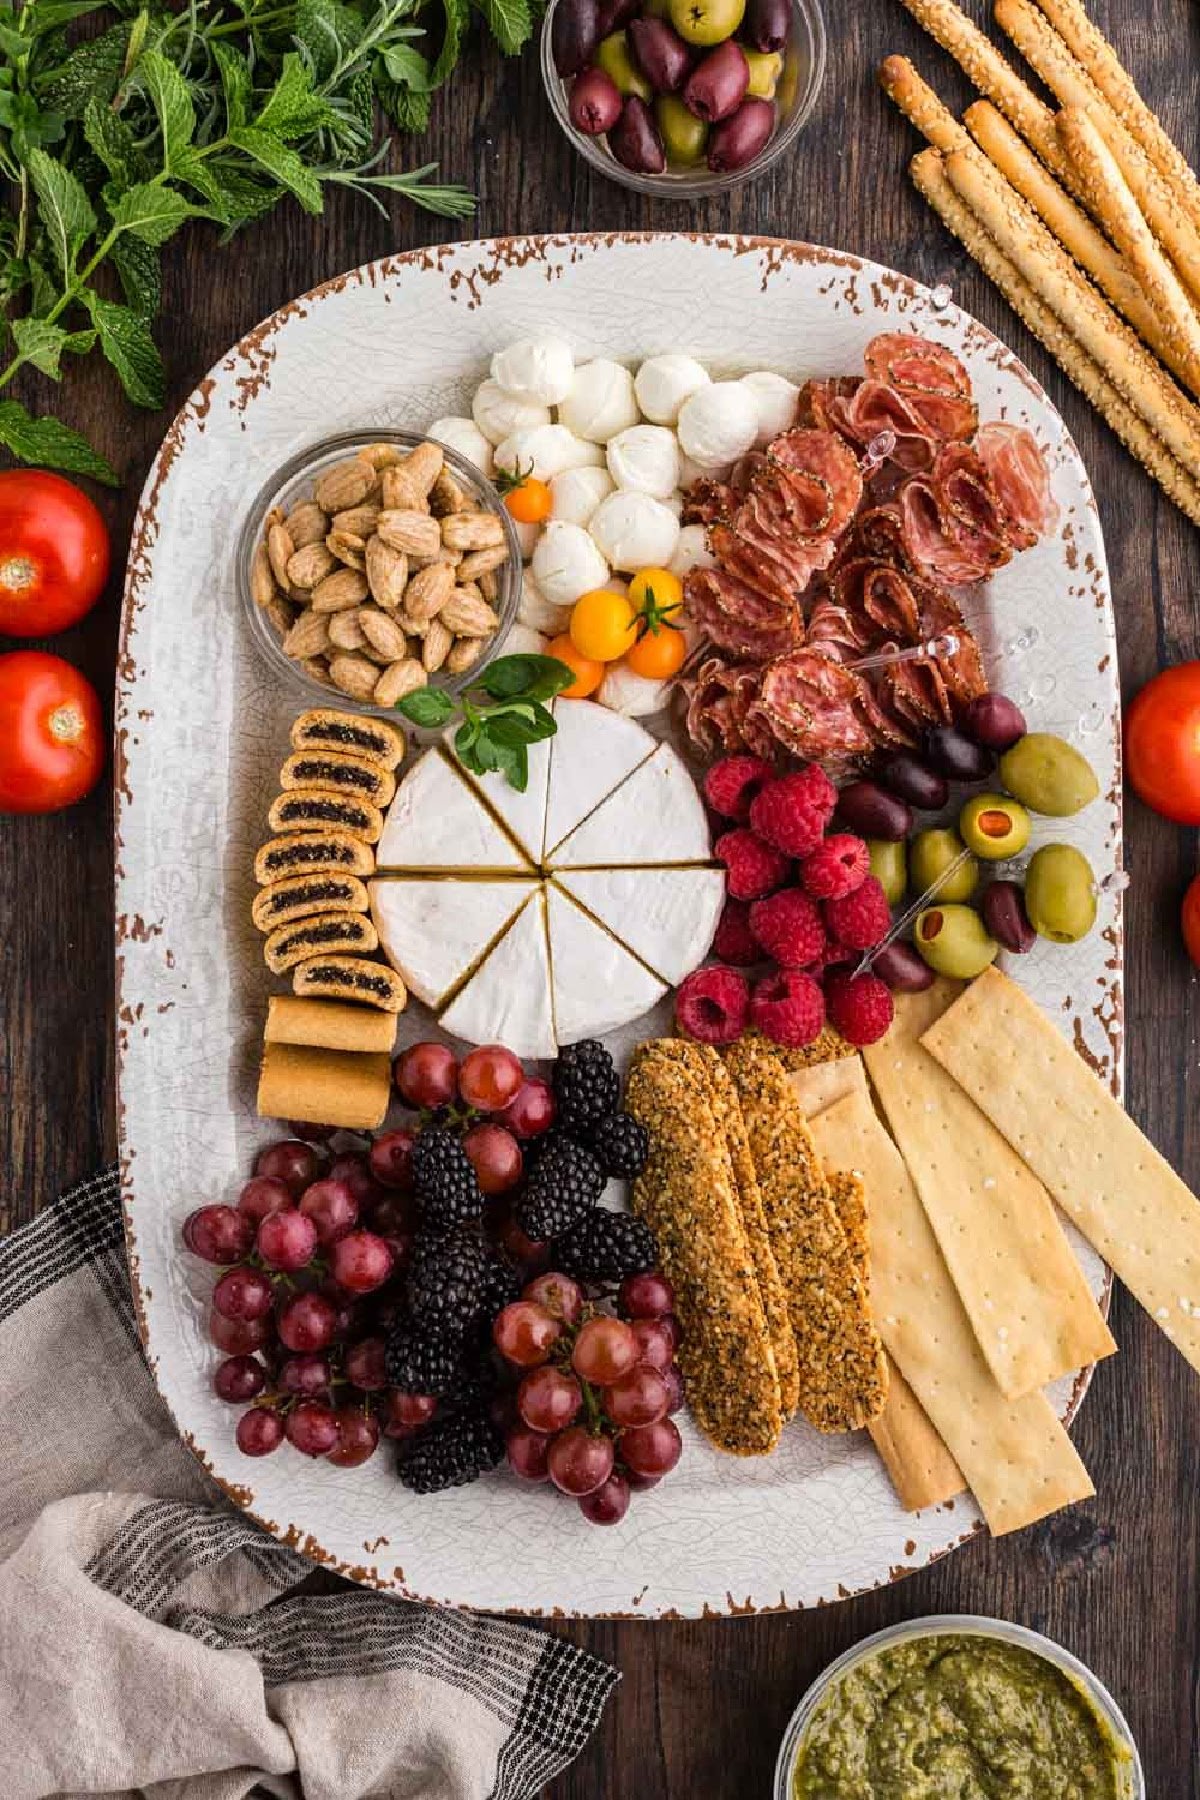
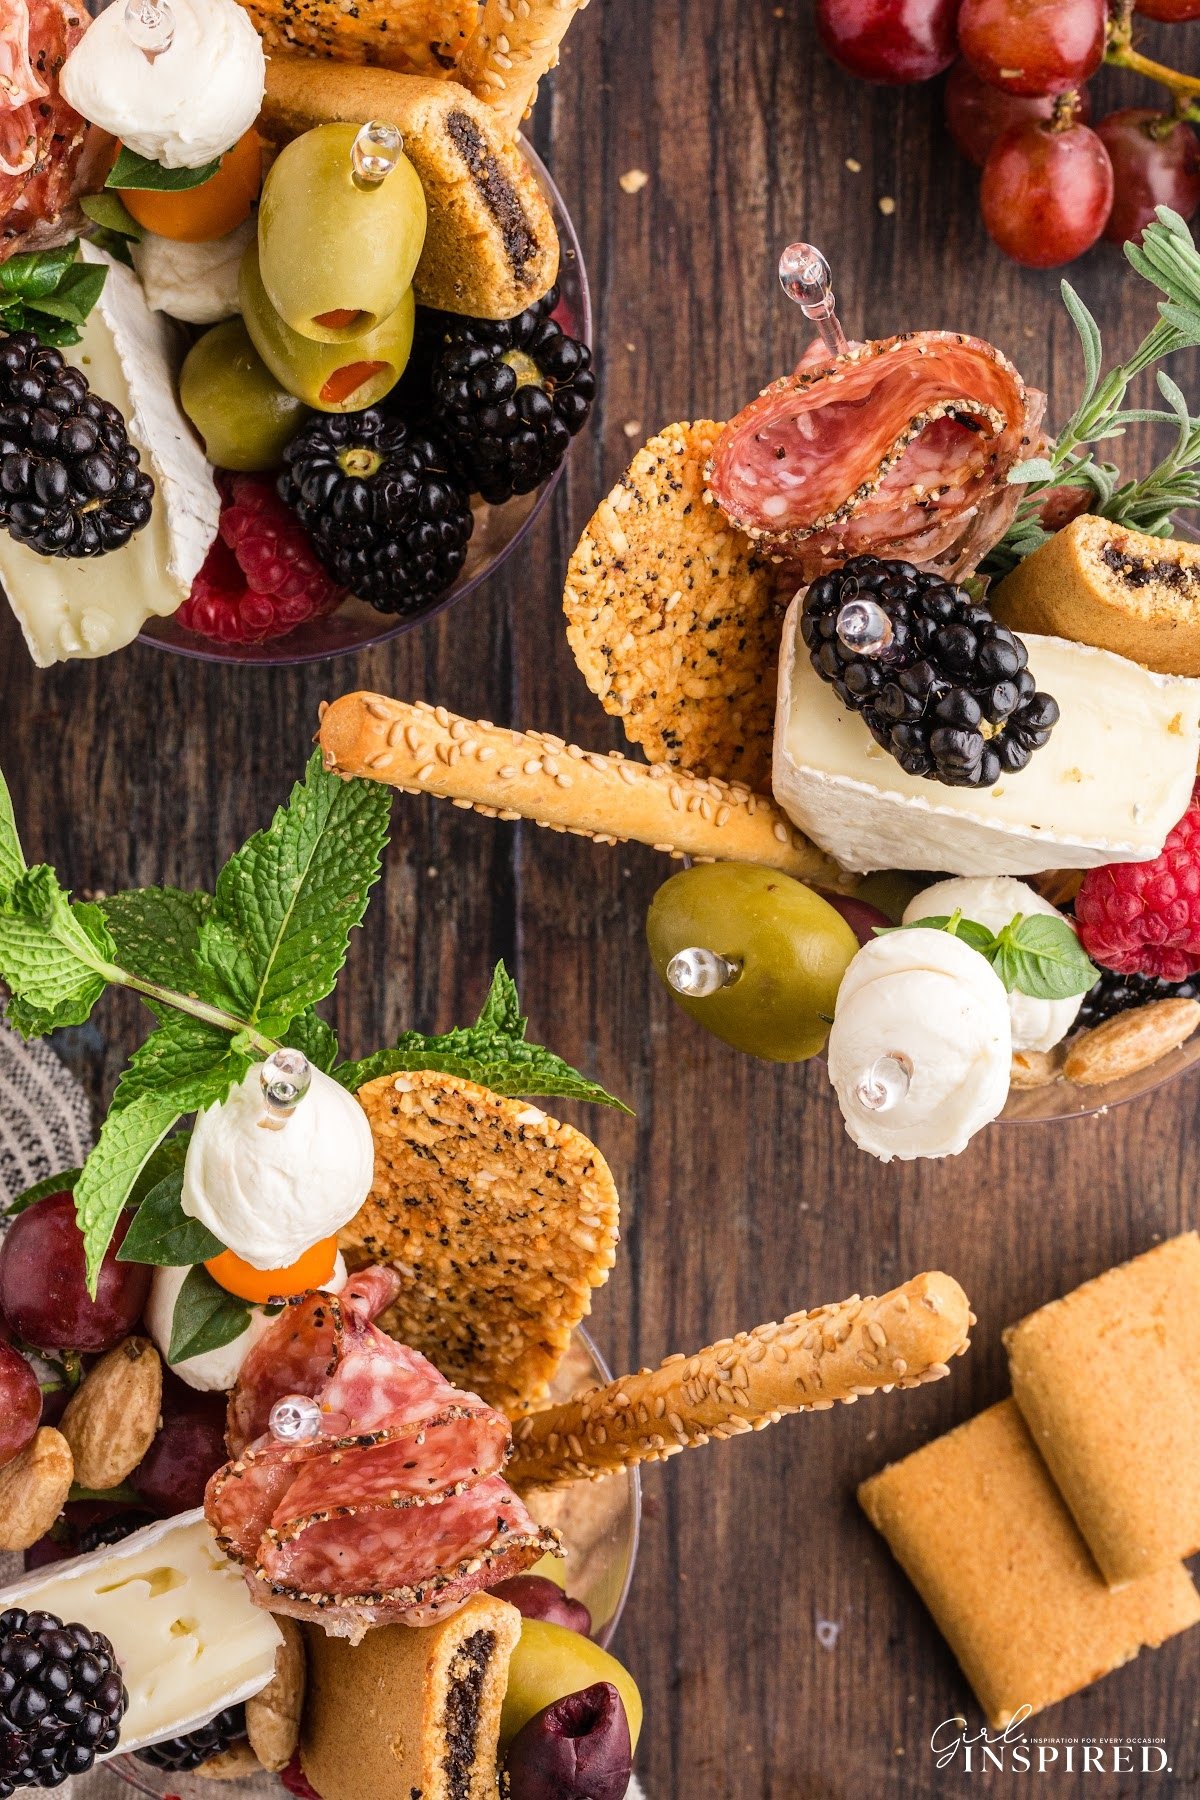
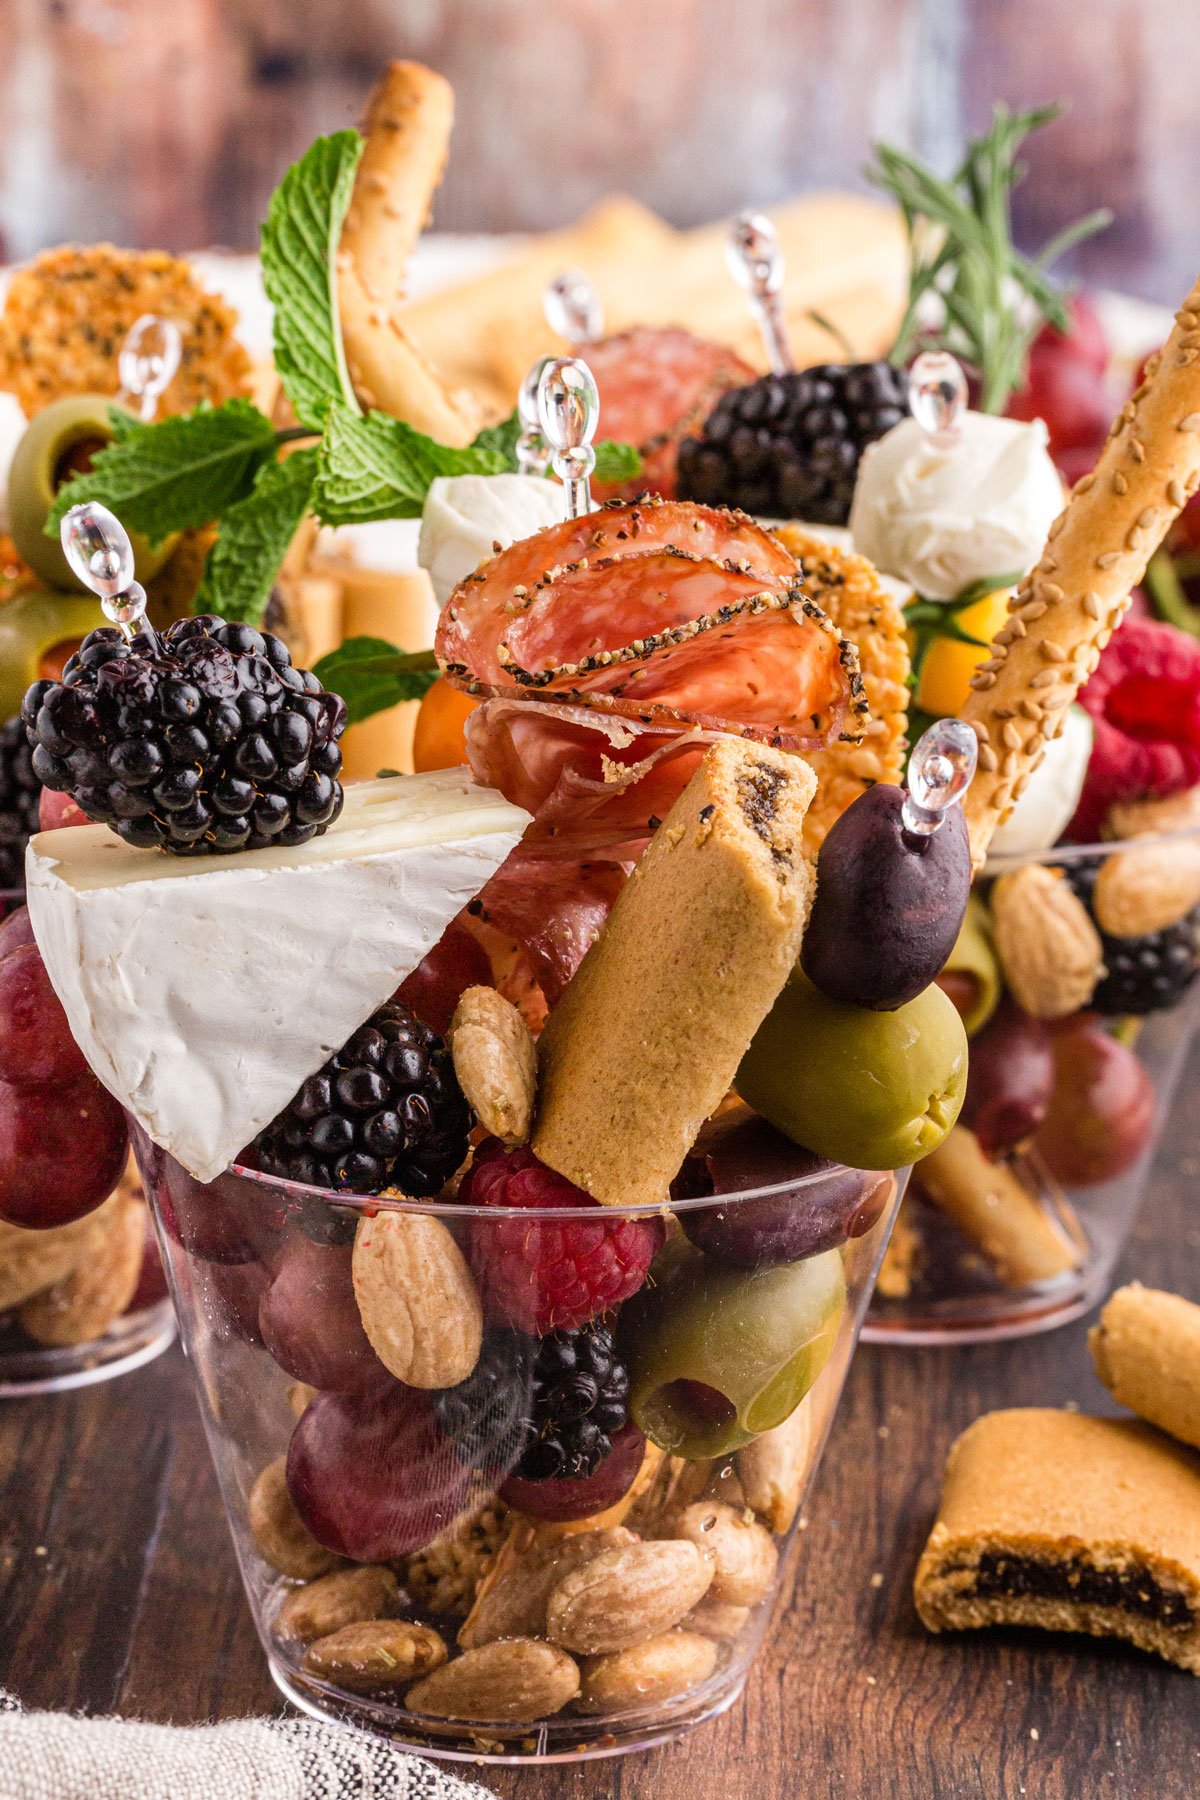
- Selection of meats (I used peppered and felino salami) – Adds savory and spicy flavors to the charcuterie cup. Fold them into bite-sized pieces for easy consumption.
- Green and kalamata olives – Provide a tangy and briny element to the cup. Arrange on picks or sprinkle them in – be sure to dab off any excess juice so they don’t make dry ingredients soggy.
- Round of brie cheese – Offers a creamy and indulgent component to the charcuterie cup. Cut it into wedges or cubes and pair it with crackers or fruits.
- Rosemary and sea salt marcona almonds – Add crunch and a flavorful seasoning. Scatter them around the cup or place them in a small dish for guests to enjoy. Peppered pistachios or spicy almonds make tasty ingredients, too.
- Sugar snap peas – Offer a refreshing and crisp vegetable option. Serve them whole or trim the ends for easy snacking.
- Red seedless grapes or green grapes – Provide a juicy and sweet contrast to the other savory ingredients. Arrange them in clusters or scatter them throughout the cup.
- Blackberries and raspberries- Bring a burst of tartness and vibrant color to the charcuterie cup. Place them on food picks so they don’t get smashed.
- Everything seasoned parmesan crackers – Provide a crunchy and savory element. Place them standing up in the center back of the cups and arrange everything else around. Cheese twists are a great option, too.
- Sesame breadsticks – Add a crispy and savory component to the cup. Place them vertically also.
- Fig Newtons – Offer a sweet and chewy option that complements the other flavors. They also pair well with the cheeses.
- Fresh mozzarella balls – Mini cheese balls are a great creamy and mild cheese option. Place them on skewers or distribute them evenly throughout the cup.
- Fresh basil leaves – Add a touch of freshness and aroma. Use them as a garnish or place them on a pick with a tomato and mini mozzarella ball.
- Cherry or grape tomatoes – Bring a burst of juiciness and vibrant color to the cup.
- Fresh herb sprigs for garnish (rosemary, lavender, basil, or oregano) – Enhance the visual appeal and add a hint of herbal fragrance. Use them as a decorative garnish on top of the cup.
For a full list of ingredients and their measurements, 📋 please view my printable recipe card at the bottom of the post.
Substitutions and Variations
- Opt for different cheese ideas such as blue cheese, goat cheese, or cheddar. Anything that won’t be too difficult to pick out of the plastic cups will work.
- Instead of charcuterie cups, consider making “jarcuterie.” Essentially, you’ll assemble the snacks in a mason jar instead of clear plastic cups!
- Add ham, pepperoni, prosciutto, or other deli meat instead of salami.
- Walnuts, pecans, candied nuts, or really any variety of nut can be used.
- Other fresh fruit that would be delicious in these charcuterie cups include blueberries or strawberries, while dried fruit such as dried apricots would be equally great additions and add interesting textures.
- Pickles are also great alongside both green and black olives.
- Baby carrots, bell pepper strips, and cucumber slices are all a great way to add crunch to your individual servings.
- If you want to serve your appetizer cups during the holiday season, be sure to include snacks such as these Sugared Cranberries! Trader Joe’s often has chips or cookies in holiday shapes or colors that would be fun to add.
- Cheese Shapes – Use a cookie cutter to cut thick slices of cheese into cute party-theme related shapes.
🔪 Instructions:
PREP: Summarize prep instructions here, if applicable.
Step 1: Open the packaging for all of your charcuterie components so that they are easily accessible while building your charcuterie cups.
Step 2: Add your tall components (in this case, the breadsticks.) The breadsticks will frame the back of the cup. Add crackers to the cup also. Fill the bottom of each cup with a few almonds (these are nice and dry so they won’t mind the other components resting in them and they also weight down the bottom of the cup a bit.)

Step 3: Fold pieces of salami into fourths and poke onto a food pick. Line up 4-5 pieces of salami on each pick (or whatever fits). Tuck the salami picks into the charcuterie cup.
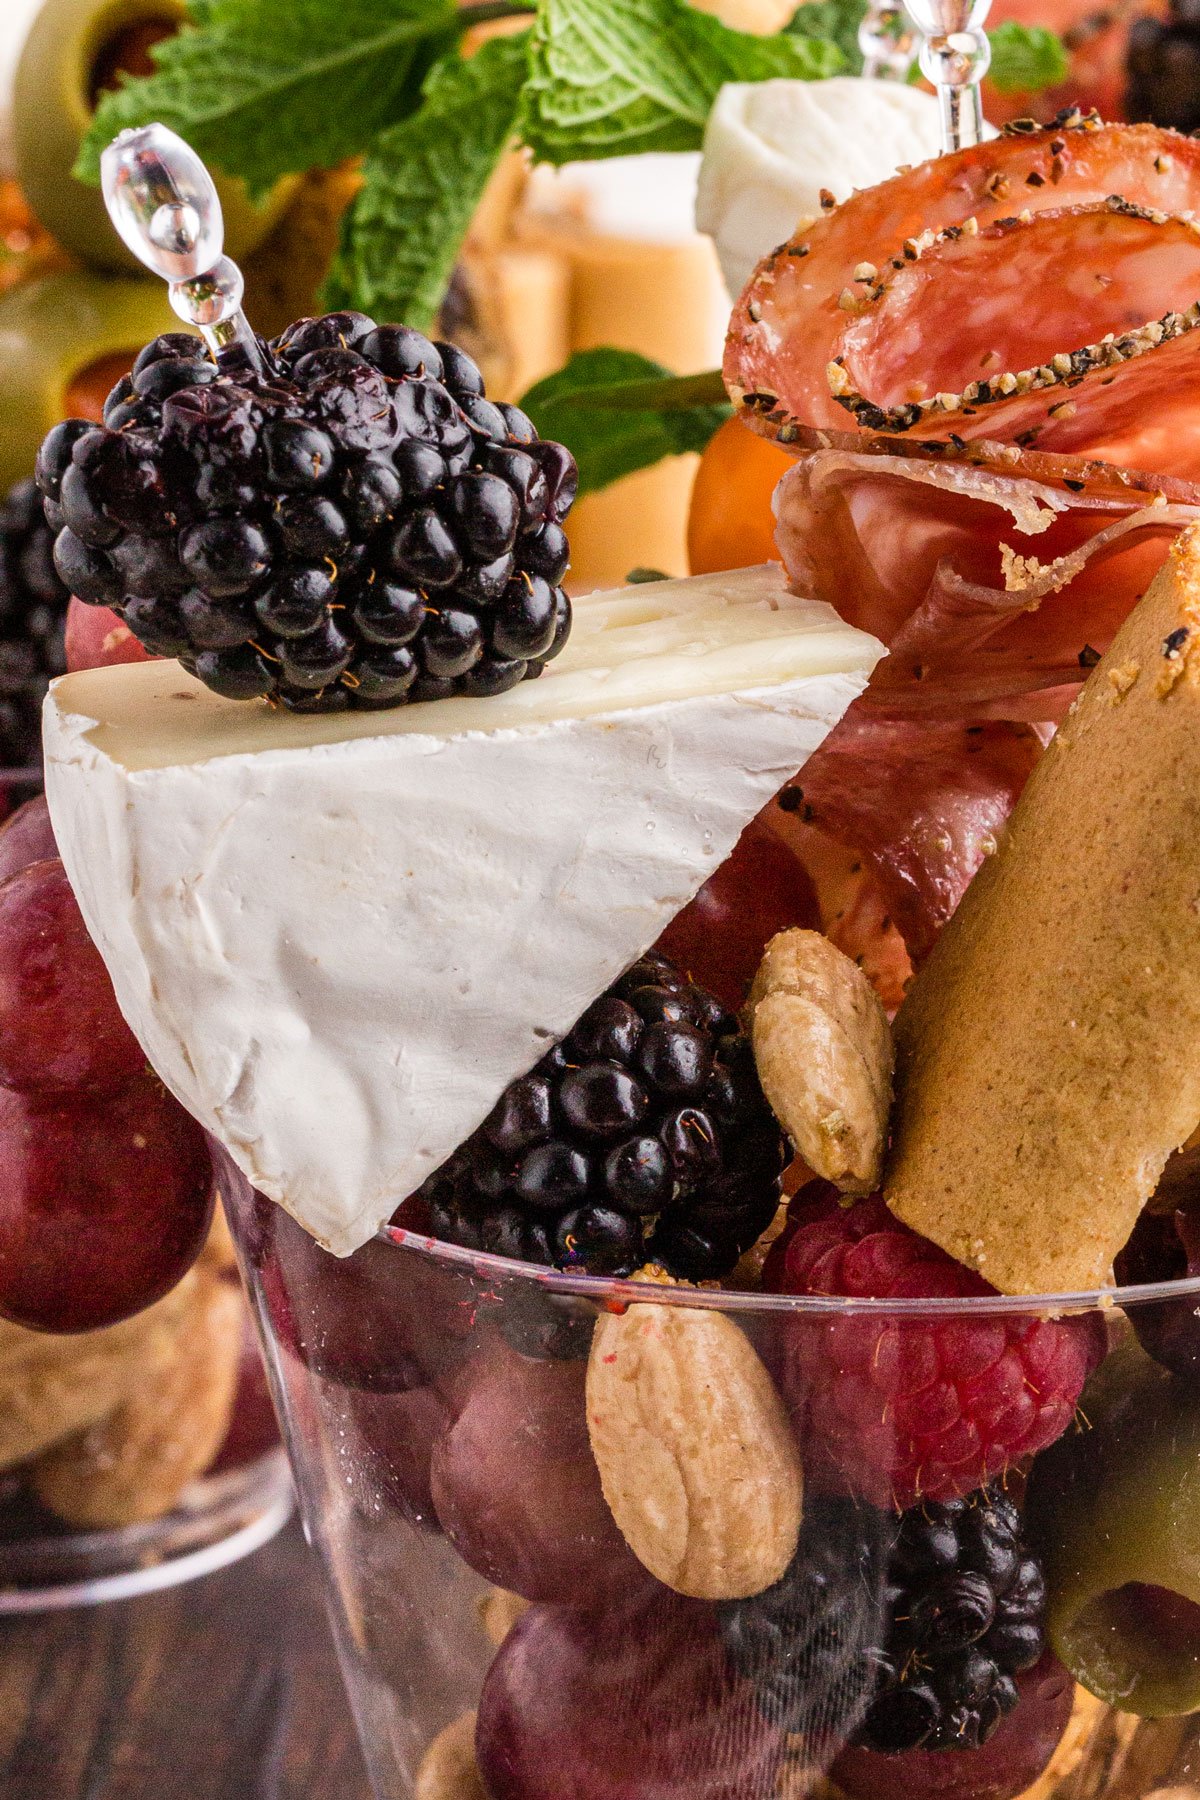
Step 4: Cut the brie into eight wedges. Place a wedge of cheese and some berries or grapes onto a pick. Make cheese/fruit picks and add them to the charcuterie cups.
You can add a Pro Tip within the step by steps if there is something pertinent to the step you just described.
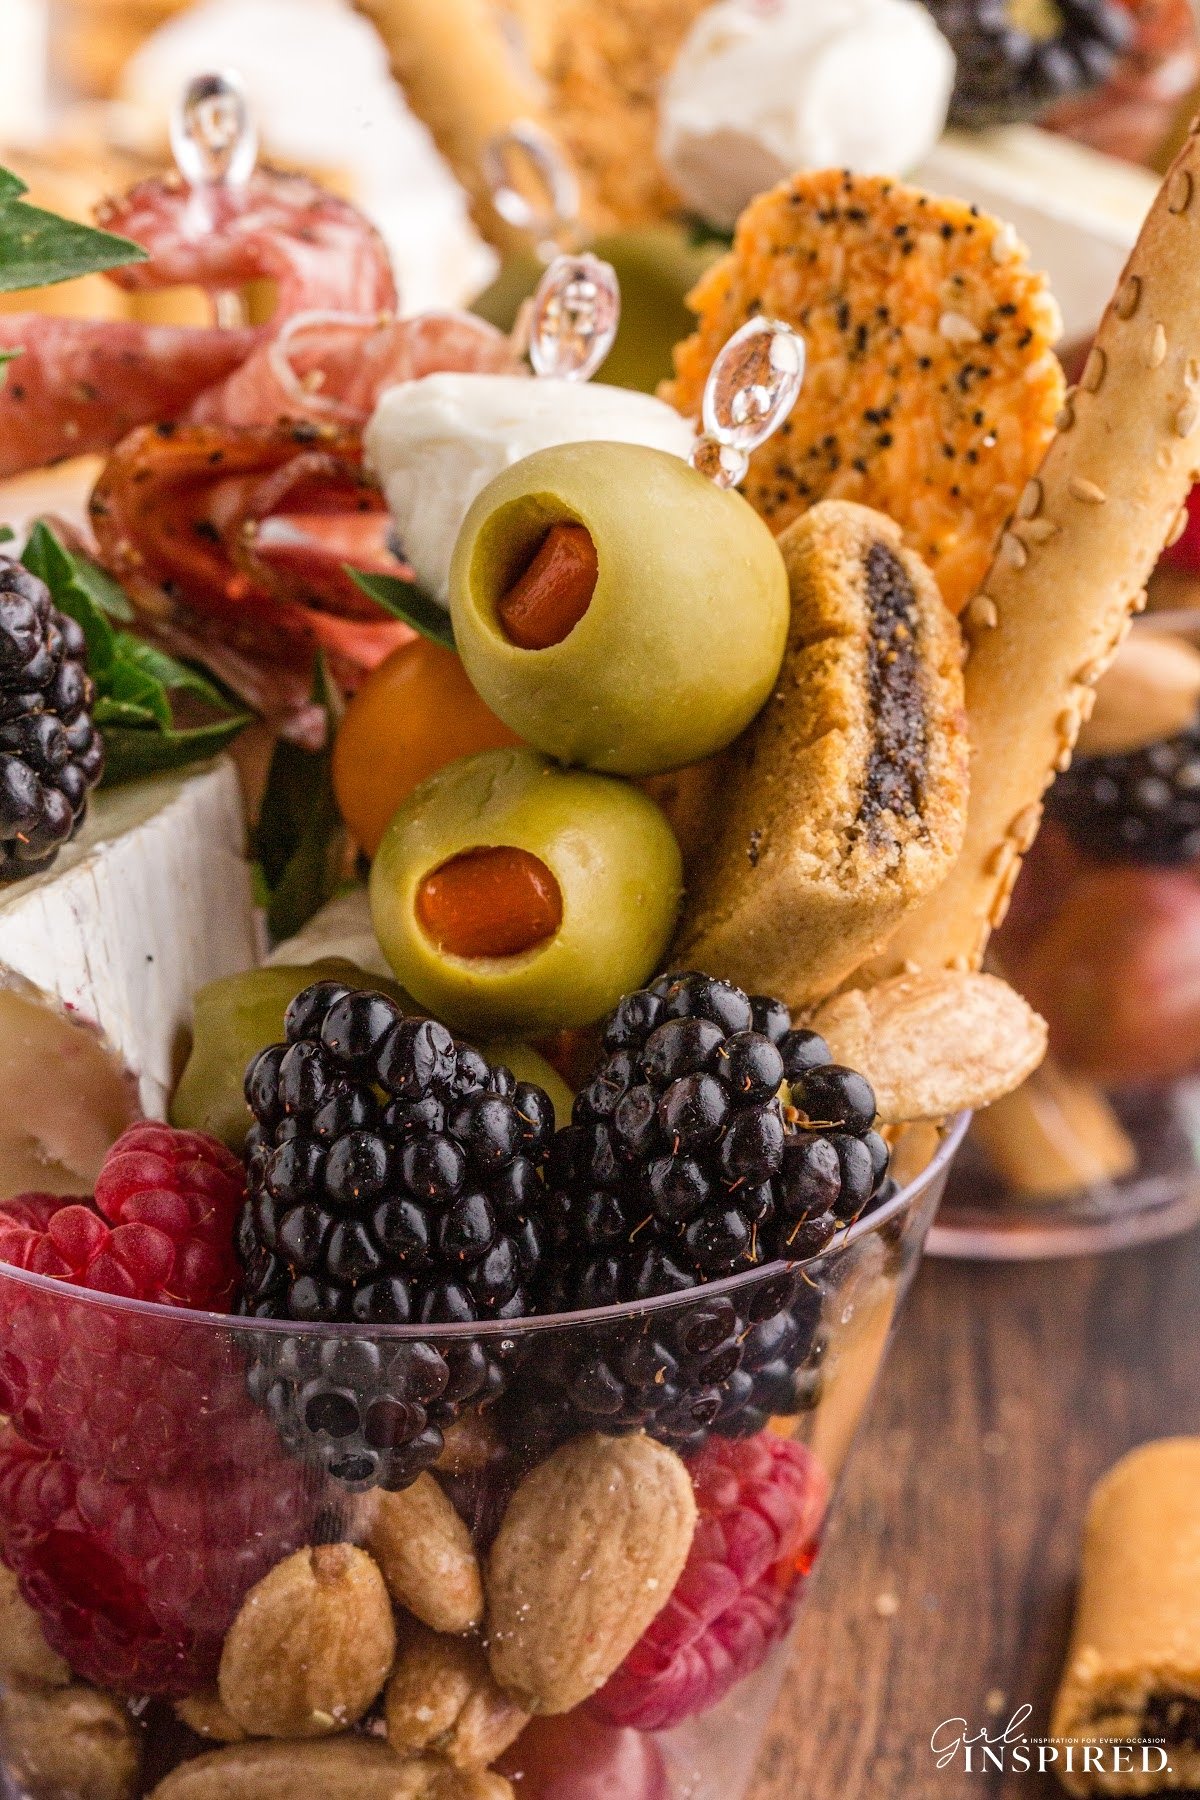
Step 6: Make olive picks and add them to the cups.
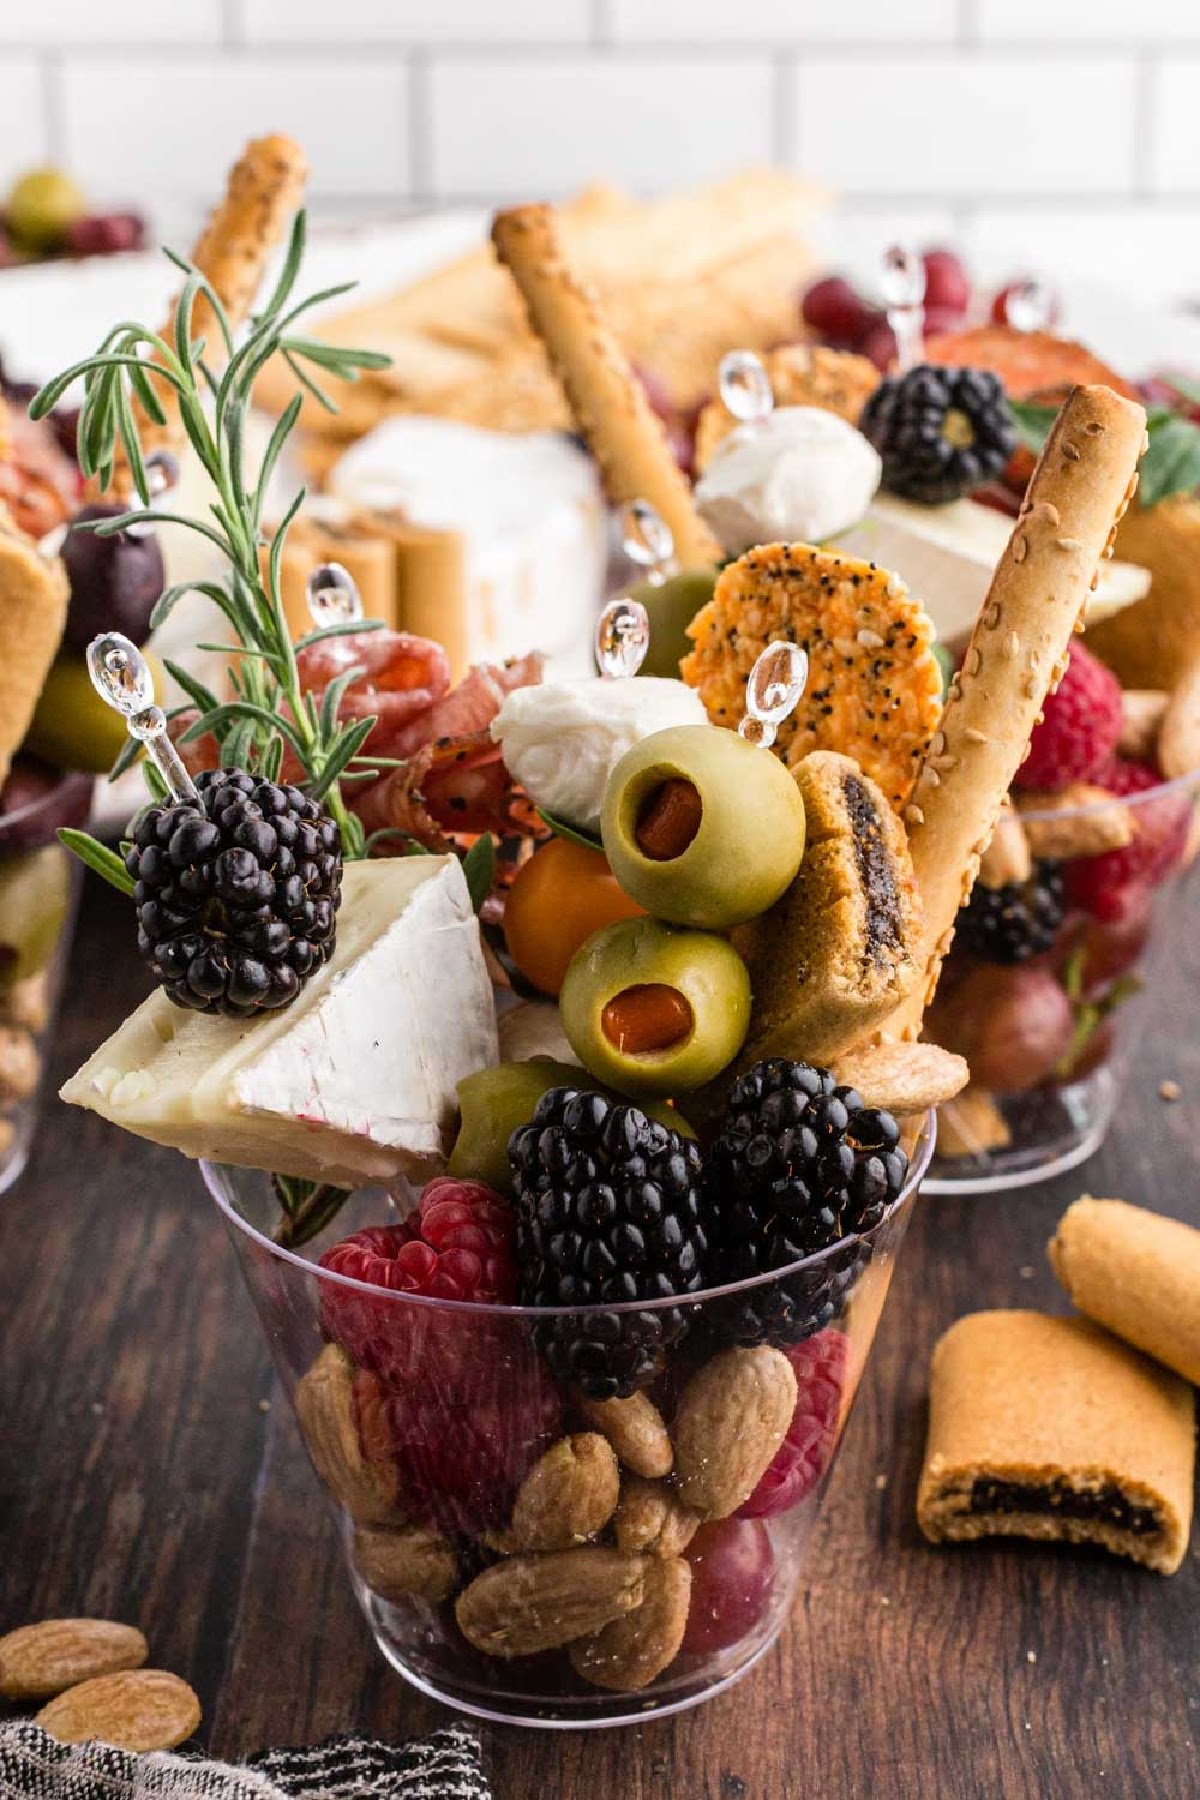
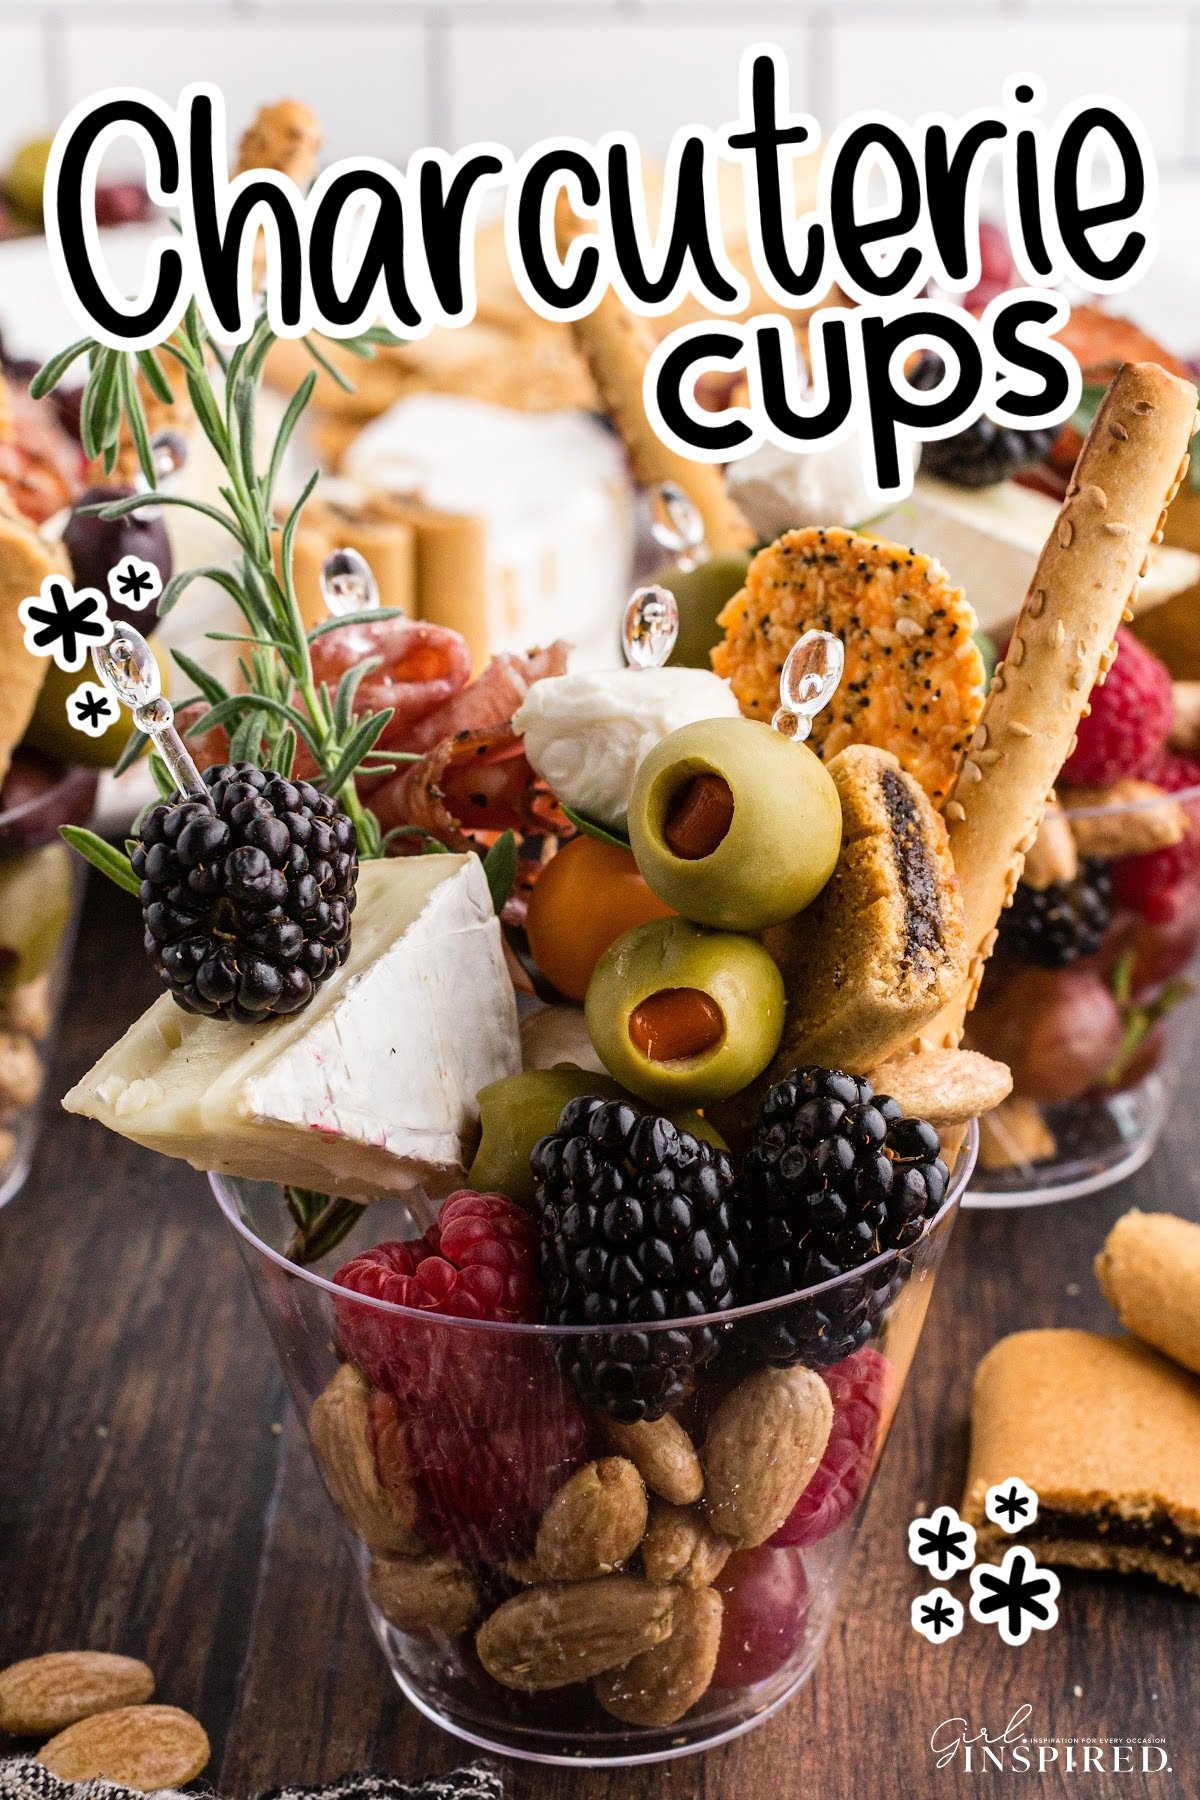
Step 7: Finish the cups by placing an herb sprig toward the back of the cup. Fill empty space with more grapes, berries, and nuts.
Tips For Making Charcuterie Cups
- With the ingredient considerations in mind, still try to use a balance of meats, cheeses, crackers, nuts, and berries/vegetables. Honestly, the sky’s the limit with what you could use. Feel free to add or swap ingredients based on your food preferences.
- Opt for a mix of sweet and savory ingredients in your cups or stick with one kind!
- If you want to jazz up any of your berries, consider dipping them into white or dark chocolate.
- Serve your fully assembled Charcuterie Cups on an appetizer table. Add toothpicks and cute mini paper napkins that match your party theme.
- Alternately, provide all of the fixings for these individual cups and allow guests to assemble their own snack in a cup!
- For softer and smaller food items such as fresh berries, assemble on cocktail skewers or toothpicks. These can then be better positioned in the cups.
- Have a few gaps in your Charcuterie cups? Consider adding in some fresh herbs on their stalks as decoration.
Recipe FAQs
These Charcuterie Cups can be refrigerated until you’re ready to serve them, keeping in mind that this is only intended to be for a short period of time, assembling them as close to serving time as possible for optimal ingredient freshness.
If you have any leftover charcuterie cups, simply disassemble them and store the components in airtight bags or containers. You can use up these ingredients in other meals or snacks for the days ahead.
This may sound pretty obvious but the bulk of weight from your assembled cups will rest on the ingredients placed at the bottom of the cups.
It’s therefore best to place the heavier, and more sturdy ingredients such as nuts, hard cheese, or dried fruit towards the bottom as a base in which you can wedge and balance softer, more delicate ingredients!
Unlike ingredients placed on a platter or board, the assortment of food items in these charcuterie cups is obviously going to be packed in together.
For this reason, it’s best to opt for ingredients that are “dry” so that juices and flavors aren’t mingling or going to compromise other ingredients in the cups. If you’re going to use fresh fruits, just ensure that they have been positioned in such a way in the cups that they won’t get squashed.
More Delicious Appetizers

If you tried these Charcuterie Cups or any other recipe on my website, please please leave a 🌟 star rating and let me know how you liked it in the 📝 comments below.
Charcuterie Cups
Equipment
- 8 short clear plastic cups
- 1 package of toothpicks or food picks
Ingredients
- 10 ounce variety package of salamis I used peppered and felino salami
- 1 jar green and kalamata
- 4 oz. round of brie cheese
- 5 oz. rosemary and sea salt "fancy" almonds
- 8 oz. sugar snap peas
- 1 lb. red seedless grapes
- 12 oz. blackberries
- 12 oz. raspberries
- 3 oz. package of everything seasoned parmesan crackers
- 4 oz. package of sesame breadsticks
- 8 fig newtons
- 8 oz. fresh, mini mozzarella balls
- fresh basil leaves
- ½ cup cherry tomatoes
- fresh herb sprigs for garnish rosemary, lavender, basil, or oregano work well
Instructions
- Open the packaging for all of your charcuterie components so that they are easily accessible while building your charcuterie cups.
- Spread out your cups – the short plastic cups work well to hold plenty of goodies and also look impressive.
- Fill the bottom of each cup with a few almonds (these are nice and dry so they won’t mind the other components resting in them and they also weight down the bottom of the cup a bit.)
- Add your tall components (in this case, the breadsticks.) The breadsticks will frame the back of the cup. Add crackers to the cup also.
- Fold pieces of salami into fourths and poke onto a food pick. Line up 4-5 pieces of salami on each pick (or whatever fits). Tuck the salami picks into the charcuterie cup.
- Cut the brie into eight wedges. Place a wedge of cheese and some berries or grapes onto a pick. Make cheese/fruit picks and add them to the charcuterie cups.
- Make olive picks and add them to the cups.
- Finish the cups by placing an herb sprig toward the back of the cup. Fill empty space with more grapes, berries, and nuts.

Would you like to save this?
Notes
- Opt for a mix of sweet and savory ingredients in your cups or stick with one kind! I try to use a balance of meats, cheeses, crackers, nuts, and berries/vegetables. Feel free to add or swap ingredients based on your food preferences.
- If you want to jazz up any of your berries, consider dipping them into white or dark chocolate.
- Serve your fully assembled Charcuterie Cups on an appetizer table. Add toothpicks and cute mini paper napkins that match your party theme.
- Alternately, provide all of the fixings for these individual cups and allow guests to assemble their own snack in a cup!
- For softer and smaller food items such as fresh berries, assemble on cocktail skewers or toothpicks. These can then be better positioned in the cups.
- Have a few gaps in your Charcuterie cups? Consider adding in some fresh herbs on their stalks as decoration.
Nutrition
Make this recipe?
Share it with me on Instagram @girlinspired1 and follow on Pinterest for more!


Comments & Reviews
Queene says
Yours was the FIRST site that includes FIG NEWTONS! And for that I thank you! GENIUS!! They were the PERFECT addition to the cups I prepared for our guests and they were absolutely loved!
Danielle says
I must first say thank you for publishing this article. It is super helpful and informative. I have just started making charcuterie cups and I am addicted. I do have a question… if I am making these cups for a 30 person event, should I be making exactly 30 or should I be making more? Am I expected to provide additional items to refill the cups? I would really appreciate your help or any resources that you may have that would help.
girlinspired says
Hi Danielle! I would definitely make 5-10 extra cups. And then I typically have a stash of extras for the most universally popular items – I’d buy an extra package of salami, an extra box of a couple different kinds of crackers, and have some extra cheese on hand. Crackers store well as long as they’re in an airtight container. Salami and even cheese can be frozen until next time, but at least then you have some filler for refills!