
While working on some substantial DIY remodeling, I haven’t had as much opportunity to create the smaller projects that I typically share in this space, but I’m excited to say that our floors are now done, the furniture is mostly back in place, my craft room is *almost* cleaned up, and we’re two trips to the hardware store into our next project. 😉 While I have some great blog projects in the works, today I wanted to share a “project” that was unplanned. As you know, we’re at a new school this year and it has been interesting to see and experience the variety of new-to-us events that this school holds. One upcoming event is the PTA dinner and auction that, I’m guessing, many schools hold each year. At this school, each classroom contributes a project (or projects) that must involve all of the students in the classroom and is also auctioned off at the event. The fifth-grade room moms recruited a veteran mom and myself to do the school art auction project. Having never attended this event before, I was excited to take a ride on my partner’s awesome coat tails and hop over to the school last week to help her with this project. 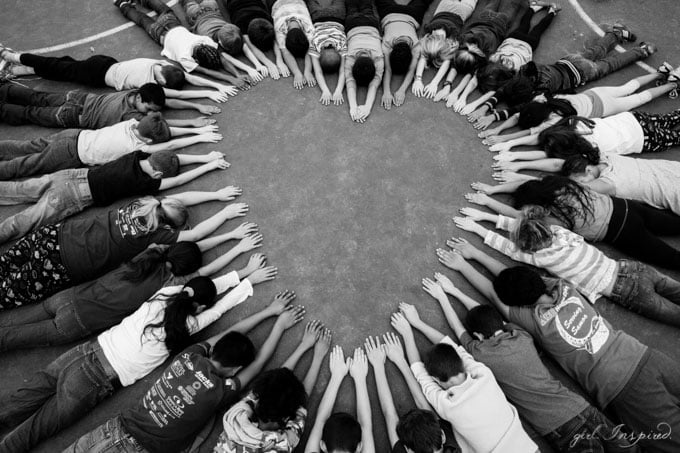 She had found this photograph through Pinterest and so we set out to recreate something similar with all thirty fifth graders. After sharing our finished photo on Instagram, I’ve had several people ask for pointers, so although the idea is not my own, I’ll give you my best tips having pulled off what I consider a successful photo!
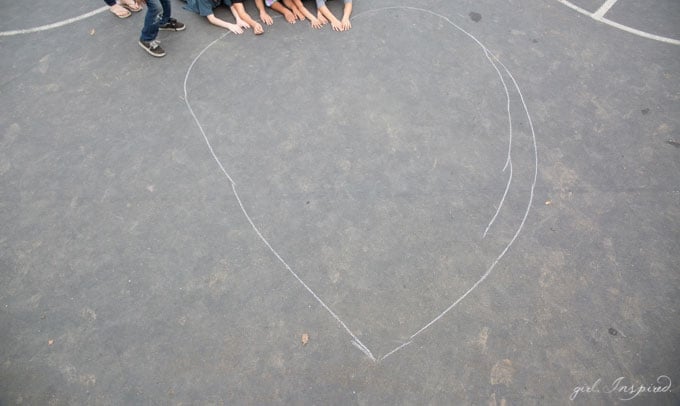
- Choose a location on the pavement or a flat, solid surface – try to choose a spot without the bold lines of four-square boxes or other sports markings. I would discourage you from using the lawn as I think the grass blades would interfere with the contrast between little hands/arms and ground.
- Choose a location in the shade! This is important because you will otherwise be trying to work around shadows cast from the kids heads and even yourself on a ladder. If you can’t find shade, recruit some helpers to hold up a large white bedsheet or something to block the direct light.
- Use chalk to outline a heart(ish) shape in the space. We had the kids form a circle on another area of the pavement and do a “test heart” to see the approximate size we would need. Then we paced off the distance needed and used that (e.g., 7 steps wide) to mark the point and top of our chalk heart in the dedicated area. We outlined a heart as seen in the photo above. You could make an even smaller heart – consider how much squishing in you think the students can handle.
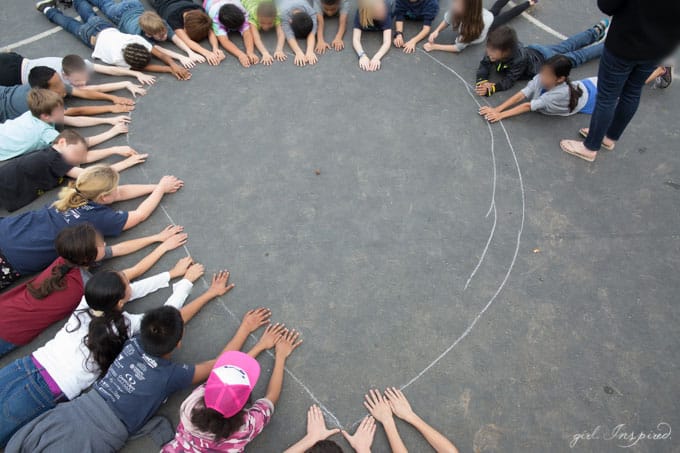
- The teacher sent the students over to the heart one by one and they were instructed to line up their elbows with the line.
- We positioned the ladder at the base of the heart – my partner’s son volunteered to lie under the ladder legs, so we didn’t have any tricky liability logistics with that one. You could place the ladder between two childrens’ bodies instead and have them reach their arms up and around.
- Once everyone is in place, head up the ladder with your camera and take a couple test shots to make sure you can fit everyone in the camera frame. I used my 24-70mm f/2.8 lens (aff.) at 24mm and f/16 for our final photos.
- You will need a partner on the ground to adjust kiddos. We had one mom on the ladder, one mom on the ground, and the teacher on the ground. This made it quick and easy to tap a kid on the arm and tell them to scoot back or forward and by an inch or a foot. I certainly don’t know all of the kids’ names – it would have been really difficult to get the kids in the right spots by oneself.
- Since the kids are lying face down, it makes it really simple to get a good shot once they’re all in place – no need to try to get everyone to “smile” or look at the camera simultaneously.
- Take several shots from several different orientations. Be sure that your aperture is set small enough (again, I used f/16) that you can get everyone’s hands in focus – since you’re not actually hovering directly over the center of the heart, you need a smaller aperture to get those hands that are on the top half of the heart in focus also.
- Take your pictures home and edit to your heart’s content!
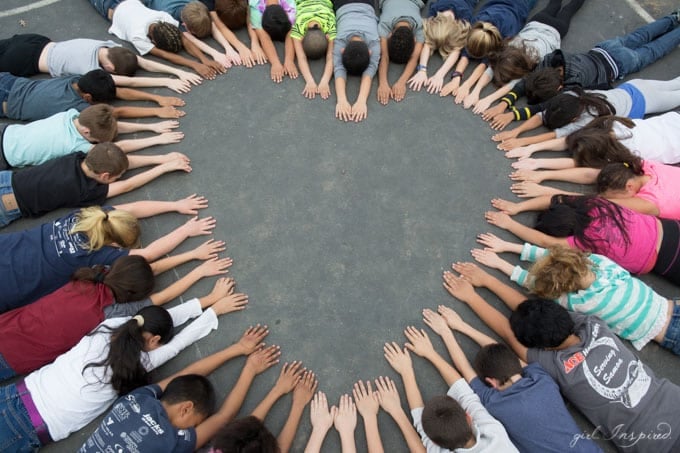
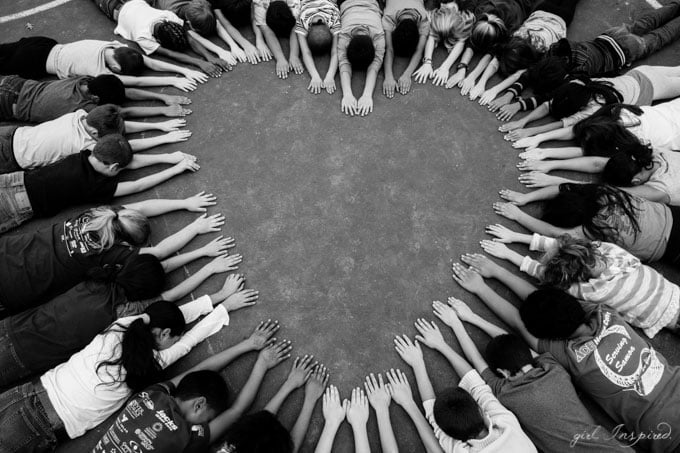
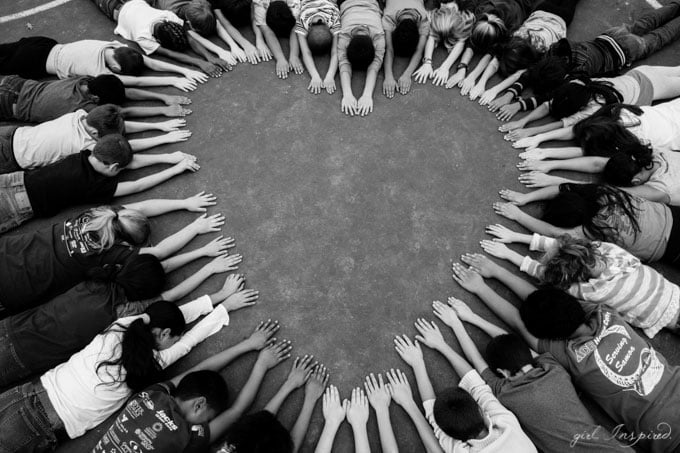
A word about editing: I use two photo editing programs: Lightroom and Photoshop. These photos required very little editing. I used Lightroom to turn the photo black and white, using a preset Lightroom BW action that added some good depth and contrast. I bumped up the contrast and exposure just a tad. I sent the photos over to Photoshop where I spot edited a couple stray leaves on the pavement in the photo. I also edited out the parts of the chalk line that were still showing and some writing that was on the backs of one student’s hands. You can see the difference between the the unedited and edited photos above.

I was careful to take a couple pictures that were “zoomed out” a bit more in case we needed to crop them down or adjust the sizing in the printing process (often, enlarged photos are scaled a bit differently than the scale straight out of the camera).
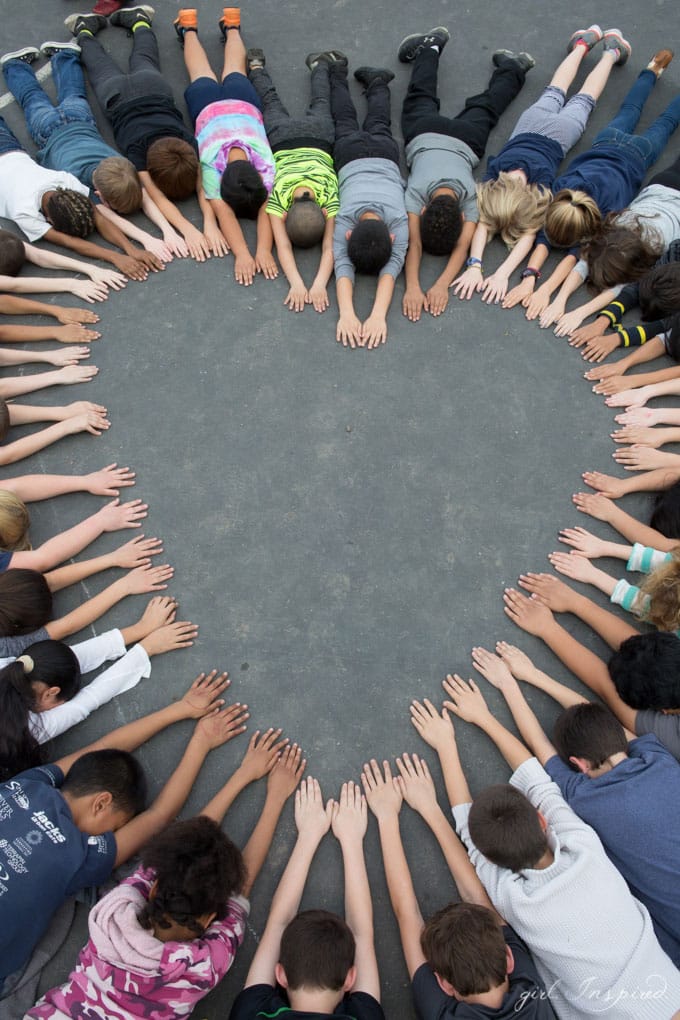

Loads of fun! We’re having a larger canvas of the landscape-oriented photo made to auction off and we’re also having an order form for parents to purchase prints – no upfront money required and everyone can spend their money on a special art piece! I just couldn’t love this idea more. The photo can also be used at the end of the school year for a teacher gift – I’ll let you know how that turns out! How much do you love this idea for a school art auction class photo?


Comments & Reviews
Jess Abbott says
this is so lovely Stef, I am in love with it!!! Well done!
Delia says
This is such an amazing idea Stef! I LOVE IT!
Charity says
That is such a great idea! I love how it turned out! I want to try this with my kids, nieces, and nephews… I think it would make a great gift for their grandparents.
TerriSue says
This is just great! I am sending my daughter the link in case she could use the idea for one of her kidlets. I am also bookmarking it for the future. My son got married on Valentines Day, and his wife is already talking children. They are living with us at the present and my son, husband and I are all saying “Whoa for a little longer.” I wouldn’t be surprised if we didn’t have our 4 th grandchild by the end of 2017 though.