Once you have learned how to make a tutu, the costume options are endless. Have you ever sewn a tutu? Be sure to read through the tips in my original tutu tutorial that will teach you how to make a tutu that won’t scratch your little one’s skin! Then read on for this tutorial on a stunning twist on the traditional tutu where you can make all your daughter’s dreams come true by whipping up this homemade Peacock Costume!
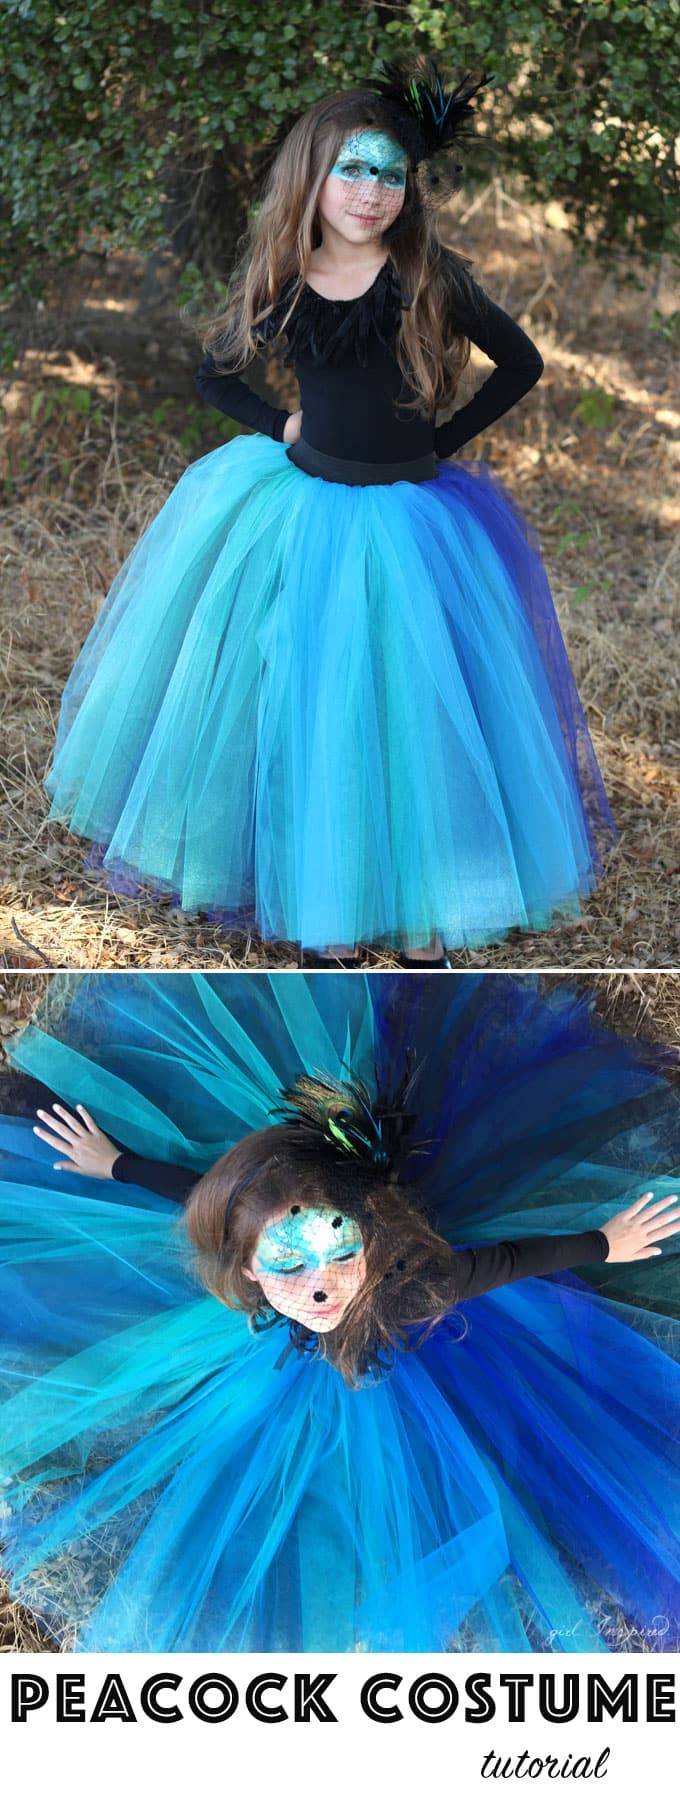
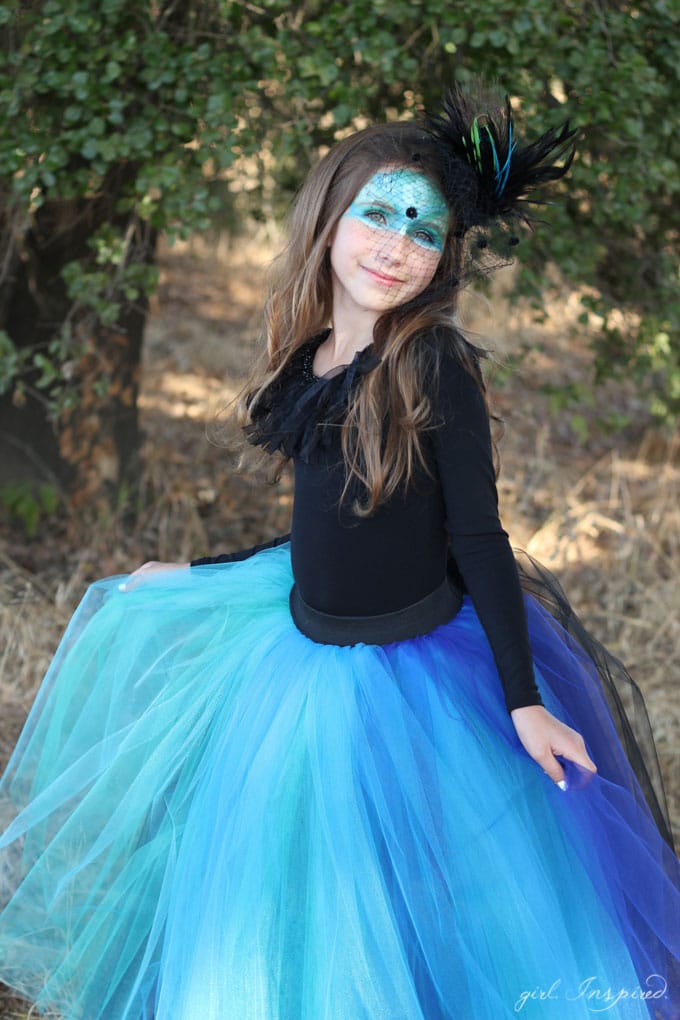 I struggle with Halloween costumes. I can get really, REALLY into sewing up something spectacular, but I’m also acutely aware that the amount of time that a costume will be worn is about 1/20th the amount of time that it I might spend making it. Nevertheless, I usually make at least one of the girls’ costumes, if not all. And almost every year, someone wears a tutu. Maybe it’s because it’s just so easy to make a tutu or that they are so versatile – from princess to bumblebee, all you have to do is switch up the color and you have a great costume foundation! Once you sew your tutu, you can pair it with a plain top or leotard and some tights; add a few accessories and you’re set! You can also adjust the costume for the weather. The overall time/money investment is drastically reduced (in my house, at least) if I can figure out a way to make a costume out of a tutu. This year….we’ve turned the tutu into one mighty fine PEACOCK!
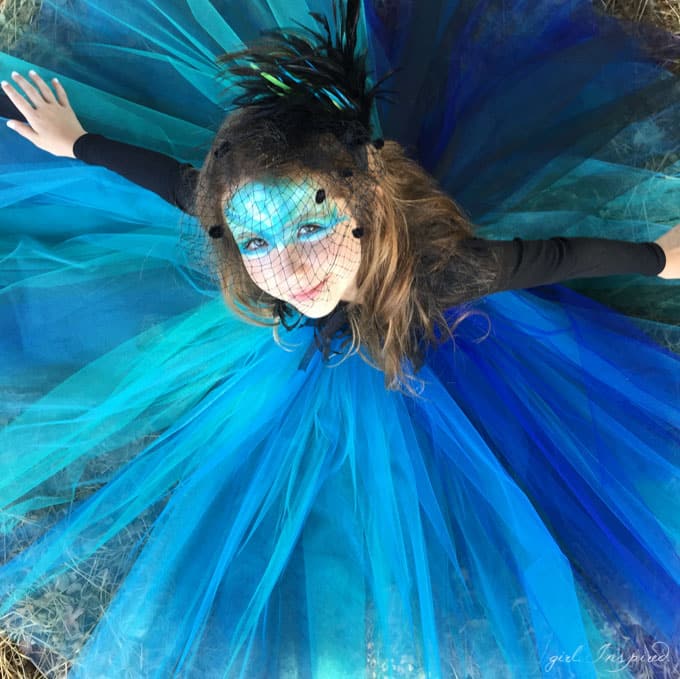
Please excuse me while I gawk at the gorgeousness that is my daughter. She transformed into a dramatic, little peacock for our photo shoot and, as so often happens, completely takes my breath away.
 Ready to make a tutu? Get ready to wrestle some tulle, but don’t worry, it’ll all be worth it!
For this Peacock Costume, you will need the following supplies which are available in Jo-Ann or online at Jo-Ann and my Amazon affiliate links below:
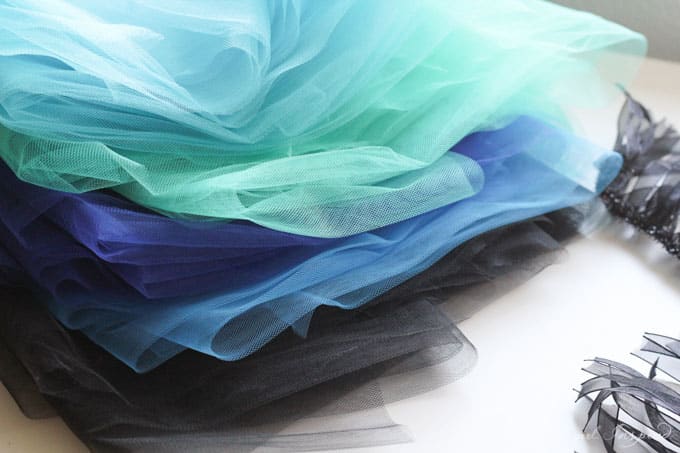 4 yards each, of 5 colors of tulle**
1 ½ inch black knit elastic, 1 yard
black thread
Peacock headband (optional)
feather trim, 1 yard (optional)
Tulip shimmer face makeup
black leotard, tights, shoes (use items already in the closet!)
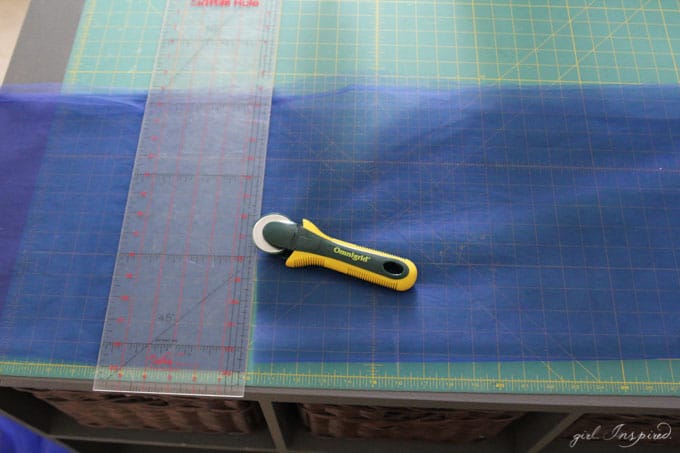
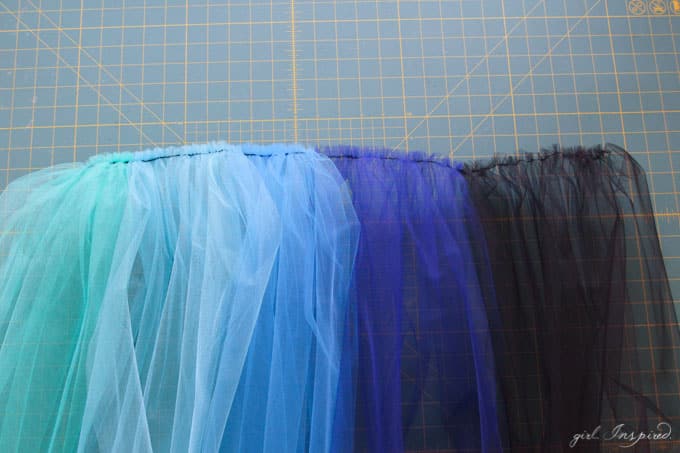
Step 1: Begin by measuring your child’s waist and the desired length of the tutu – for example, I measured from the waist to the ankle for a long, dramatic tutu. Make a note of the waist measurement and set that aside. We will begin by cutting the tulle into sections according to the length measurement. Fold the tulle along it’s width (typically 56″ for tulle). Your yardage will drape off the cutting mat. We need to cut five sections of tulle at the desired length. My measurement was 26″ from waist to ankle, so I cut five sections of this cobalt blue tulle to measure 26″ long (and 56″ inches wide). **If you are making a shorter skirt or sewing for a toddler, you will want to measure the length and multiply that by 5 to determine the amount of tulle to purchase. For example, if your desired length of finished skirt was 12″, you would only need (12″ x 5=) 1.75 yards of each color of tulle. Be sure to add 6″ or so on to your finished yardage to make sure you have a little excess.
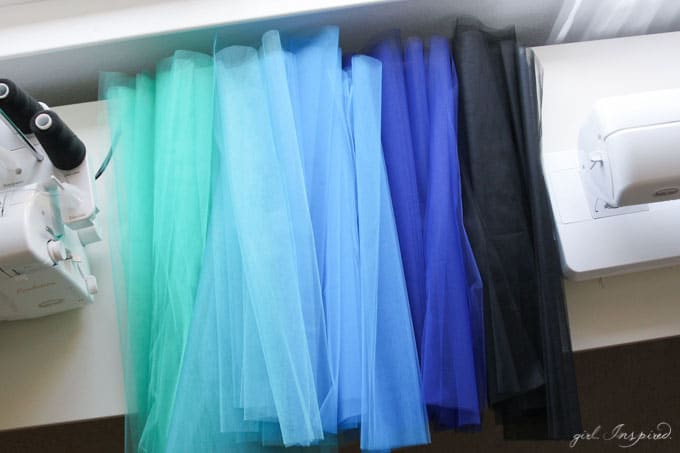
Step 2: Continue to cut your other colors of tulle so that you have 5 pieces for each of the five colors – 25 sections in all. Line them up next to your sewing machine in color/hue/saturation order.
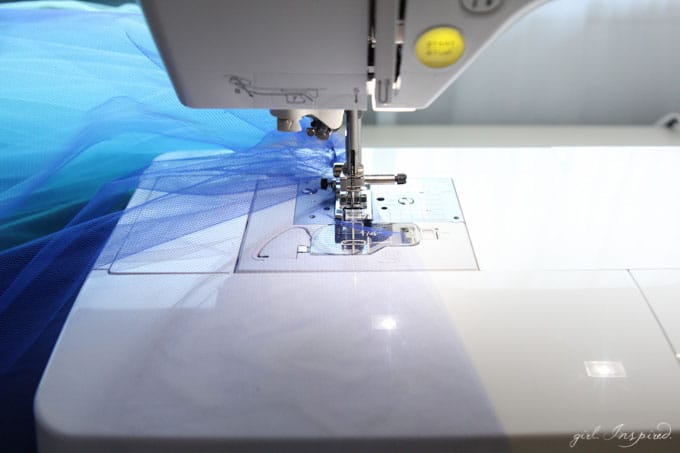
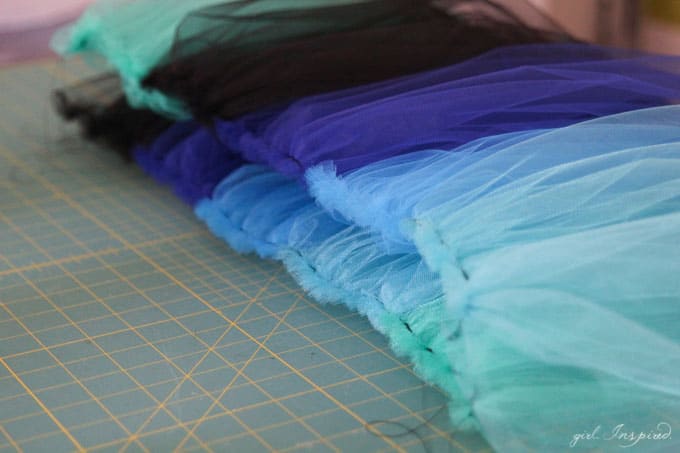
Step 3: Now it’s time to gather the tulle sections. The quickest way to gather the tulle is by letting your sewing machine do the work for you. Using your regular presser foot, adjust the sewing machine settings so that you are using the longest stitch length and the highest tension. With these adjusted settings, you simply feed the tulle through and the machine gathers it for you. Also, since it’s stitching on tulle, you will be able to adjust the gathers later even though you’re tension is set high. Be sure to leave about 7″ of thread hanging at the beginning and end of each sewn layer so you can adjust the gathers later. Begin with the lightest shade of tulle (I started with the aqua as seen two pictures above) and stitch along the long edge of the tulle (the side measuring 56″). The machine should gather this section and when it is gathered, it should measure around 5-7″. That’s a lot of gathering, right?! Stop when you have just about 1″ of tulle left to gather and keep your needle down in the tulle.
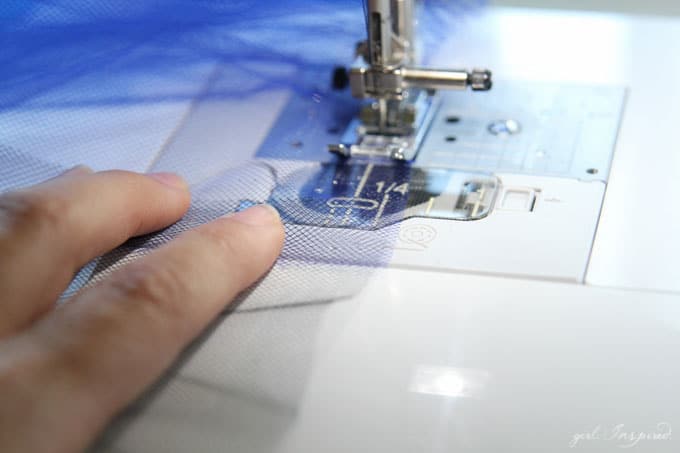
Step 4: Pick up your next shade of tulle. Place the new piece of tulle to overlap the previous piece by ½-1″, as shown. Use your fingers to guide the tulle under the presser foot and continue gathering until you get within 1″ of the next end. You will notice that by overlapping the ends, the machine continues gathering the fabric seamlessly.
 Step 5: Continue with subsequent shades of tulle until you have five pieces gathered together.
Step 6: Now, it’s time to gather up the sections for the next layer of skirt. We are going to rotate the color order of the tulle so that when the final five layers are set on top of one another, the colors all vary for each layer. Start with “Shade 2”, sew/gather, continuing to add “Shade 3,4,5” and so on until you finish with “Shade 1.”

Step 7: Once you have all five layers of tulle stacked on top of one another, you can see how the colors shift down one for each layer.

Step 8: When you have all five layers gathered, it’s time to adjust the gathers for the waist measurement. Take the waist measurement of your child and add 5″. Now divide that new measurement by 5 (for the 5 colors of tulle) to determine how wide each gathered section should be. So, my waist measurement was 20″, I added 5″, divided by 5 and found that each of my gathered colors should be 5″ wide each for a total skirt width of 25″. Pull the bobbin threads gently and shift the gathers to adjust the section widths and make the layer the correct overall width. Adjust all 5 skirt layers so they are uniform in width.
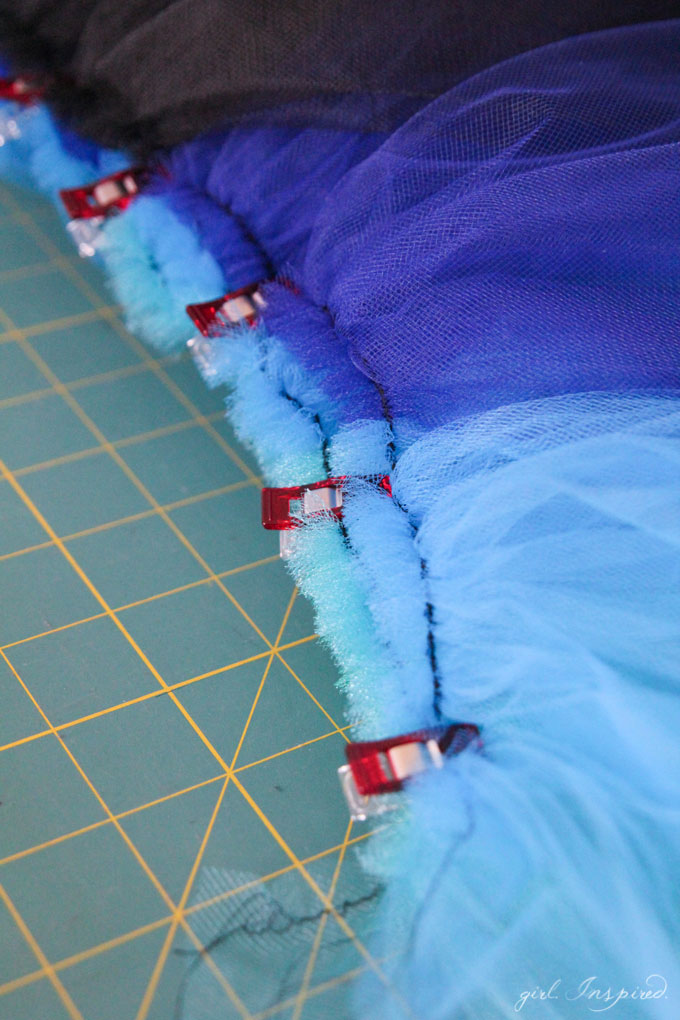
Step 9: Time to sew the layers together!! You probably won’t be able to sew all five layers of skirt together at once, but you may be able to do 3 layers and then 2 layers and then sew those together. Using these clips to hold the tulle together is helpful in the tulle wresting game! Match the raw edges the best you can and sew them together using a regular stitch length and tension.
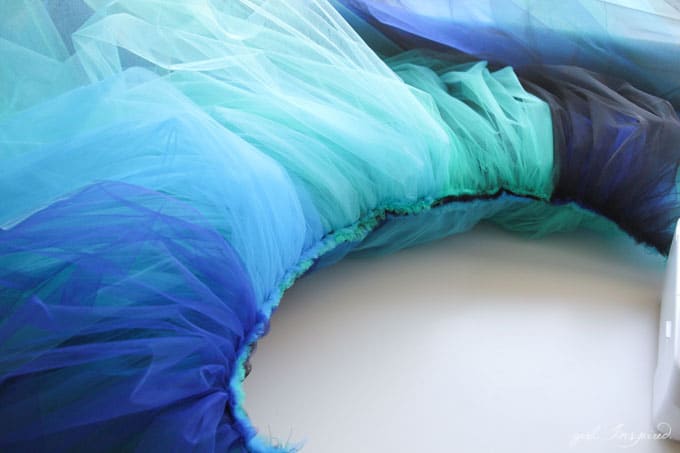
Step 9: Pat yourself on the back once you’ve wrestled all five layers into a neatly sewn strip. You’re almost done!
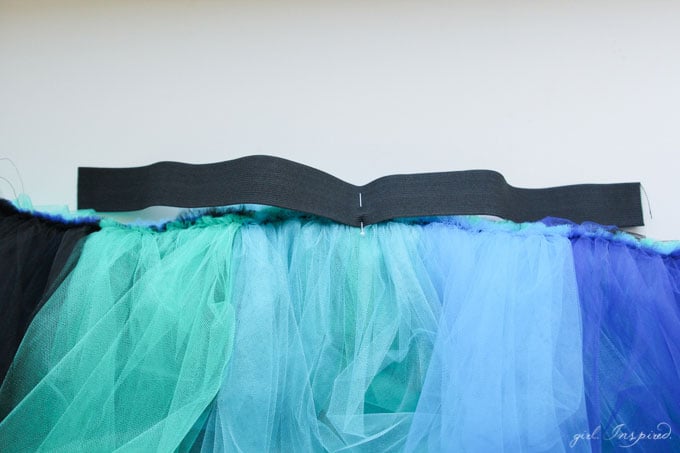
Step 10: Time to sew on the elastic waistband. Cut a section of black elastic to the exact length of your child’s waist measurement. This should be 5″ shorter than the prepared skirt. Match the center of the elastic to the center of the skirt and pin it so that the elastic is on top of the skirt, with the raw edge of the tulle coming up behind the elastic no more than halfway.
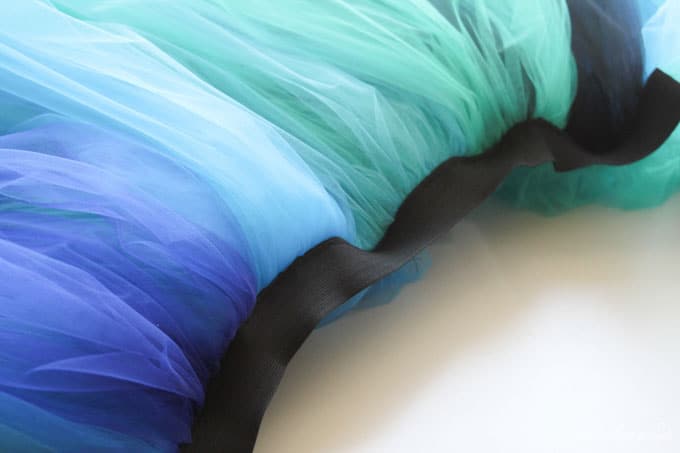
Step 11: Sew the elastic waistband onto the tulle skirt using a wide zigzag stitch. Stretch the elastic as you sew so that the end of the elastic extends about ¼″ past the end of the skirt, on each end. I found it easiest to sew out from the middle where I had pinned the elastic, stretching as I sewed. Also, be sure that you’re catching the tulle underneath with your stitches and that the raw edge of the tulle remains about midway up the back of the elastic.
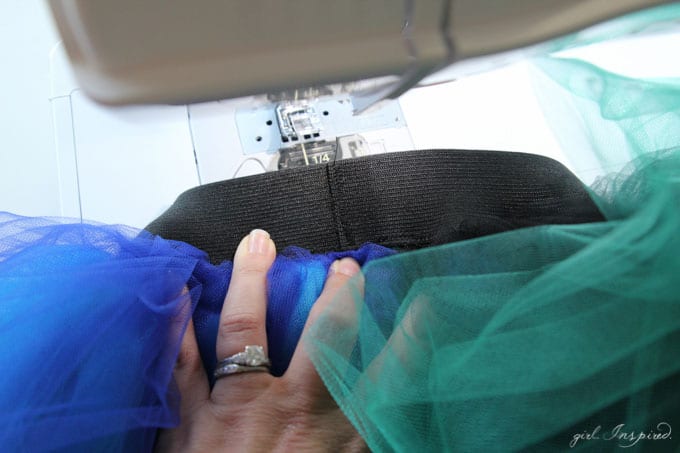
Step 12: Finally, overlap the raw ends of elastic waistband and stitch them together using a zigzag stitch. DONE!!!
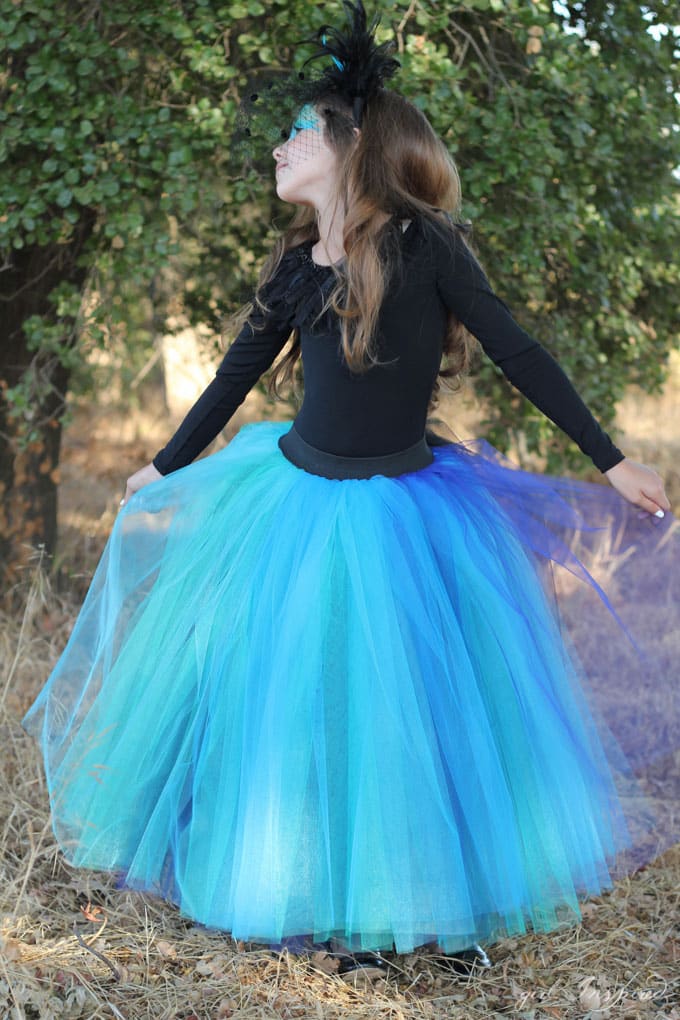
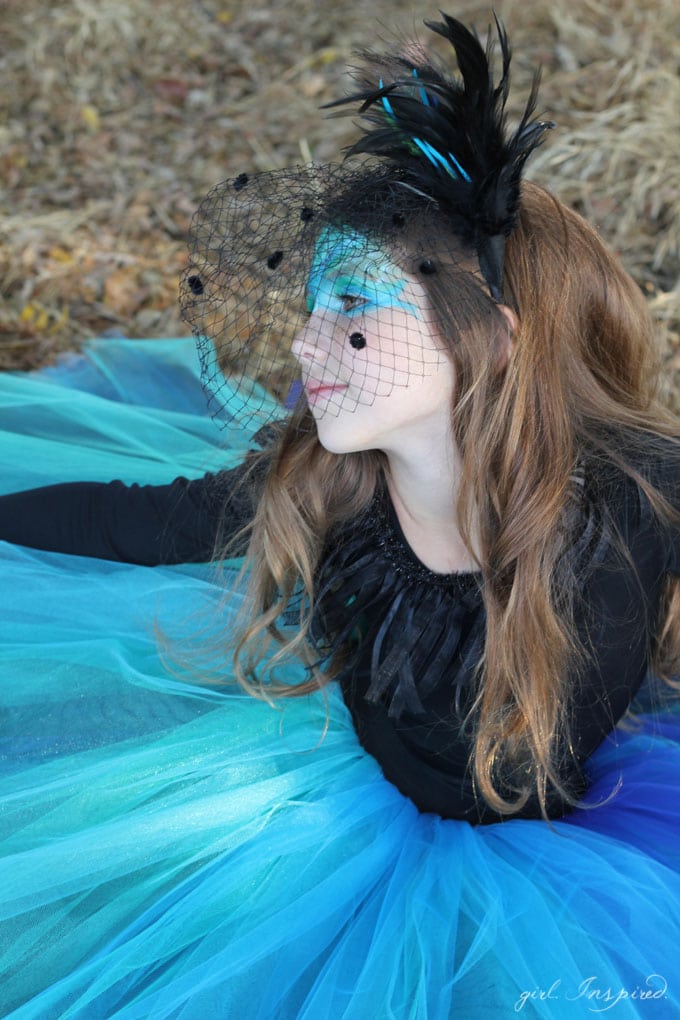
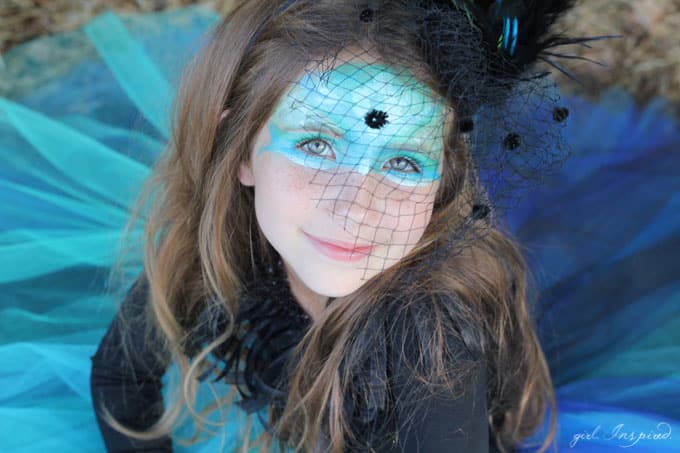
Use accessories and makeup to get your little peacock ready for trick ‘o’ treating! This Tulip Shimmer Makeup worked REALLY well. It was much thicker and provided better coverage than the cheap costume makeup that you get in the Halloween section at the big box stores this time of year. I’ve never ever done face painting before and I think it turned out great for my first try! She thought it was super glamorous, too! It takes some work to remove it completely, though, so keep that it mind. I’m sure makeup remover would come in handy. We just used a warm, soapy washcloth, which removed almost all of it, though the blue right around her eyes took an extra day to come off completely since we didn’t want to scrub on her eyes.
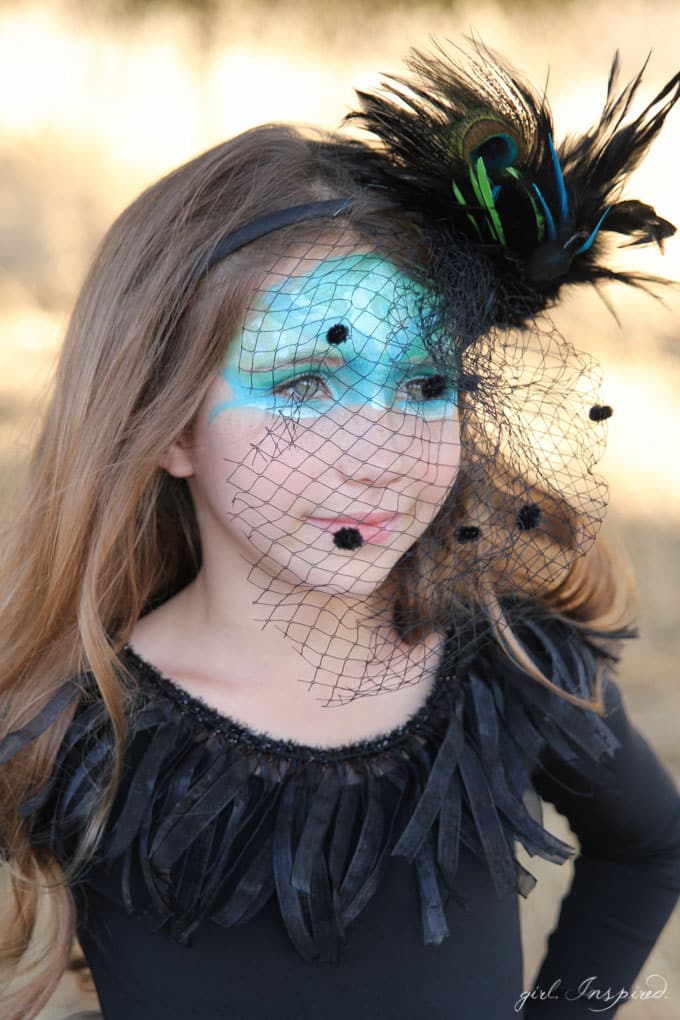
I added this feather fringe trim around the neckline of the leotard with just a few quick basting stitches. That way, it looks festive for Halloween, but I can take it right off when it’s time to head to dance class!
After I’ve spent a couple hours wrestling tulle, it is so nice to find a few ready-made accessories to pair with the ensemble. I loved this Peacock Headband to complete the outfit – it was in the aisle with all the hair accessories at Jo-Anns. You can also find it online, which I linked to above.
What costumes are your little ones dreaming up this year? If you get to work a tutu into the ensemble, I’d encourage you to also visit this Soft Waistband Tutu tutorial, which is great if the tutu is going to be touching their skin – you can use this same Peacock Tutu tutorial and just incorporate the knit waistband and lining. Have fun!


Comments & Reviews
Kristie Pepsny says
This is fantastic! I can’t wait to make my daughter a skirt. No peacock this year but I want to convince one my 3 girls to be one for next year after seeing your finished costume. Beautiful!
Wanda says
If you were calculating this for an adult with a 36 inch waist how would you measure the yardage needed??