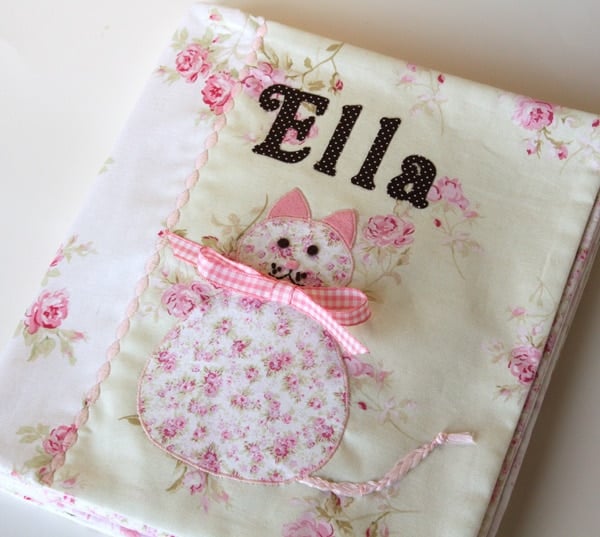
Woohoo! Are you so excited to make your quiet books? I hope so – these will be gifts that your children or grandchildren will treasure and pass down to their children. As I mentioned in my quiet book post a couple years ago, we cannot find the one that my mom made for us when we were kids, but I loved it so much that I can still picture it in my head; I can feel the pages with my memory. The quiet book that I’m going to share with you over the next week is a combination of my childhood quiet book, the quiet books I made for my girls, and some little tweaks of things that bugged me when I finished the girls’ books. These are just my ideas, what I thought would be fun and pretty. Make this project into whatever you want. Change it, build on it, personalize it for your little one. Be inspired and have fun!
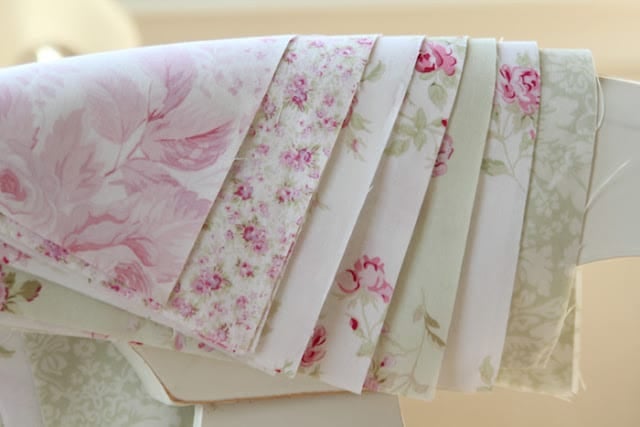
So, to start today, we’re going to gather materials. The first decision you’ll need to make is on the background fabric(s) for each page. This time around, I’m using coordinating fabrics from the same fabric line. In my other quiet books, I used totally different fabrics on each two-page spread. I prefer the cohesiveness of coordinating fabrics. You could also just use the same fabric throughout the entire book. I used cotton here, but you could also use a heavier fabric such as denim, if you wish.
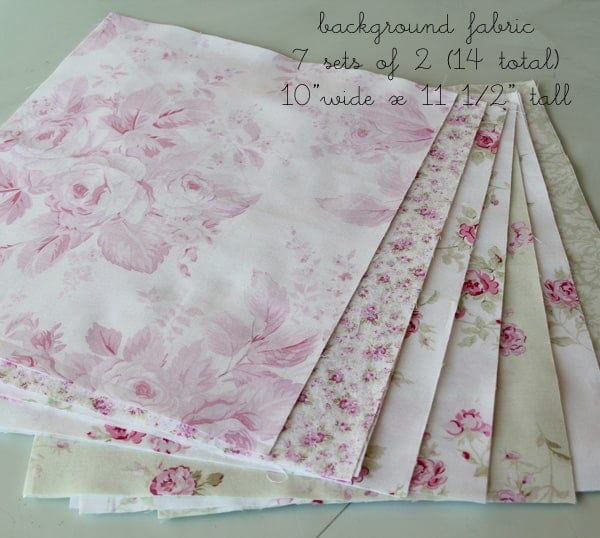
Each page will measure 10″ by 11 ½″. Since the width from selvage to selvage is usually around 43″, you should be able to get four pages out of each 12″ length of fabric (⅓ yard). Does that make sense? You’ll need a total of 14 individual pages which calculates out to approximately 1 ⅓ yard of fabric total for the background pages (estimate a little more to give room for trimming.) You will probably want to use the same fabric on each two-page spread, so think about that when deciding on fabric.
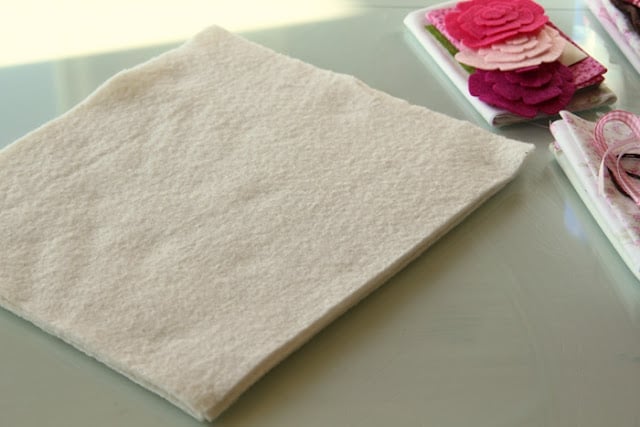
You will need some batting to pad each page. I like Warm and Natural cotton batting. I do not like polyester batting. ever. That’s just me. Buy what you like – it should be thin. You’ll need to cut seven pages sized 10″ by 11 ½″ from the batting.
You will also need a pile of scraps. You can dig in your scrap bag or purchase extra bits with your background fabric. Be sure that the scraps will stand out a bit on your background fabrics. Included in the scrap fabric, you will want:
a brown print (trees and armoire)
a black print (ladybug spots)
solid pink (ladybug)
a green print (grass and leaves)
variety of pink prints
brown felt (armoire)
black felt (ladybug)
colored felt (flowers)
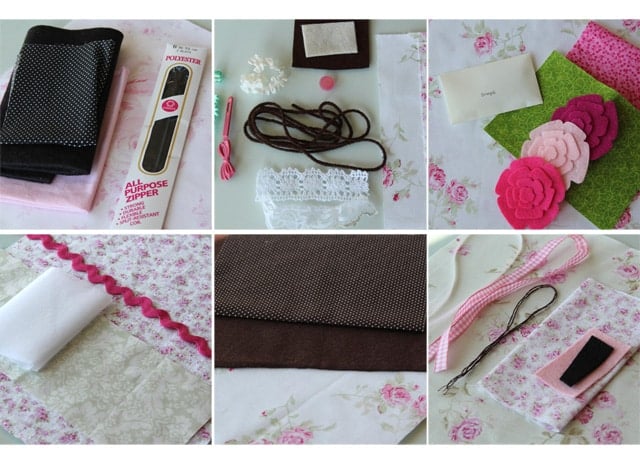
Other bits and pieces that we’ll use in small quantities include:
1 black or pink zipper – 4″ preferred, but 6″ is fine, too (the 4″ are harder to find, I discovered)
10″ piece of jumbo ric rac
ribbon
lace
1 shank button (the kind that has the knob on the back where you sew the button on)
brown yarn
brown embroidery floss
elastic (elasticized ribbon preferred)
interfacing (just a small amount)
6 snaps (size doesn’t really matter, I used size 15)
10″ length of Velcro (I strongly recommend the iron-on Velcro v. sew-on)
heavy duty fusible web (you will not need much of this, I use Heat ‘n’ Bond – ultrahold)
crayons
small notepad
hair clips/small hair accessories
Sewing Machine Thread: white, pink, brown, and black
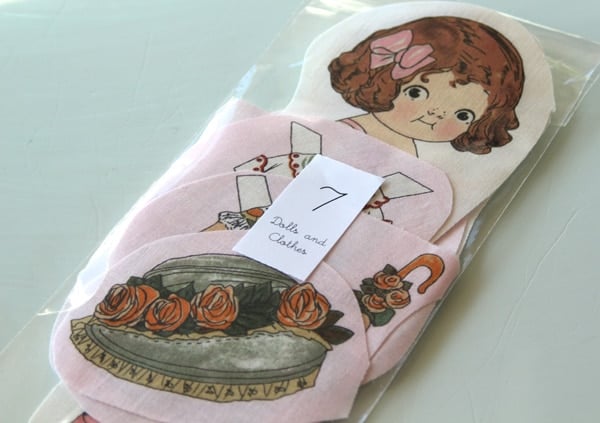
For those of you who did not purchase a kit or a doll kit, I have identified a source for the “paper doll” fabric and clothing. You’re never going to believe it – FABRIC.COM. I seriously had NO idea it was there, but it is, in large quantities. I’m ordering more because it’s one of those fabrics that I just have to have sitting on my shelf. And I sent my whole supply to YOU! (which really actually thrills me to know that you love it, too!)
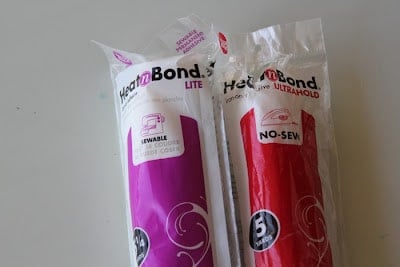
Okay, the final item you will need, is a lightweight fusible web. I used Heat ‘n’ Bond LITE for this project. I also like Steam a Seam. You will need a decent amount of fusible web. Buy a big roll, it’ll be handy to have around. ( Please note that you will also need a small amount of ultrahold (no-sew) fusible web).
Over the weekend, you have two assignments. First, SHOP and gather all your materials in one place so they’re ready to go. This will make the quiet book assembly SO much easier.
Second, CUT your background pages and your batting. Remember, a total of 14 pages of fabric (seven two-page spreads) and 7 pages of batting. Cut to 10″ by 11 ½″. If your fabric is directional, you will want the page to be 10″ wide and 11 ½″ tall. Okay? Any questions?
I will try to answer most questions within the comments section so that everyone can see answers. You can also email me if you prefer. Have fun and be sure to let me know how you’re doing!! We’ll pick up on Monday with our first set of pages.


Comments & Reviews
Stephanie says
I know this is an old post, but hopefully you will see this question! I read through the posts, and I didnt notice whether or not you said to prewash the fabrics – the page backgrounds in particular. Sorry if you did and I missed it!
girlinspired says
Hi Stephanie – I don’t think you’d ever wash the book, so I wouldn’t prewash the fabric, but that’s just my personal preference!
Personalized Sketches and Sentiments says
Sew, sew cute!! Love your quiet book…I had one started for our first daughter…but then it got put away before a military move! And here it is…years later! (Our daughter now is a new mommy to our sweet little granddaughter!) I just came across that one, so will need to work on it for her :o) …of course, like the cathedral baby quilt I made for her, I plan to make for all the future grands, so will need to make quiet books as well.
Love that I found you while blog hopping…I have been out of the blog loop with being in and out of town for our grandbaby visit, and our other daughter’s graduation and then two weeks later her wedding….but so happy to meet you! And will have to come back again.
Blessings & Aloha!
I’d love for you to come by some time :o) & if you get a chance, please leave a comment so that I know you were there.