Today I’m going to show you how to sew napkins that require simple folding and pressing to create neatly mitered corners before stitching around the perimeter of the napkin. I think this technique makes them a simple, straightforward sewing project, easy for anyone.
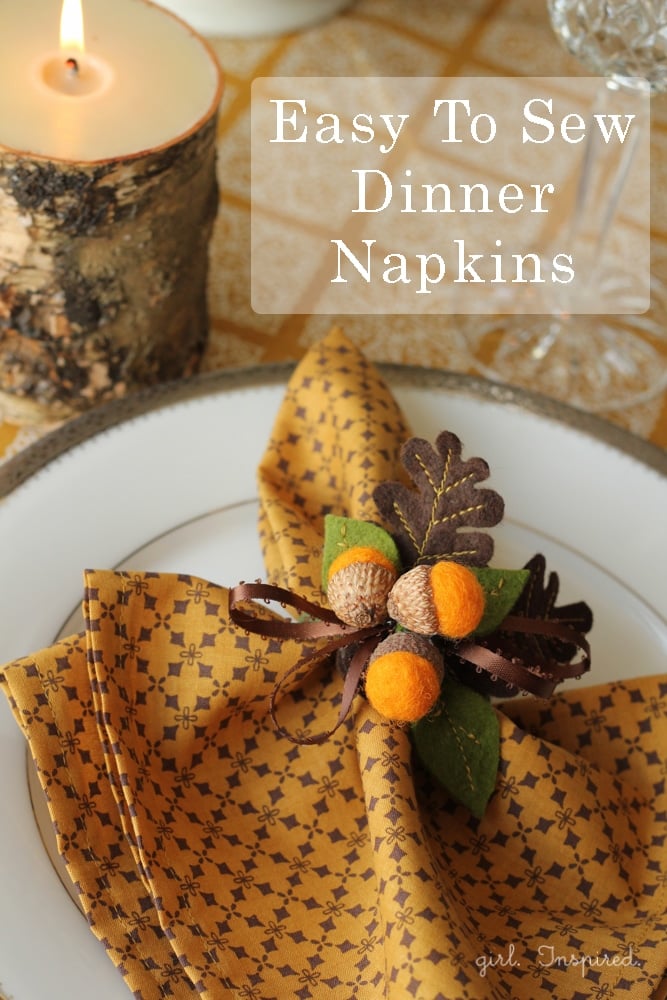
The Halloween decorations have been taken down and stored for next year…except the sticky eyeballs that seem to be permanently affixed to my foyer ceiling from one very exciting hour of eyeball throwing by the children. thanks kids. Regardless of that eyesore (haha!), I’m cozying up the house for the colder weather and beginning to think about Thanksgiving. I spent a little time last week making a stack of dinner napkins.
Step 1: Prewash your fabric and iron it well. Cut the fabric into 18″ squares (or larger). On the wrong side of the fabric, make a mark with a disappearing fabric marker in each corner where 1″ up and 1″ out intersects. You can also draw a light diagonal line from the corner up through the circle mark – this will help you to see where the folded fabric will meet to form the mitered corner (see step 5)

Step 2: Fold each corner up to meet the circle mark you made in Step 1.
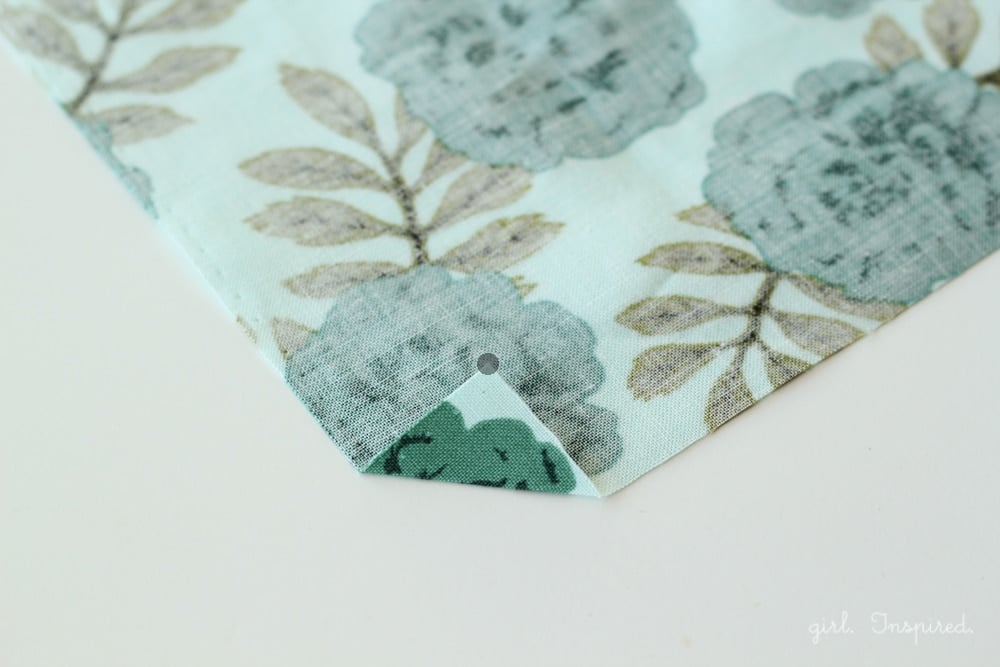
Step 3: Fold each corner again, bringing the first fold line up to meet the circle mark.

Step 4: Fold and press up each edge about ½″. Repeat for all for sides of the napkin.
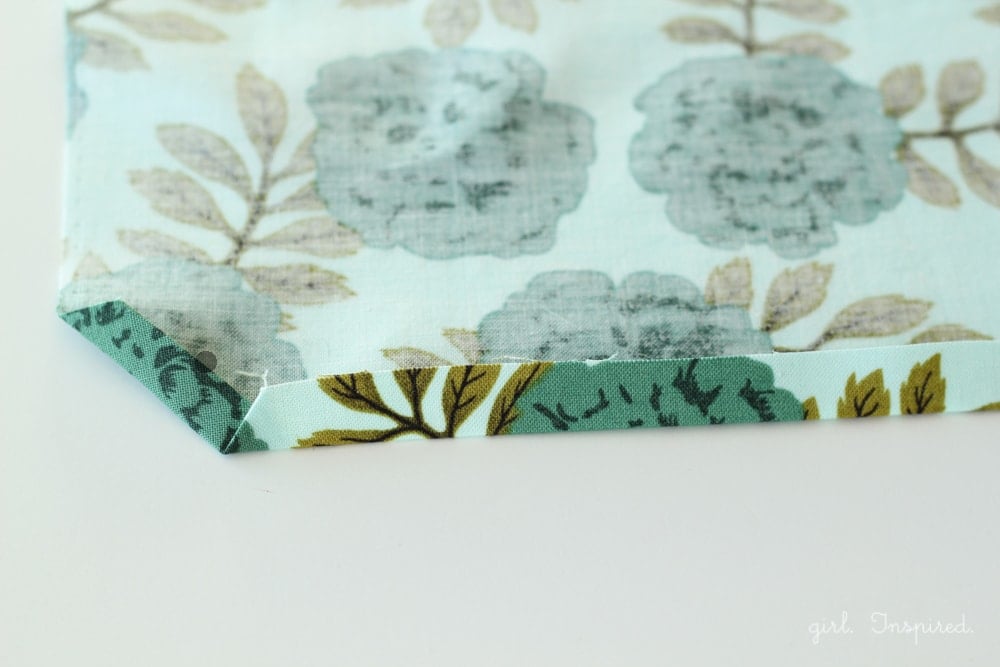
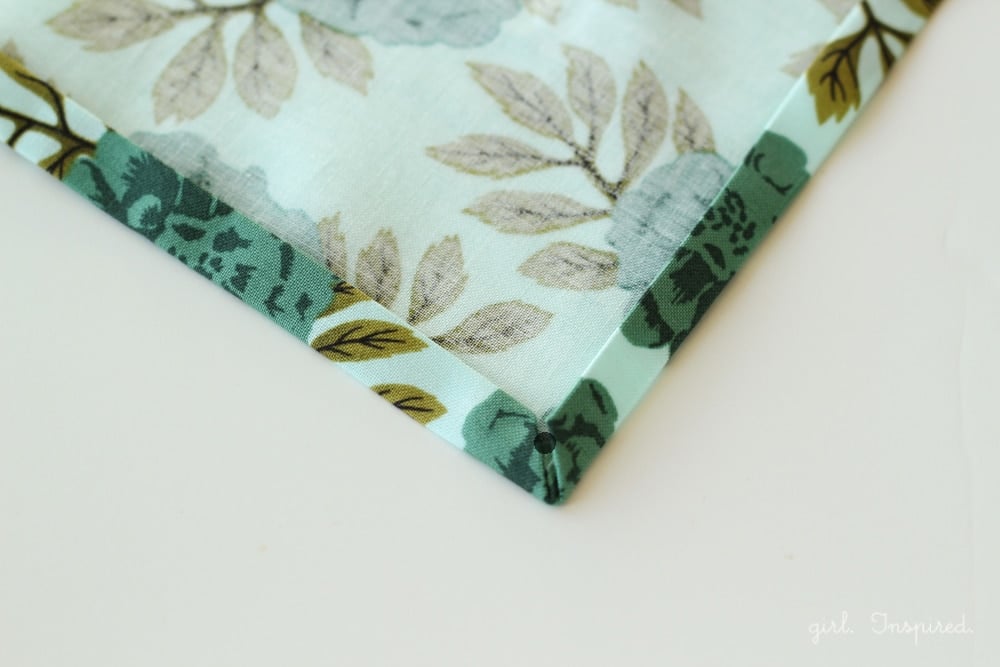
Step 5: Fold and press each edge up another ½″ so that the corner lines up at a diagonal with the line you drew in Step 1.
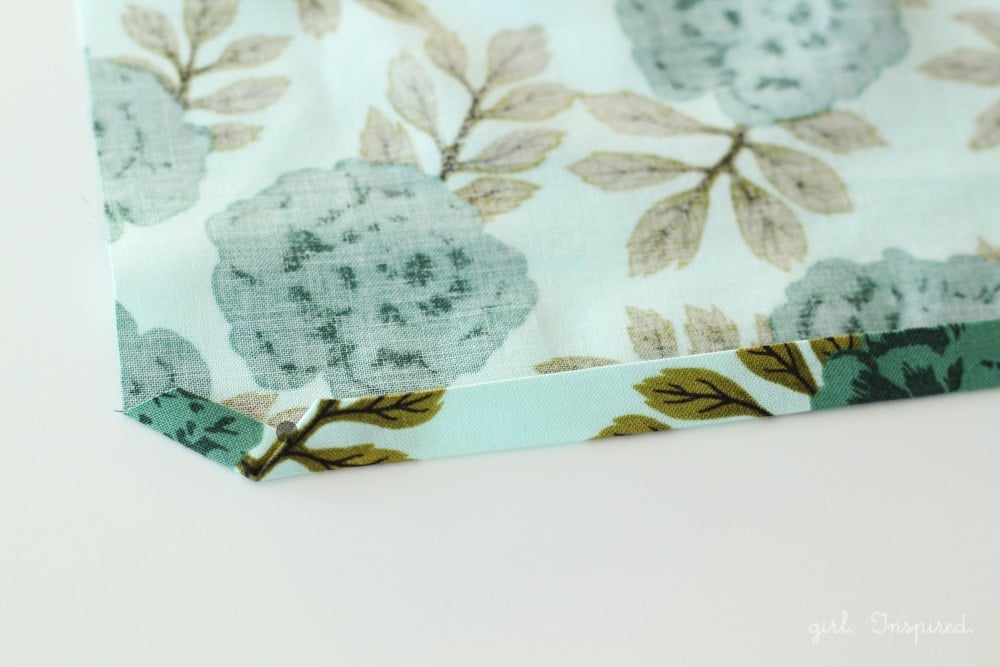
Adjust the sides and press well so that the corners align with one another. Pin the edges in place if you wish.
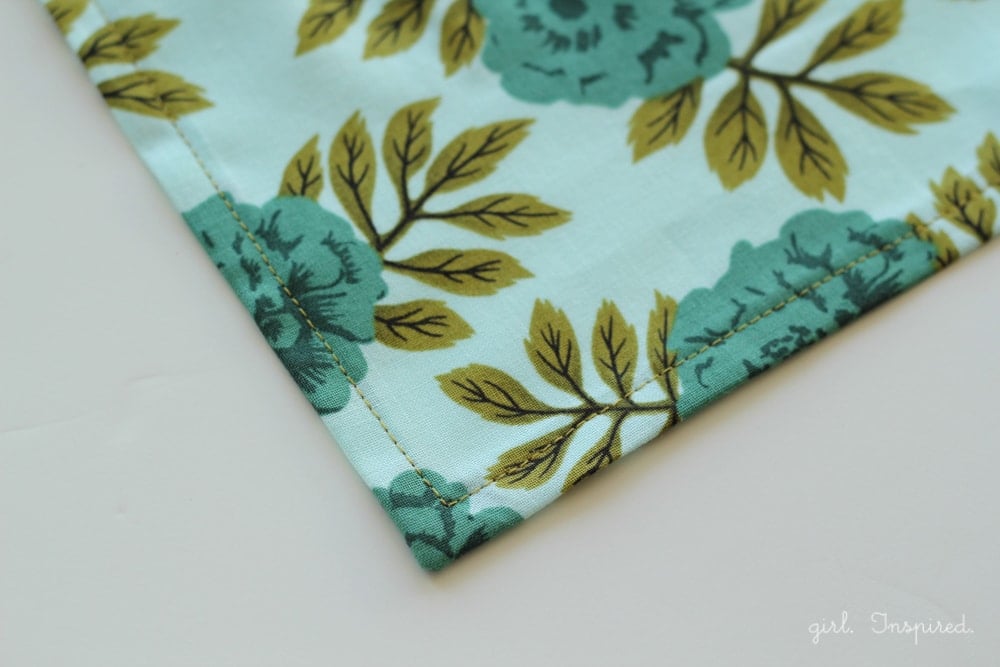
Step 6: Working on the right side of the napkin, place the napkin in the sewing machine and topstitch ¼″ from the edge of the napkin all the way around. Begin stitching ¼″ from the first corner and stop stitching ¼″ before you reach the other edge. Leaving the needle in the napkin, lift the presser foot and rotate the napkin. Continue stitching until you reach ¼″ from the next corner and so on. This will result in a neat square of stitching, all ¼″ from the outer edge of the napkin.
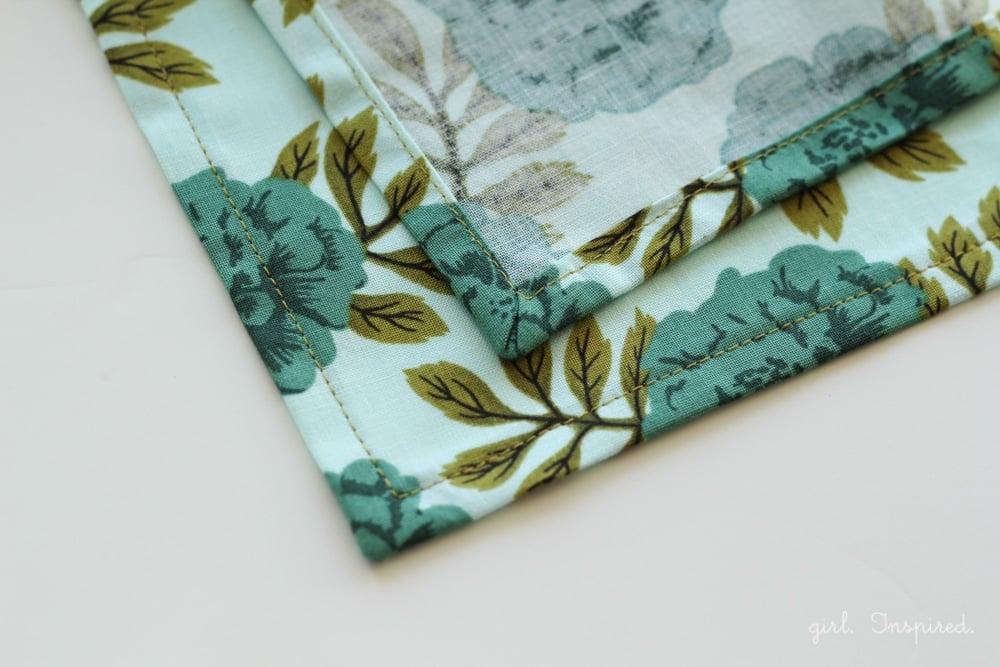
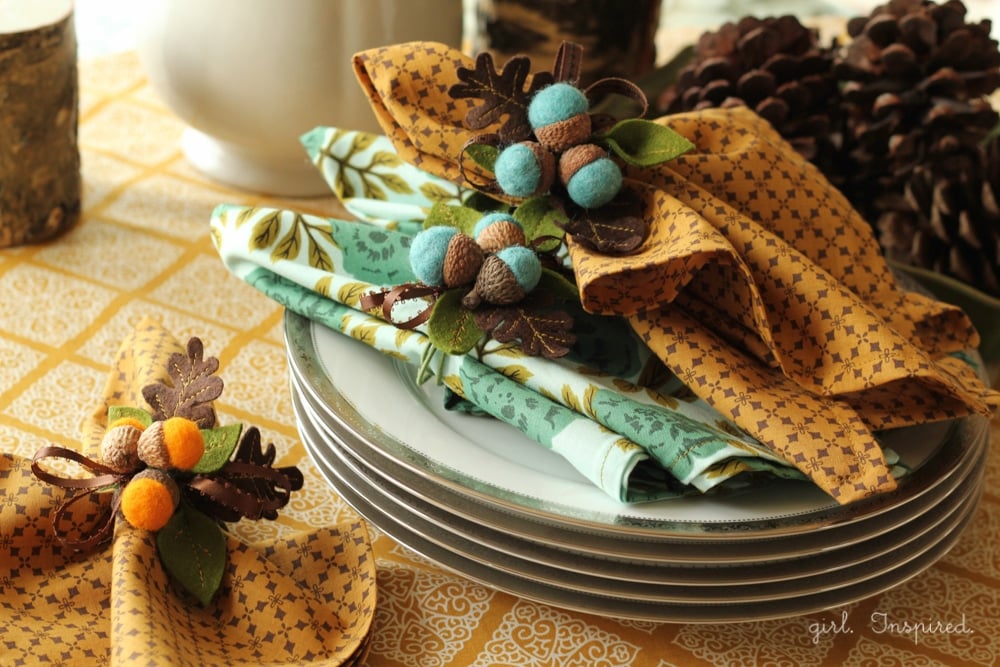
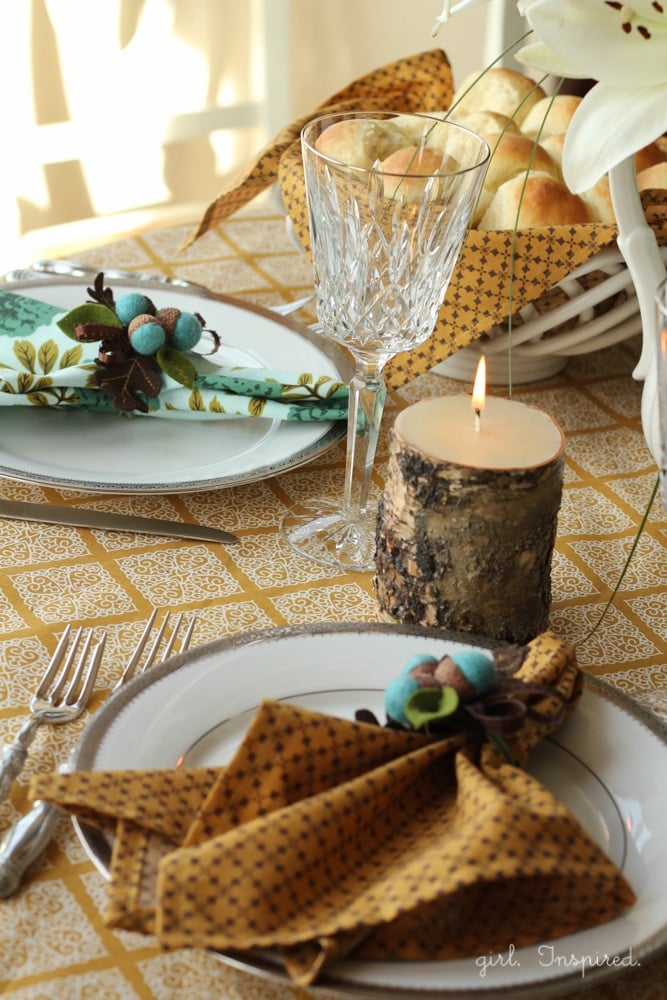
That’s all there is to it. Now you know how to sew dinner napkins! Once you get the hang of the folding, you should be able to make a stack of custom cloth napkins in no time. I used some autumn colored quilting cotton from Jo-Ann for my napkins.

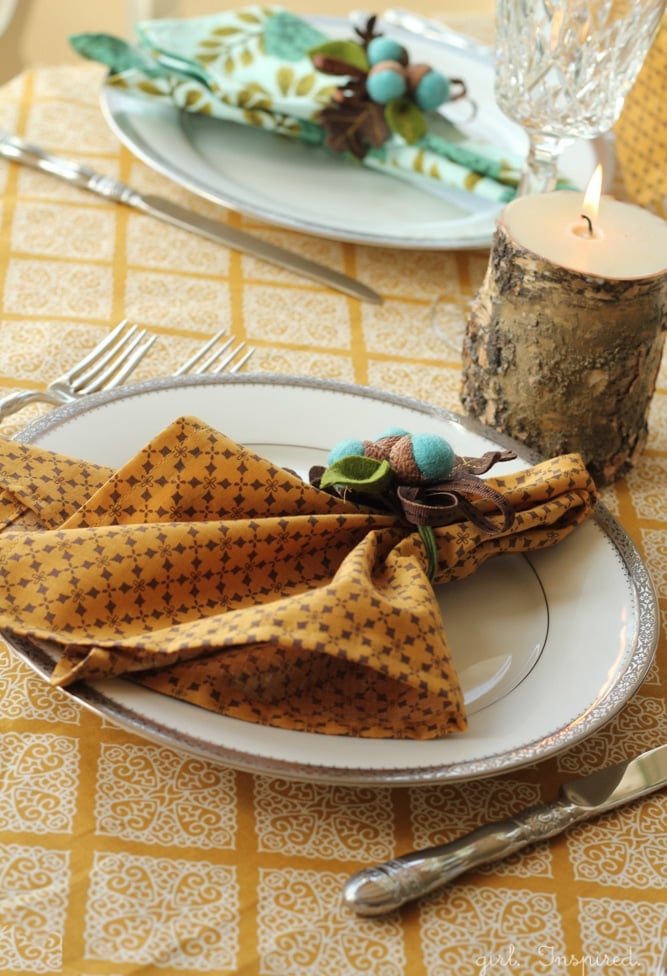
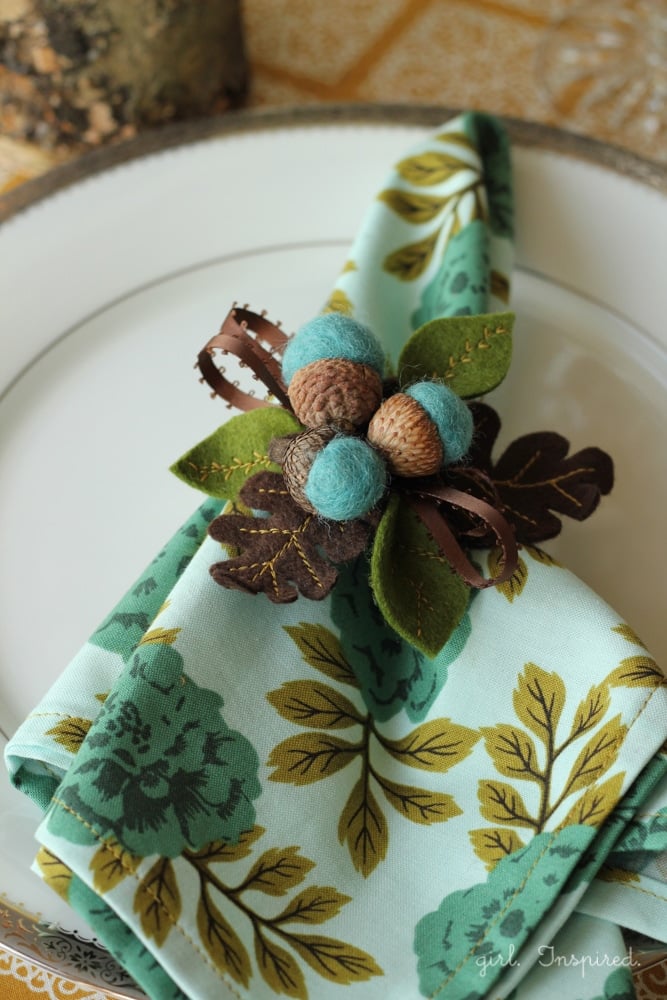
I’ve also shared how to make these beautiful autumn acorn napkin rings, so be sure to check them out! So fun, huh?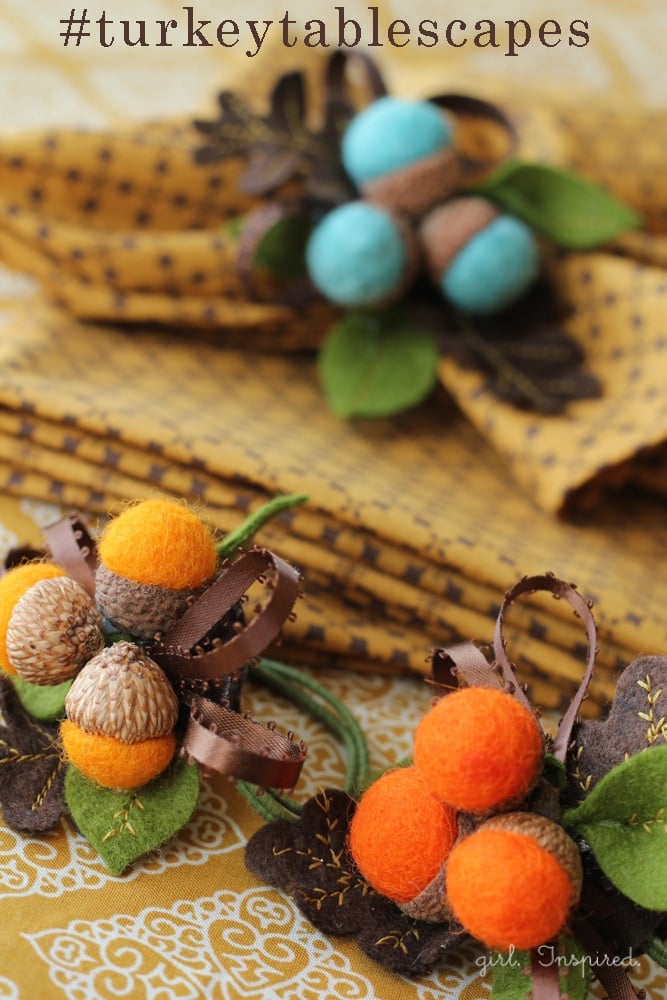


Comments & Reviews
Nancy Cantril says
Beautiful!! If you are still reachable I’m looking to buy the green rose fabric used in this napkin tutorial please let me know. Used napkins would also be great! Thanks
Stefanie says
Hi Nancy, it was a print in the quilting cottons at Jo-Ann Crafts many years ago. I really loved the unique color combo – I hope you can find something similar!
Kimberly B Carlton says
I’m obsessing over the aqua-teal fabric. Do you remember where you got it or the fabric designer?
Stefanie says
Hi Kimberly! I got the aqua quilting cotton from Joann Fabrics, but since this was more than 10 years ago, I don’t know that you’d be able to find it. But maybe they have something in a similar color way! Let me know what you find!
susan R. says
The tutorial and pics look good. I’ll have to try it soon. Can you make any size napkins or would the corner measurement have to be changed? Thanks for sharing!
Julie Yates says
Thank you so much for this – I was looking for directions on how to make napkins – and this is explained so well!
Linda says
Great tutorial! I love cloth napkins especially for holidays. Your tutorial makes the corners easy to do! I had no seen that before! Thank you!
Jayne Cascarelli says
WOW thank you
Tammy says
Your squares of cloth have to be perfectly square for this to work, right? How do you do that? Do you use a quilting mat and rotary cutter? I really don’t know how to do that – my stuff always seems crooked or shifts as I cut it. Is there a trick to making straight lines or is it just a practice?
girlinspired says
Hi Tammy – I do use a quilting mat and rotary cutter. I do think it takes practice, but if you can find the grain line in the fabric and cut one side along the grain line, you’ll be able to square everything else up off of that. Use the selvage edges rather than the edges cut by the fabric counter folks as well. Sometimes, you’ll get a piece of fabric that is cut really crooked – use the grain line to square it up.
Ursula Carter says
have always wanted make napkins thatnks for the easy to follow directions. when do we get them for the napkin rings?
B3$T!eZ says
TNX SO MUCH
Alicia says
I’m now making my second set of napkins using this tutorial. Very helpful and easy to do!
I’ve had one problem: the measurements didn’t work for me. Either the dots need to be marked 1.5″ from the edge and then the edges folded 1/2″ each time for the hem OR dots marked 1″ from edge and edges folded 3/8″ each time. (I’m doing the latter, because I like a narrower hem.)
Other than that, awesome.
Debbie Melton says
I really think this is a great tutorial and inspiration. Very well done. Thanks for sharing. I’ll look for more ideas from GirlInspired.