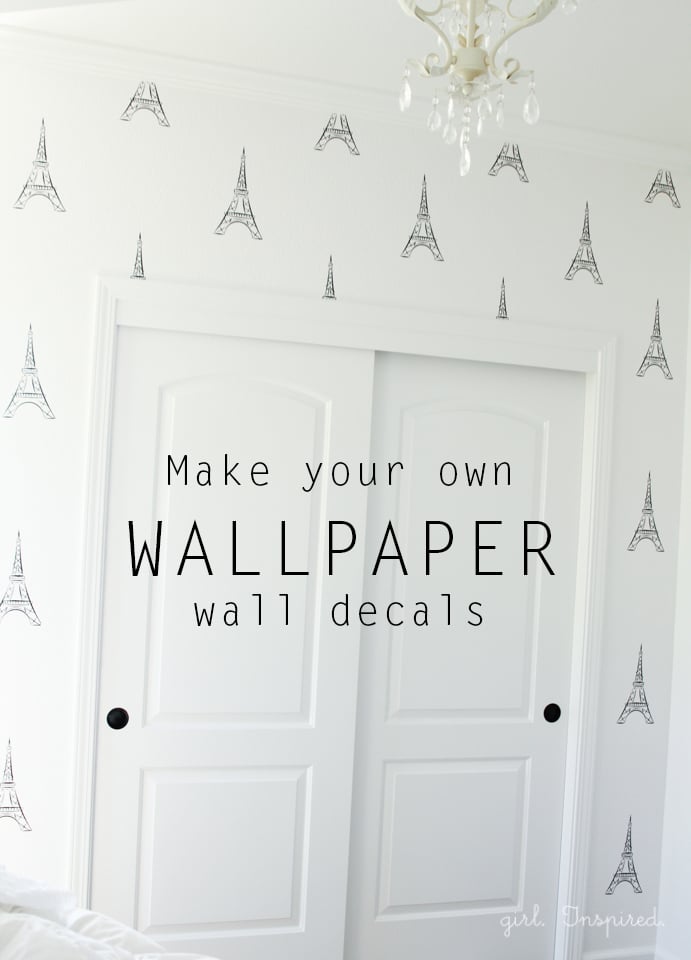
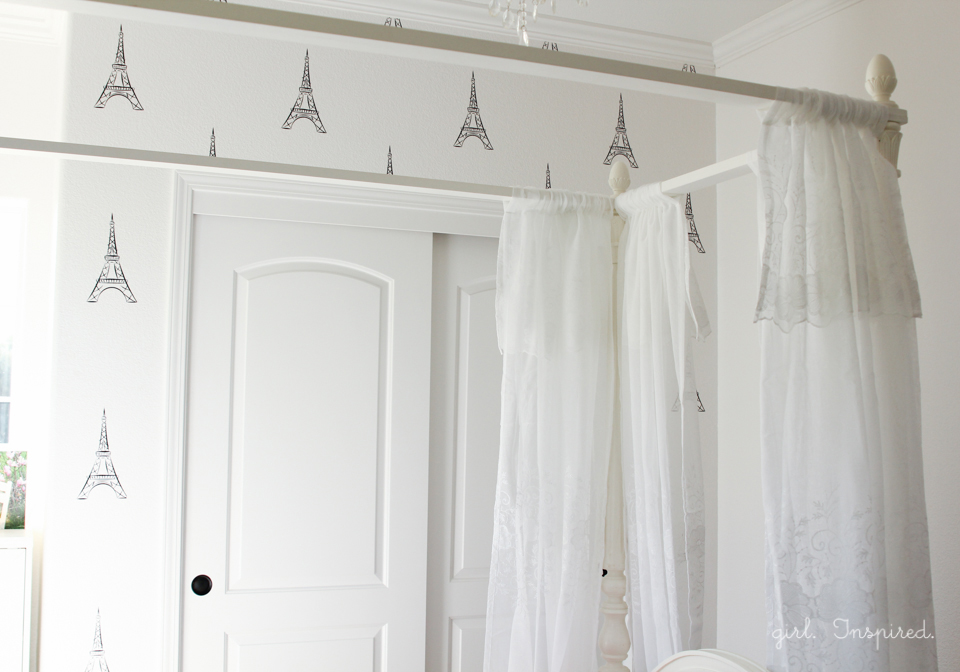
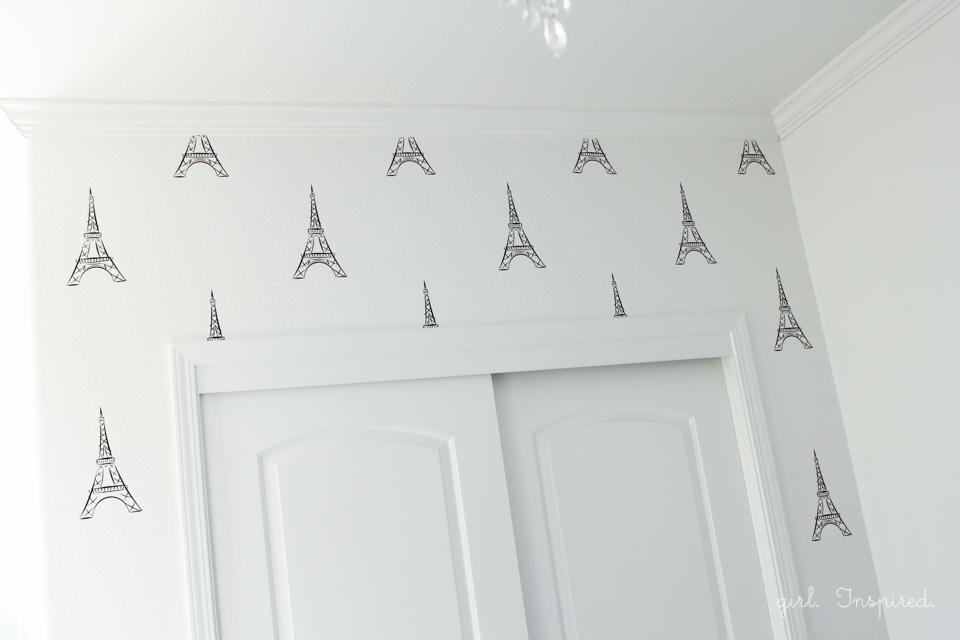
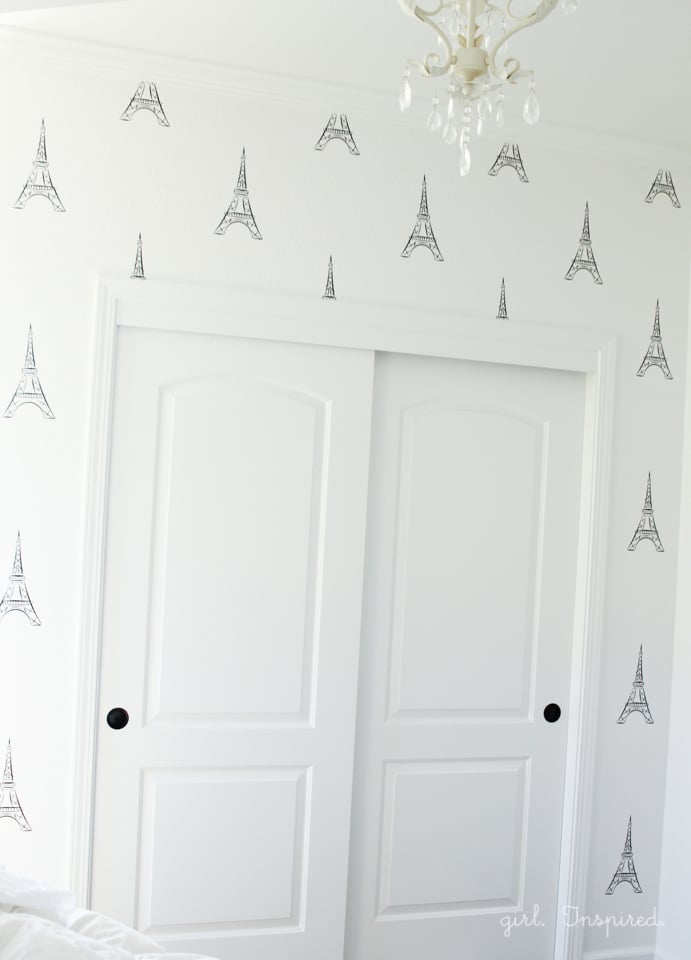
Still plugging along at Olivia’s bedroom makeover. Last week, we finished up the Eiffel Tower vinyl wallpaper and I am thrilled with the results. We applied the wall decals to just one wall, and the closet wall to boot, so it didn’t take long to finish up. I had some frustration with the project after my initial attempts a few weeks ago, but once I had the right materials together, it was sooo much easier. I’ll show you how to make vinyl wallpaper of your own – you’ve got to try this!
To start, you will need to gather a few supplies. You’ll need craft vinyl – the size of the design and the area you wish to cover will drive the amount of vinyl that you will need. I purchased a 10 yard roll for about $25 and it was plenty to cover my wall space. I have plenty leftover as well. You will also want to purchase transfer tape paper. This was my initial mistake. I didn’t think I’d need the transfer tape, but with a detailed design like this Eiffel Tower, it was absolutely necessary. Because the cuts are so intricate, the design becomes completely warped if it’s lifted off of the background sheet and it is impossible to apply to the wall in a flat and straight manner. I was able to get one wall decal onto the wall, almost flat, after 40 minutes of effort, and when I stepped back, it was still crooked. Therefore, you need to use a tape to cohesively lift the design from the background so that it can be applied to the wall all in one piece. In an attempt to finish my project quickly instead of waiting for an order of transfer tape to arrive, I tried to substitute painter’s tape and lint roller tape sheets. They did not work AT ALL. I ordered some transfer tape, it arrived in just a couple days, and it worked easily and seamlessly. Once on the transfer tape, each decal took less than a minute to apply.
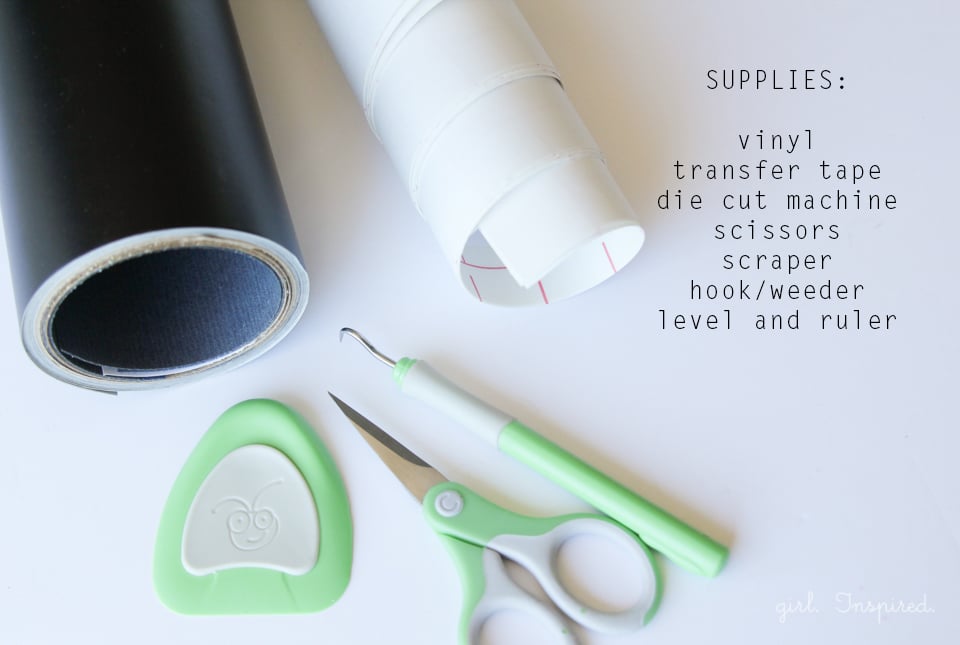
You will also want a few other supplies. To cut the vinyl designs, you will need a die-cutting machine of some sort (Cricut or Silhouette, for example) and any software needed to run those machines. You will also need a weeder (the hook-shaped tool), scissors, a scraper, and a ruler and level for marking placement and aligning the decals on the wall.
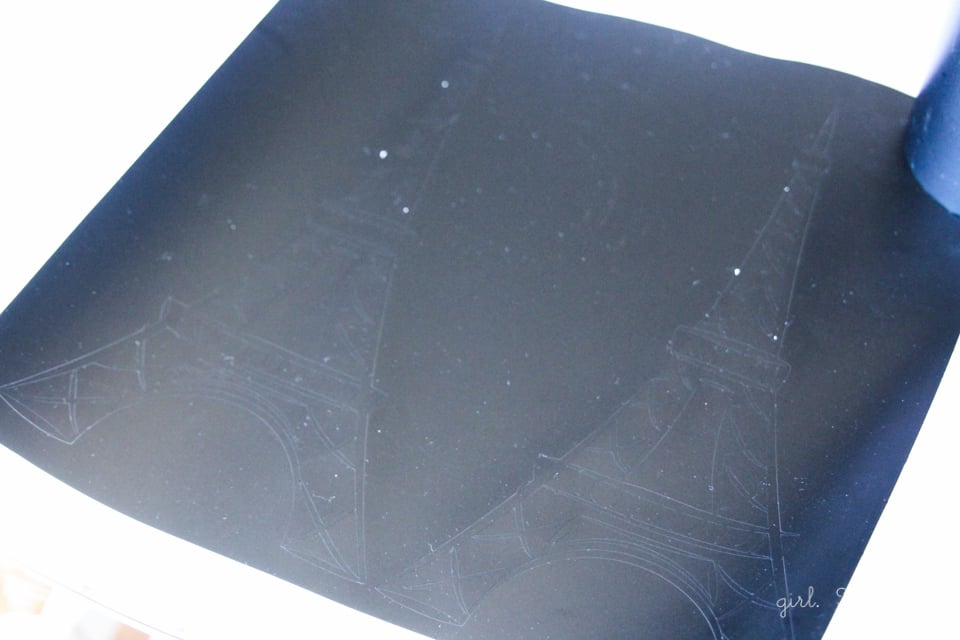
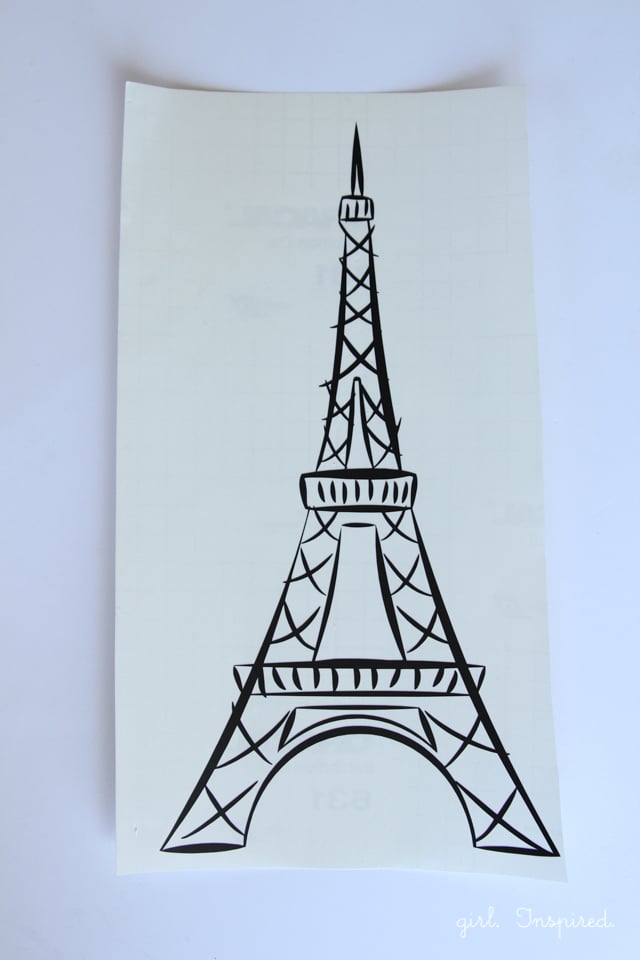
Begin by cutting the design onto the vinyl. I used my Silhouette Cameo and found an Eiffel Tower image in the Silhouette library that I loved. I lined up two Eiffel Towers side by side on the 12 inch width of vinyl using my Silhouette software. You can just load the vinyl directly into the machine – no need to place it on the cutting mat. Cut and cut and cut until you have enough decals. I cut 30 Eiffel Towers and ended up using about 18.
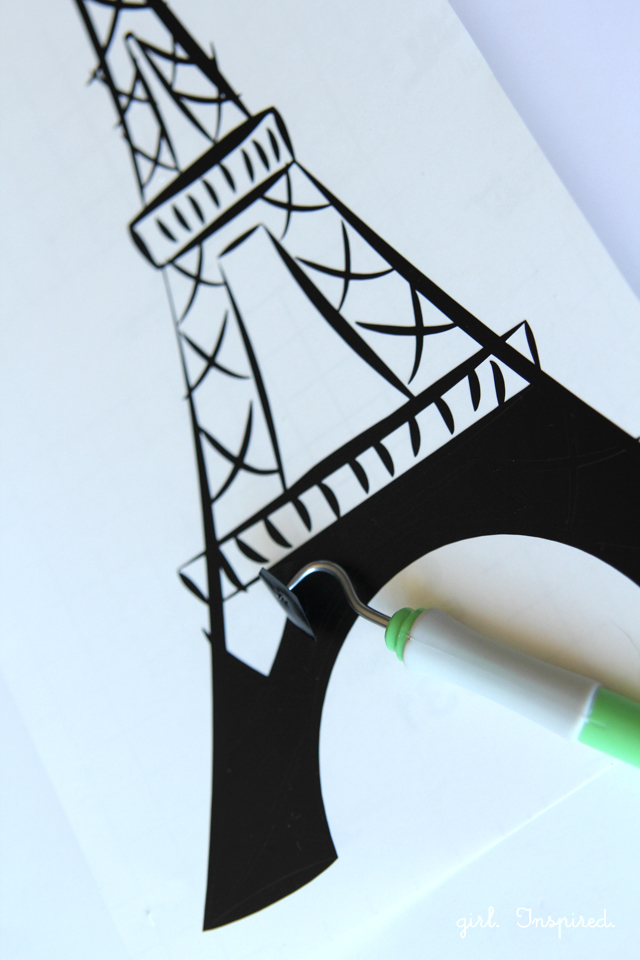
Next, you will need to remove all of the excess vinyl from the design. Use the weeder to pick smaller pieces – this tool really makes the picking go faster. This is the most time consuming part of the project.
Now you are ready to lift your design off of the background paper using the transfer tape.
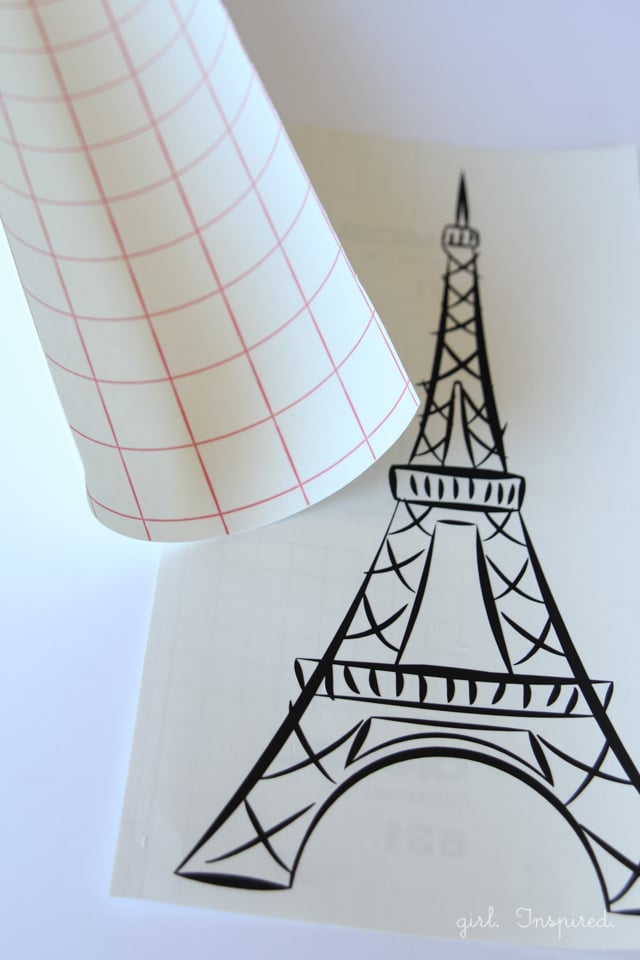
Cut a piece of transfer tape paper approximately the same size as the vinyl design. Peel the backing off the transfer tape.
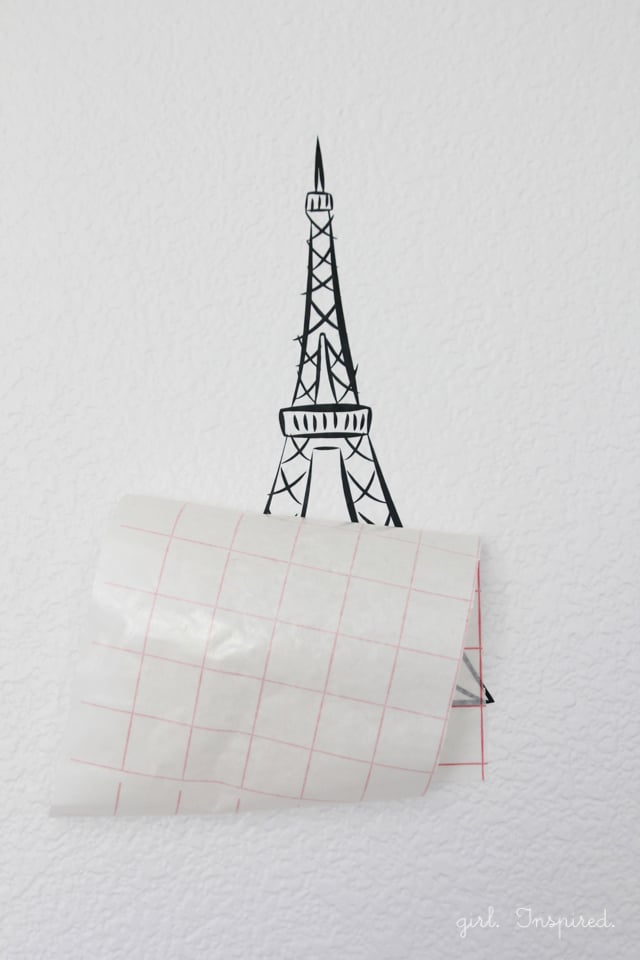
Carefully apply the transfer tape over the vinyl design. Be sure to align the gridlines on the transfer tape with the orientation of the vinyl design so that you can use the gridlines to ensure a straight application onto the wall. My particular Eiffel Tower design wasn’t symmetrical so I used the horizontal lines in the design to make sure I didn’t have my tower crooked.
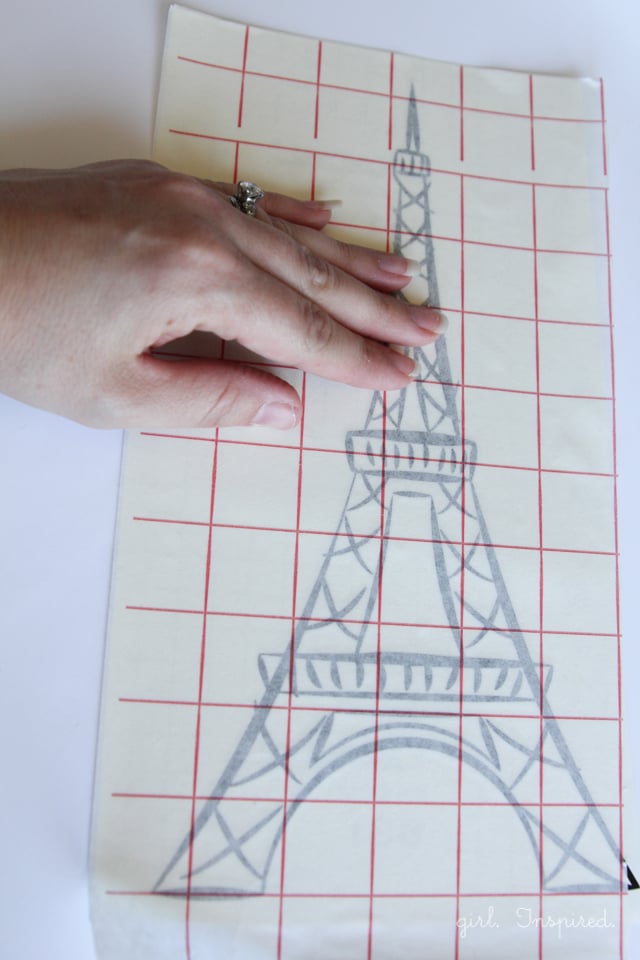
Use your hand or the scraper tool to thoroughly smooth the transfer tape over the vinyl. Be sure that the transfer tape sticks to all the elements in the design.
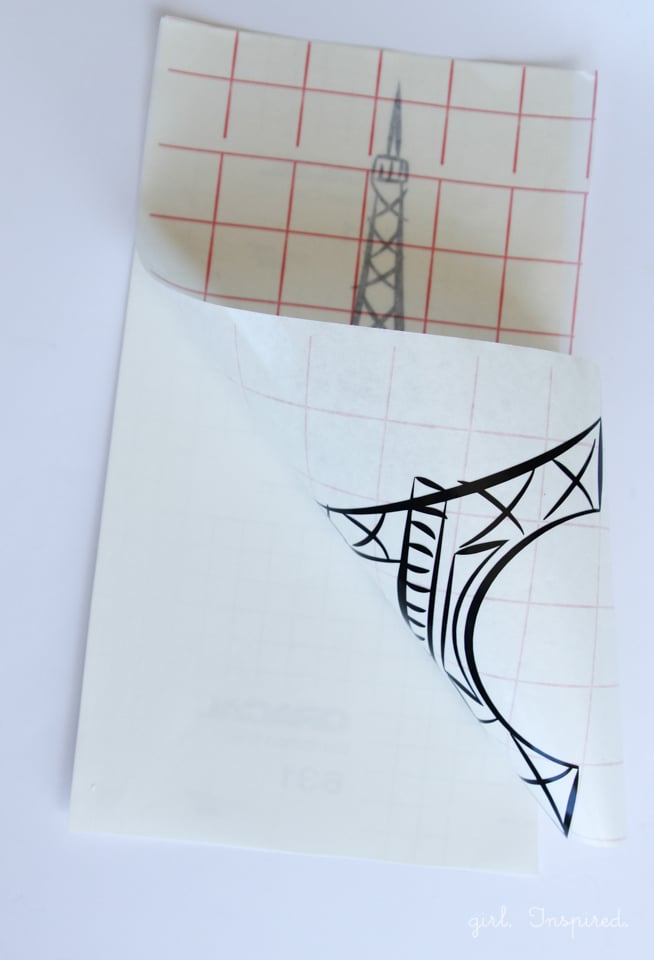
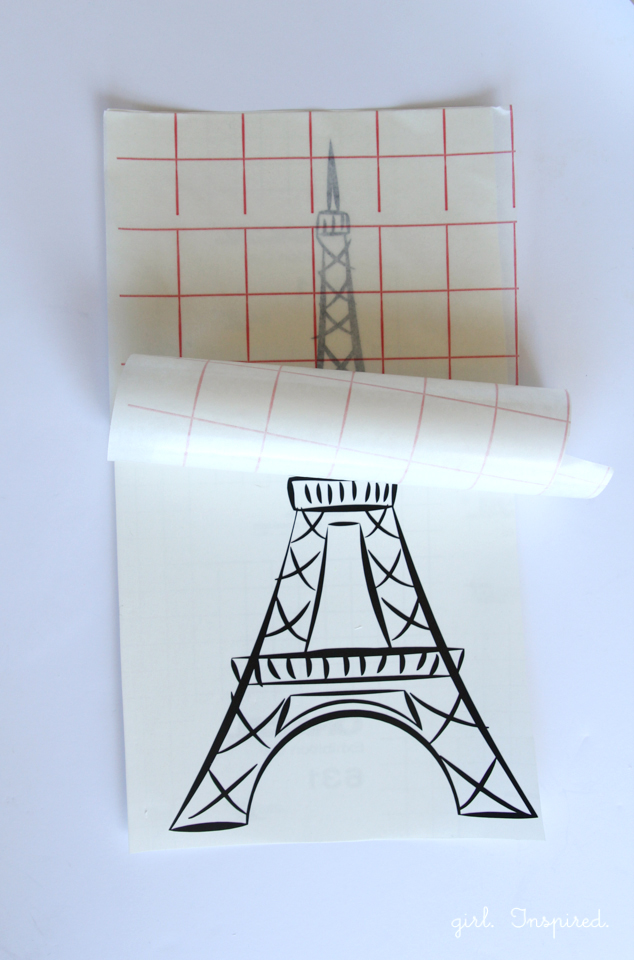
Carefully peel the transfer tape up off the background paper, ensuring that the full vinyl design is lifted with it. The sticky side of the vinyl will now be ready for application onto the wall.
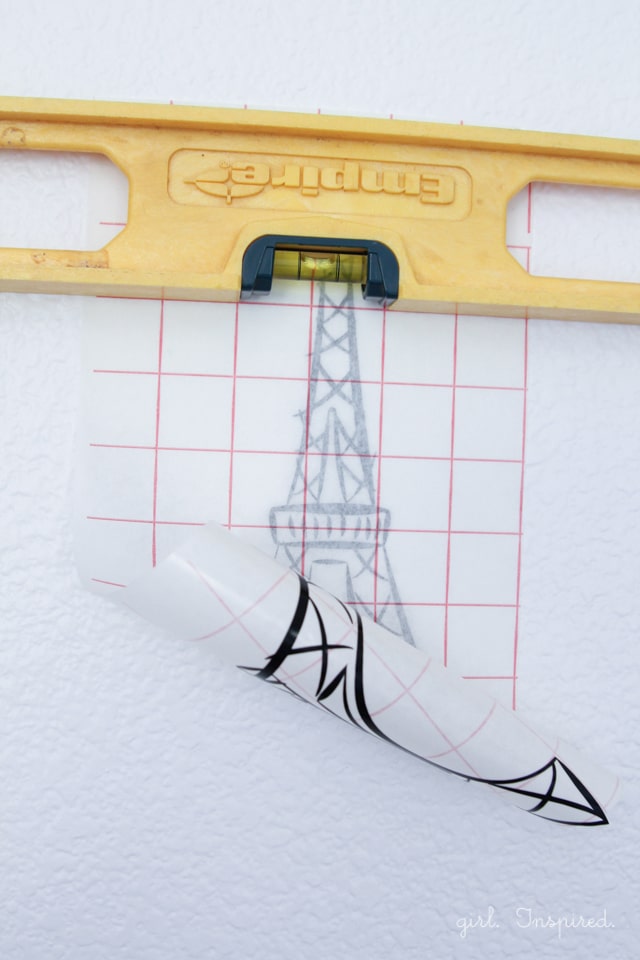
Mark the wall to indicate your desired layout of the vinyl “wallpaper.” Place the top of the vinyl/transfer tape onto the marked spot on the wall. Check the gridlines with a level to make sure that the design is straight on the wall and press it the rest of the way onto the wall.
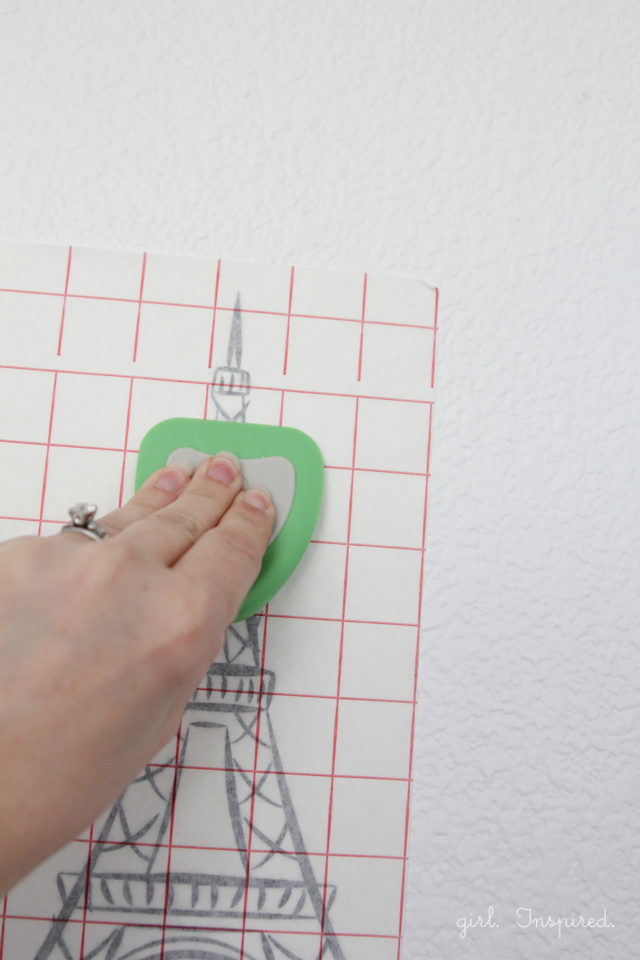
Run the scraper over the back of the transfer tape to transfer the vinyl from the tape onto the wall.
Gently peel the transfer tape from the vinyl decal. You can reuse the transfer tape over and over. I think I only used about three pieces of transfer tape (all cut from one 12 x 24 sheet) to complete my wall. Repeat to complete the layout on the wall. That’s all there is to it!
Once I had all of the materials, I’d say the project took me 3-4 hours from start to finish. Pretty good!!
I purchased my vinyl products through Vinyl Expressions, links below:
black indoor craft vinyl – 10 yard roll
transfer tape paper
Have fun! I’d love to see your vinyl wallpaper creations!


Comments & Reviews
Josette says
Great post. I was checking constantly this blog and I am inspired!
Very helpful information particularly the last section 🙂
I deal with such information a lot. I used to be looking for this certain info for a very long time.
Thanks and best of luck.
Stephanie says
absolutely spectacular,creative and fabulous, J’adore! Wish you could come do it in my home, big fan, pinned already. I on Instagram if you want to see my paper cuts of tour Eiffel @ikekepania au Revoir!
Heather {Woods of Bell Trees} says
I adore this look! How fun!
courtney says
I love this idea! Now this is making me feel like I need a Cricut! Was it hard to keep the decals straight and aligned? My three friends and I created a lifestyle link party called Be.You.Tiful, where we focus on interior design, beauty, fashion, healthy living, and what inspired us! You’re the perfect match for the party and I love your creative content! You can link up here: http://www.frysauceandgrits.com/2014/03/beyoutiful-link-party-10.html
girlinspired says
Hi Courtney! It was easy to keep them aligned as long as I transferred them straight onto the transfer paper. You do need a Cricut! or a Silhouette!
Charity says
That is gorgeous! I so wish I had a machine to cut things like this. I particularly appreciate how you used half-pieces above the door and at the ceiling…. it looks like real wallpaper! =)
cécile says
That is so awsome, as a parisian girl I just have to love this !LOL . You are so creative ! I would love to make this kind of things on my wall , but living here in Japan , houses are so different and impossible to paint on woven bamboo wall !
Lindsey says
This is incredible! I have fabric I’ve been holding onto for years of various major cities. It’d be fun to create wall paper that alternates more than one landmark. Thanks for the inspiration!
kirstin @ kojo says
I love this Stef! Ohmygoodness- can’t wait to see the finished product!
Stacey Dalton says
Stef, it turned out soooo cute. As always I am inspired to do some in the kids room.