I am loving the warmer weather and beautiful light for taking pictures this spring. It’s always a challenge to photograph one of my children, trying to coordinate their mood with available time, perfect lighting, cooperating weather, and a great location. Spring weather definitely works better than winter weather! However, it’s not always possible (rarely, actually) to get the pictures I need at exactly 1.5 hours before sunset outside with the right backdrop. My main living area has direct light coming in from the west all afternoon and evening. It’s my favorite place to be and it provides great lighting for a longer period of time than if I’m trying to take pictures outside. BUT, I don’t have any empty walls where the kids can stand and pose. I have been contemplating various solutions and have a few ideas for DIY backdrops. Today I thought I’d show how I made a backdrop for several of my recent photo shoots. It is so simple!
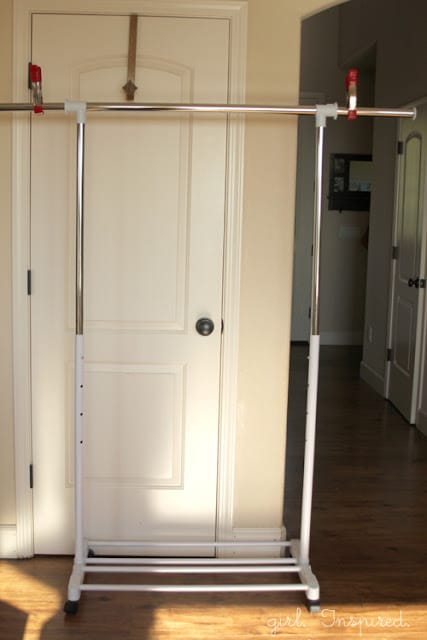
I picked up a cheap clothing rack from Home Depot – just $17 – to use for hanging the baby layette at my cousin’s shower last fall. I was able to come up with a more decor friendly solution for the shower, but I held on to this rack for experimenting. I spent some time looking at vinyl backdrops online, but they are pretty pricey and they all looked so nice, I couldn’t decide on just one that I’d use forever. I like the idea of being able to switch out the backdrop and have some variety. Then I looked at my stash of fabric.
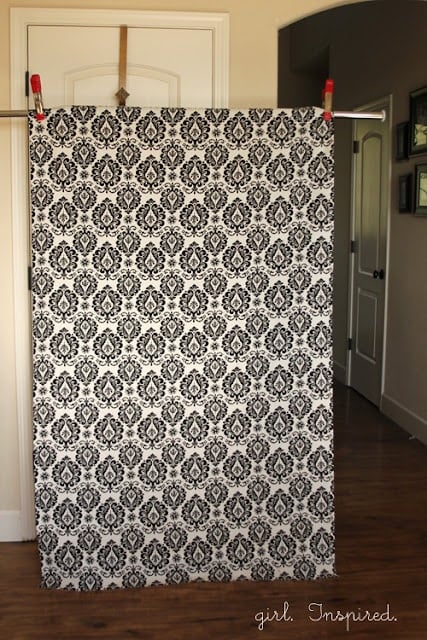
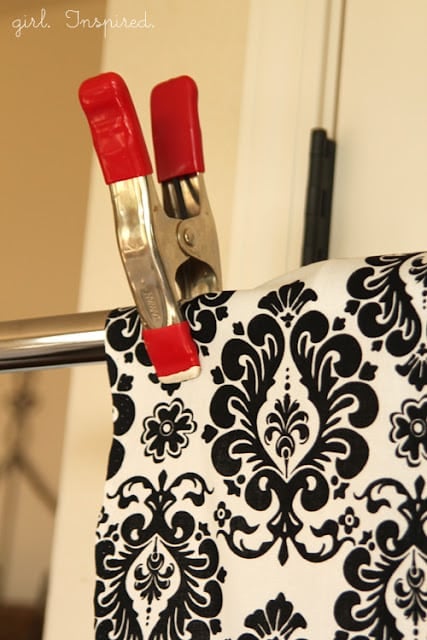
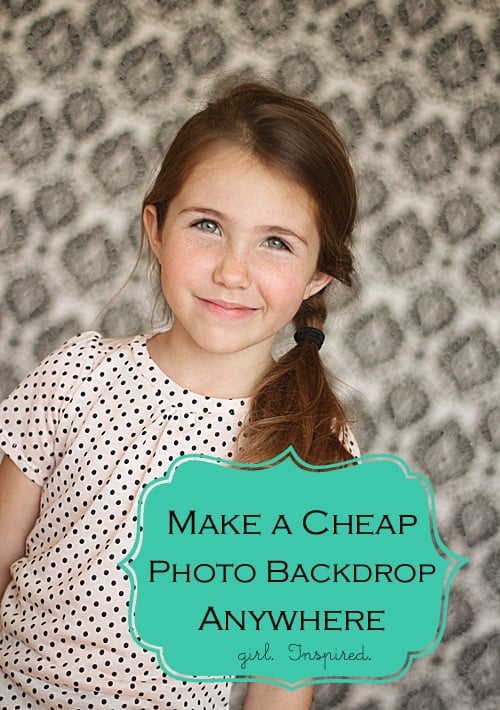
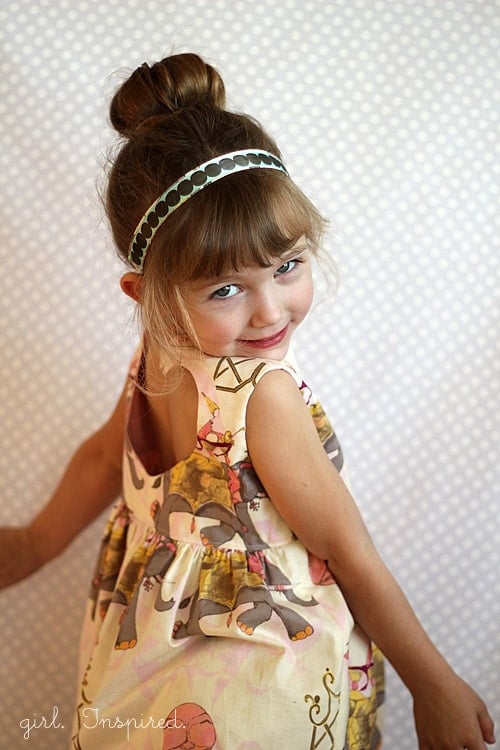
With a couple yards of fabric and two clamps out of the garage, I just clamped up the fabric that I want in the background and I have an instant backdrop behind the girls. So simple! And then you can change out your background however you want. Use a sheet, use a curtain panel, use a fun quilting cotton design. Since the clothes rack can be expanded about 5 feet wide and 6 feet high, it really gives you quite a bit of space to work with. You can also drape your fabric out on the floor in front of the clothes rack if you wanted your subject to stand on the fabric, too. And you can snap your pictures no matter what the space looks like around/behind the backdrop. Here are a couple recent pictures I took with my instant fabric photo backdrop:
Then, there are days like Monday when the weather and the kiddo did cooperate and the perfect backdrop was waiting just outside. Head over to Alida Makes today to hear all about Grace’s photo shoot and her new skirt I made for the Calling All Kids series. Go here!

I’m also over at Project Run and Play today answering a few questions for the designer introduction interviews. Fun!! Come say hi!


Comments & Reviews
maria says
Wow, fabulous idea! I have a 1-year-old daughter who is usually a good sport in front of the camera. A DIY backdrop would be perfect for her! I love taking pictures with my iPhone (camera+ app takes crisp photos that are saturated with color and a breeze to edit). But I’d like to get a nice camera. What do you use? Thanks for sharing your idea!
rachel of OddModicum says
Ok, this is handy!!! I do jewelry and tiny items, so I’d have to ammend it some to a ‘flat’ backdrop, but so going to pin this for my buddies who do wearables and are always looking for new and unique photo ideas. Thanks for inspiration! Seriously clever and just ludicrously simple!
Hugs & Hope,
rachel of OddModicum
http://www.OddModicum.etsy.com
semina says
hi I stumbled across your page whiles trying to find ideas for my daughters princess bday party, I have picked up lots of great ideas (crowns, how to make princess dress, photo back drops ect) jus want to say a great big thank you. oh and by the way I took your photo drop idea I got some free samples or wall paper from the local decorating shop so I can have a range of different backgrounds and even use some of the pictures to make the birthday invitations for the party. thanks again
girlinspired says
Hi Semina, Thanks so much for your message – it thrills me to hear how you’ve liked some of the ideas! I bet your daughter’s princess party will be incredible. Love the idea to pick up wall paper samples – I’m going to have to scout some out! Have a wonderful weekend!
Kate Giovinco Photography says
Love it. As another cheap add on to a background. I always grab a piece or trim from the local building store. You can paint it or stain it and clip it to the bottom with the clips you used at the top. It makes it look like a wallpapered wall.
I love your tutorial and your site is full of beautiful creations.
Shannon says
Ooh, great idea!
Pam @Threading My Way says
VERY clever idea and one I’ll be trying out!!!
Melissa {polkadot chair} says
Okay,
I’m seriously having a DUH why didn’t I think of that. I’ve been trying to get some new backdrops and was looking at building one out of wood. This is sooo much easier!
Charity says
Clever! I didn’t realize a clothing rack like that could be found so inexpensively. I’ve tacked a sheet to the ceiling before, but this would be SO much simpler. =)
trish says
Your pictures are so sweet and what a clever idea for a backdrop!!
Angelina- JoJo & Eloise says
Great Post!! We love coming up with creative ways for back drops especially when weather is not permitting us to go outside 😉 Beautiful Fabric, by the way!
xo
Angelina
Angelina- JoJo & Eloise says
Great Post!! We love coming up with creative ways for back drops especially when weather is not permitting us to go outside 😉 Beautiful Fabric, by the way!
xo
Angelina
Angelina- JoJo & Eloise says
Great Post!! We love coming up with creative ways for back drops especially when weather is not permitting us to go outside 😉 Beautiful Fabric, by the way!
xo
Angelina
Sweetbug Studio says
Super inexpensive and WONDERFUL idea! Great work. Every blogging mama should see this and use it if they have not yet had the idea!
zoeope says
Thanks for sharing. 🙂
Creations By Cindy says
Great photos! Hugs and blessings, Cindy