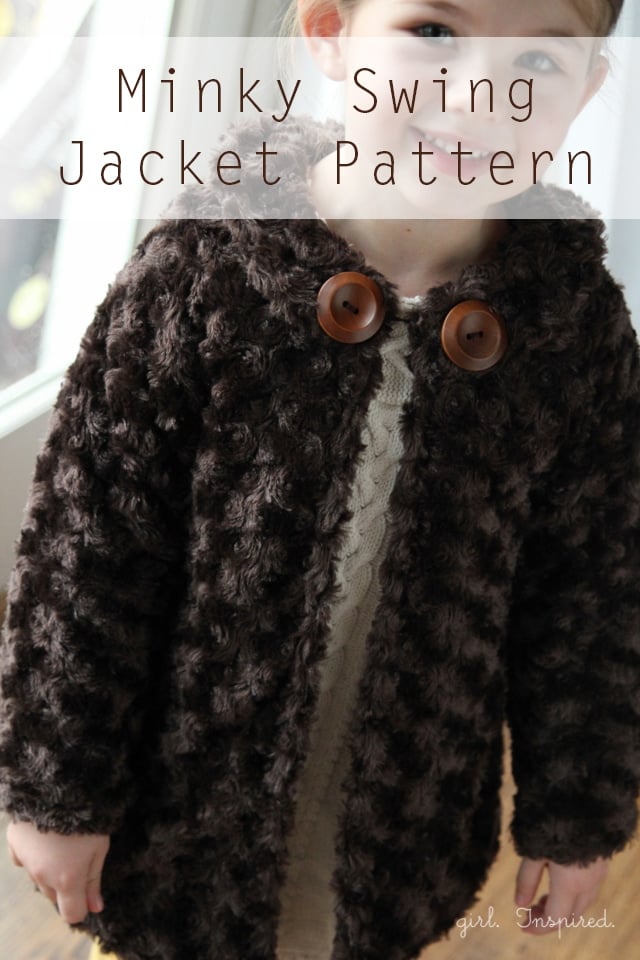
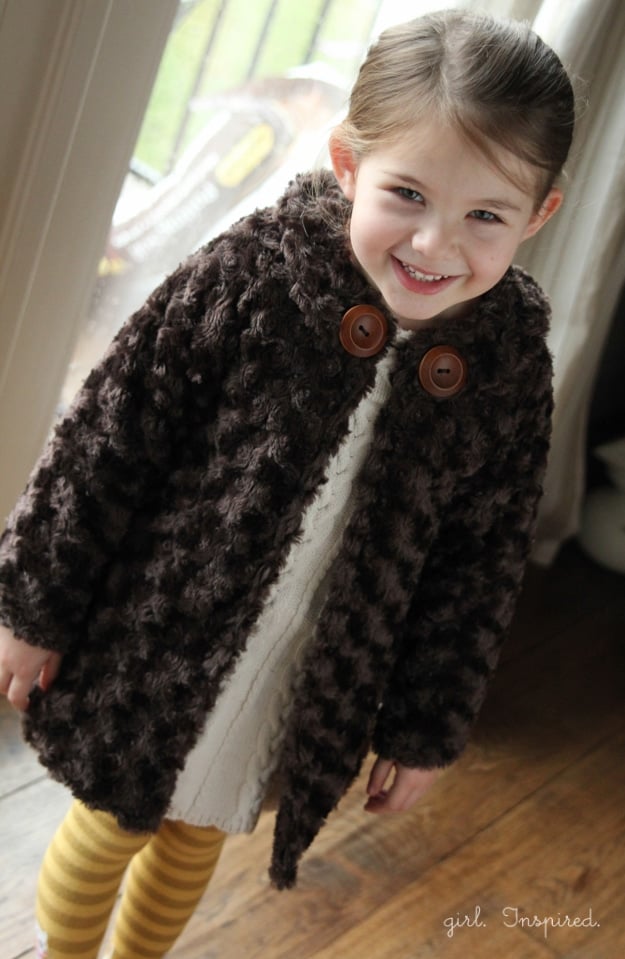
Thanks for your patience, friends! I told you last week that I would have a pattern for you for the Minky Swing Jacket and I think I finally have it together enough to share it with you! Please note, this free pattern is in one size – 4T, although it’s roomy enough that you could easily size it up a few sizes by extending the sleeve length and hemline. And frankly, even littler ones could probably wear it just fine. So a very forgiving 4T is what I have for you today! You can find the link to download the pattern pieces below, followed by a quick tutorial for sewing the jacket together.
Supplies:
Minky Swing Free Girls Jacket Pattern – download and print here
3 yards minky fabric (1 ½ main and 1 ½ lining) – this is a generous fabric allottment
elastic cording for loop
1-2 buttons, any size
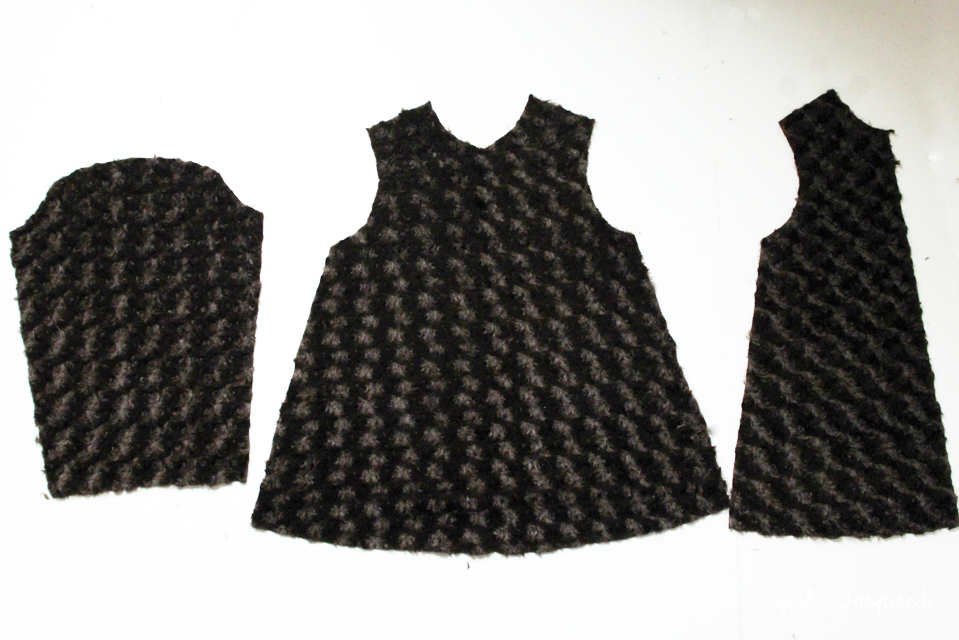
1. After printing and assembling the pattern pieces, use the pattern to cut the pieces for the jacket. Cut 1 bodice piece on the fold for the back. Cut two bodice front pieces (one left, one right). Cut two sleeves on the fold. Repeat for all lining pieces (one back, two front, two sleeves). Cut two collar pieces on the fold (not shown).
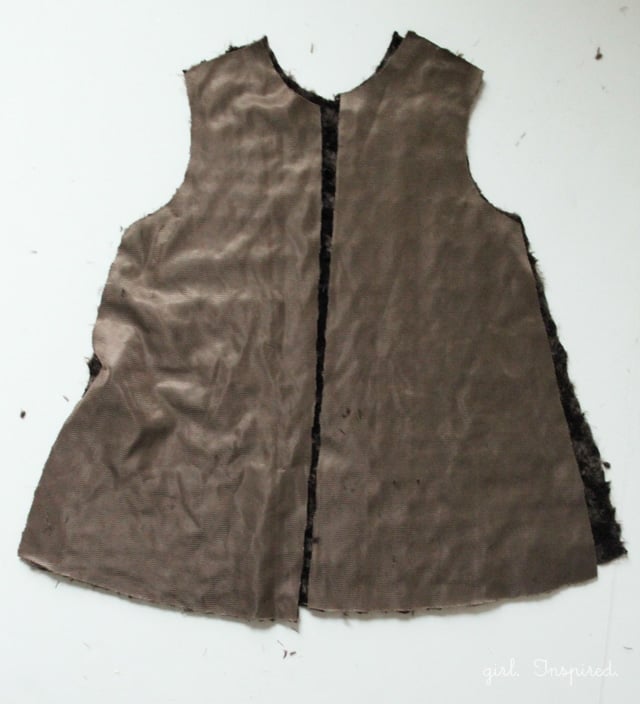
2. Match bodice fronts and bodice back, right sides together, at the shoulder seams. Sew with ½″ seam.
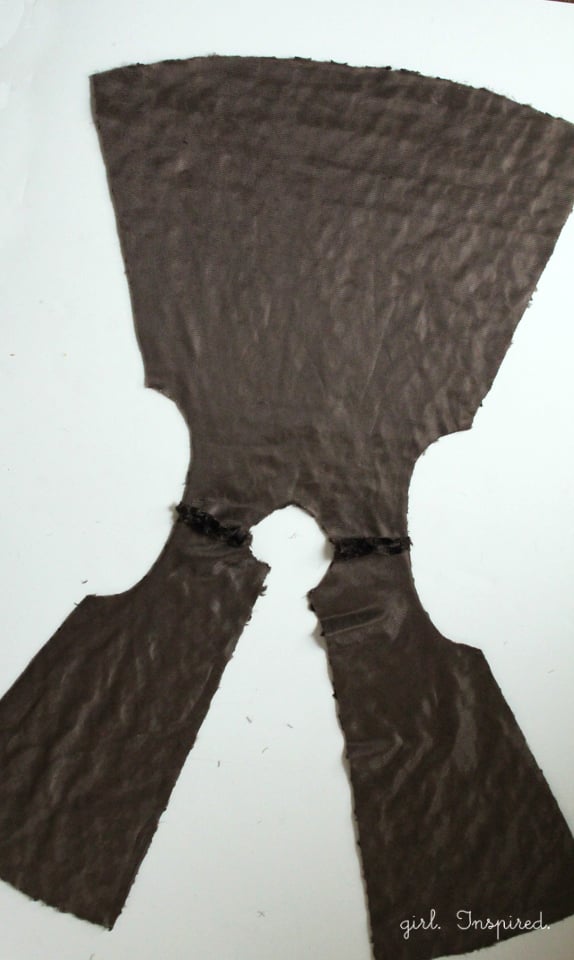
3. Open front and back and finger press the shoulder seams open.
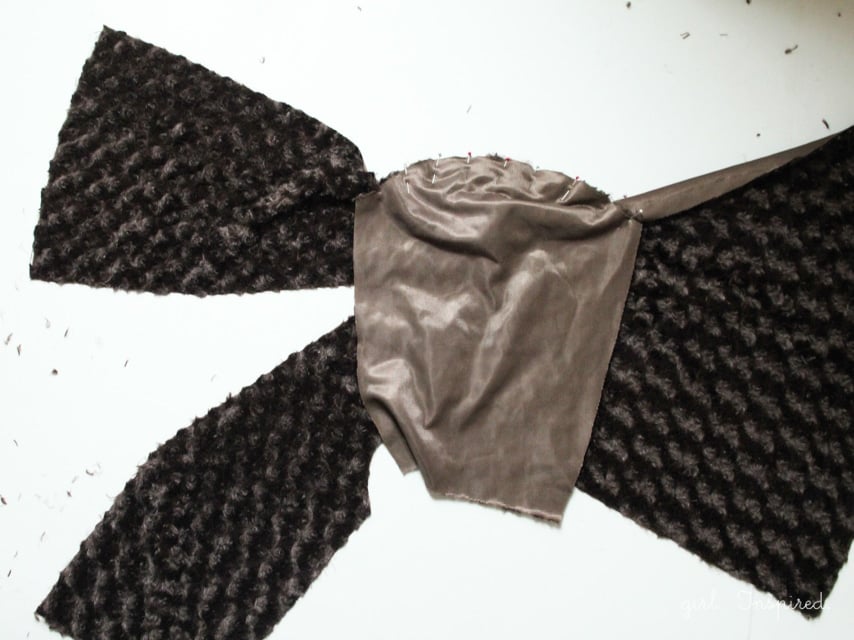
4. Align the center fold of the sleeve with the shoulder seam. Pin to fit the sleeve cap into the armscye with right sides together. Stitch the sleeve to the armhole.
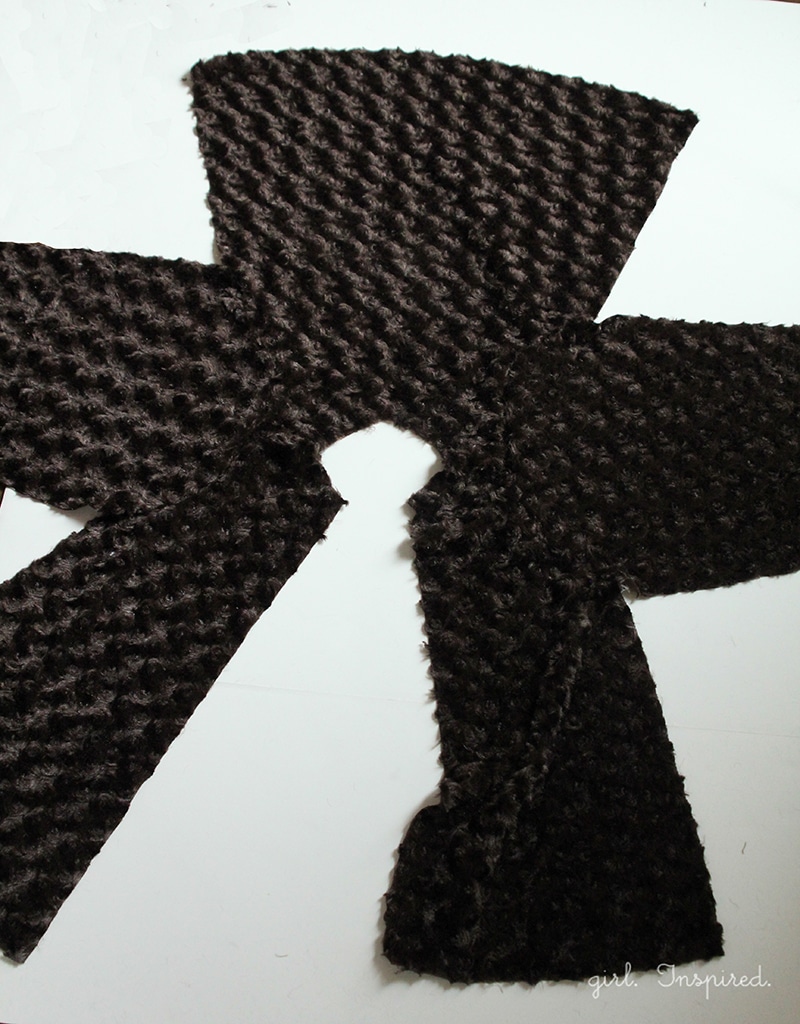
5. Repeat with the other sleeve.
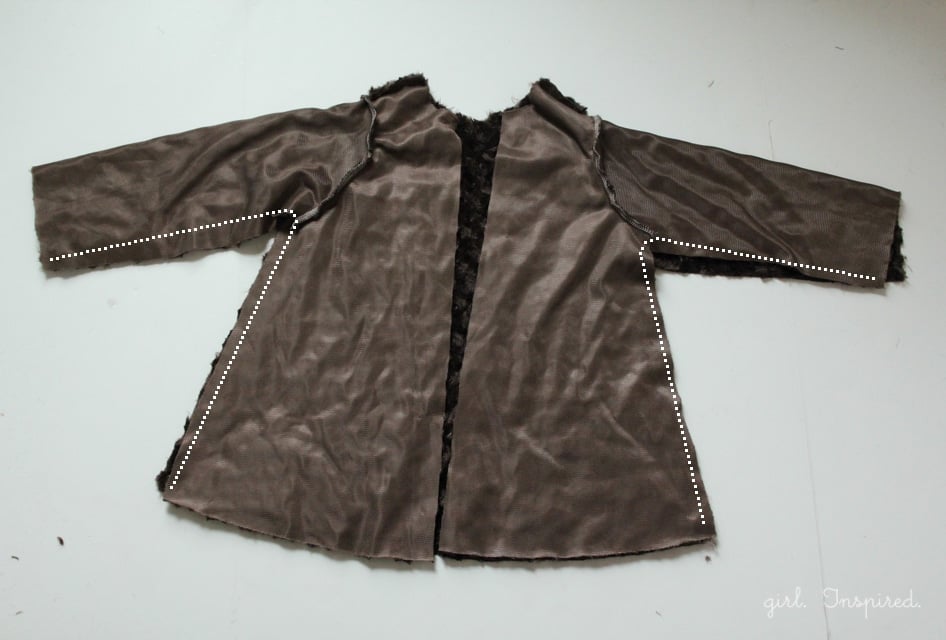
6. Fold bodice front to meet bodice back, right sides together and matching raw edges of the sleeve. Match and pin underarm seams. Stitch from underarm down to hemline. Stitch from underarm seam to sleeve hem. Repeat Steps 1-6 to form the lining in the same manner as the main jacket.
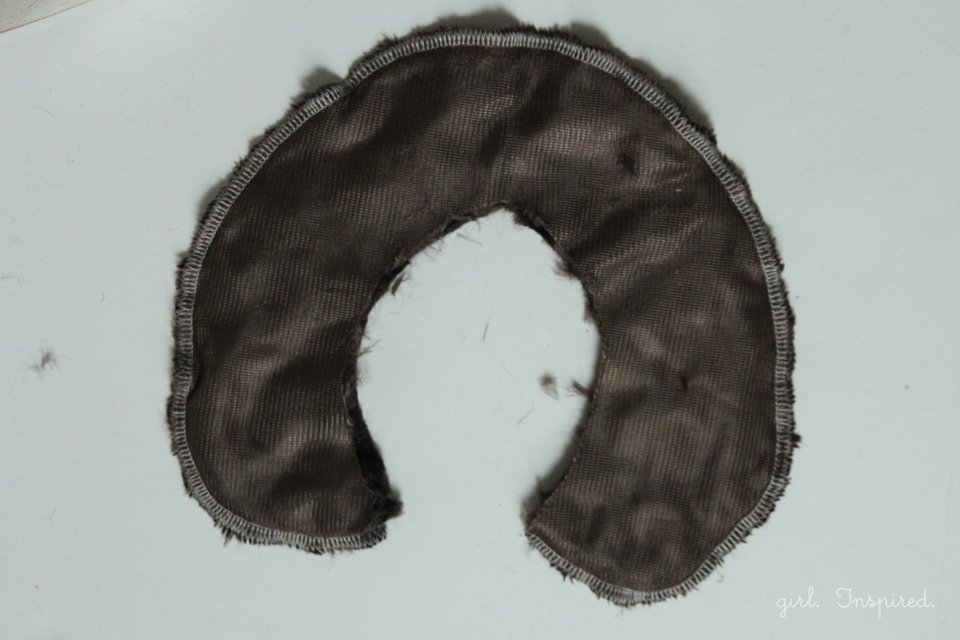
7. Place collar pieces right sides together and stitch around outer edges (you can serge if you wish). Turn right side out and work the seam with your fingers to fill out collar and form a smooth shape. Topstitch around the seam edge to help it lie flat and maintain shape if you wish.
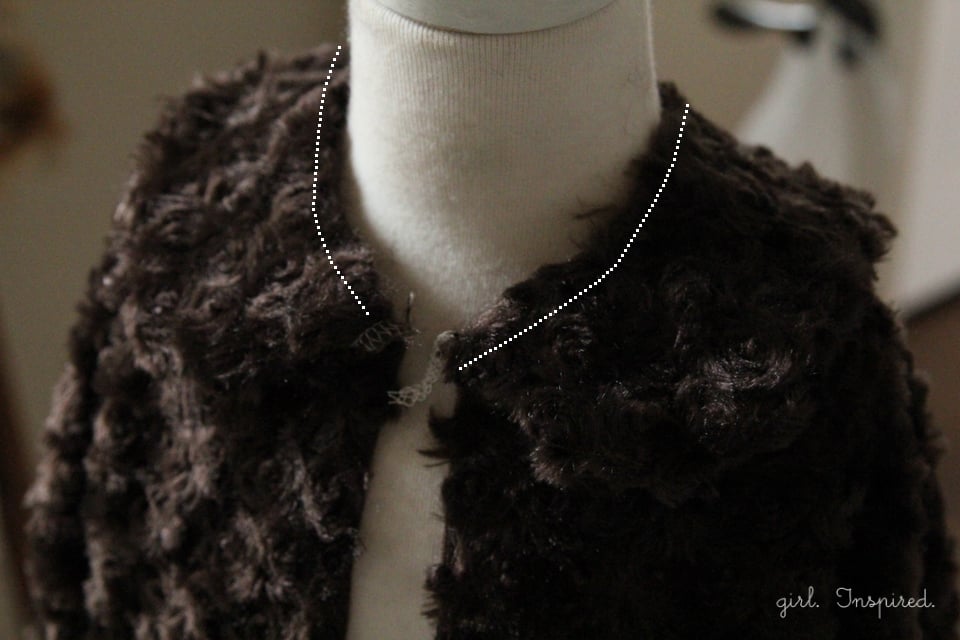
8. Turn the main jacket right side out. Pin the collar to the jacket neckline, matching raw edges. Baste in place using a ¼″ seam.
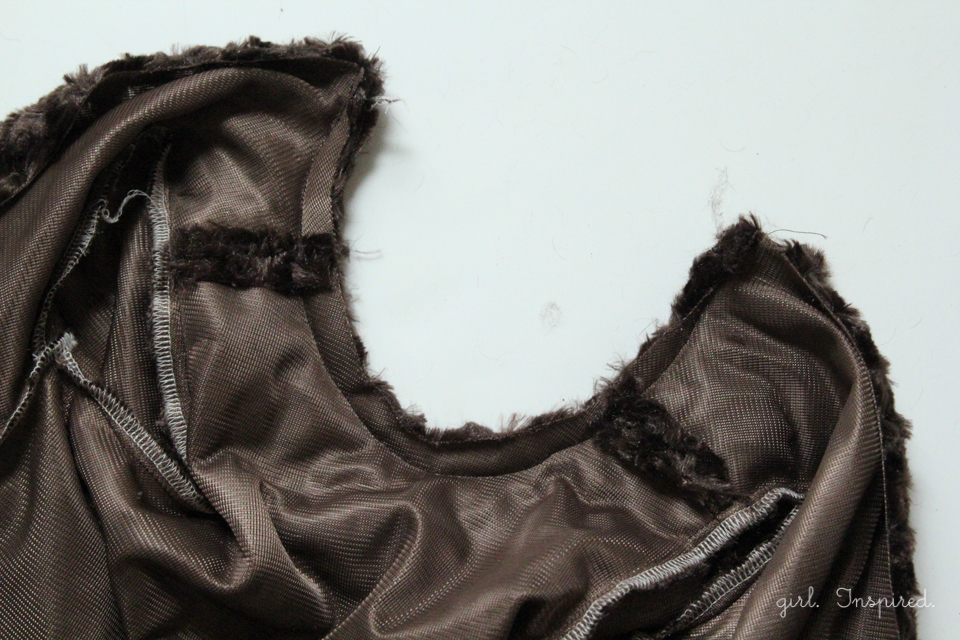
The above picture shows how the underside of the neckline will look when the collar has been basted in place. If needed, clip into the curves around the collar.
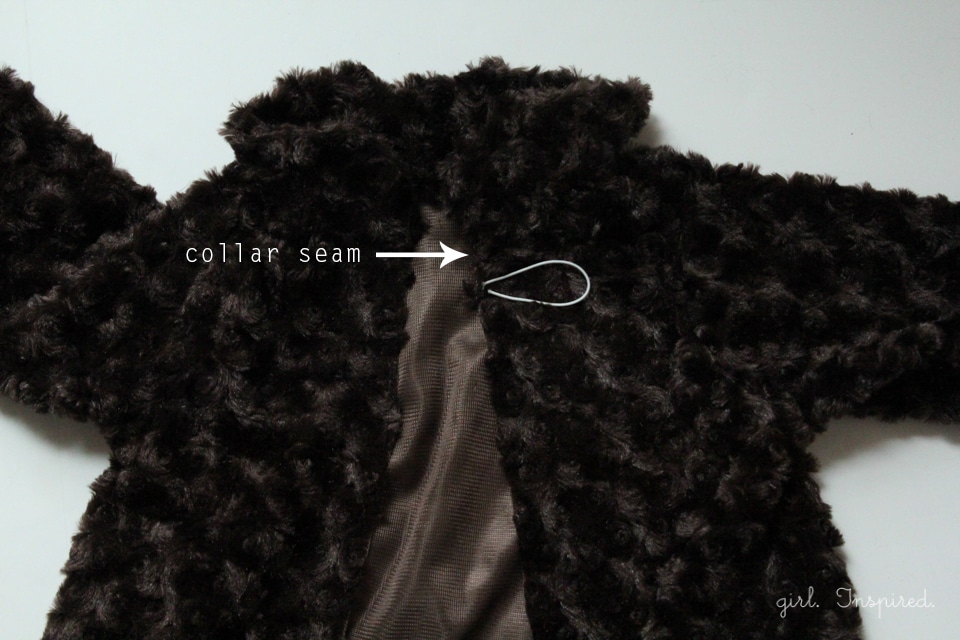
9. On the wearer’s left hand side, on the front of the jacket, attach a 3-4″ loop of elastic cord by stitching repeated zigzag stitches over the ends of the cord just under the collar seam and ¼″ in from raw edge.
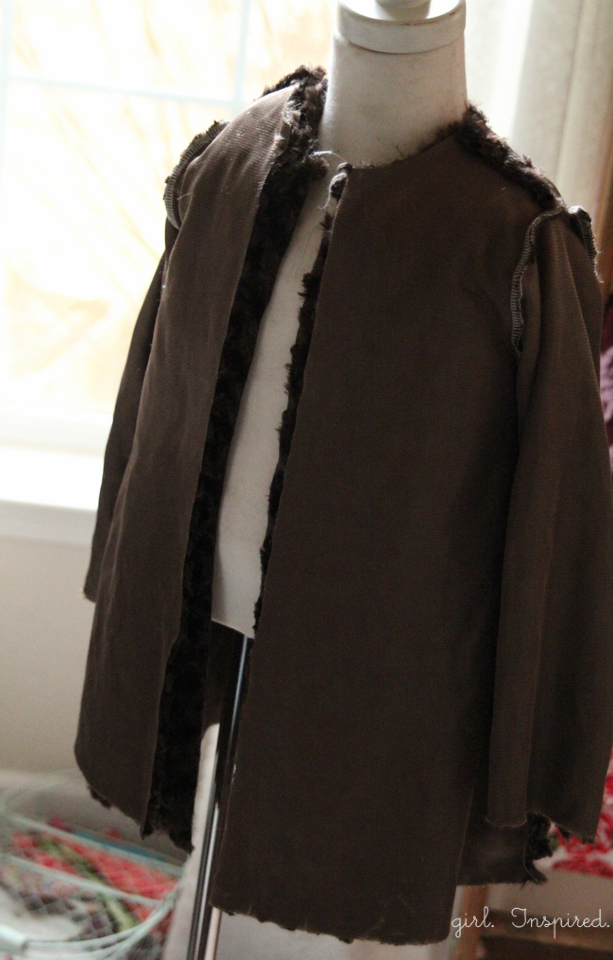
10. With the main jacket right side out and the lining turned wrong side out, slip the lining over the top of the main jacket. Stitch around the neckline and down both sides of the front bodice to join the jacket to the lining.
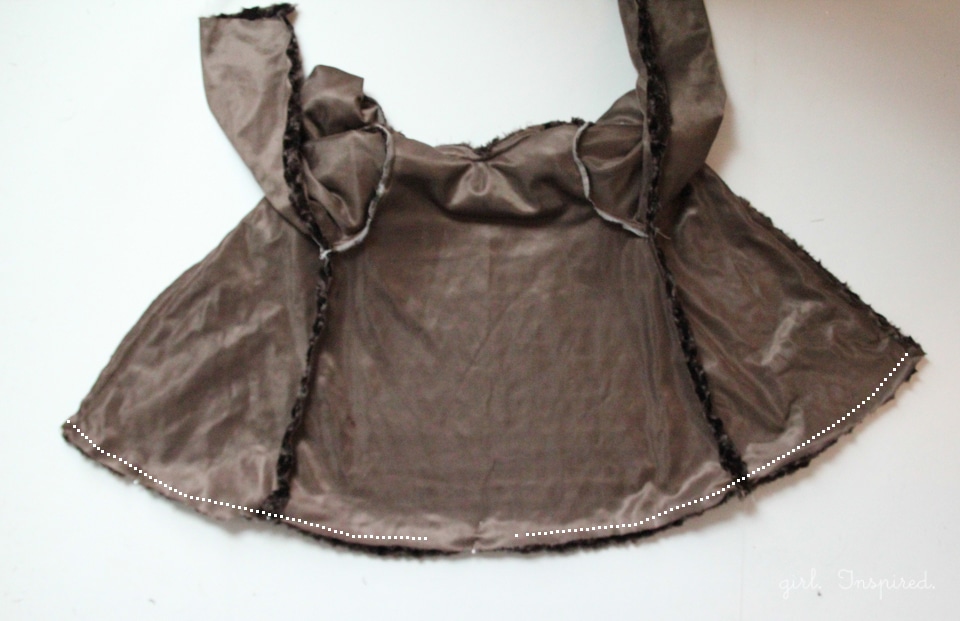
11. Lay the jacket out flat and match the side seams of the main and lining. Stitch along the hemline, about ¾″ from the edge, leaving a 4-5″ opening for turning. Trim corners as needed and turn the jacket right side out through the opening. Topstitch along the entire hemline, closing the opening in the process. You can also topstitch down each side of the front – I like how the topstitching provides a little crispness to the seams on this type of fabric (particularly since you can’t iron it!)
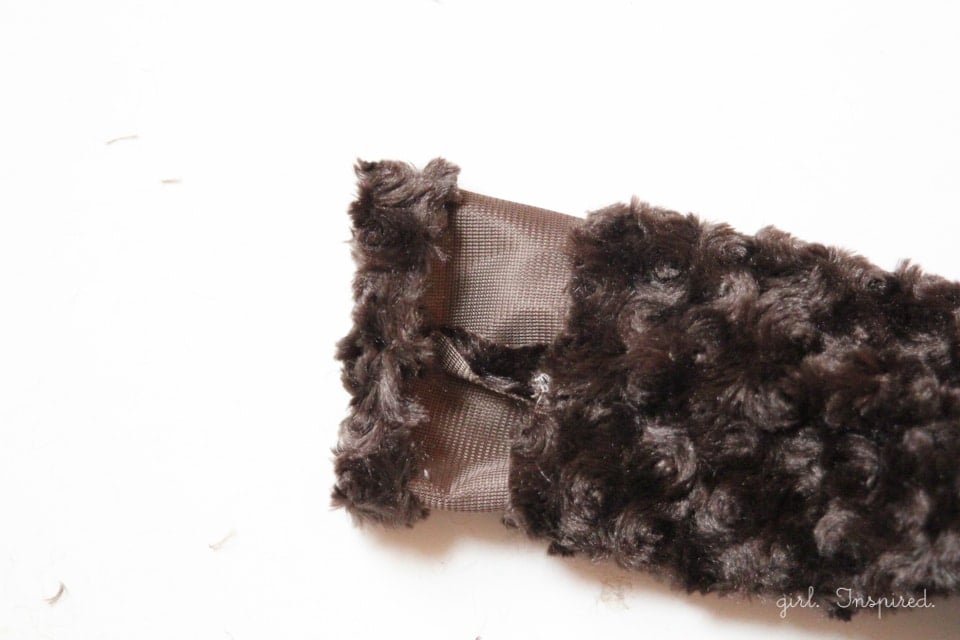
12. Tuck the lining of the sleeve into the main sleeve. Fold under the hems of both the sleeve and the sleeve lining, so they are turned in toward one another.
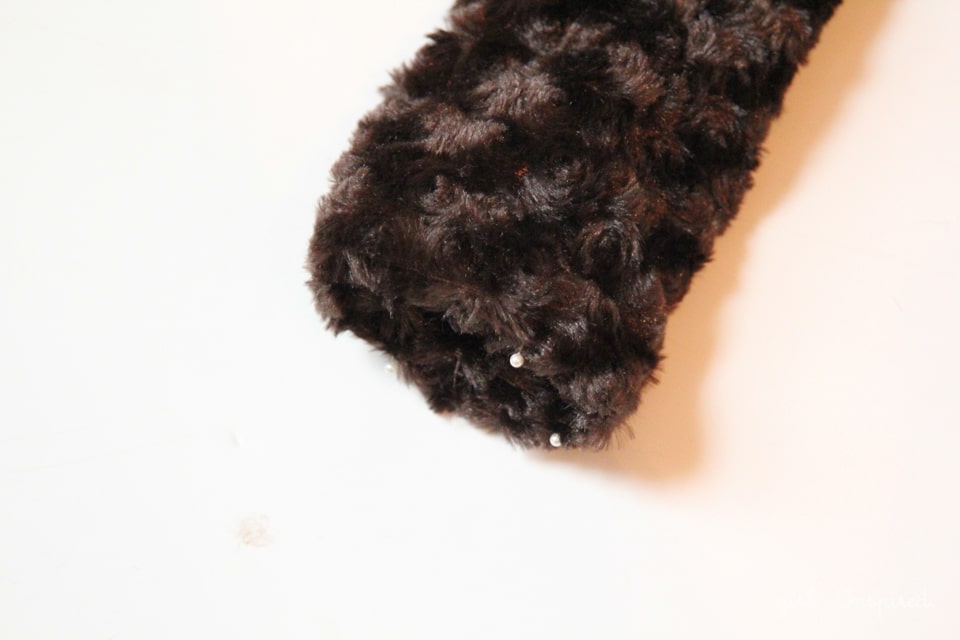
13. Pin the main sleeve and the lining sleeve together at the hems. Stitch together with a ⅜″ seam, making sure to catch both the lining and the main sleeve hems in the line of stitching.
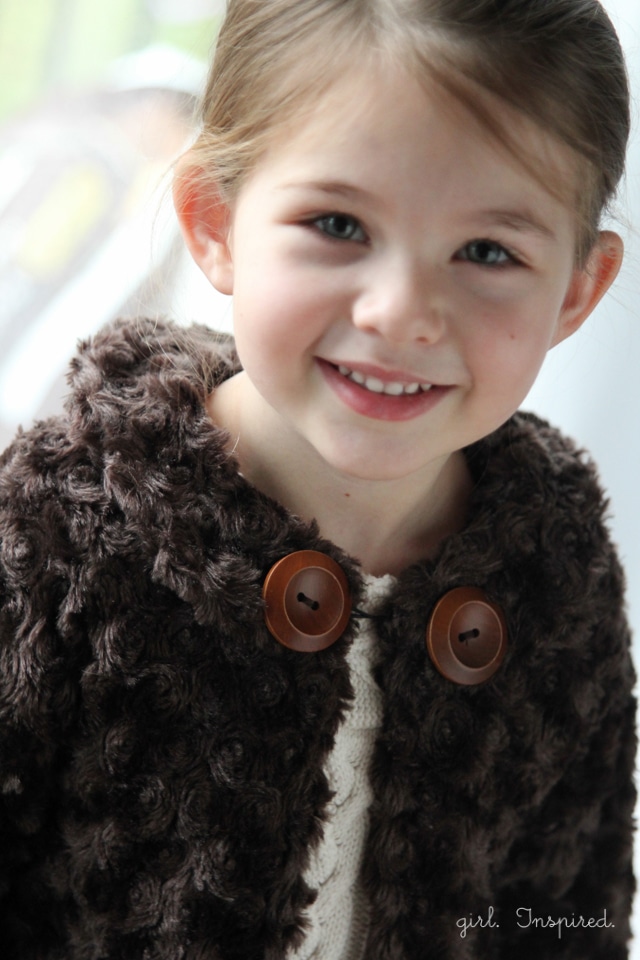
14. Attach button(s) to the jacket by sewing one directly across from the elastic loop. I sewed these larger buttons right on top of the collar. The second button (on the same side as the loop) is decorative only and is completely optional.
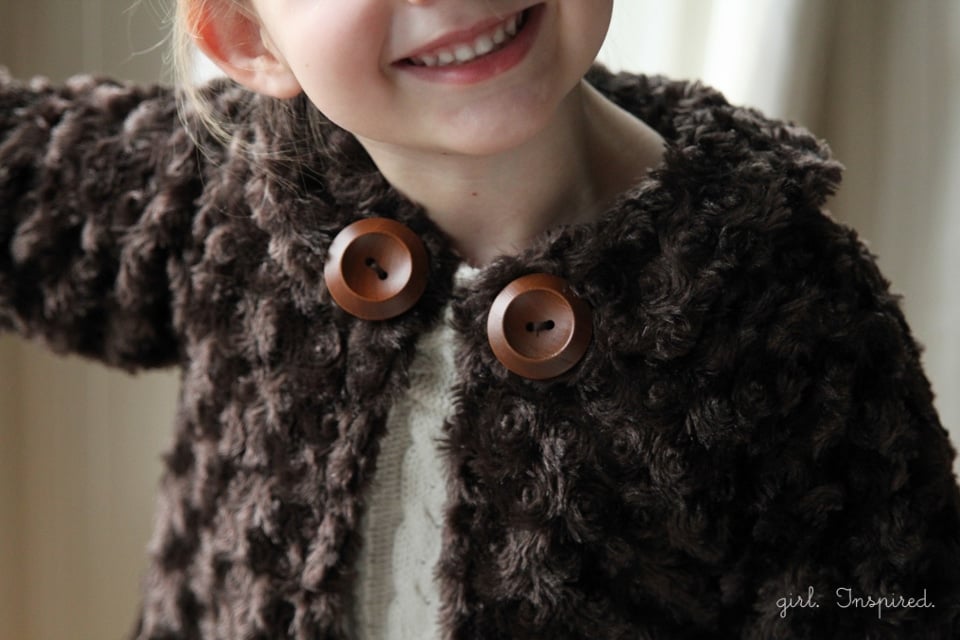
Your Minky Swing Jacket is complete! Good job!! You can read more about how the Minky Swing Jacket came to be here.
I’m also sharing some hand sewing basics over at I Heart Naptime today.


Comments & Reviews
Alycia says
I made this jacket for my daughter and just posted about it. I made it with fleece instead and it still came out cute. The pictures and post are at http://seaminglysane.blogspot.com/2014/11/minky-swing-girls-jacket-review.html. Thanks for the pattern and tutorial. My daughter and I both love the jacket.
Lindsay says
Is there a trick to getting the pattern to print correctly? It either prints too small (1 inch scale reads 3/4 inch) or too large (the lines are running off the page). Thanks!
girlinspired says
Hey Lindsay, Be sure that you download the pattern and then open it in Adobe. Sometimes if I open a file from the preview where it downloads in my web browser, then the sizing is off. I have to open the folder where it downloaded to, and then open it from there. Or open Adobe and then open the file. Also, be sure you uncheck Print to Fit so that it doesn’t resize. Hope that helps!
OneDayOfPeace says
Thaaaaank you for sharing this pattern!! I finished the jacket for my niece- it turned out great! I didn’t line it with minky (I didnt have enough, and um. That stuff is not cheap! lol) but I still love it!
I posted pics on my blog! http://odop.ethran.com/the-minky-jacket/
louise says
I soooo love this! I wish I had a little girl to sew it for! I’m pinning it just in case! I love it!
Carin says
This is so beautiful. Thank you for the pattern. I love the brown with those big buttons!
Natalia says
Thank you so much for this wonderful pattern! I’m from Canada and it makes sense if we’re going to have a warm jacket that it would close up at the front so I think I will make the front pieces a bit wider so they overlap, and use a couple more buttons and loops. Also I plan to use thrift store coat that already has a lining. Love the simplicity of sewing the two as one. 🙂
One question, is there a chance of a 1 inch square or maybe could you give me the exact measurement of one of the pieces so that I can print one page and check if it’s printing accurately? I’m sorry if I missed the square but I don’t see it.
Thank you again. Love it.
Natalia
Natalia says
Okay, I’ve been reading it more closely and realize that the lining and outside are not sewn as one–I was confused by the underside of the outside looking like the lining. Tricky when you’re using the same fabric for both. For a while I was confused about what is done with the collar seam but after figuring out the first thing, that made more sense too. It looks like in step 10, the collar is just lying flat underneath the lining, is that correct? Oh, and I still have the same question about the printing that I had in the first comment.
Thank you again! 🙂
girlinspired says
Hi Natalia, Thanks so much for your kind words! The nice thing about using this furry minky for the lining and the outer is that the jacket sews up really quickly because you don’t have to tediously iron and make sure all the lining falls to the inside of the seam and all that jazz. At least, that’s why I like it! 🙂 I’ve added a 1 inch square to the first page of the pattern, which you can now access through the link within the post. Thanks for the suggestion! Happy sewing!
Natalia says
You are amazing! Thank you so much for adding the square so quickly! I purchased an e-pattern without one and wrote them two days ago for help and haven’t even heard anything yet–and you didn’t even have a purchase for motivation! I’ve subscribed to your blog and look forward to reading regularly.
Thank you again. 🙂
Charity says
Thank you! Now I’m just waiting for a chance to buy some Minky. =)
Joy Candrian says
Darling jacket – I’ll be making this into a size 3 – thanks so much!
http://xoxograndma.blogspot.com/
Jess Abbott says
that is so adorable Stef!!! I love it!! Great job on the pattern!
marissa | Rae Gun Ramblings says
This is so darling!
kristin says
Oh boy, I bet Em would LOVE this. Should take her to the minky section and see what she decided on. Thanks for the pattern! 🙂
Brenda says
I cannot get the pattern link to work. Can anyone help me?
girlinspired says
Hi Brenda,
Try to paste the link directly into your browser: https://thegirlinspired.com/wp-content/uploads/2014/02/Minky-Swing-Pattern.pdf – let me know if you still can’t pull it up.
Amy says
So Excited!!! The jacket is precious. GREAT JOB!!! I have a 3 and 4 year old. I purchased a huge lot of milky fabric on a daily sale at 75% off. I had not figured out what to do with it. Perfect Timing. Thanks so much. Amy
Anne says
Minky inside and out! That has GOT to be the softest coat ever!!! I’ve linked to your post over at Craft Gossip:
http://sewing.craftgossip.com/free-pattern-minky-swing-coat-for-little-girls/2014/02/18/
–Anne