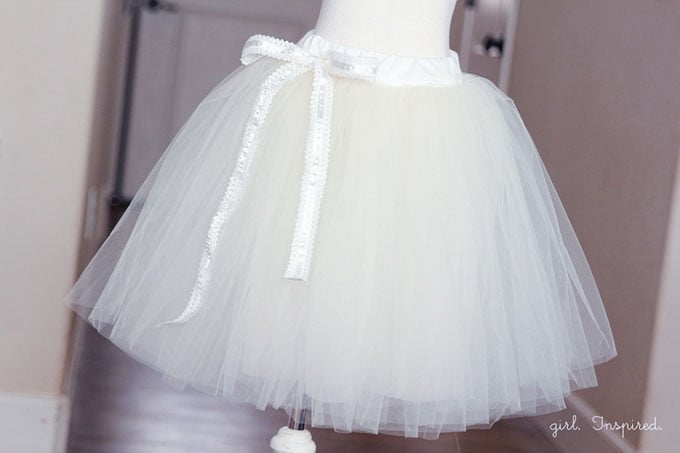
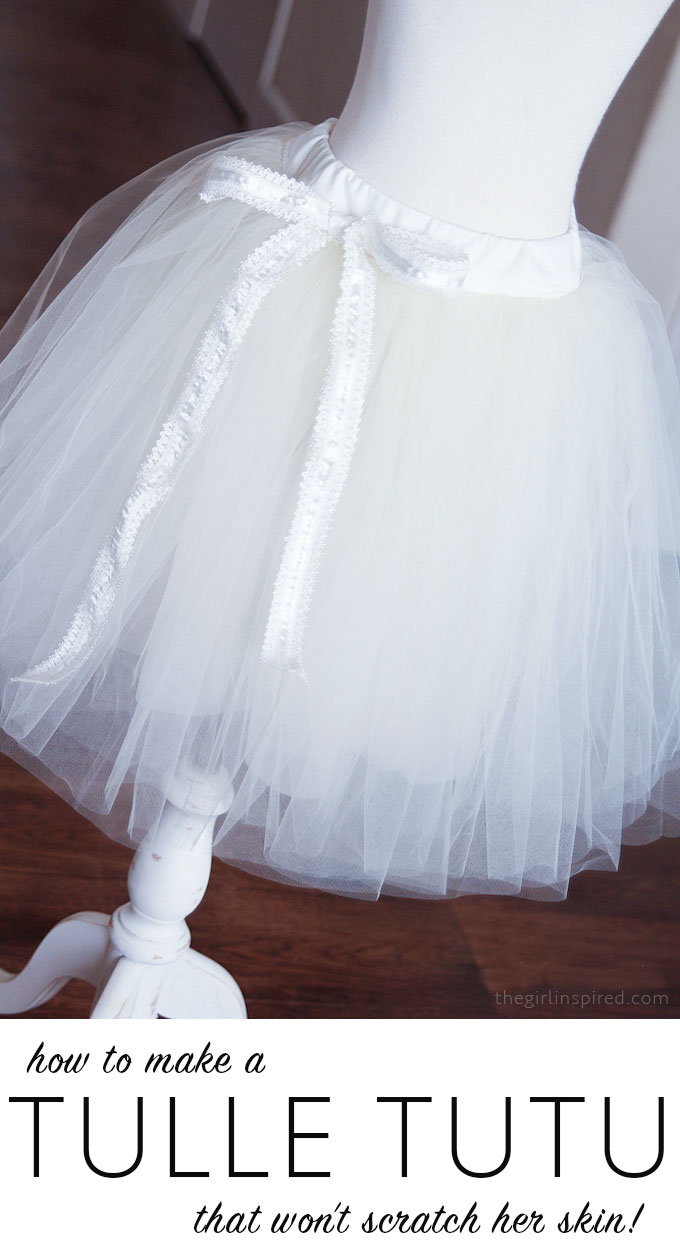
If you’ve ever wondered how to make a tutu for your little one that is soft on her skin and simple to sew, this is the tutorial for you. Tulle is inexpensive, hence making this a cheap sewing project, but the satisfaction of being able to sew a tutu skirt for your little one is invaluable!
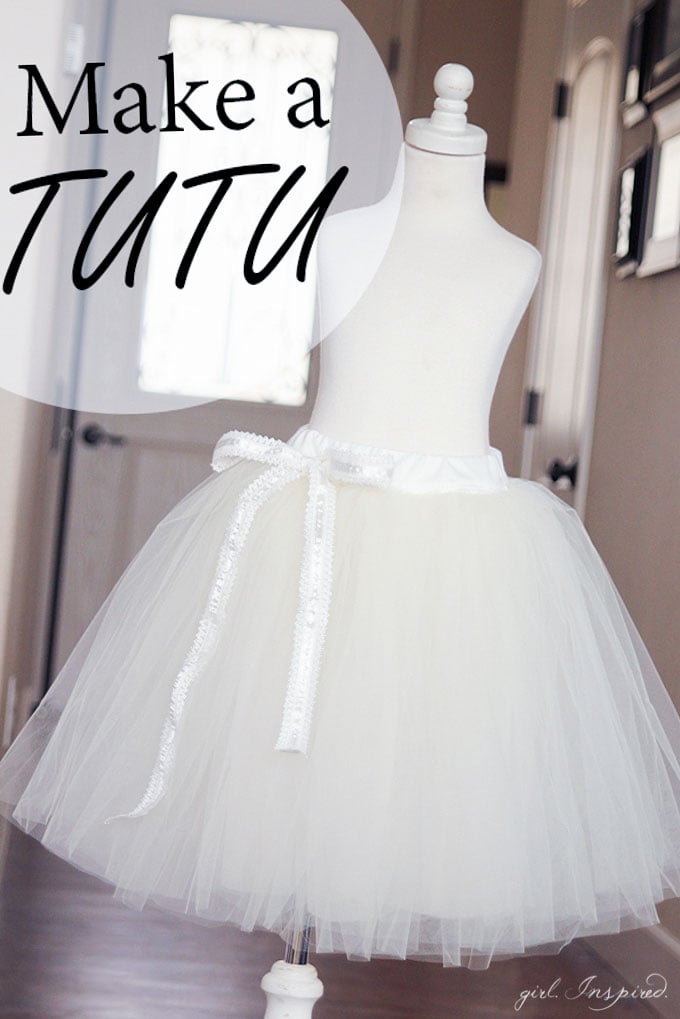
I’ve made a tutu or twenty in the last few years. They’re great for dress-up and also serve as a nice pettiskirt under big, fluffy dresses. I needed to make a new one in a bigger size to go under Olivia’s costume for the Nutcracker, so I took a few extra minutes to snap some pictures of the process.
Tutus are inexpensive to make , but take a little time since you’ll be gathering quite a lot of tulle to get the desired puff effect. I finish the gathered skirt with a soft lining and knit waistband so that the tulle isn’t scratchy against the kids’ skin. Have someone in mind that would like one? You can use this same set of instructions to make a baby tutu and even a tutu for an adult. I’ll show you how to make a tutu for anyone right now!
Supplies:
5 yards lightweight tulle
½ yard lining fabric
¼ yard thick knit
1 yard ¾″ elastic
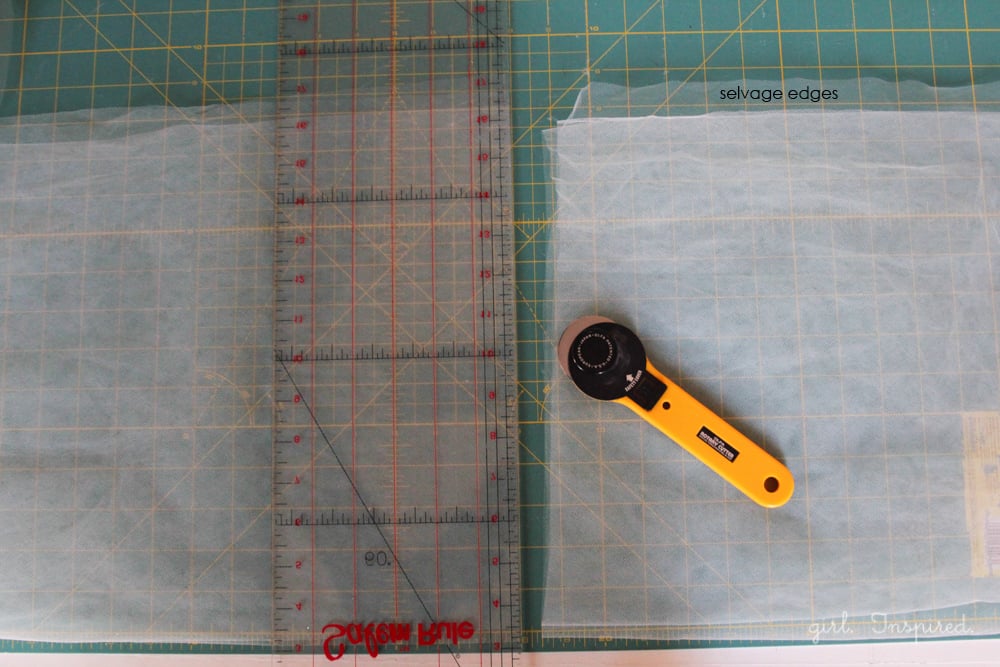
Begin by cutting your tulle into at least 10 sections. For this longer tutu, I cut each section 18″ long, giving me exactly 10 lengths from the 5 yards of tulle. The length to cut the tulle will depend on how long you want the skirt – measure from your child’s waist to the desired finished length of the skirt and cut all lengths of tulle according to this measurement. Fold the tulle on your cutting mat, matching selvage edges and then folding one more time – this makes it easier to cut with a rotary blade. Use a rotary cutter for the smoothest edge on the tulle.
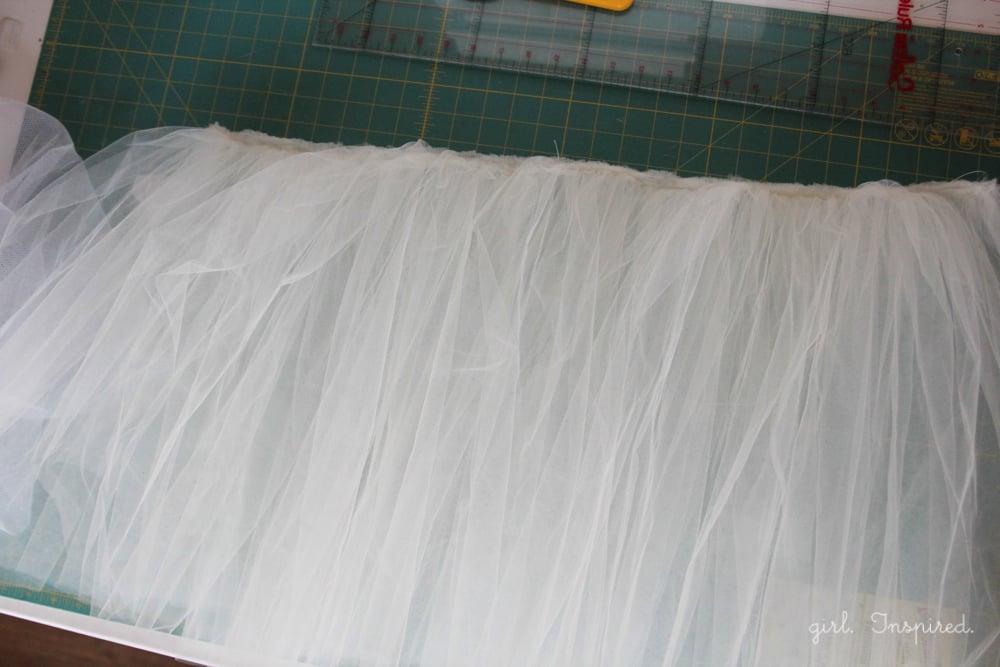
Next, gather each section of tulle along the long side. Feed each piece of tulle into your sewing machine right after the previous so they’re all connected. I like to use a ruffling/gathering foot (affiliate link) to gather the tulle quickly – if you don’t have one, you can set your machine to a long, loose stitch length and then pull the bobbin threads when you’re done to gather the tulle by hand.
Regardless of the method, gather all of the tulle as tightly as possible. Next, we’re going to fold the gathered length of tulle back and forth on itself to make one skirt piece. Measure your child’s waist and add 7″ to find the skirt width. Fold the skirt back and forth on itself to make one skirt piece equal to this determined skirt width and stitch the layers together across the top.
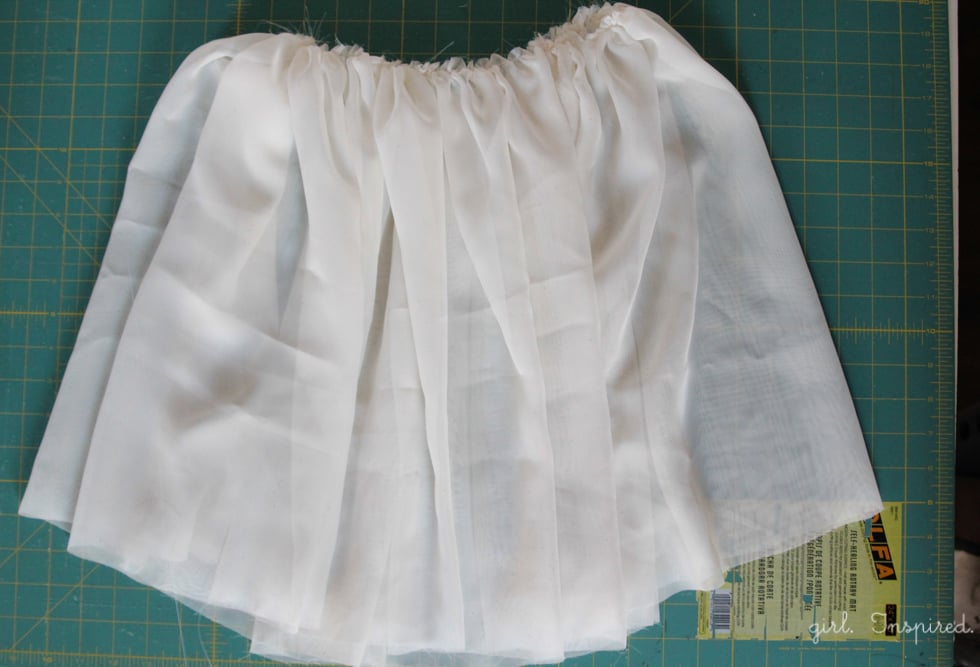
Cut one piece of lining from selvage edge to selvage edge and about ¾″ shorter than the tulle layers. If you’re going to hem the lining (e.g., if the fabric frays), cut the lining piece the same length as the tulle layers and hem with a narrow hem so that it’s just slightly shorter than the tulle. Join the short ends of the lining and stitch together to form a tube. Sew a gathering stitch around the top of the lining and gather it until it measures your child’s waist measurement + 7″.
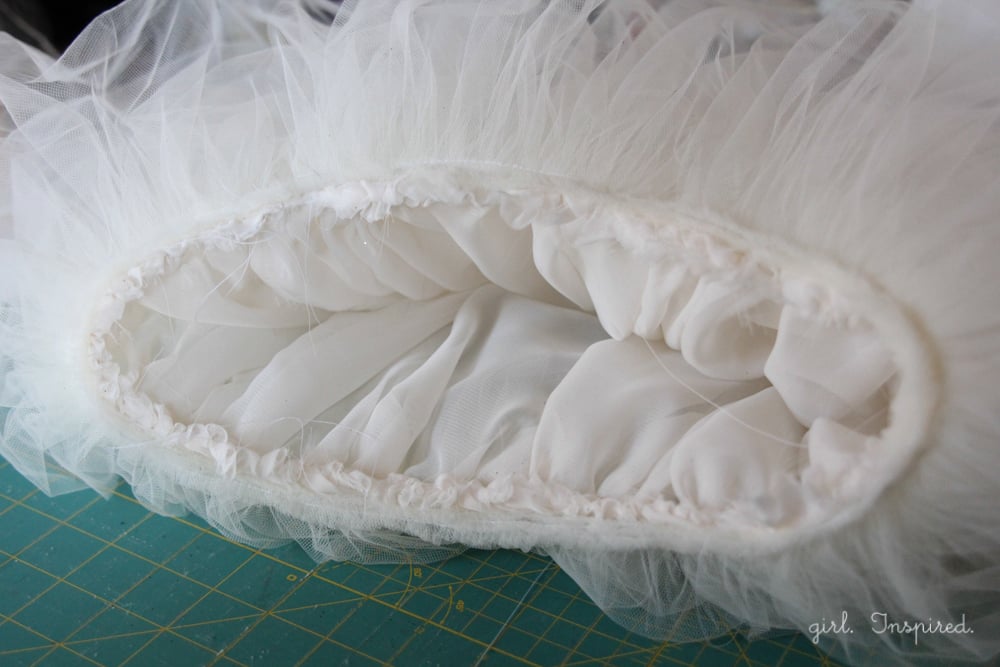
Stack the lining under the tulle and stitch the two together around the top.
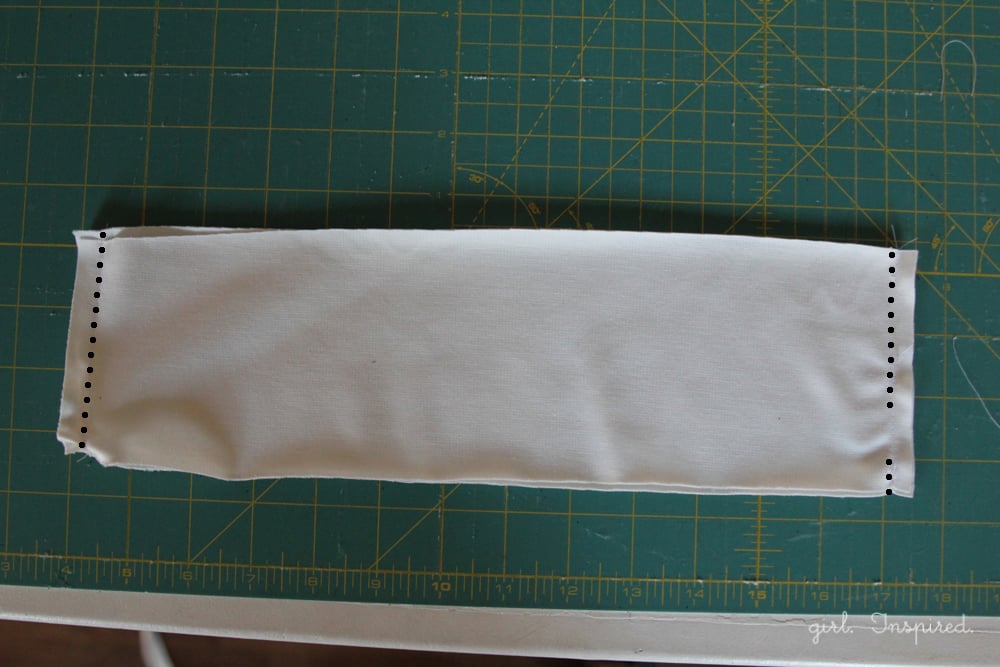
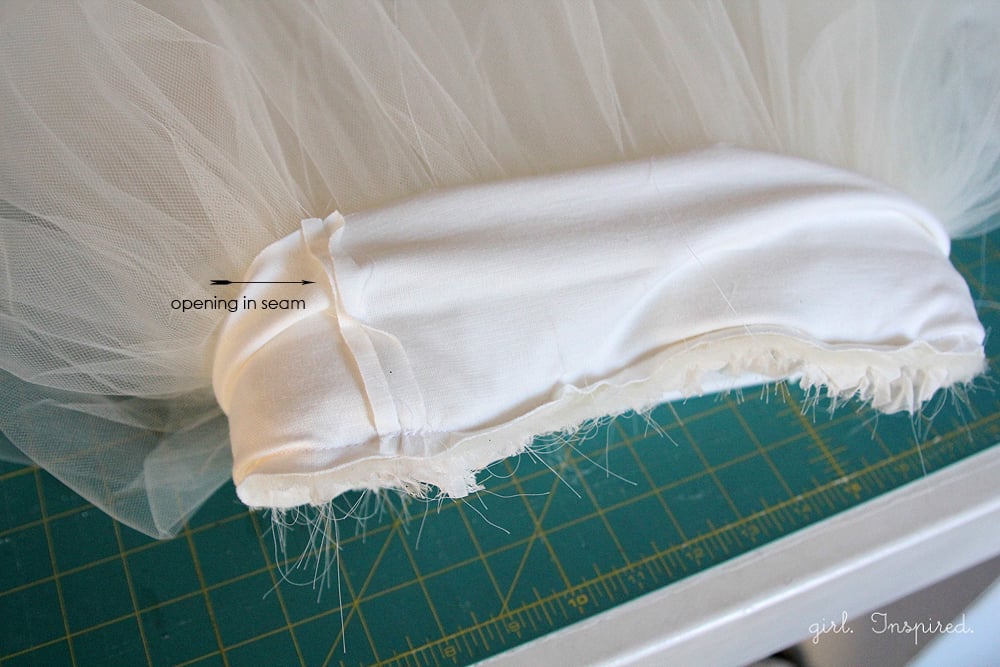
For the waistband, cut two pieces of knit 5″ wide by ½ the waist measurement + 4″. Sew the short sides together on one side with a ¼″ seam allowance. On the other side, sew 3.5″ down one side, leave a 1″ opening, and sew another .5″ to the edge. This is the opening we’ll put the elastic through later.
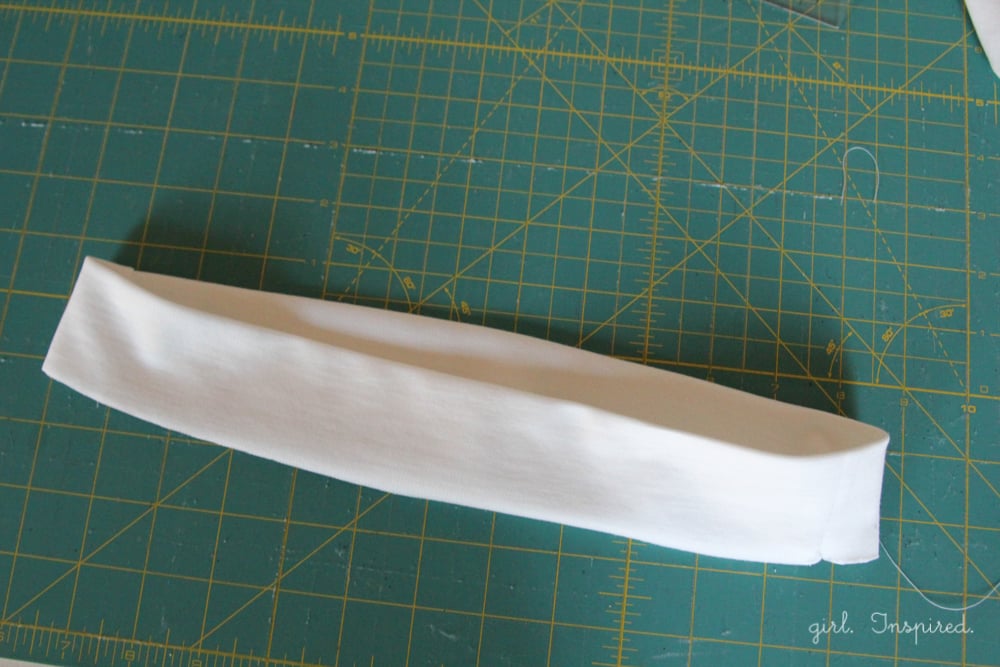
Now, fold the waistband wrong sides together and press a crease into the top.
Open the waistband up, match the raw edge and right side of the the waistband to the raw edge of the right side of the tulle/lining skirt and pin. Be sure that the side of the waistband with the opening is further away from the waistband (so that it will end up on the inside of the skirt when finished). Stitch the waistband to the skirt using a straight stitch and ⅜″ seam allowance.
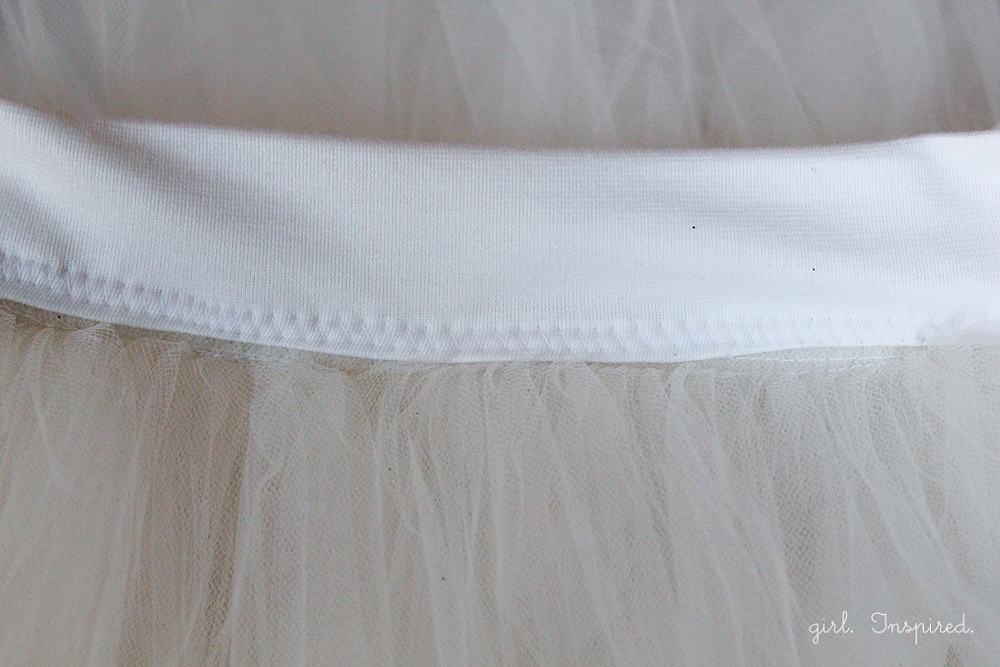
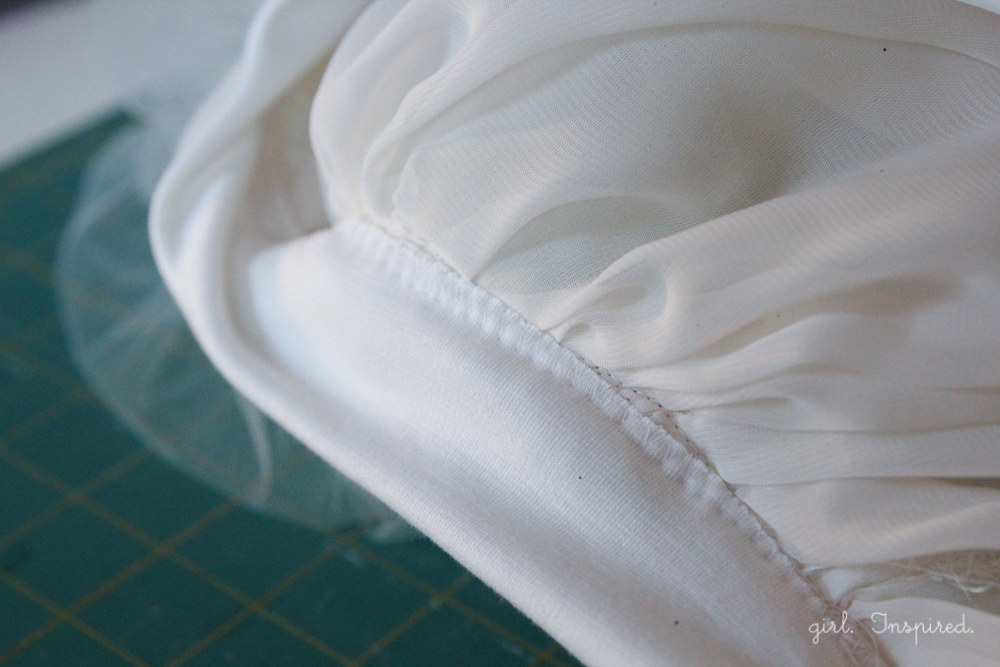
Turn the waistband up and to the inside along the top pressed fold. The raw edge of the inside waistband should fall over the stitch lines on the inside of the skirt. Pin if needed. From the TOP of the skirt, use a zigzag stitch to finish the waistband, being sure to catch the raw edge on the inside of the waistband. Remove the gathering stitches from the tulle if you wish.
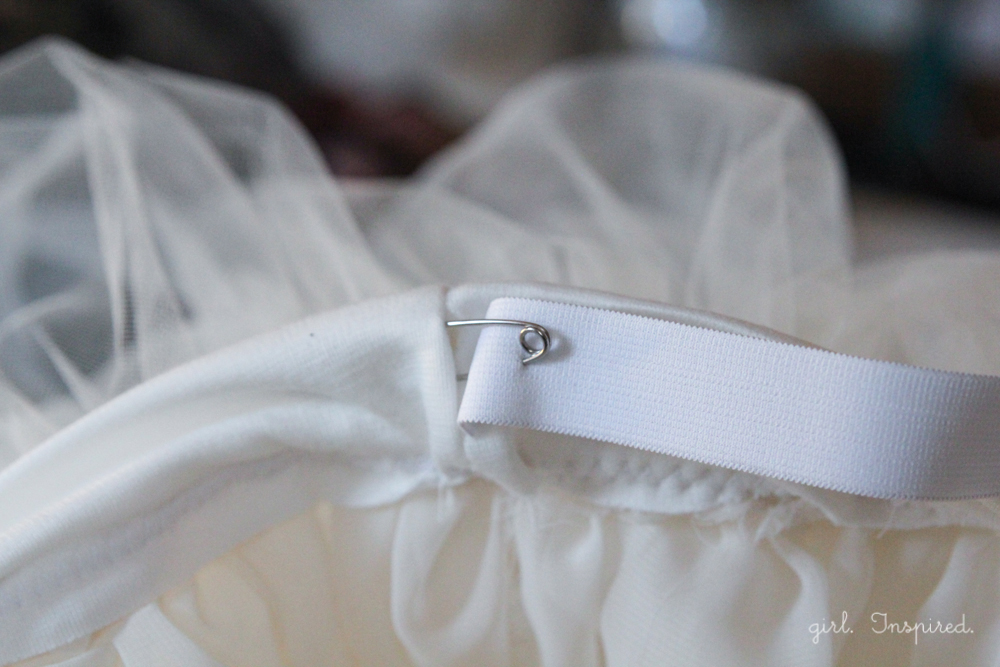
Measure a length of elastic equal to or 1″ shorter than your child’s waist measurement. Use a safety pin to feed the elastic through the opening on the inner waistband.
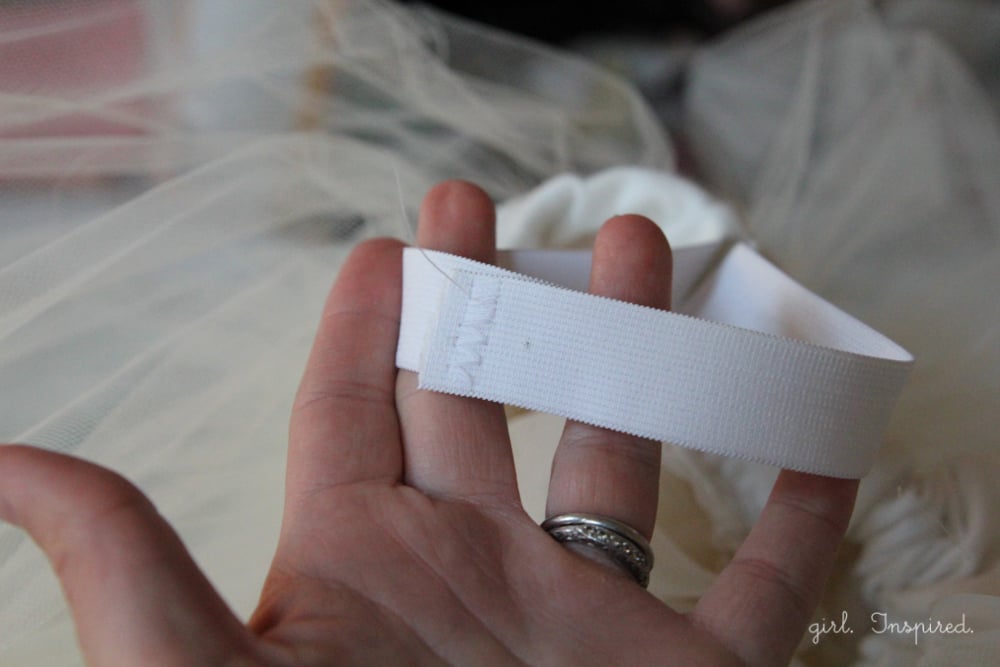
Join the two ends of elastic together and stitch with a zig zag stitch back and forth over the elastic several times. Pull the waistband to slip the elastic back into the opening and you’re done!


Comments & Reviews
Carrie says
Wonderful tutorial! Can’t wait to make one of these for my 9 year old ballerina who always loves a good tutu to dance in! I will be making hers without the lining though so she has more freedom to twirl and do arabesques. Thanks for this!
Tonya says
This is the best tutorial I found on sewing a lined tutu! I found tutorials on “no-sew” tutus. I found tutorials on unlined tutus. But this is the FIRST I have found for a sewn, lined tutu with an elastic waist. I’m definitely making one to wear for my birthday! This should be interesting since I’ve never used a sewing machine before!
Dawn says
Hello there. I LOVE this tutu and thanks so much for providing the tutorial. I was wondering what your setting were on your ruffle foot. I have one and am always unsure what settings to use to get that prefect tutu ruffle. I can’t wait to whip a few of these up for my daughter’s upcoming 3rd birthday party for favors.
girlinspired says
Hi Dawn, The tulle really gathers up pretty tightly in the ruffle foot. I’m not certain, but I think I probably had it on the setting for the least amount of gathering. The party sounds fun!!
Debbie says
I thought I posted a comment a couple of days ago, but don’t see it. Trying again.
This is an excellent tutorial. I’m interested in making this sort of thing, only floor length, for my daughter. She’s age 10 and 5 ft. tall. How long and how many layers is your’s? I ask so that I know if I need to add more fabric for purchase.
girlinspired says
Hi Debbie,
Sorry for the delay! My skirt ended up being about five layers and hits my daughter about mid-calf. She’s 8, but very petite – probably closer to a typical size 5-6. Tulle is so inexpensive, I would probably purchase a few yards extra just to be safe! Have fun!
Debbie says
Thank you.
Corina Duarte says
Thank you. This couldn’t have come at a better time! I have to make a bunch of these for a party and yours sounds the most comfortable and the easiest to make.
girlinspired says
Yay! That sounds like a dreamy fun party!! Good luck!
Melinda says
This looks great – forget the kids, I’d like one for me!
One question – when you say to fold the tulle back and forth on itself to the determined waist measurement, is that folding into a circle, or does the tutu end up with an opening in the tulle as it’s a rectangle? I notice the waistband and lining are made circular, I’m just not sure about the tulle?
Thanks.
girlinspired says
Hi Melinda – Great question. You could do it either way – the tulle is so fluffy, you don’t really see the opening when it all comes together if you fold it back and forth into a rectangle, which is what I did here. You can also wrap it into a circle – it just gets a little more finicky to measure and sew (and explain in a tutorial ;)), but I’ve done it that way, too, and it works just as well! Have fun! I’d like to see a pic when you make yours!
Nicki says
I didn’t understand this at first and I had to go back and read the comments and then the directions. So I’m commenting for those who didn’t get it (like me) – so she creates one LONG LONG LONG piece of gathered tulle – THEN she folds in in thirds or 4rths or whatever works so you have a folded piece of tulle with a final waist lenght measurement (which is waist plus 7 inches).
DeD says
Great tutorial! I wonder if it would be even more comfy with a repurposed pair of leggings as a liner?
girlinspired says
Good idea, DeD, I think the knit would be really comfortable. You can see through the layers of tulle, so you’d probably want the shorts in addition to the skirt lining to maintain that airy blur of tulle, could enclose the whole ensemble within the waistband.
Jaya says
this is beautiful in its simplicity. thank you for the tutorial!
Misty says
Lovely tutorial! The lining makes it better and dresses it up since you could use any colour underneath.
Thanks!
Anne says
It’s gorgeous!! And it looks so comfortable, too! My girl is sooo picky about the fabrics she wears. I’ve linked to your tutorial here:
http://sewing.craftgossip.com/tutorial-make-a-tutu-for-dress-up-or-layering/2014/01/07/
–Anne
Lindsay says
So pretty!!! Thanks for sharing! 🙂
girlinspired says
Thanks, Lindsay! Hope you week is off to a great start!
Preppy Pink Crocodile says
Love love love this!! I want one…for me!
KK
girlinspired says
Thank you! You should make one for you – I think I’m too short to pull one off, but I wish I could!
Tone says
Thank you for a great tutorial!
I just remembered I ordered a huge amount of tulle from etsy right before christmas! Hope it arrives soon! (can take a while though all the way to Norway…) But I will be shure to look back on this tutorial! I just love the simple rIbbon band to! Super cute:D
girlinspired says
Oooo! That’s exciting – I love forgetting things that I’ve ordered and having them arrive in the mail!
Charity says
I love that this has a knit waistband and is lined! Beautiful.
girlinspired says
Thank you, Charity! I love the knit waistband, too, makes it so soft!
TerriSue says
Stef,
This has got to be the best tutu tutorial I have ever seen. I love how you line it and the waist band is inspired. No rough tulle ever to touch their delicate skin. I can’t wait to make one up for my granddaughters birthday at the end of this month. Thank you so very, very much.
girlinspired says
Aw, thanks Terri, you’re too kind. Yes, my girls don’t seem to mind when I make the tutus this way – they’re so soft on the waist and inside. I bet a knit lining would be really soft, too. Your granddaughter is one lucky girl!
Raven says
would this be good for a petticoat?
girlinspired says
Yes! This is what I use for petticoats for my girls’ big dresses.