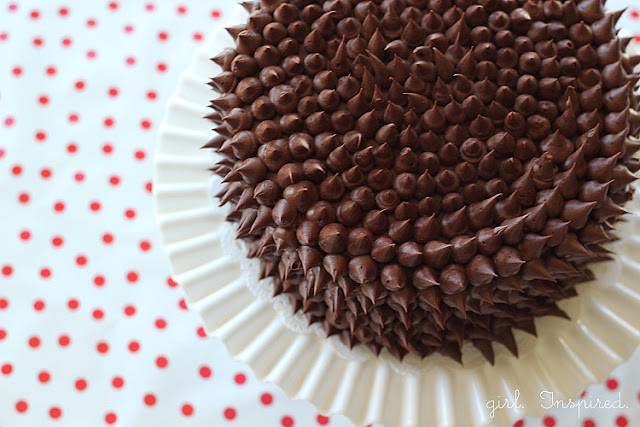
If you love chocolate, I’ve got a cake for you!! And just in time for Valentine’s Day, it’s one covered in dark chocolate piped “kisses.” As far as I’m concerned, the best fix for a chocolate craving is this Dark Chocolate Frosting slathered on a pile of cake. Chocolate frosting doesn’t get better – this one’s rich, it’s thick, it’s shiny and gorgeous. You can spread it out smooth or pipe it into swirls or kisses!
To make a chocolate kisses cake, you will need your cake layers, one recipe of dark chocolate frosting (double the recipe if you’re using the frosting to fill your layers, too), a piping bag fitted with a coupler and #12 piping tip.
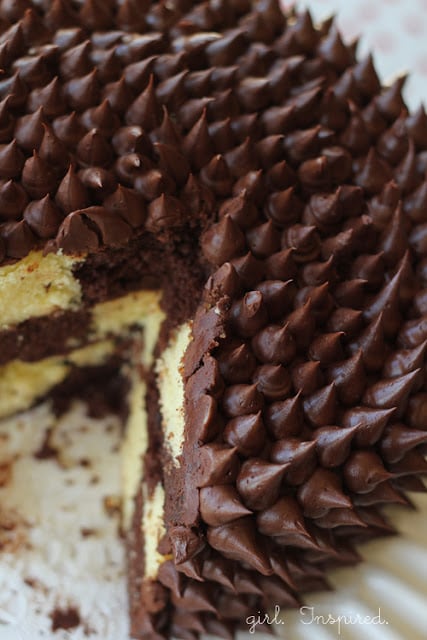
The directions couldn’t be easier. Stack and fill your cake (click here for more detailed instructions on stacking and filling). Then, fill your bag with frosting and start piping – you can start anywhere on the cake, you might want to start on a side (or even practice off the cake) to get the feel of it. Holding your tip just off the cake layer, begin squeezing until the frosting has formed a small mound, then release pressure on the bag while swiftly lifting straight out from the cake. You can make your “kisses” any size you like, but you should try to make them a consistent size. Cover the whole cake, fitting each “kiss” up against those around it. They won’t all be perfect and that is just fine – once the cake is done, any imperfections will blend seamlessly together. If you really flop on one of the kisses, just scrape that part away with a knife and continue! So easy and such pretty results!
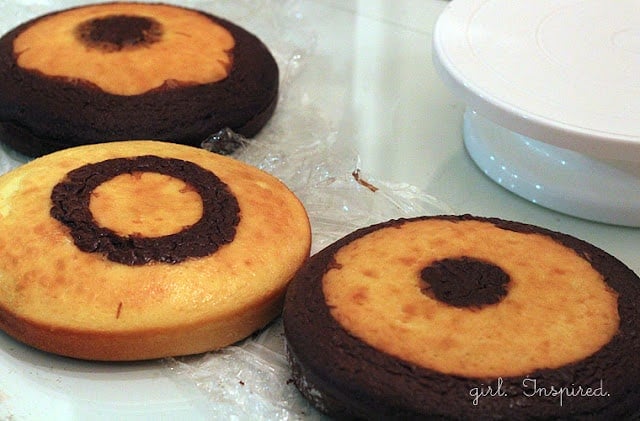
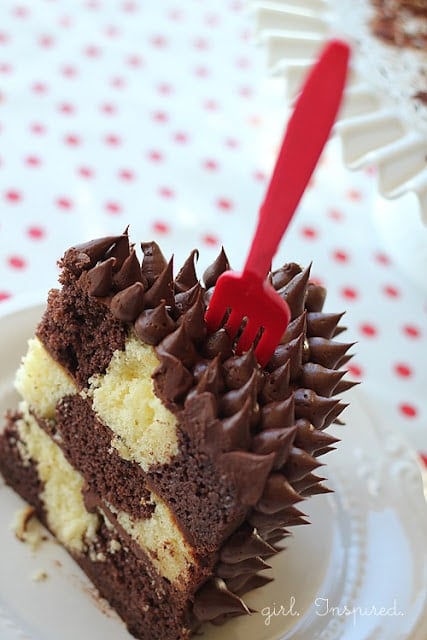
As far as the inside of the cake, I used a cool checkerboard pan set from Wilton and the results were easy and fun!
My inspiration for this kisses cake came my friend and baker extraordinaire, Emily. That girl is seriously AMAZING!! She makes the most delicious sweets and has true creative genius.


Comments & Reviews
Angelina Gonzales says
That is so beautiful and i’m salivating
KayleneP says
Wow this looks so yummy and I will definitely give the ‘kisses’ a try myself one day!
Thanks for the great post.
Tauni says
Oh my gosh. This cake looks amazing! Thanks so much for sharing on Show & Tell at SNAP!
Jenn says
Way cool cake!
Susan @ Oh My! Creative says
This is so pretty and looks delish! What an easy way to ice a cake and make it look special!I would love for you to stop by and submit it on my website so I can feature it!Susan @ Oh My! Creative
Chandra Sirois says
Oh My Goodness that took serious paitience on your part! But oh boy am I glad that you did it! I wish I could have a slice right now! I found you on Lil Luna’s Linky Party!
Charity says
Cake covered in kisses… sweet! =)
And that rainbow cake is incredible!
Tanya-Lemonsforlulu.com says
This one of the most amazing cakes! Those little kisses are to do die for! Wow! I would be thrilled if you’d share this at Saturday Share with Us!
http://www.lemonsforlulu.com/2013/02/09/saturday-share-with-us/
A to Zebra Celebrations says
wow! wow! wow!!!! AMAZING!!! I hope you stop by to share- http://atozebracelebrations.com/2013/02/link-party-7.html
Nancy
Summer says
Oh this looks so divine! And that 74 layer rainbow cake is CRAZY AWESOME! 😀
xo
summer
sweeter than cupcakes says
Wish I could take a bite! Looks yummy!
Truly Myrtle says
OMG look at that rainbow cake!!! I bet she only does it once 😉
I love the chocolate kisses! My mouth is watering…
Jessica Peck says
we love dark chocolate! this cake looks delicious 🙂
kate says
and dark chocolate is good for you! you should have called this “healthy chocolate kisses cake” 😉 that rainbow cake IS amazing.