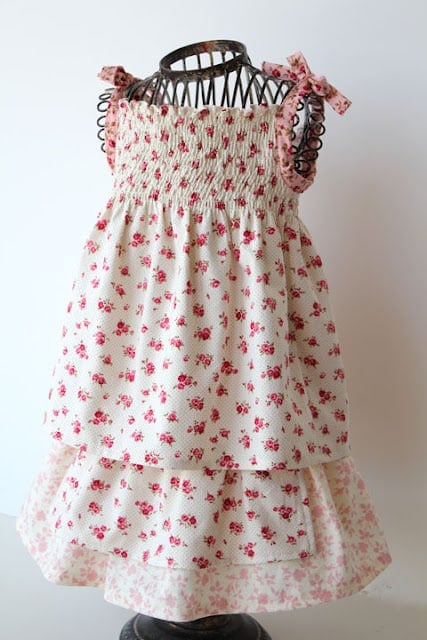
Alrighty! This top is a very simple, very quick sew. I think it would also be a darling little dress. It requires a small amount of fabric and no pattern to sew this simple shirred top.
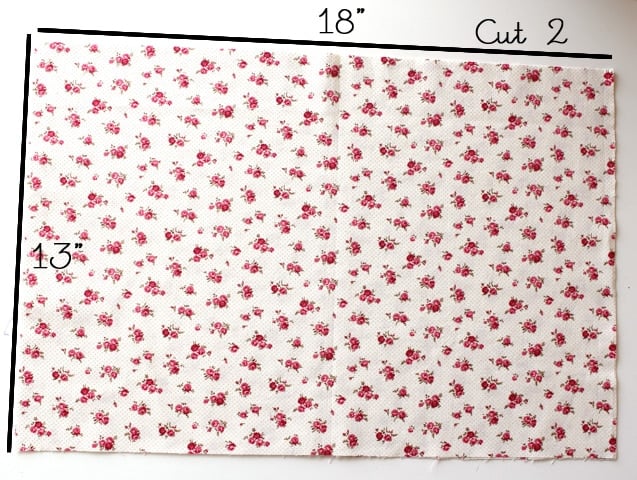
The measurements I’m using in this tutorial are for about a size 3T – adjust as needed. For Grace’s shirt, I felt that the finished shirt was just a little wide, so I made some adjustments for the purposes of this tutorial. If you’re using a light cotton, I would recommend measuring your little one from one underarm to the other, and then multiply by 2 to determine your fabric width. Measure from her collarbone to desired length and add 1″ for hemming to determine the length.
Begin with two rectangles of fabric, measuring width x length. For a 3T, cut two pieces of fabric 18″ x 13″.
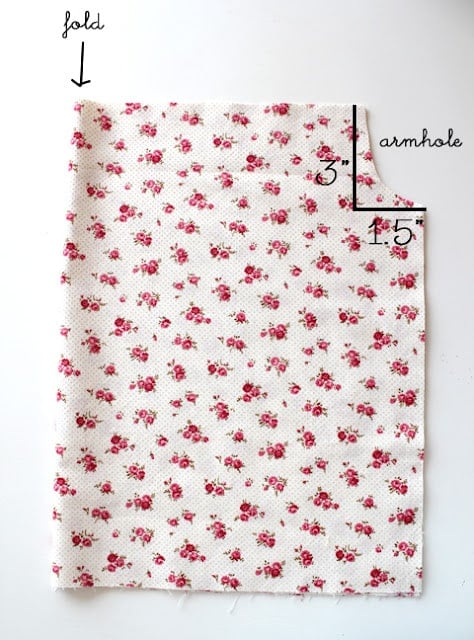
Now, stack your rectangles (perfectly) and fold in half along the width. Cut a curved armhole so it looks like the following picture. If you have a sleeve/armhole pattern you want to use, go for it, or you can just wing it! It doesn’t have to be exact.
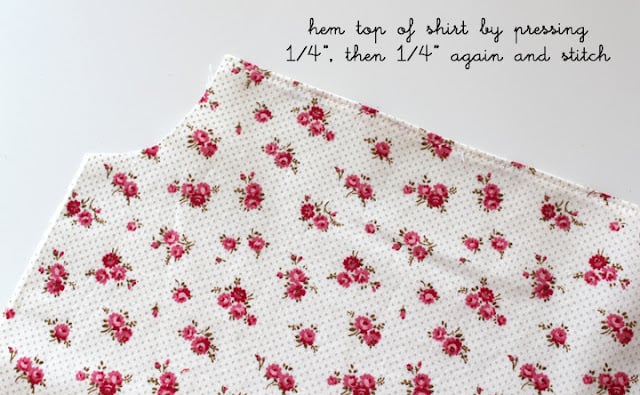
Next, unfold and separate your two rectangles. Hem the top edge: turn and press a ¼ inch, then turn and press another ¼ inch; topstitch close to the edge. Do this on both rectangles.
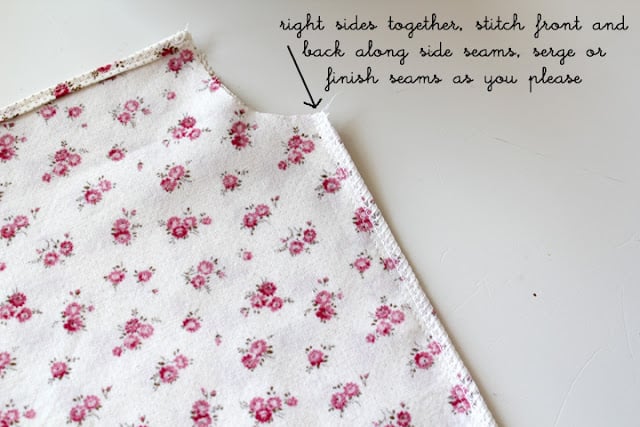
Now, place your two rectangles right sides together (line up armholes). Sew up the side seams and serge or finish as you please. You’re just going to sew from the bottom of the armhole to the bottom of the shirt. Leave the armholes for now.
Turn your shirt right side out and hem up the bottom. For a quick hem, I serge all the way around the bottom, then turn and press the serged edge and topstitch. Hem how you like (but you may need to adjust length of cut fabric if you want a fancier hem).
Next, you’re going to do your shirring. Wind bobbin with elastic thread.
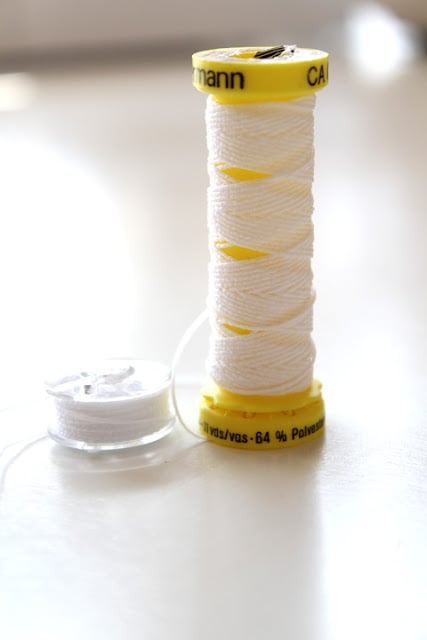
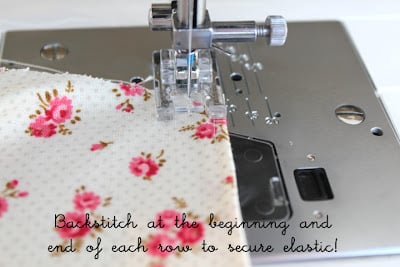
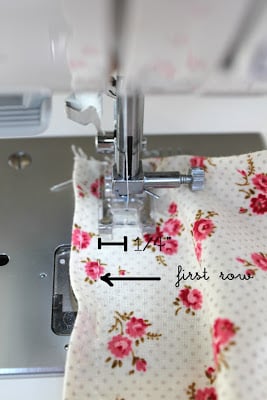
I use my machine’s bobbin winder to wind the bobbin and it works great, but I’ve heard it’s a little different for everyone. So, once you have your elastic thread in your bobbin and your regular thread in your machine, start stitching rows ¼-inch apart. I just line up my presser foot with each previous row so that the rows are ¼ inch apart. Super simple! Don’t forget to backstitch at the beginning and end of each row.
Stitch rows all the way down to the bottom of the armhole on the front; this is what it will look like at this point:
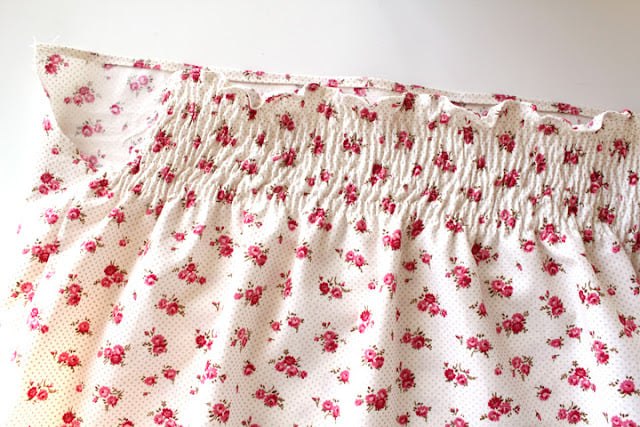
Repeat on the flip side. When you have reached the bottom of the armholes on both sides, shir several additional rows going all the way around the shirt. Now, hit your shirred rows with some hot steam from your iron. I LOVE watching the whole thing scrunch up, don’t you?

Now you just need to finish the armholes. I made some bias tape with a contrasting fabric, but you can certainly use packaged double fold bias tape. You’ll want two length of bias tape about 24 inches each. Turn in and press each end of the bias tape.
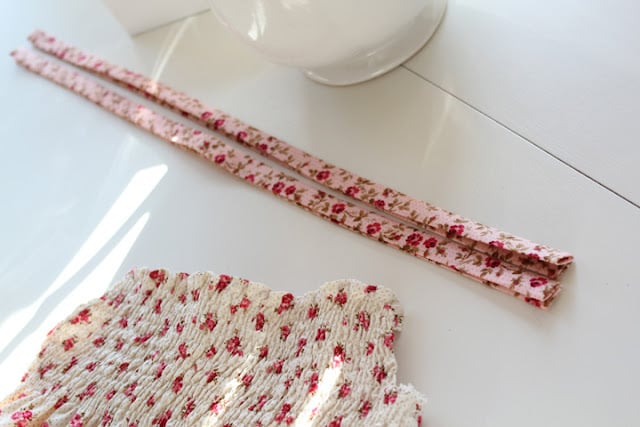
Line up the center of one piece of bias tape with the side seam at the base of an armhole. Wrap the bias tape around and pin. Work your way out on each side, pinning the bias tape to the unfinished armhole edge. Stitch your bias tape closed, one end to the other, encasing the entire armhole and finishing the straps.
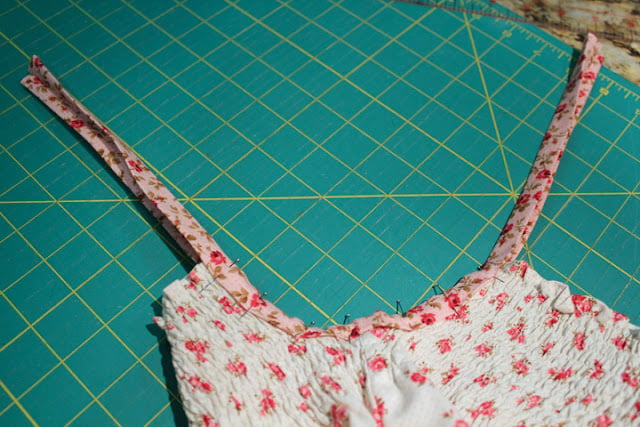
That is it!!! Tie those straps into a cute bow and stick it on your girl!
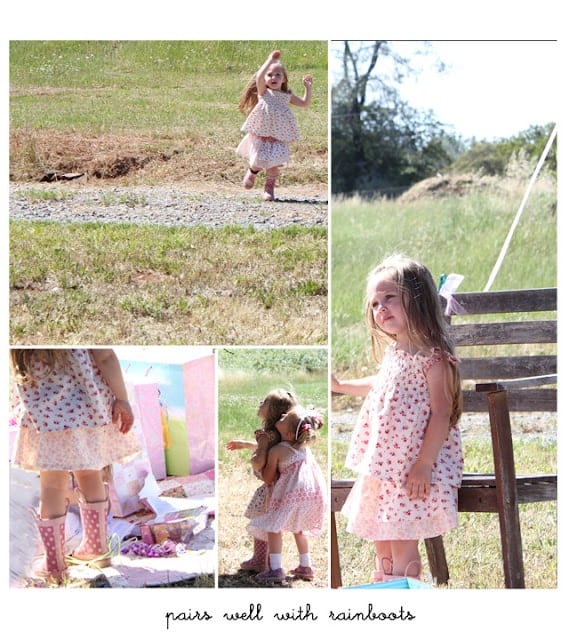
At this point, I’d love to show you a picture of Grace wearing her little shirt and apron-front skirt, but she’s a busy girl and I don’t have a single still shot showing the outfit. We’ll have to settle for an in-action collage…
*********************


Comments & Reviews
Anonymous says
This is just what I was looking for – it seems like all the other shirred dress/top tutorials just call for a tube without armholes, which makes the neckline a bit lower than I would like on my little girls. This fit the bill and was so easy to sew up!
Lisa says
Thank you so much for sharing. This is absolutely perfect.
Rachel says
This is adorable! I love the fabric, it looks great when shirred too.
Tanya @ Greetings From the Asylum says
I think this top is lovely! Thanks for sharing!
Toqua's Crafts says
Too Cute! (Now I just need a granddaughter…)
gail says
awww, your grace is just as pretty as her new outfit! Great job. Thanks for sharing @ catch as catch can.
gail
ps catching you!
Tammy says
I really want to try this! I’ve had my sewing machine since Nov, but I’ve been too scared to use it. lol Hopefully, I can make this!
Jessica at Me Sew Crazy says
What a cute cute outfit!!! I do love the Summer, I think that is when all the cute little girl’s clothes come out 🙂
Sandy says
Love it! I have yet to dare to try doing the shirring. It would save a lot of money. since shirred fabric is so expensive.
Thanks Stef for putting together such a great tutorial. By the way… did you have to check if the stretch was too tight or too loose?
I wondered…
Patty@ Time to Boom says
It’s really that simple? I will definitely be adding one or two of these to my sewing this weekend. Thanks for sharing, it is just adorable.
мамаДаника says
Топик вышел нежный и веселый. МК понравился,спасибо!
Tasha says
I adore it. We think everything pairs well with rainboots at our house.
camcraftymom says
How sweet! One of these days, I will need to try shirring something.
Kristie-Creating Chaos says
Love it! Thank you so much for this easy-peasy tute. I will totally be making one as soon as I can decide what fabric to use.
Naturally Carol says
Hi Stef..love those last two outfits, all the layering is absolutely lovely and your little girl is georgeous in her new skirt and top!