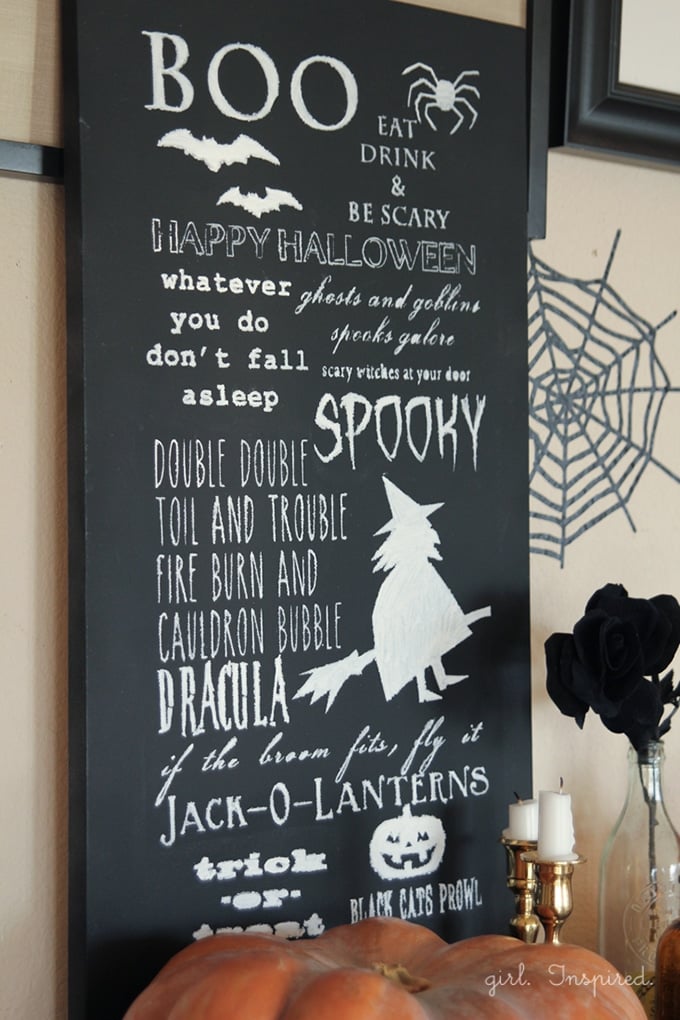
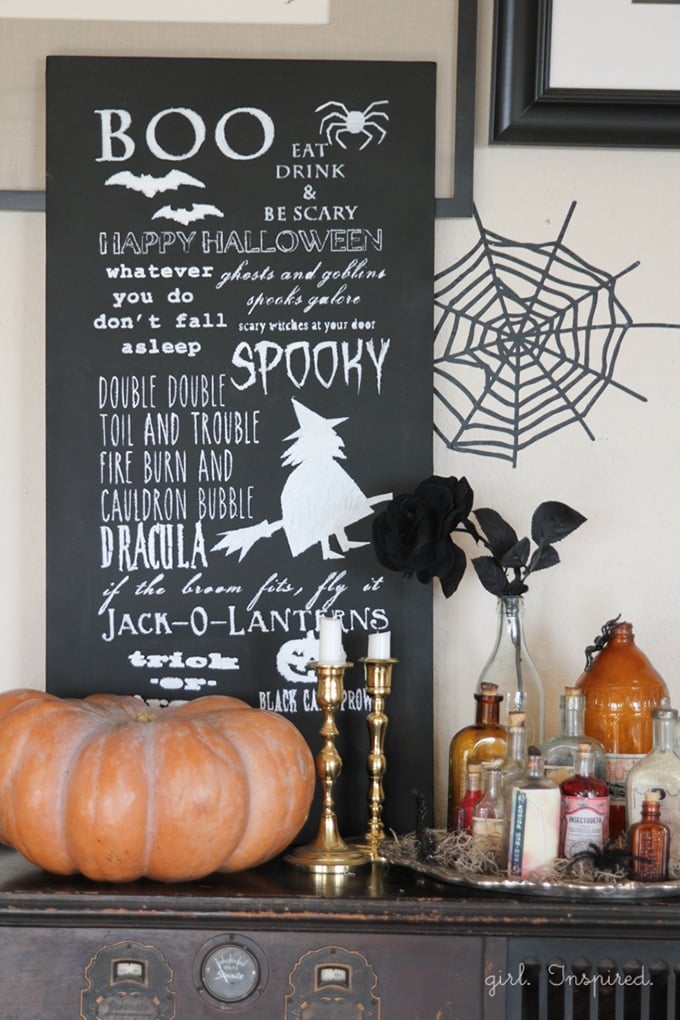
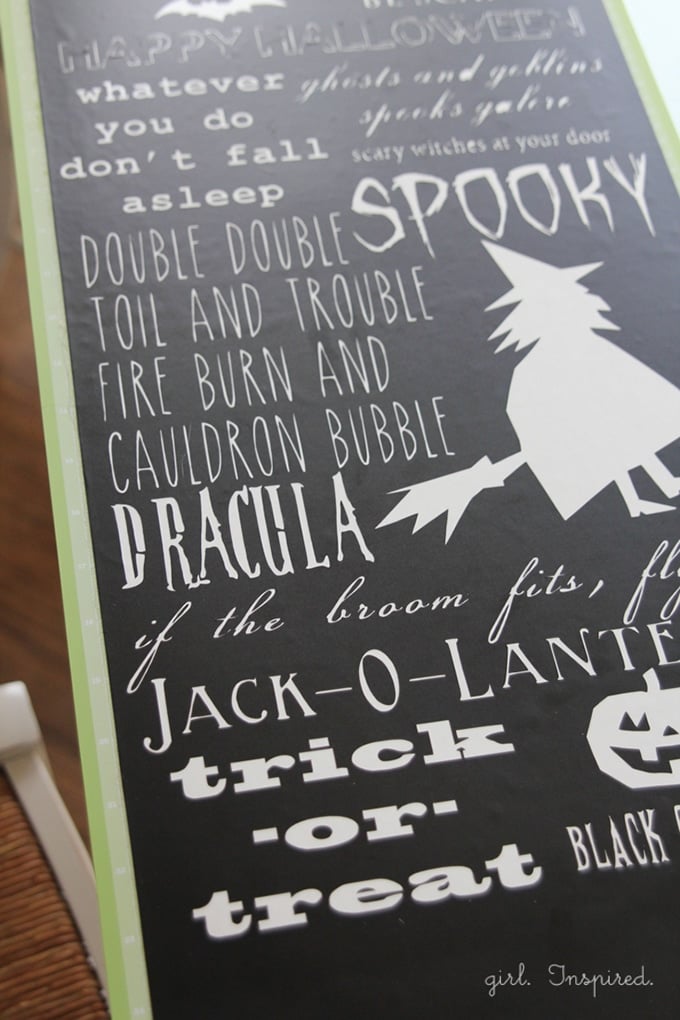
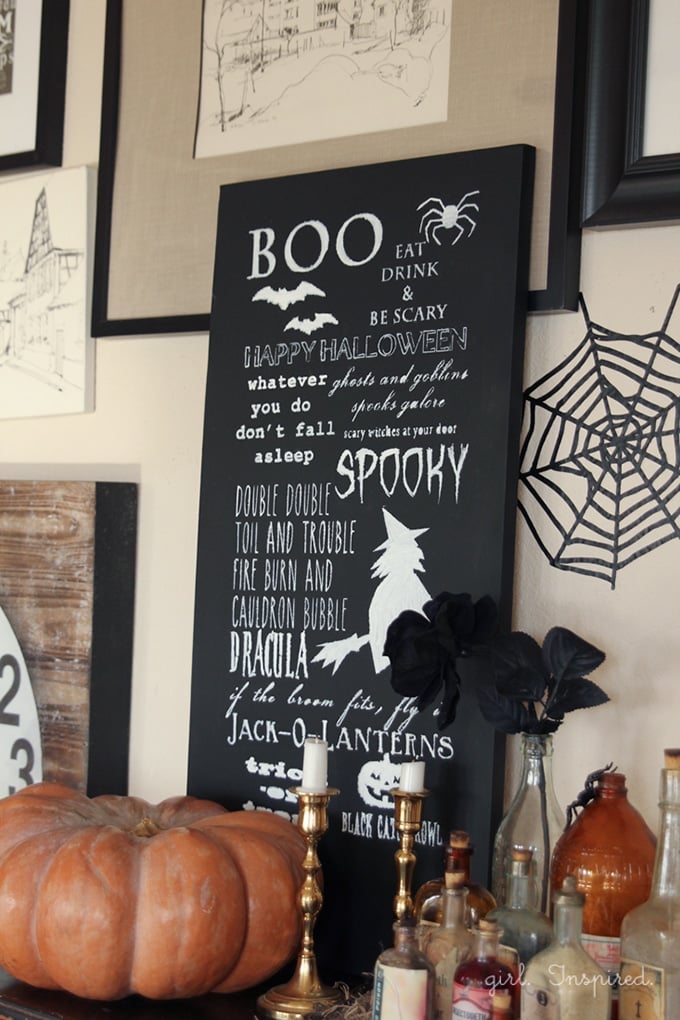
The Halloween Chalkboard Sign is a simple project that is created using a stencil file, a die-cut machine, and white paint on a black canvas. In a short time, you can make a permanent chalkboard to use for Halloween decor year after year.
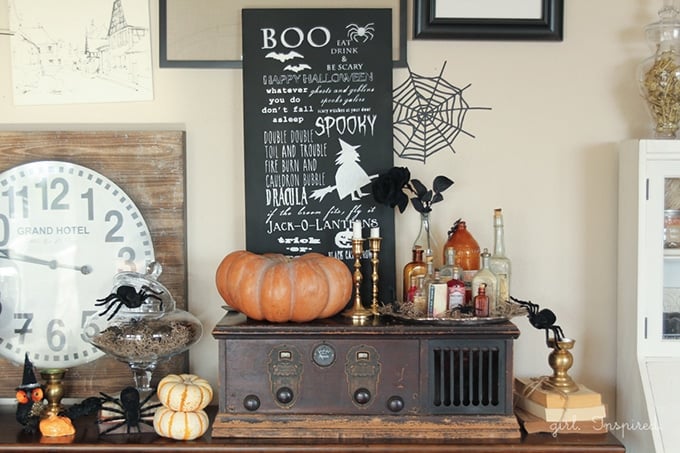
With only two weeks to go, I’ve opened up the Halloween bins and put up some decorations. The girls get super silly and scatter skeleton bones around the house and drape snakes around their necks. I debate between trying to keep the mess contained and letting them have their holiday fun.
Once I put together the image file in Photoshop, I was able to create the project with my Cricut, vinyl, and a large canvas. I’ll share the file if you’d like to make one, too. Don’t have a Cricut Explore? Well, BIG NEWS!! My team is giving one away to one of you! There’s a Rafflecopter at the bottom of this post where you can get all your entries in! I’m excited for ya because this machine is so much fun to use! Let’s get to the project:
You will need:
Cricut Explore or cutting machine with 12″x 24″ cutting capability
12″ x 24″ cutting mat
vinyl (12″ x 24″)
vinyl transfer sheet (12″ x 24″)
Halloween Chalkboard Sign file – click here to download
15″ x 30″ stretched canvas
chalkboard paint
liquid chalk pens or white paint
Begin by coating your canvas in chalkboard paint. I used a canvas that already had a coat of pink latex paint on it and my chalkboard spray paint completely covered it in just one coat. If you don’t have paint to prime the canvas with first, it may take more than one coat. Allow the canvas to dry completely. If you want to use a different size canvas, you should be able to easily use anything smaller with just a little adjustment of the image.
Upload the Halloween Chalkboard Sign .png file to your Cricut Design Space software. Adjust the image to fit a 12″ x 24″ cutting space. Lay your sheet of vinyl with backing attached onto the cutting mat and cut out the image. This will take a while, but hang in there – the Cricut Explore doesn’t need babysitting and I haven’t had it mess up in the middle of cutting yet. Grab a fresh cup of coffee and check up on your drying canvas. Once the design is cut from the vinyl, you will need to remove all of the words and images so that only the negative space remains.
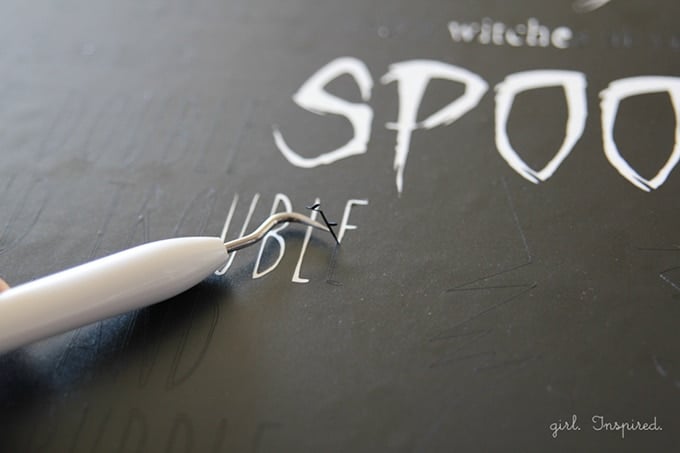
Use a pick tool to get the tiny little letters out cleanly. “How I Met Your Mother” reruns come in handy while you’re doing this – or perhaps a nightime viewing of The Shining??

You will need to use a vinyl transfer sheet to move the design outline from its backing onto the chalkboard canvas. This is painless as long as you use the transfer sheets!
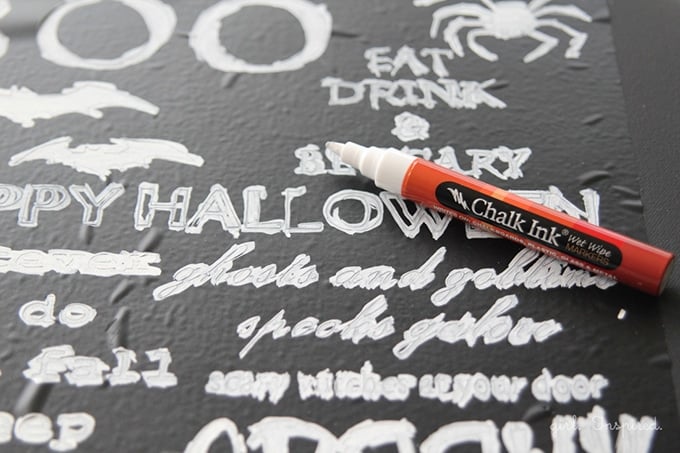
Once you’ve placed the design onto the canvas (centered please!), peel off the transfer sheet and you’re ready to paint in the design. I used a liquid chalk pen because I thought it would give the canvas a more authentic chalkboard feel. The chalk pen bled a bit under the vinyl, which hasn’t happened with regular paint when I’ve done something similar in the past. Use whichever painting medium you prefer. Peel off the vinyl, using the pick tool to remove the small pieces, such as the centers of a’s and o’s and your canvas is just about done! You can gently spray it with a couple coats of clear paint to set the chalk or just leave it as is. Hang or prop it up on the wall and admire its festive beauty!


Comments & Reviews
Rosellen Ralph says
What would I make? Hmmmm……. Probably something Halloweeny.
Thanks for the giveaway.
Alicia Farrant says
I would make either a Christmas sign or an “Est.” sign with our last name!!
Jenn says
You have such creative ideas. I really enjoy the variety of projects you share. Thank you for taking time to walk through the steps so we can get crafty too.
TanyaC says
These look awesome! I keep telling myself I don’t need a Cricut, but I think maybe I do!
Sandra says
Ornaments for gifts
Jenny Bean says
I would make a growth chart!
Molly P says
I’d use one to make lots of signs and decorations for our house! Our walls are so empty!
Melissa P says
I would love one of these fancy Explore Cricuts! I can’t believe all the amazing things you can do with them! 🙂 I would love to make one of the signs you showed in this blog post!
Ayelet says
What wouldn’t I make?! I think I’d make some vinyl art for our living room and then some holiday gifts for my family!
Margilyne W says
I would love to try out the print/cut feature to make some invitations/decorations for a birthday party.
Vanessa B says
First thing Id make is Vinyl letters and numbers for our mailboxes 🙂 Then Id be on to Holiday Cards 🙂 Thank You!
erin says
Thanks for the fabulous giveaway!!
Jewel says
What you have done with your Cricut is amazing. Can anyone, simply anyone do that?
Leslie DelaTorre says
Such a great project! And a great giveaway!! I really would love to win a cricut explore! The project possibilities are endless!!
Leslie DelaTorre says
But I’d love to make custom cards, decorative blocks, cut pattern pieces for these dolls I make and lots of this with leather and vinyl!!
Kim says
So cute and I think I need one of those machines!