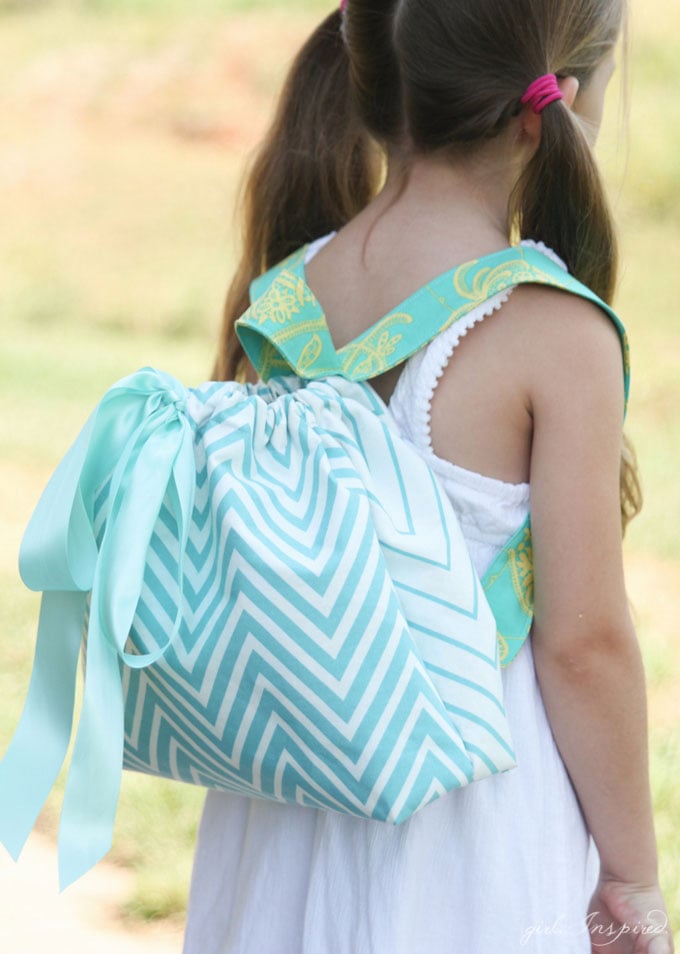
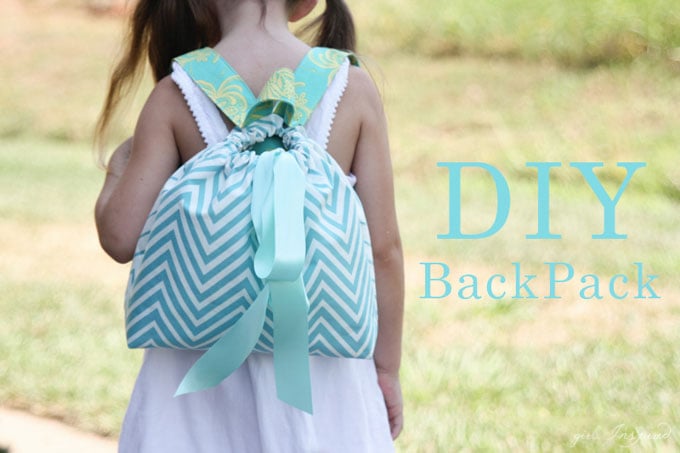
 This sewing project is fairly simple and quick! It doesn’t take much fabric or time to create this DIY backpack for your littles. It’s the perfect size for summer outings or to haul a snack and some crayons on daily errands. You could even size it up for bigger kids or yourself.
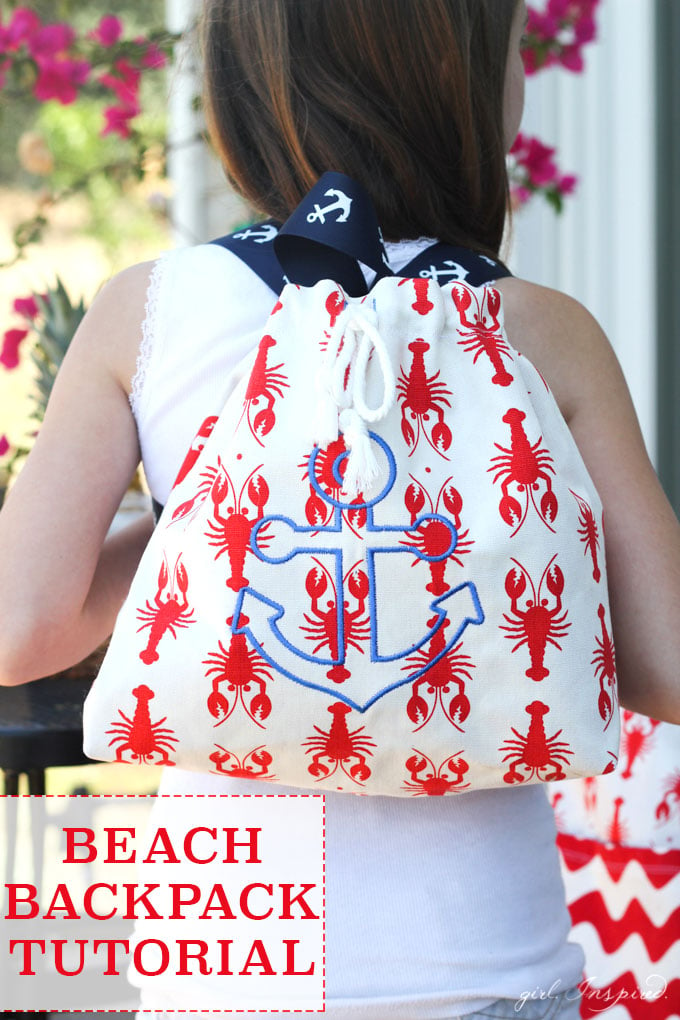
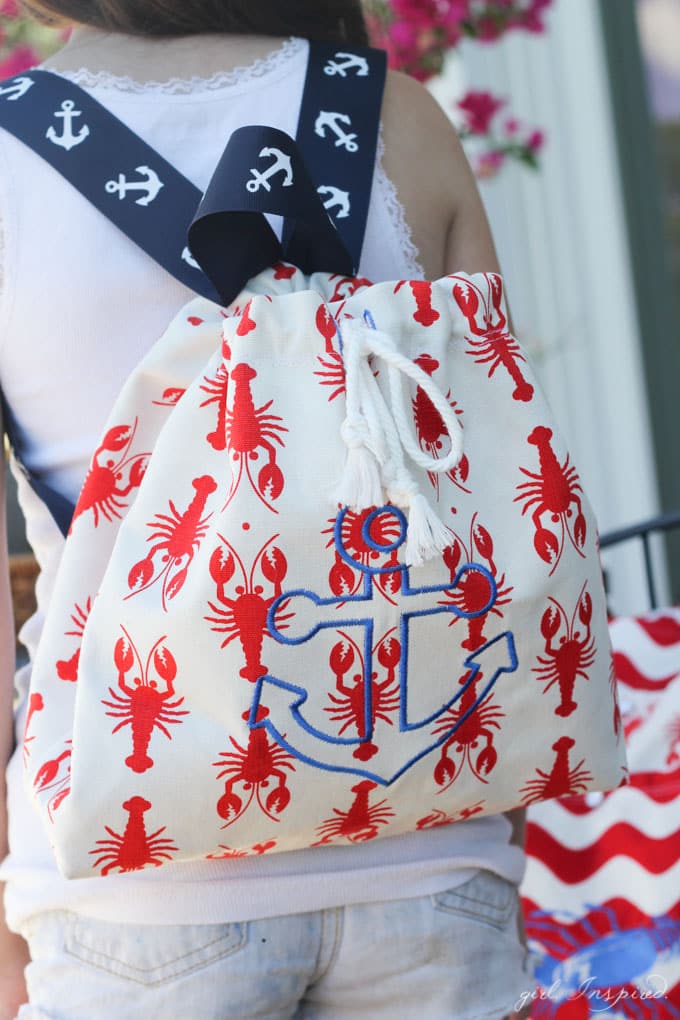
You can even add an appliqué, monogram, or embroidery design to personalize the tote! Ready to make one? Let’s get started. You will need:
- ½ yard main fabric
- ⅔ yard lining fabric
- sewable, fusible web such as Heat ‘n’ Bond Lite
- disappearing ink fabric marker
- 2 yards of ribbon or drawstring

Step 1: Begin by cutting two rectangles of main fabric and two rectangles of lining fabric measuring 15″ wide and 14″ tall.
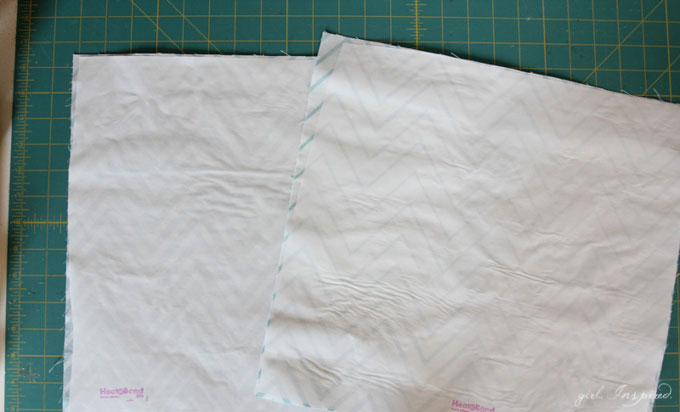
Step 2: Cut two pieces of fusible web, each measuring 15″ x 14″. Adhere one side of the fusible web to the wrong side of each lining piece.
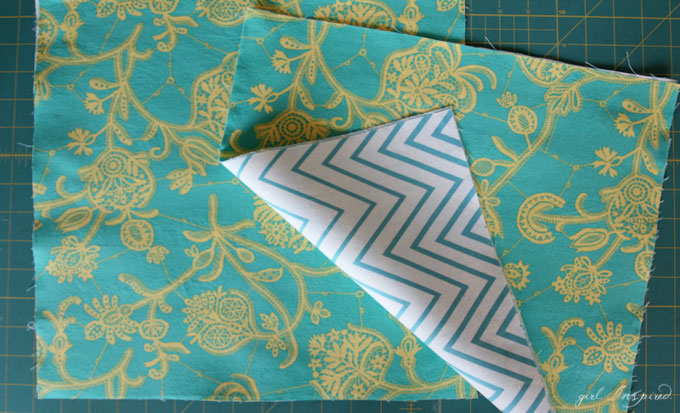
Step 3: Adhere the main fabric to the other side of the fusible web so that you have two rectangles with one side exterior and the other side lining fabric.

Step 4: From the bottom corners of each rectangle, cut out a 2″x 2″ square as shown.

Step 5: Fold the top edge of each rectangle toward the wrong side by 1.5″ and press a crease in the fabric. Open the top edges back out.
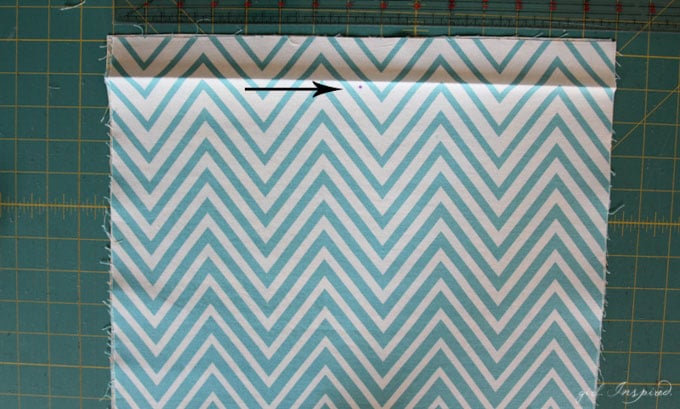
Step 6: Use the fabric pen to mark the center point just beneath the folded, exterior edge on ONE of the rectangles, as shown.

Step 7: Sew two parallel buttonholes, no longer than ¾″ tall, splitting the center mark. Be sure that the fold you previously made is turned up and out of the way so that you are not sewing through it on the backside. Use a seam ripper to carefully open the buttonholes and finish the cut fabric with Fray-Check.
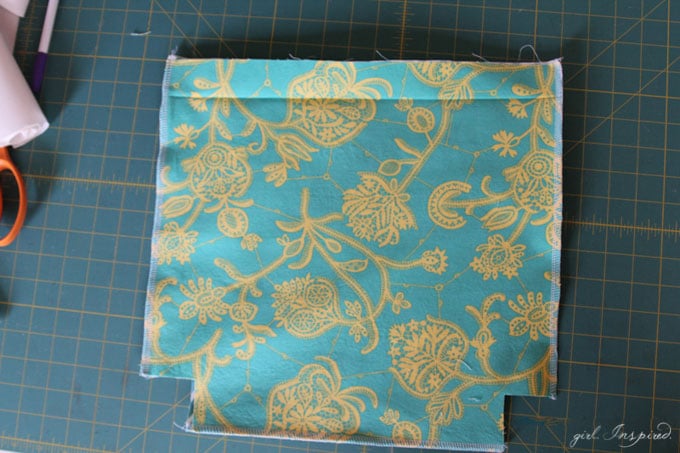 Step 8: Match the two rectangles, right sides together. Be sure the folded top edges are unfolded at this point. Sew and/or serge along each side and along the bottom edge.
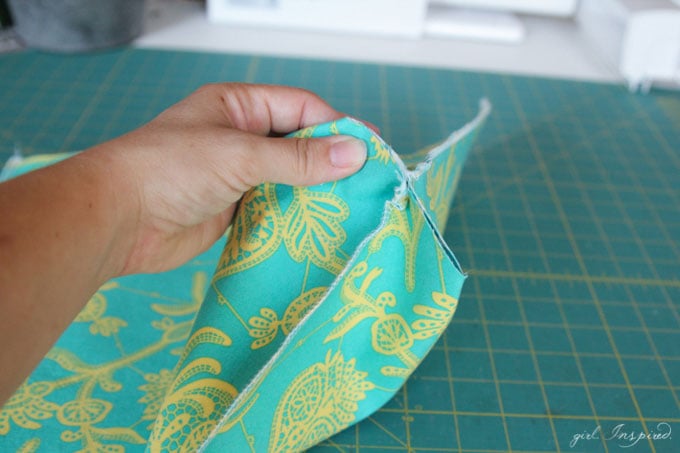
Step 9: With the backpack still right sides together, open up the square hole in the bottom corners. Bring the bottom seam up to meet the side seam so that the open squares now form a line across as shown in the picture above.
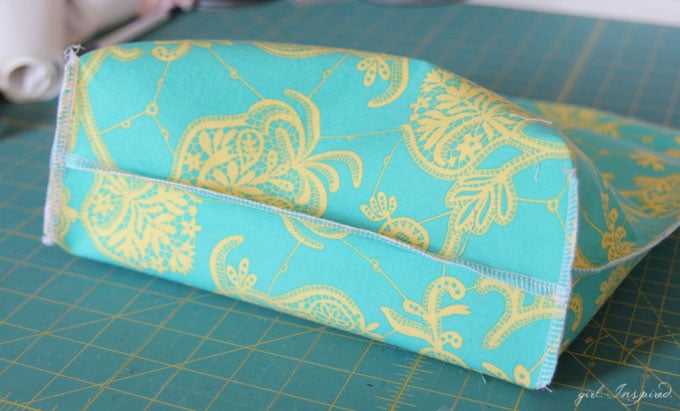
Step 10: Sew across that open line, closing up the corners and forming a squared off bottom to the backpack. Repeat on the other side.

Step 11: Turn the back right side out and iron as needed. Refold the top edge to the wrong side along the creased line you made in Step 5. Stitch about 1.25″ from the top edge, all the way around the top, to form a casing. Be sure you are catching the folded edge on the underside. If you have a cover stitch machine, a cover stitch works nicely here.
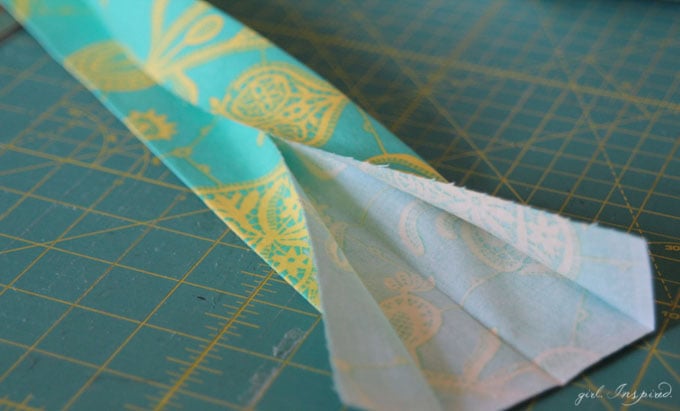
Step 12: Now, it’s time to make the straps. Cut a 6″ wide by 44″ long strip of the lining fabric. You can also use grosgrain ribbon here. Press each long side in toward the center. Fold over again to make a strip of fabric with raw edges enclosed and four layers thick.
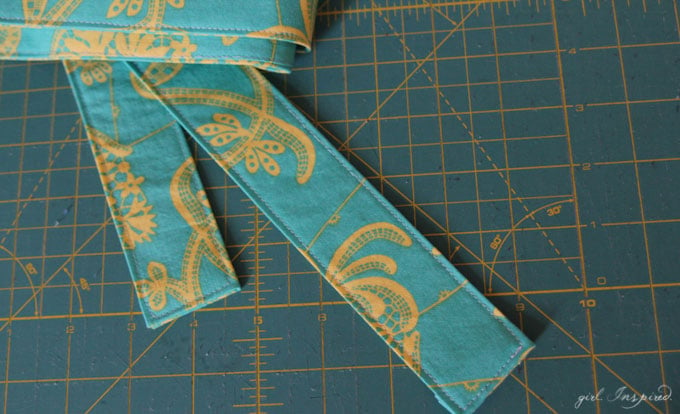
Step 13: Tuck the short ends in before folding the fabric into the strip and sew along the edge all the way around the strap.
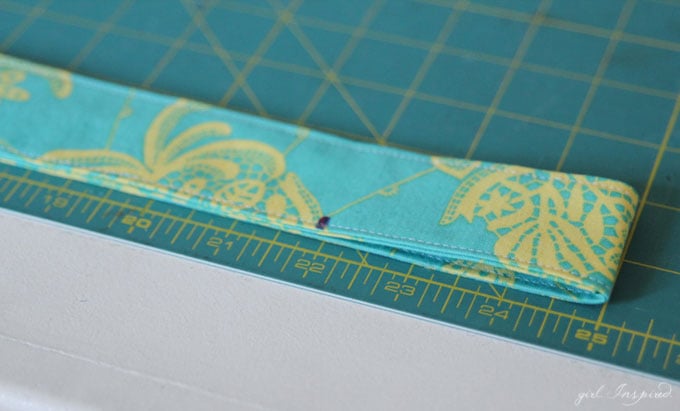
Step 14: Fold the strap in half and note the center point. Mark 3″ down from the center point on the strap.
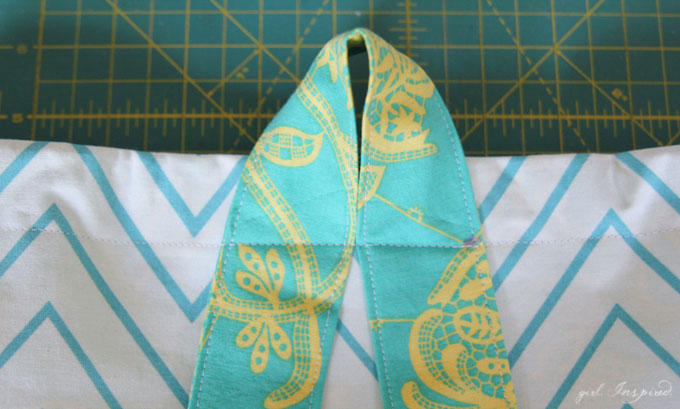
Step 15: On the back side of the backpack (opposite the buttonholes), place the center loop of the strap along the casing stitch line. Stitch the strap in place, as shown.

Step 16: Loop the straps down the backpack and pin the ends in place about ¼ of the way up the back of the backpack and about 3.5″ in from each side seam! Stitch a small rectangle to secure the ends on the backpack. Repeat for the other strap.

Step 17: String a ribbon or drawstring of some type through the buttonholes and casing of the top and tie a bow. Trim excess ribbon, but be sure that the ends of the ribbon will not pull inside the buttonholes when the backpack top is fully open.
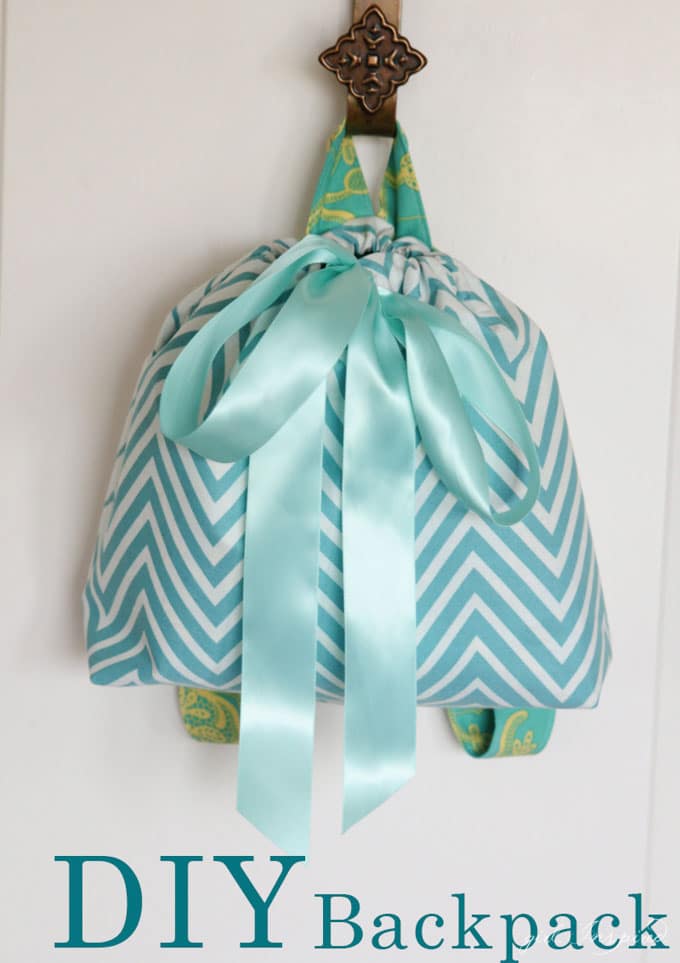
There you have it! The cutest little backpack!


Comments & Reviews
Lori M. says
Love this, off to make one for granddaughter now………