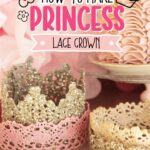
DIY Princess Crowns
Make the cutest DIY princess crowns with any strip of lace and fabric stiffener. Customize with craft paint and glitter!
Yield: 1 crown
Materials
- 15 inch synthetic or fabric lace
- ½ cup fabric stiffener
- 2 tablespoons acrylic paint
- ½ cup Mod Podge
- glitter fine grain
Instructions
- Cut lace into 15" lengths.
- Saturate the lace in fabric stiffener, working it into the lace with your fingers.
- Spread the lace out flat on a sheet of parchment or waxed paper and allow to dry completely.
- Paint one side of the stiffened lace at a time with paint. Allow to dry completely.
- Add a thin coat of Mod Podge and sprinkle glitter over the lace. Shake off excess glitter.
- Allow to dry.
- Seal the glitter with another coat of Mod Podge. Before it dries, apply a bead of hot glue to one end of the lace and join it to the other end to form a circle.
- Place crown upside down onto a tapered column and allow to dry. You want the base of the crown to rest on the narrower part of the column so that the tips of the crown flare out slightly when dried.
- Use bobby pins or affix hair combs to the crown to place in hair.
Notes
- Work on a warmer day and use the sunshine and dry air to move through the project more quickly. Humidity and cooler temperatures simply mean that each step of the project will take a bit longer. It is important to completely dry out the lace between each step.
- We use bobby pins to secure the DIY crowns in the hair or on top of the head. You can also try hot gluing a little comb onto the inside of the crown to attach to the hair.
- We liked super fine glitter the best - Martha Stewart craft glitter was our favorite for this project.
- If you apply the final coat of Mod Podge to seal in the glitter, be sure to leave the very ends of the lace dry so that it doesn't prevent the hot glue from sticking.
- Synthetic laces hold their shape better when saturated with the fabric stiffener.