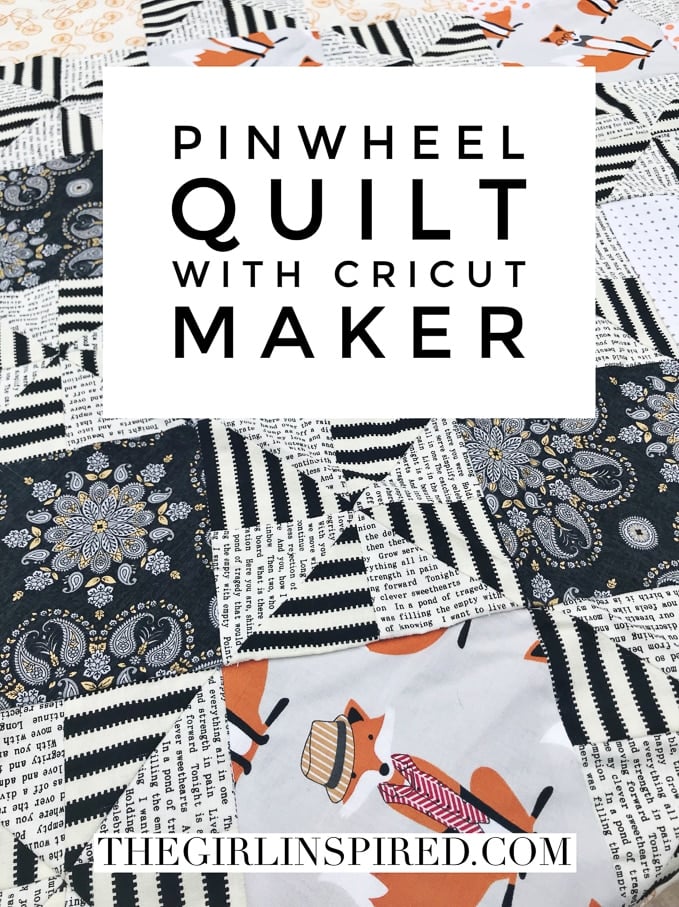
HOW MANY YEARS HAVE I BEEN WAITING FOR CRICUT TO CUT FABRIC? I know I’ve already said it, but it’s kind of like pinching myself to see if this is really real – I still can’t believe all my Cricut + fabric dreams have come true. So excited to share how FAST and quite SIMPLE it can be to make even something so intricate as a pinwheel quilt when you have the Cricut Maker to help you along!!
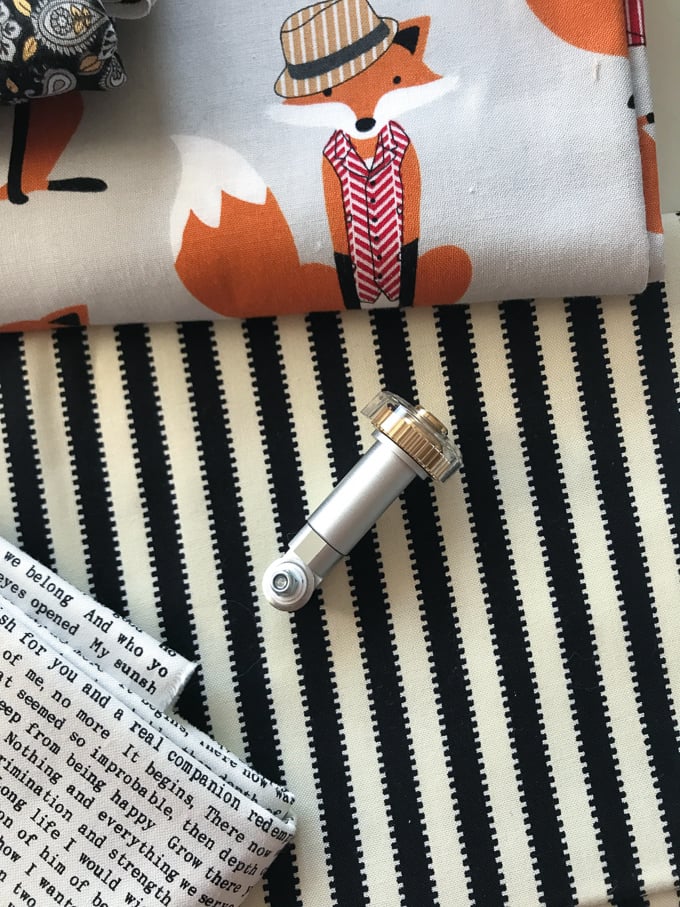
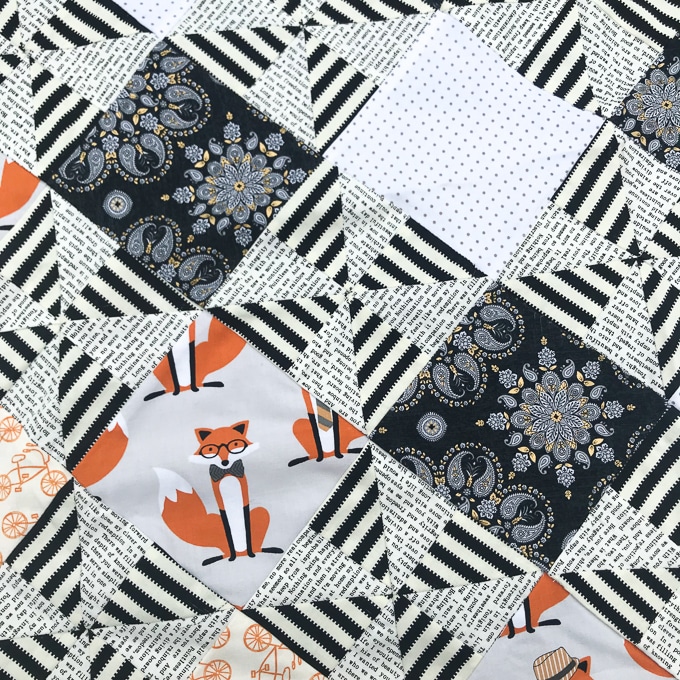
I have been wanting to make a snuggly seasonal quilt for many years – the cooler weather in Autumn just makes snuggling up a must! I wanted to add a quilt to my home decor that looked a little Halloween-y, but not so specific that it couldn’t stay out throughout the season. I pulled together some of my favorite fabrics from my collection (the foxes and the bicycles) and added a couple fun prints (the typeset and stripe) I picked up during my recent trip to Vermont. The I added two neutrals – the ever-useful polka dot and this fabulous metallic medallion print from Jo-Ann’s Buttercream line.
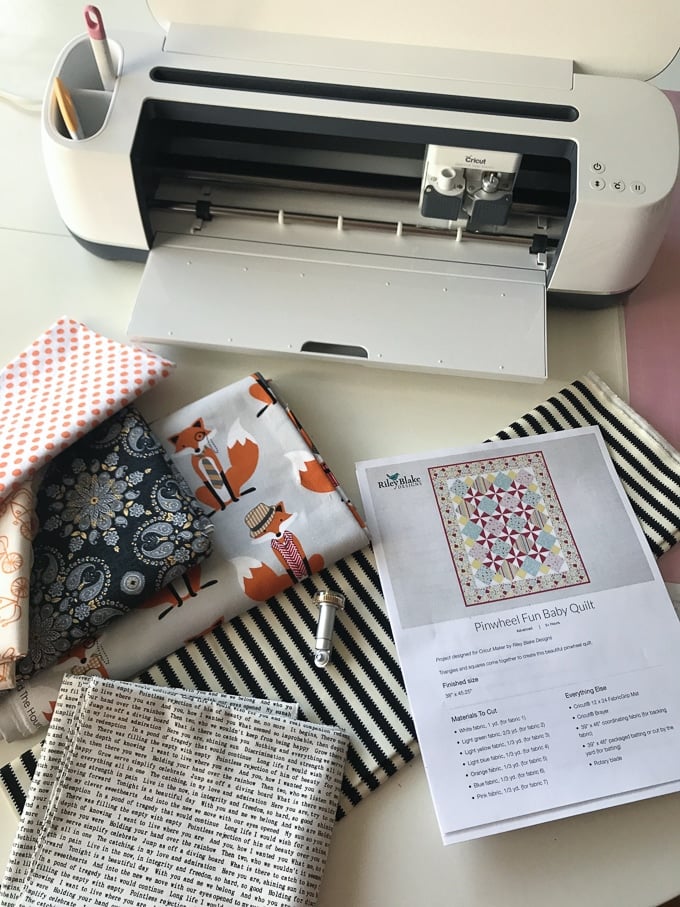
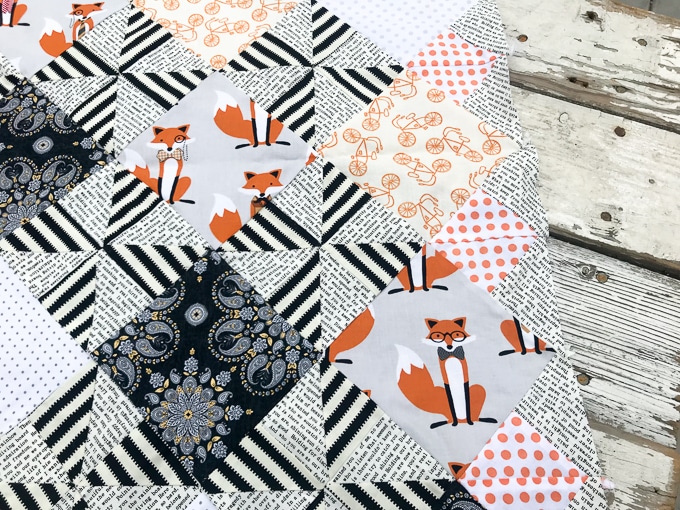
Next, I went on to Cricut’s design space software and chose the perfect quilt pattern. The Pinwheel Fun Baby Quilt was calling my name – it has that playful vibe I was looking for to incorporate a bit of a Halloween feel, and it was also challenging – I wouldn’t choose a pinwheel quilt to hand-cut just because – well, I might not ever feel ready to cut all those little pieces. ENTER CRICUT!
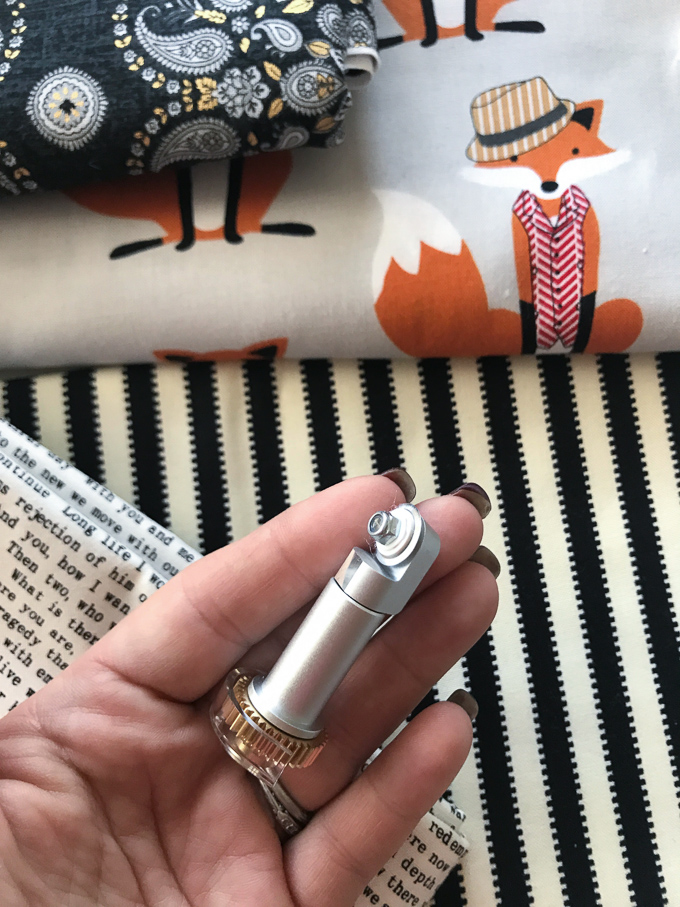
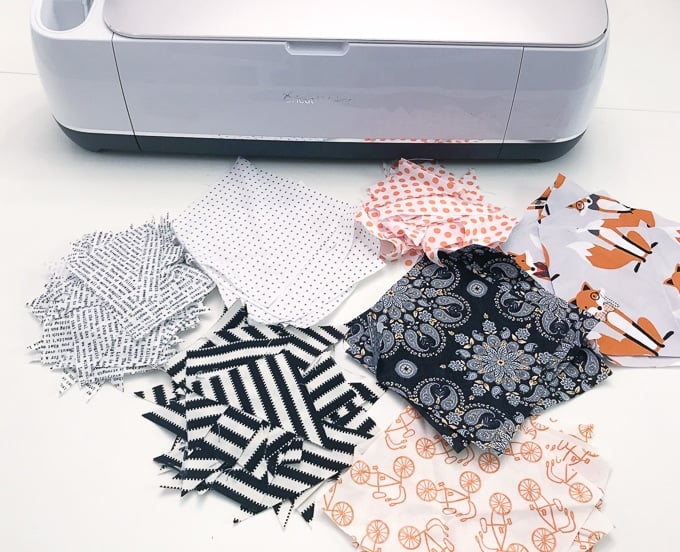
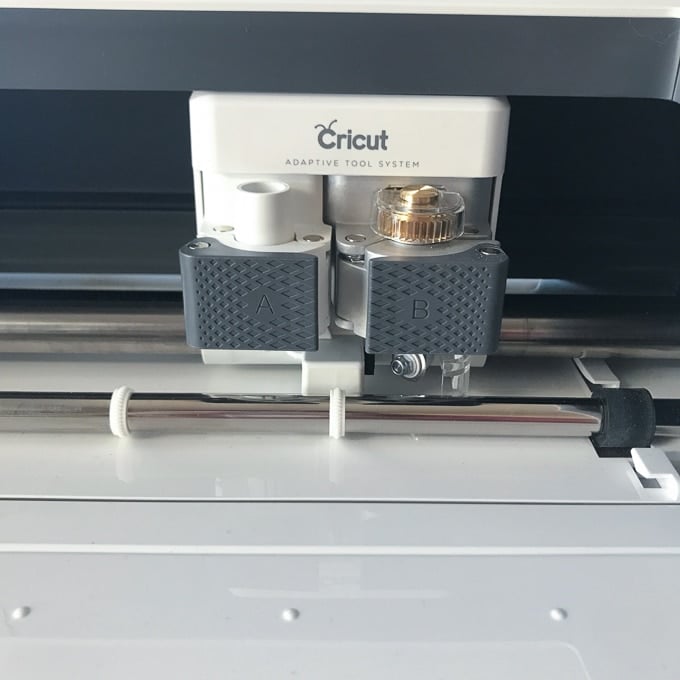
Friends! I had all the pieces of this quilt cut out in one evening of watching a movie or two. Once you are in design space, you can print out the full instructions for cutting and assembly of the quilt top. Load the fabric onto the special fabric mat, pop the fabric rotary blade into the machine, and hit GO! All that fabric, perfectly cut, without ever needing to measure or count a thing! And because I wanted a quilt larger than the baby quilt size, I simply doubled the number of cuts and came out with twice the pieces to assemble.
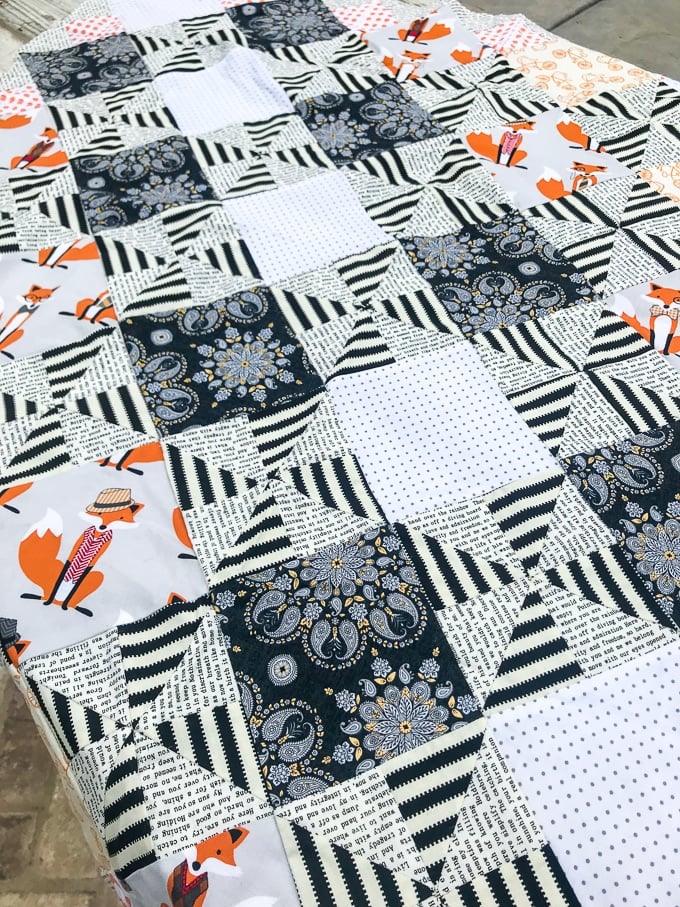
Let’s talk about assembly – sure, it takes some time to assemble a quilt top. I’ve made a quilt or two or three. This quilt was a blast. I was fresh and motivated since I didn’t just tick off a zillion hours cutting a zillion tiny pieces. I stacked up my pieces and sewed up the pinwheels during another round of late night movies. It took me three evenings total to cut and assemble the entire quilt top.
If you have ever wanted to make a quilt, but just can’t get yourself to begin, using Cricut Maker to cut out your pieces for you might be just the solution you need. Now I just need to choose a backing fabric and quilt this pretty together!


Comments & Reviews
Sara says
Hi,
That’s beautiful!
How did you manage to stitch everything together? Is it difficult?
I have basic beginner skills for sewing and wondering if I could make it.
Thanks,
Sara
Anna says
The whole quilt looks great. It looks beautiful. I like such colors. Thanks for sharing this information. Such posts are very inspiring and motivating for me to continue working! I am waiting for more posts.