 I mentioned last week that we’re selling our home. We built this house nine years ago and it has been a beautiful dream starting our little family out in the country. But, alas, it’s time for us to move on. We’ll be relocating to Sacramento over the summer and continuing our journey in a new home, with new dreams and new SPACES TO DECORATE!! So, there’s that. I have worked and reworked decorating our current home over the years and so I want to document where this road has led. I have shared several of the rooms in the past, but it’s my intent to complete our home tour over the next couple weeks!! My faaaaavorite FAVORITE room comes first! My Sewing Room.
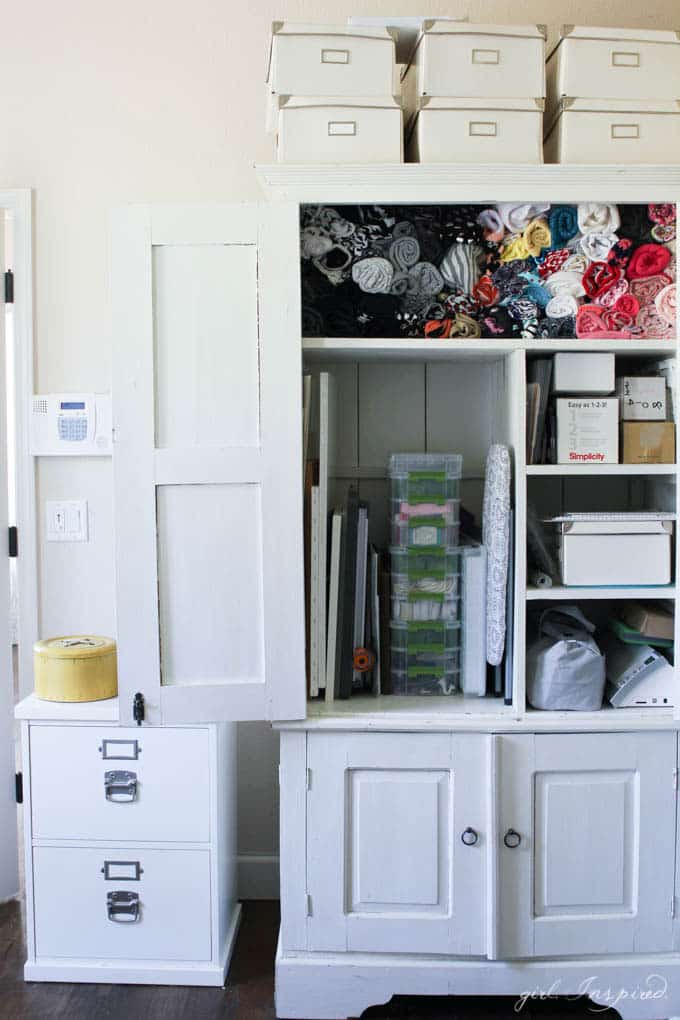
Although this room was intended to be an office, it has become the core hub of my creative work. It houses nearly all of my sewing and craft supplies, save for the additional bins of fabric that runneth over and are stored in the garage. This room is rarely clean and tidy. I’m a messy worker and I usually have several projects out and in progress at the same time.
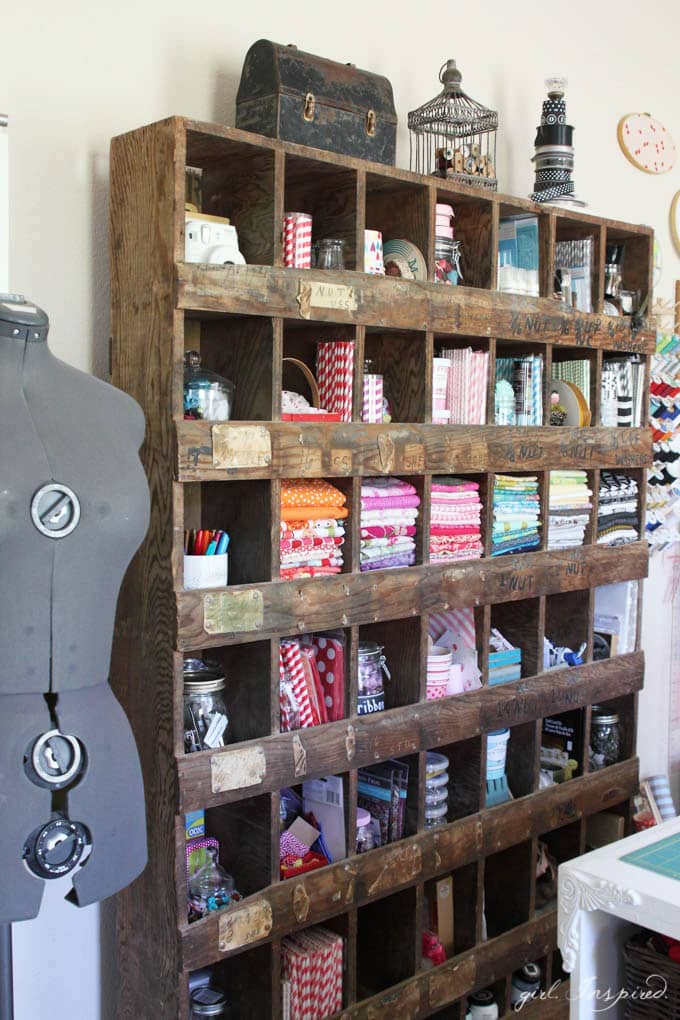
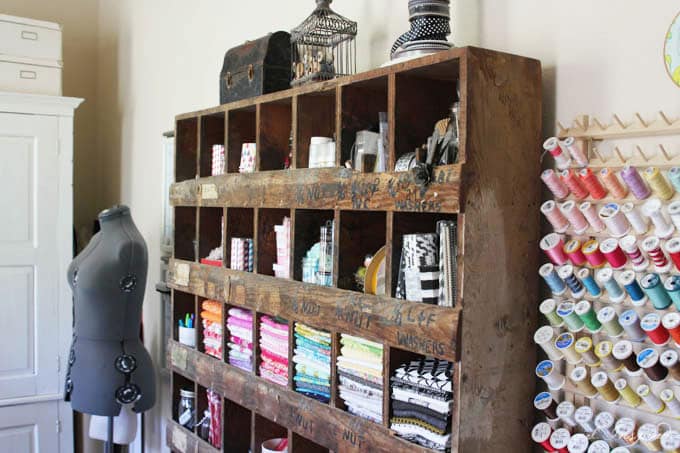
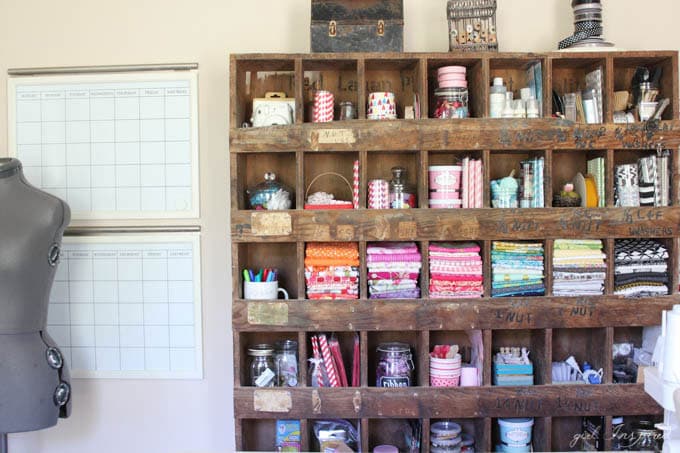
Organizing this space to get it “show-ready” was so soothing and fun! If you’re a crafter or a sewing fanatic, you can probably relate – love to sort through all the pretty things!! I FINALLY was able to rainbowtize this amazing cubby wall unit that I picked up from my local antique/junk shop guy a few years ago. It has served me well and is one of the select few pieces of furniture in the house that I could never part with. It came from a factory warehouse and has markings for screws and nuts and whatnot. The cubbies are the perfect size and there are so many, I never run out!!
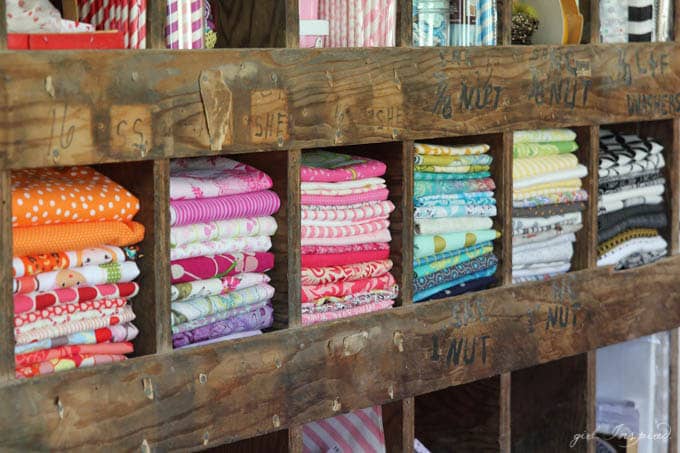
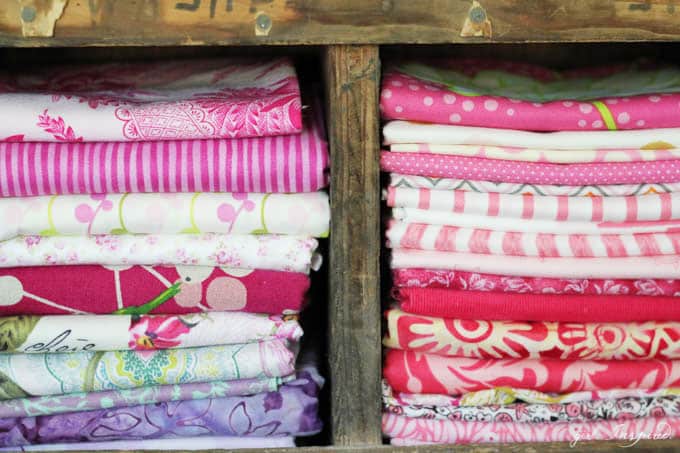
Just some of the things I store here: neat, little stacks of fabric – either 1 yard cuts or large remnants. I’ve organized them by color – mostly – and it makes me super happy!
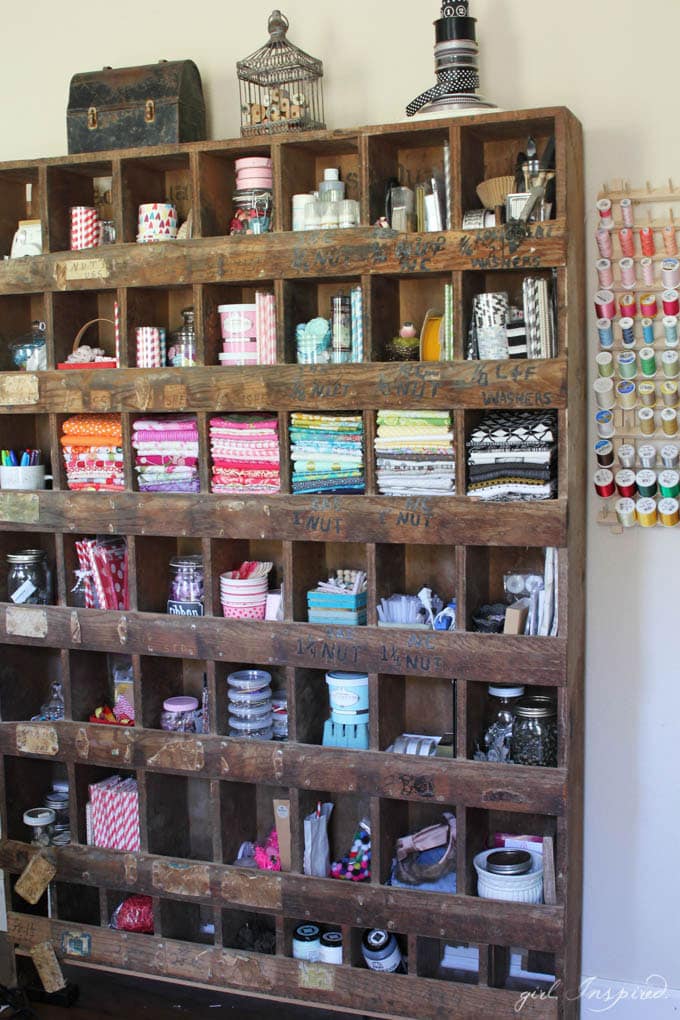
I also keep all my little nicknacks on this unit. Party supplies like cupcake wrappers, stripey straws, and gift baggies are sorted by color. Upholstery nails and supplies, as well as sewing machine feet, are stored in quart-sized mason jars. I have a mug with all my Sharpies and a basket with clothespins. Another little basket holds a million glue sticks and my hot glue gun sits next to it. I have tape and paint bottles and jars with buttons. Embroidery floss and paper flowers, and pom-poms all find their spots.
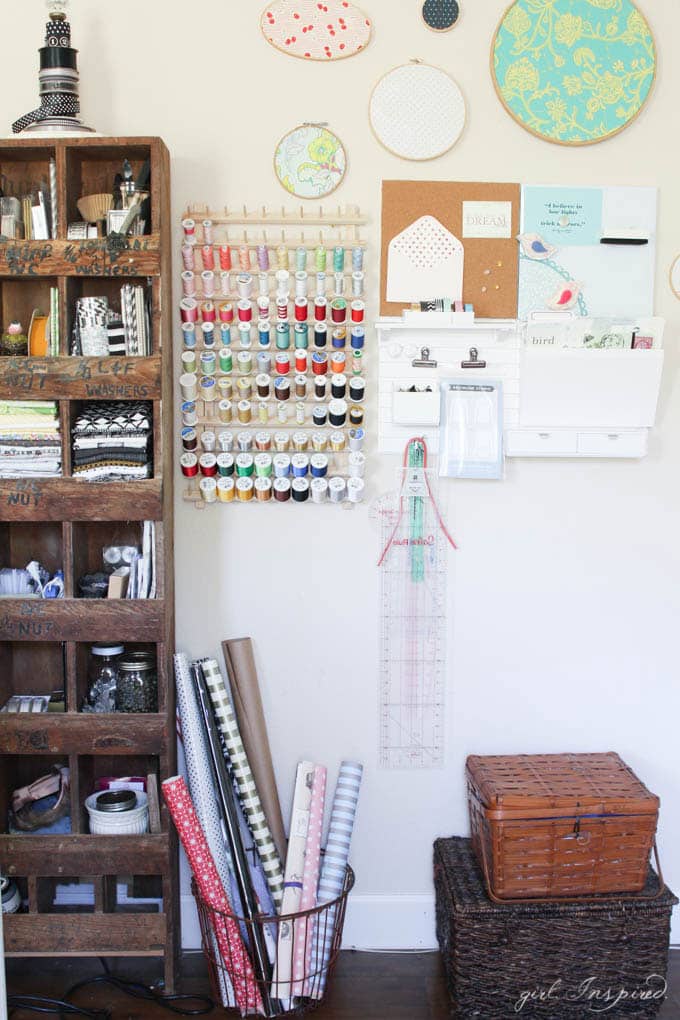
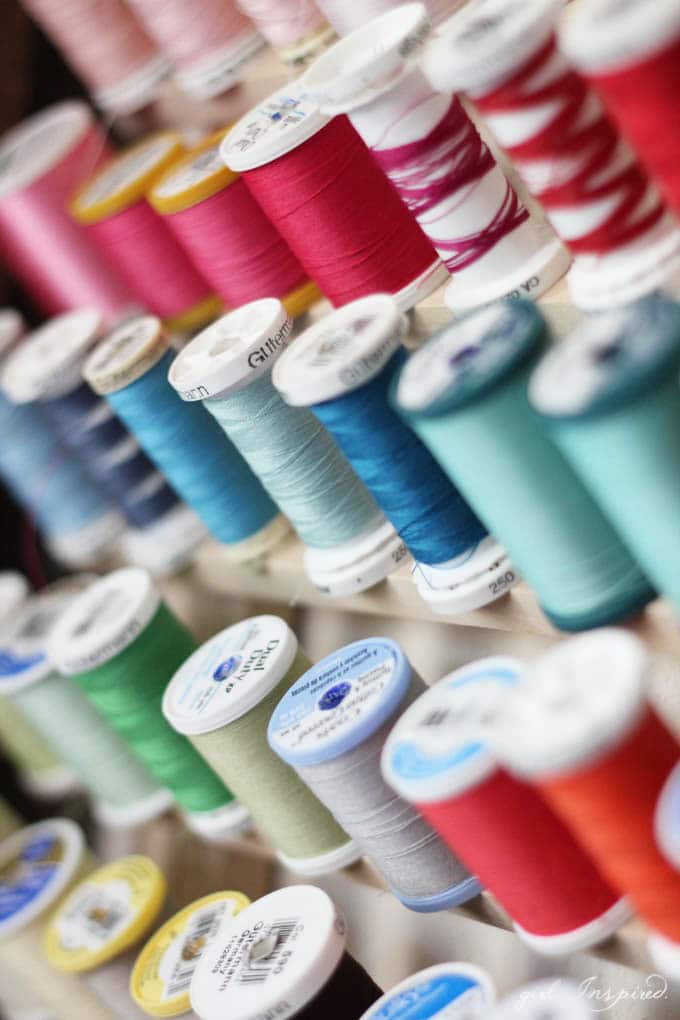
Moving around the room, I have a vintage basket with rolls of paper, a large thread rack, and a wall organizer that holds binder clips, washi tape, patterns I’m currently using, and drafting tools/rulers. I also have baskets stacked on the floor – the top one houses all of my yarn and knitting/crochet stuff (it’s not large because I don’t actually know how to do much in this department). The bottom basket is my scrap bin and is usually overflowing, but I THREW IT ALL AWAY in the name of organization!! It feels good to have a fresh start.
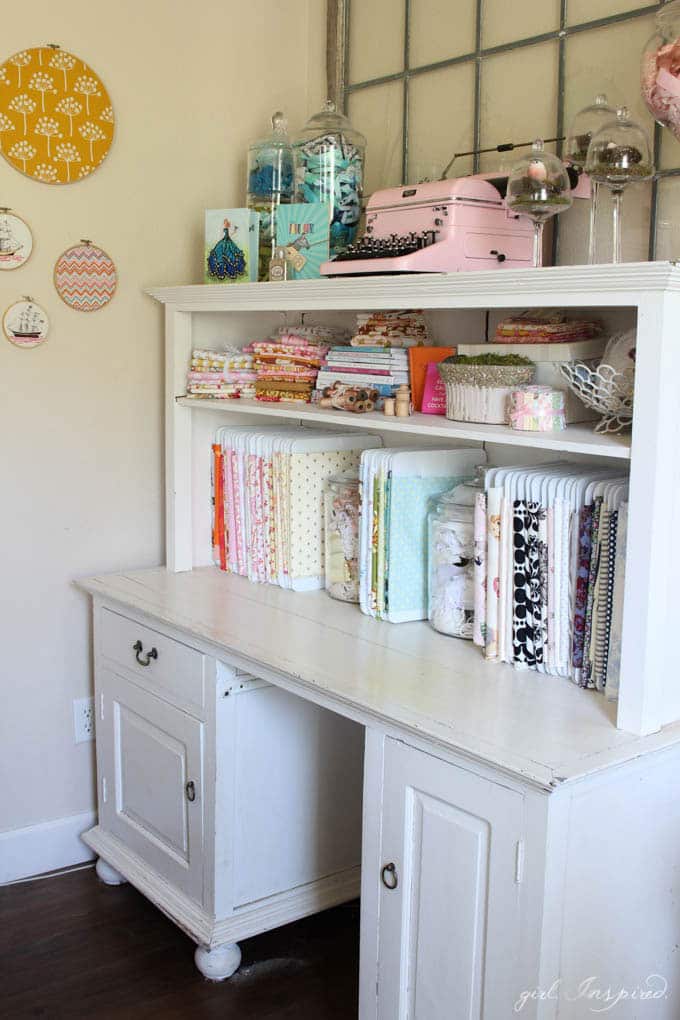
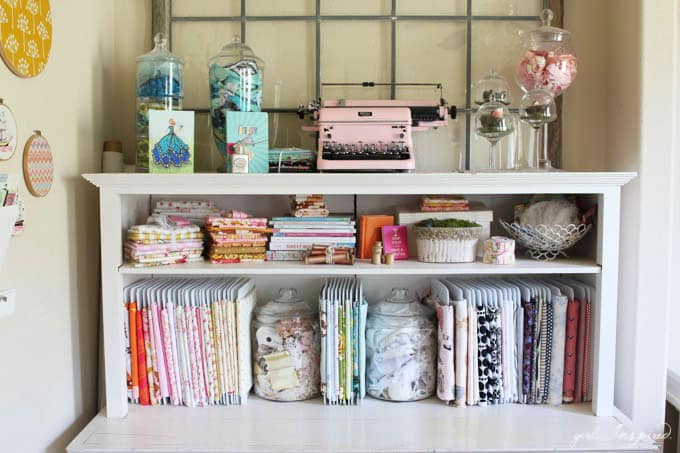
Next, I have a desk that is mostly decorative, but holds lots of pretties.

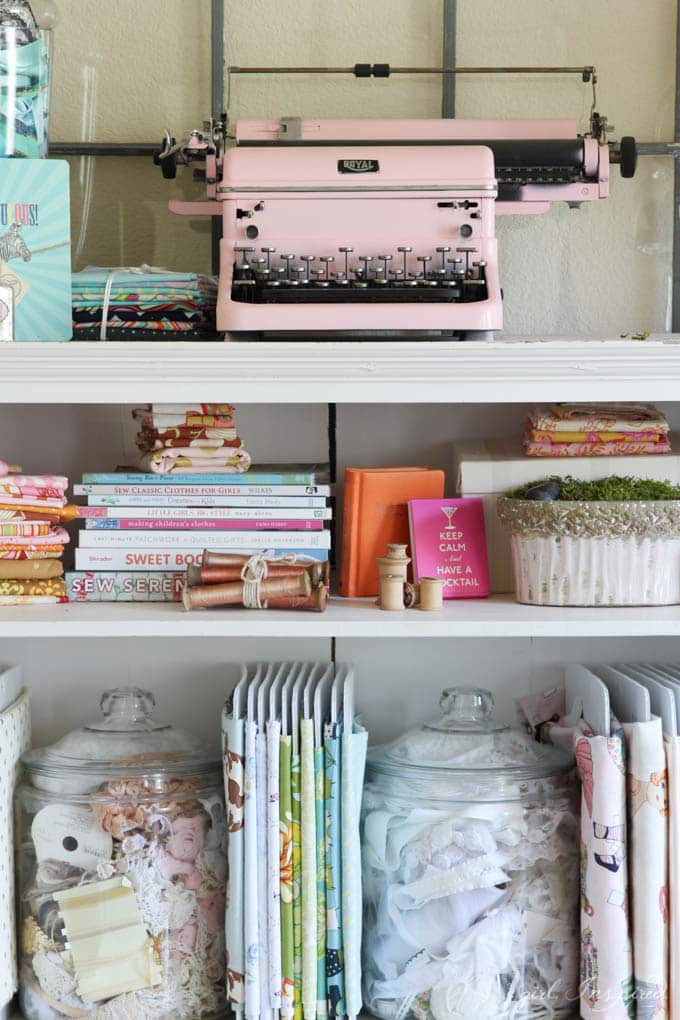
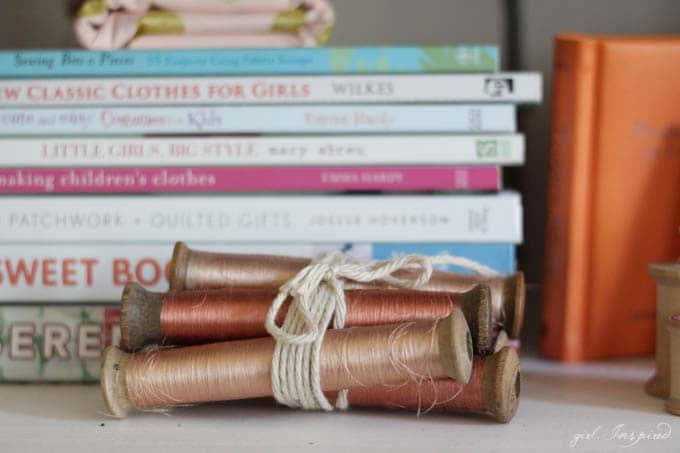
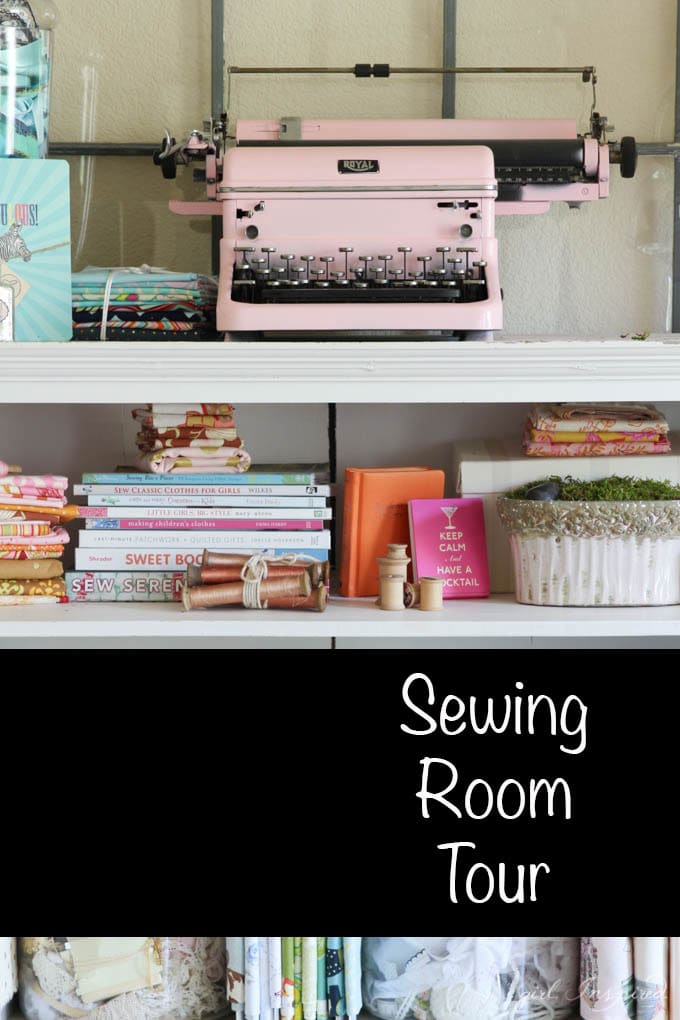
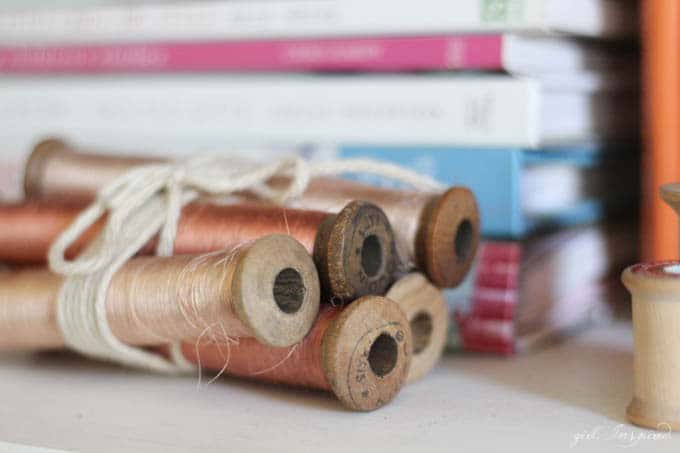
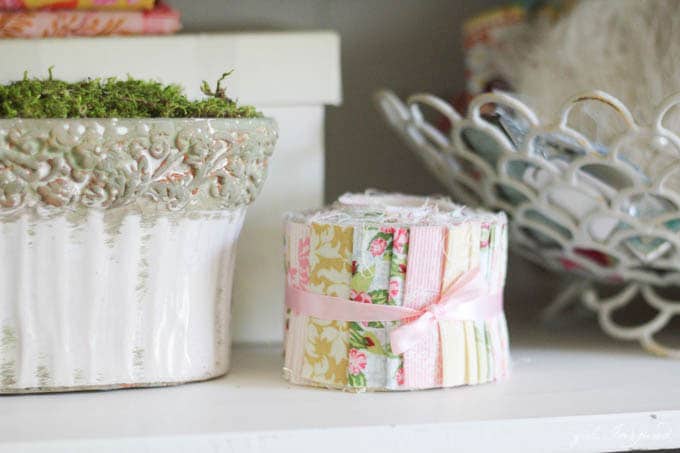
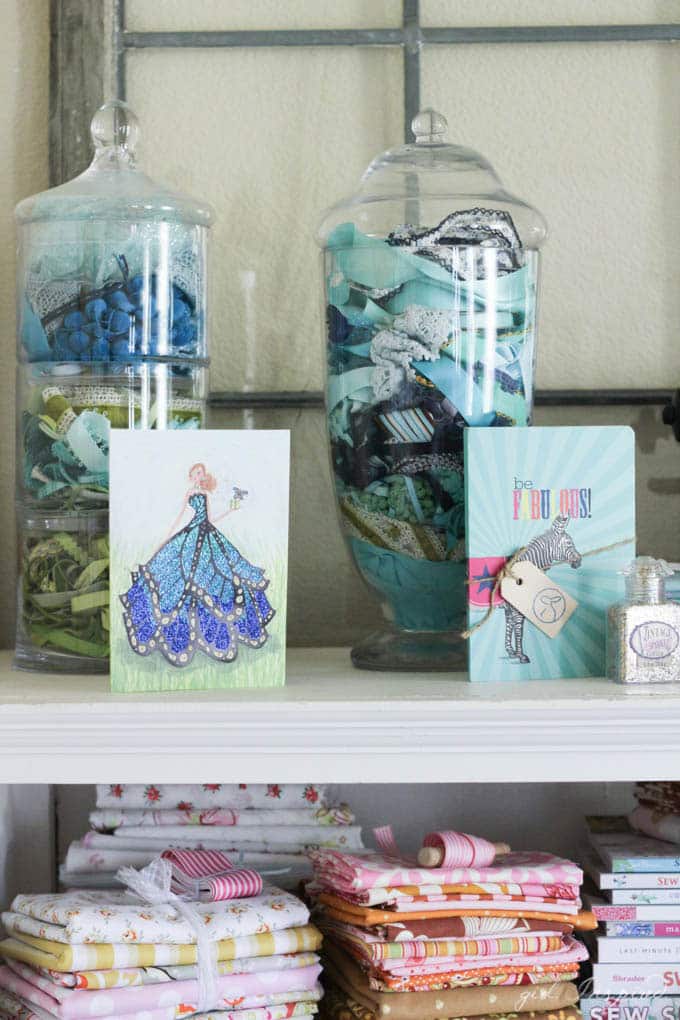
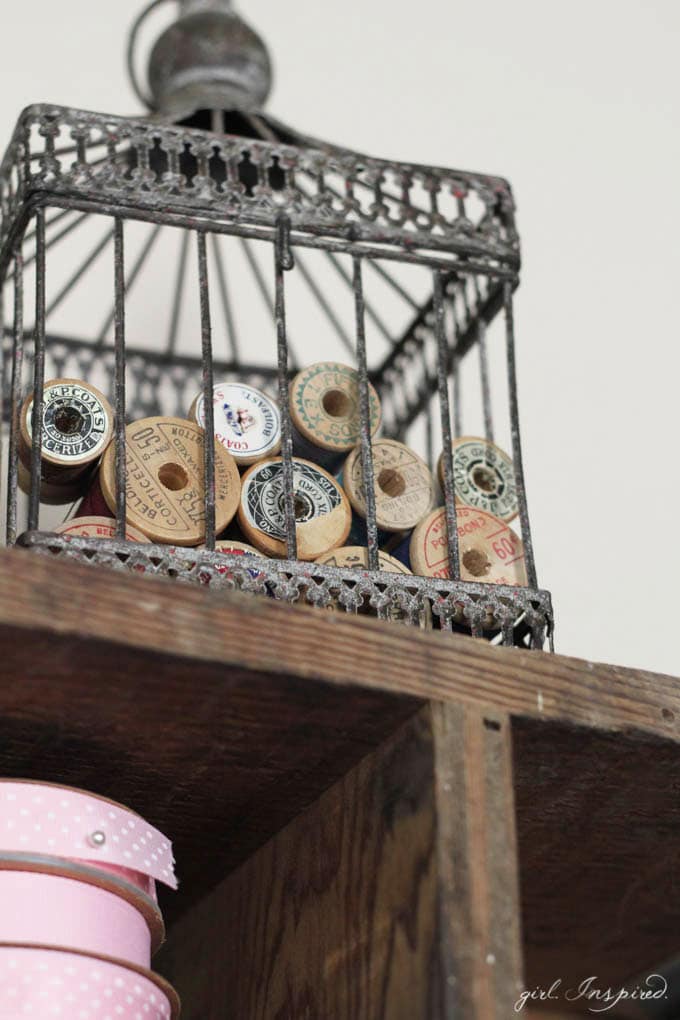
More stacks of fabric, the vintage typewriter I painted pink, lots of big glass jars full of ribbon (sorted by color), old thread spools I snagged at the flea market in Paris, and my favorite fabric organizer boards!!
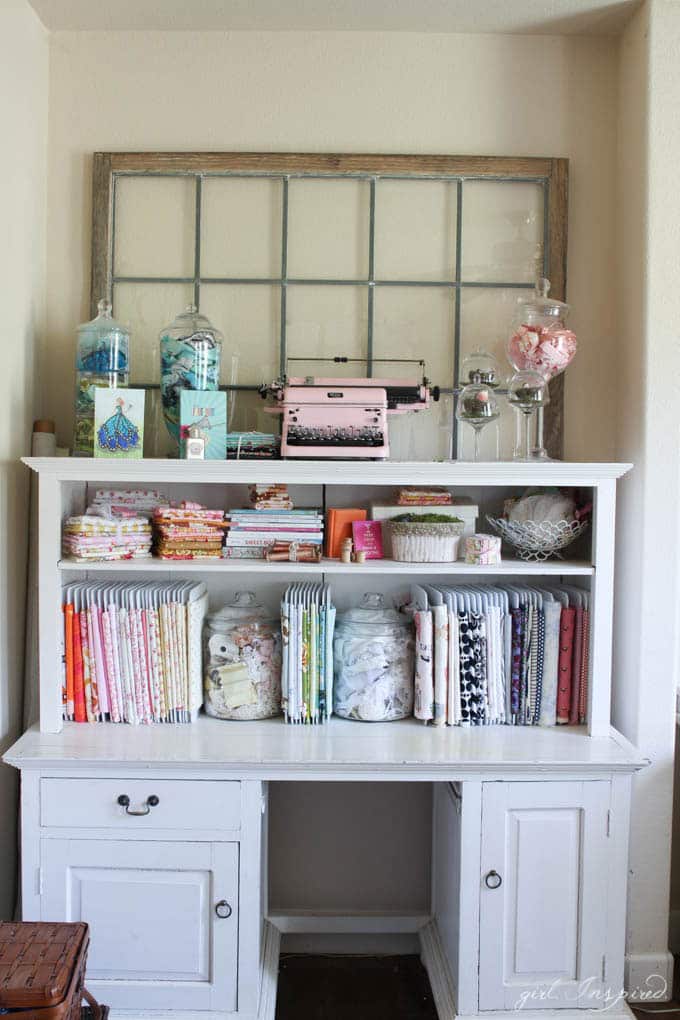
Sometimes people comment on my old post about those fabric organizer boards that it would be impossible to store much fabric on them. And I say, YES!, that’s what the bins in the garage are for – yardage, slippery fabrics, bulky fabrics, all that! But the yummy quilting cottons go here. The desk cupboards hold some of my less used supplies – office supplies like empty binders and extra staples and allll the stamps I needed to have when my main hobby was scrapbooking.
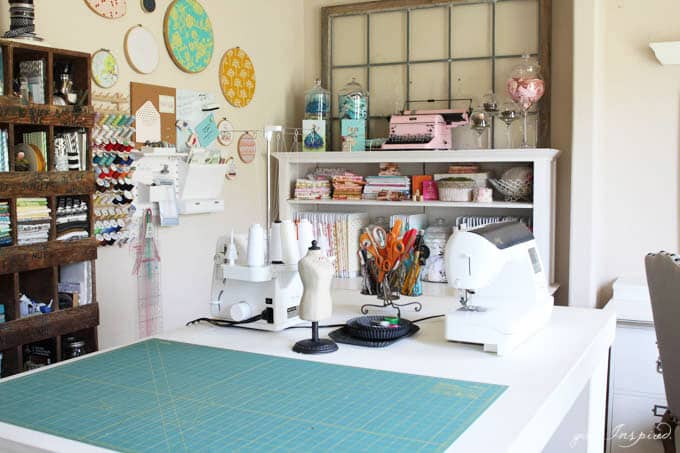
If you step back from the desk, you’ll find my main workspace and MORE storage. We built this large worktable, modeled after a similar one from Pottery Barn, several years ago. You can read more about it in this Project Table post:

The room has come a long way since I first wrote that post, but the project table still provides many of the same functions. The whole table is custom built, and many have suggested you could put two cheapy cubby units together with a table on top. I’m all for quick DIYs, but I don’t regret going the custom route and building something that is tall, super sturdy, and has held up to a LOT of sewing!! The baskets in the side cubbies hold zippers, punches, craft/scrapbook materials, and patterns.
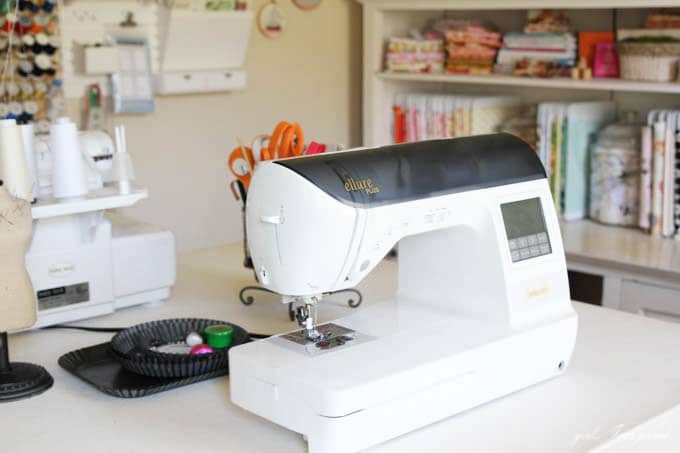 I now keep my sewing machines and cutting mat on top of the table all the time because I use them daily. I started sewing with Baby Lock machines at the beginning of the year and I am in love! I will be sharing more about the specific features on the machines, but want to show you what I’m sewing with now. This Ellure Plus has some of my favorite features including: auto-cut (seriously the best feature ever, such a time saver), automatic threading, a “your bobbin is running out of thread” alert!!, and seam allowance guides on the throat of the machine. It also does embroidery, a feature that I haven’t had before and am really excited to try!!
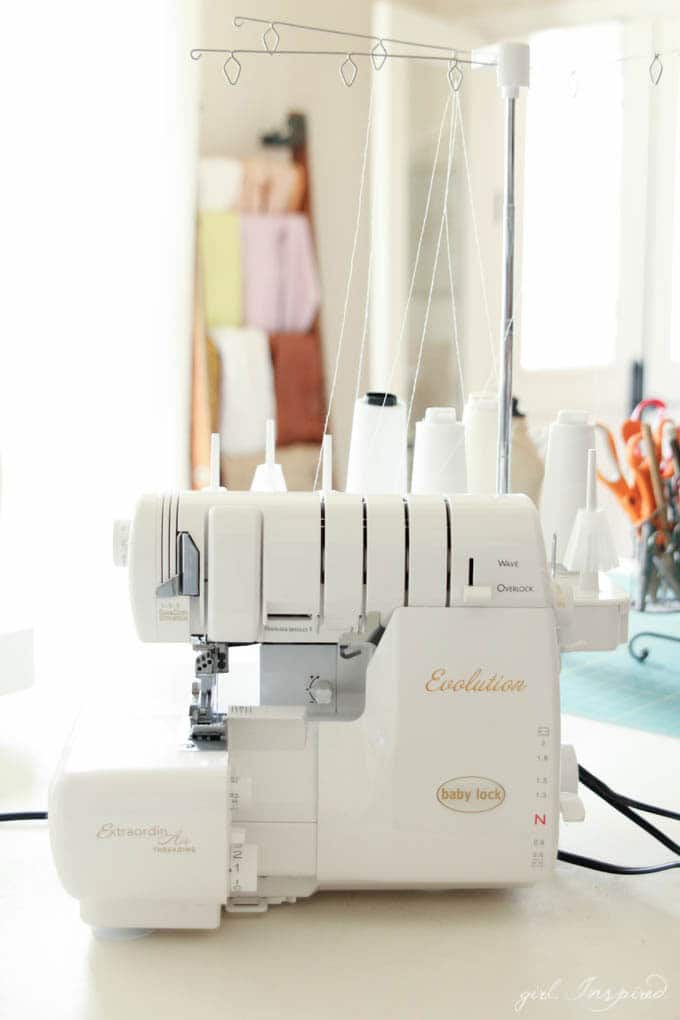
And my serger!! The Evolution dream machine! I am beyond thrilled to have a machine that can do both overlock and cover stitching. There are so many stitch options with the ability to use 8 spools of thread! But, my very very favorite thing about this machine is the ExtraordinAir threading capabilities. You Guys. If you haven’t ever seen this in action, you are absolutely going to faint!
It’s almost unbelievable it’s so awesome, right?? Dare I say I get giddy to change out my serger thread now?
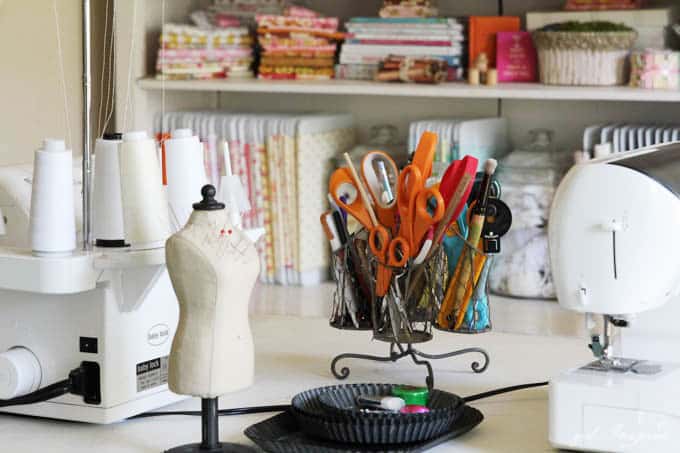
Alright then, moving on with the tour. I have also started keeping my pins and basic tools super handy right on the tabletop. Makes things much easier. There are quite a few tools that are used less often and are stored in various plastic storage organization bins. I recently wrote a whole post about Craft Supply Organization and you can click here to read more about those supplies.
I have a large armoire over on the other side of the room, and it holds lots of my knit fabric stash in neat rolls. I also have extra sewing machine components, like the embroidery hoops, cover stitch plate, and machine manuals. My Cricut machine and Silhouette machine are in the armoire. And the bottom holds a never-ending supply of scrapbook paper! My large cutting tools, some blank canvases, and plastic organization containers all line up inside.
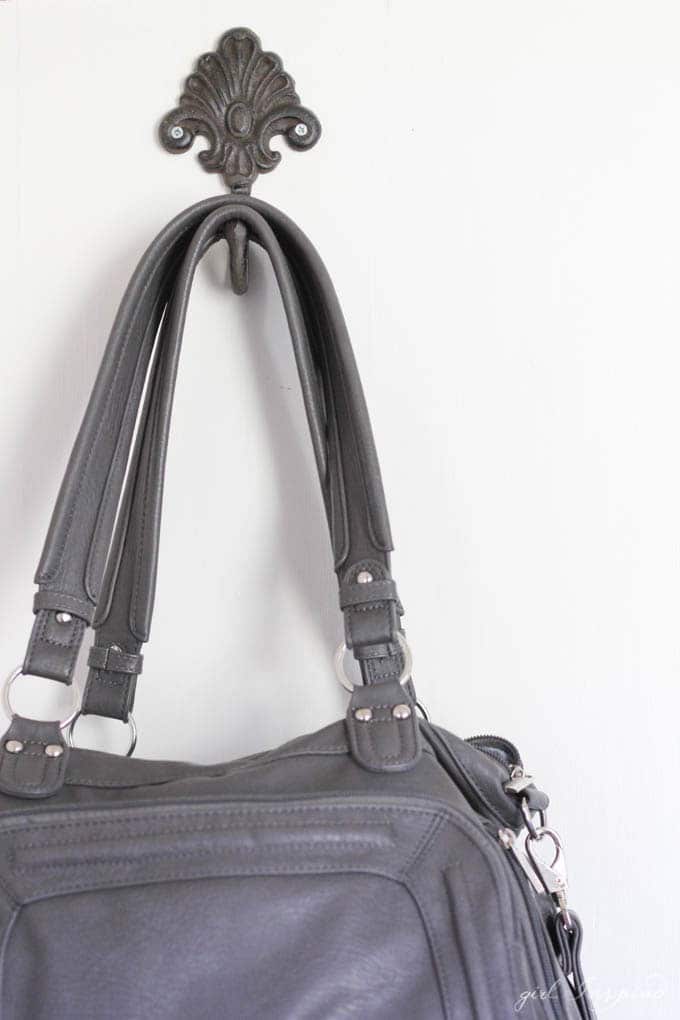
On the side of the armoire, I added a heavy metal hook, which holds my camera bag and lenses. Between the wall and armoire, I hide my tripod and large mats for photo backgrounds and/or light bouncing.
They’re over there behind those dress forms – hidden from (almost) every angle, thank you very much!
Next to the armoire, I have a file drawer that holds work files and receipts. On top of it, I keep a cute tin to stash small mending projects (they never ever get done because you know how much I hate hand-stitching). The larger basket is where I usually stash larger works in progress, but it tends to overflow and look really ugly. I’ve finished up (or given up) all of my WIP as part of organizing and staging this room, so currently the basket holds just a few linens that I use for photo shoots.
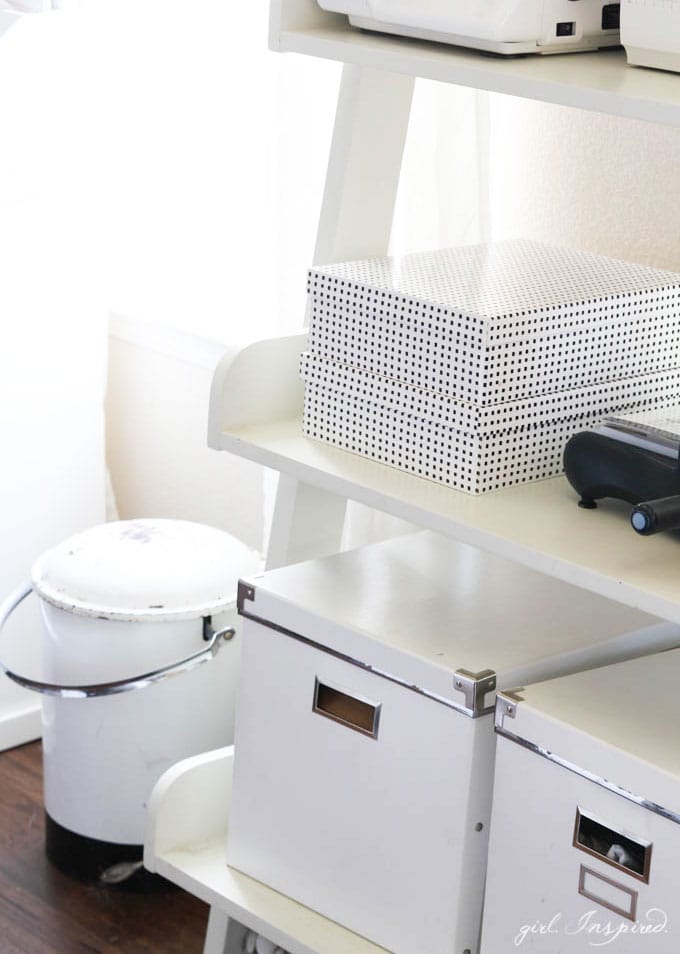
Alright! We’re almost around the room. Who knew you could shove so much stuff into one space and still have it look organized?? This here is an open bookcase where I stash extra printer painter and card stock, a few sewing books, some bins with glue products, and then those large boxes that house rolls of products like vinyl, interfacing, freezer paper, and sewing adhesives. I also keep finished garments that are waiting to be photographed or gifted.
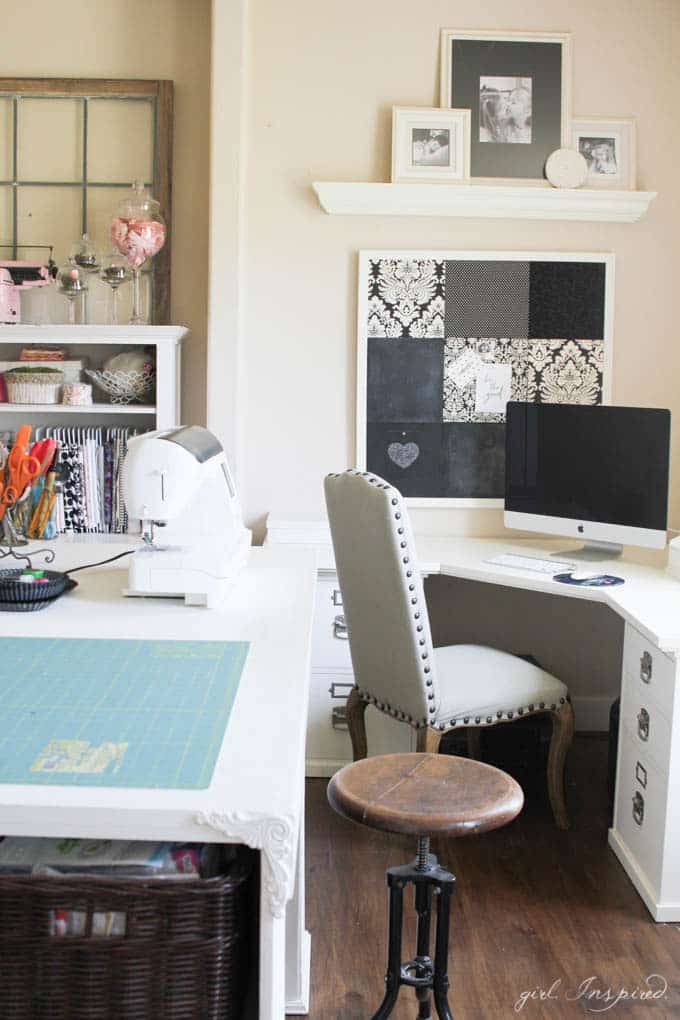
My work desk and computer sit in the far corner. I have PDF patterns filed in one of the file drawers, as well as household and work files and office supplies. My iMac is new after killing three PC laptops in the last three years. I LOVE her!! I spend a lot of time at this desk, as you can imagine. It keeps my work confined to the office and “work hours”, which is good for my family. The inspiration board up on the wall there still makes me happy. It’s less functional than I thought it would be, but I pin up friends’ business cards and little inspirational notes and it still adds some decoration to the room.
Well!! I think that’s it! We’ve gotten all the way around the room! I have an antique ladder that I keep over by the door that somehow didn’t get photographed, but it holds my big pieces of leather and sometimes new pieces of fabric that I’ve just toted home. I also didn’t show my ironing board because I haul it up and down the stairs from the laundry room. I’m hoping to have a nice place to store the ironing board within my craft room in the next house. We shall see!
Thanks for hanging out with me today for my very long-winded sewing room tour!


Comments & Reviews
Vanessa from the UK says
Your sewing room is ABSOLUTELY AMAZING! I live in the South of the UK, have a nice little house which is more than big enough for my hubby and I. I have a sewing room, which is the second largest room in the house but it is a quarter of the size of yours. I don’t have a cutting table but have covered a large piece of board which I balance on my ironing board – it does the job 😊! I have an overlocker and a Husqvana sewing machine and all my supplies are spread within drawers and a cupboard in my room as well as in a cupboard on the landing. (Mind you I do have a large wardrobe and a sofa bed in there as well 😂😂). I have even taken up a bit of space in the smaller room, which is supposed to be for my hubby 😯😉🤣🤣. Sorry for the boring description but you guys in the US are sooo lucky to have bigger rooms etc. We travel to the US every year and can only be in awe of the properties there. We absolutely love it there.
Thank you for sharing your wonderful sewing space with us – is it truly inspiring and I often sit and think how I can rearrange my little sewing nook but there’s just no space left 🤣🤣🤣.
JillyJo says
HI. I enjoyed the sewing room tour. Congrats. I really just want to make sure you are aware that storing quilts or fabrics next to wood is not good if left a while. I don’t know how often you use up the stash of fabric you were showing. I did this and so many of my fabrics were basically ruined; I don’t want that to happen to you or your readers. HAGD
kirstin @ kojo says
OHMYGOODNESS Stef. I love this room so much. Also, that wall cubby- NEVER part with it. Never. It is now on my list of Things I Must Build (ok, have Adam build for me). Not in Saipan, taking on a project like that here would make me want to stab out my eye with a fork, but when we move back home, it is number one on my list.
GORGEOUS GORGEOUS GORGEOUS!
Tori says
Insert *heart eye emojis* here! Gorgeous 🙂
Kristine Hansen says
What an inspirational space! I am coveting your Babylock serger. It’s on my wish list for sure!
Charity says
That’s a beautiful space! I love the organizer. And lucky you with your Babylock machines!
sorahart says
I love to see how others utilize their sewing space. Thanks for sharing!
Queenie says
Nice! Thank you for sharing your creative space.
Emily says
So beautiful!